This article was co-authored by Lancy Woo. Lancy Woo is a Certified Pet Groomer and the Owner of VIP Grooming, a pet grooming salon based in San Francisco, California. VIP Grooming has served San Francisco for over 35 years. Lancy received her pet grooming certification from the WWPSA (Western Word Pet Supply Association). VIP Grooming has been voted "Best in the Bay" in 2007, 2010, 2011, 2014, 2017, 2018, and 2019 and won Bay Woof’s "Beast of Bay" in 2014. In 2018, Lancy's work contributed to VIP Grooming's acceptance onto San Francisco's Office of Economic and Workforce Development's Legacy Business Registry.
wikiHow marks an article as reader-approved once it receives enough positive feedback. In this case, 90% of readers who voted found the article helpful, earning it our reader-approved status.
This article has been viewed 50,620 times.
Grooming a dog on your own can be a little intimidating, especially if it’s your first time. If you use a quality set of grooming scissors and work carefully, you can take care of things right at home. Scissors have the benefit of being quiet, which also helps keep your dog calm as you work. Start by trimming hair from the sides and legs with straight and curved shears, then finish up on areas like the face and tail with rounded safety shears. If there are any thick patches or matted areas, you can take care of those with some thinning shears. Give your dog some praise and treats, and you’ll be done!
Steps
Prepping to Groom
-
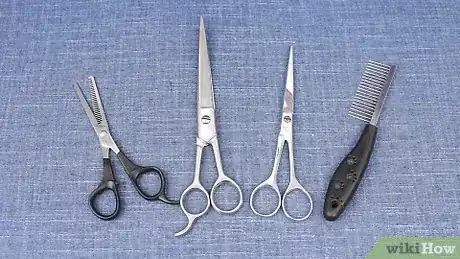
1Get a full set of grooming scissors. To trim the hair in a way that is comfortable for your dog and looks right, you’ll need more than a standard pair of scissors. Go to a pet supply store and look for a full set of grooming scissors. Each type has a specific purpose. You’ll need:[1]
- Straight grooming shears for general cutting
- Curved scissors for rounding off layers of hair
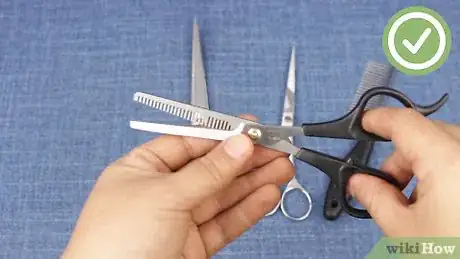
- Thinning shears for giving your dog’s coat a natural edge, and for dealing with problem areas
- Rounded safety tip scissors for trimming delicate areas like the face and tail
-
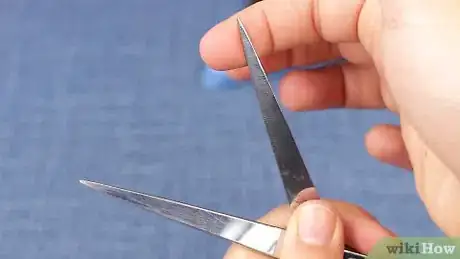
2Make sure the scissors are sharp and oiled. Dull scissors will yank on your dog’s hair, causing pain and stress. If your scissors are new, they should be sharp. If the shears have been used several times, however, they may need to be sharpened. Putting a few drops of scissor oil on the blades before you begin will also maintain the shears and make cutting easier.[2]
- Scissor oil and sharpeners should be available wherever you buy your dog grooming supplies.
EXPERT TIPLancy Woo is a Certified Pet Groomer and the Owner of VIP Grooming, a pet grooming salon based in San Francisco, California. VIP Grooming has served San Francisco for over 35 years. Lancy received her pet grooming certification from the WWPSA (Western Word Pet Supply Association). VIP Grooming has been voted "Best in the Bay" in 2007, 2010, 2011, 2014, 2017, 2018, and 2019 and won Bay Woof’s "Beast of Bay" in 2014. In 2018, Lancy's work contributed to VIP Grooming's acceptance onto San Francisco's Office of Economic and Workforce Development's Legacy Business Registry.Certified Pet Groomer
 Lancy Woo
Certified Pet GroomerExpert Warning: Clean your tools thoroughly every time you trim your dog. To sterilize your scissors, you can spray or wipe them with a household disinfectant, like Lysol or Clorox, or you can dip them into boiling water for 1 minute.
-
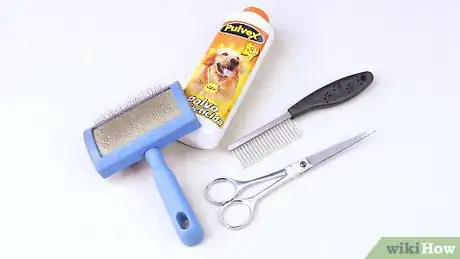
3Set up a grooming station. Once the scissors start cutting, hair will fly everywhere. Make clean-up easier by placing a mat underneath your dog to catch most of the flying hair. If you have a small dog, you can even place the mat and dog on top of a table to make grooming easier.[3]
- When you’re done grooming, just pick the whole mat up and throw the hair away.
- Make sure your shears, dog brush, and any other grooming supplies you need are easy for you to reach while you work.
Trimming the Dog’s Coat
-
1Comb out your dog’s coat. Use a regular dog brush to make sure everything is nice and even. If there are any knots, hold them gently with one hand and place the brush in your other hand. Slowly and gently brush them out to avoid hurting your dog.[4]
- Many owners prefer to groom their dog right after its bath, since the hair may be easier to work with when it is slightly damp. If the dog's coat is very knotted, trim these out before washing the dog, as water can knit mats together even more.
-
2Decide how short you want to cut the fur. If your dog has long hair and you want to keep it long, be sure to trim enough in places that are prone to matting, such as the belly and tail. Beyond that, length is largely a matter of preference. Use your fingers as a guide to make sure that you don’t cut too much off.[5]
- For instance, you may decide that you want to cut most of your dog’s hair to the length of your finger. Use your finger to measure the length as you cut and keep things consistent.
- You don’t have to cut all of the hair to the same length. For instance, you might cut the dog’s sides to finger length but the belly to half a finger length.
-
3Cut hair on the dog’s body front to back. Start with the straight shears and begin cutting from the area at the top of the dog’s neck. Slowly and carefully work your way down to the tail area, but don’t cut the tail hair yet. Then go back and trim the hair down the sides of the dog’s belly and legs.[6]
- If your dog has thick fur that you want to lighten up, you can go back over these areas with the thinning shears a bit to feather the hair into varying lengths.
- You can also go back over the sides a bit with the curved scissors so that the hair looks more natural instead of all being cut straight across.
-
4Work slowly and carefully. Injuring your dog is sure to make it afraid of grooming sessions. Take your time! Working carefully also makes it less likely that you will make mistakes when cutting. A couple of basic guidelines will ensure a painless, successful grooming session:[7]
- Cut only where you can hold up the hair and see through it. That is, if the hair is so thick that you can’t lift it up and see light shining through, you are probably cutting too close to the dog’s skin.
- It's best to keep a comb between the dog's skin and the scissors, as this will help prevent you from cutting the dog's skin.
- Use a light touch when cutting with the scissors, instead of chomping the blades down hard and fast. That way, if you accidentally do catch your dog’s skin in the scissors, you’ll probably be able to stop before causing an injury.
Grooming Sensitive Areas
-
1Save sensitive areas for last. Cut the sides and legs before you start on more difficult parts like the face, ears, feet, and tail. That way, you can be sure to get the bulk of the cutting out of the way. If your dog gets skittish at the end and you have to stop, it will at least have been mostly trimmed.[8]
-
2Use extra care around the dog’s face, ears, and tail. When cutting these areas, don’t plan on removing lots of hair. Instead, concentrate on carefully removing any hair that’s getting in the way of the dog’s eyes, and removing excess hair to prevent matting on the ears and tail. Use the rounded tip safety shears when working on these areas.[9]
-
3Work back to front when trimming the dog’s feet. Use the rounded tip shears here as well. Trim the feet from the back, near the leg, up toward the toes. This makes it easier to see what you are doing and not cut too much off. Only cut fur that hangs out past the edges of the toes and foot pads--no shorter![10]
-
4Use the thinning shears to fix any problem areas. If there are any matted areas or patches of thick hair, use the thinning shears to remove these without taking all of the hair away. Varying the length of the dog’s hair will also give its coat a more natural look.[11]
Expert Q&A
-
QuestionCan I cut my dog's nails with scissors?
 Pippa Elliott, MRCVSDr. Elliott, BVMS, MRCVS is a veterinarian with over 30 years of experience in veterinary surgery and companion animal practice. She graduated from the University of Glasgow in 1987 with a degree in veterinary medicine and surgery. She has worked at the same animal clinic in her hometown for over 20 years.
Veterinarian No, trimming a dog's claws require purpose-made nail clippers for pets. This is because the keratin in a dog's claw is very tough and regular scissors will just slide off the claw or else pinch painfully as they cut.
 -
QuestionHow do I trim their ears?
 EmilyCommunity AnswerYou have to make sure you know where the hair starts. If you don't have special dog scissors, just cut the hair to the preferred length you want it. Try to avoid going into the ears, only cut the hair outside of the ears.
 -
QuestionHow long does it take for a chihuahua's hair that is behind their ears to grow back? My dog had long hair behind her ears and my sister cut it with a pair of scissors and I hate it.
 Community AnswerShort-haired Chihuahua hair grows very slowly once they have their full coat - it might never grow back even. However, long-haired Chihuahua hair grows back quite a bit faster, though it might take a few months. It all depends on the dog's genes.
References
- ↑ http://www.presidentpet.com/cut-dogs-hair-with-scissors-home/
- ↑ http://www.presidentpet.com/cut-dogs-hair-with-scissors-home/
- ↑ http://www.presidentpet.com/cut-dogs-hair-with-scissors-home/
- ↑ http://www.presidentpet.com/cut-dogs-hair-with-scissors-home/
- ↑ http://www.petsafe.net/learn/diy-dog-grooming-basics
- ↑ http://www.presidentpet.com/cut-dogs-hair-with-scissors-home/
- ↑ https://m.youtube.com/watch?v=5C4g5iRq-7M
- ↑ http://www.presidentpet.com/cut-dogs-hair-with-scissors-home/
- ↑ http://www.presidentpet.com/cut-dogs-hair-with-scissors-home/
About this article
If your dog’s coat is getting too long, you can cut its hair with grooming scissors. First, comb or brush its fur to get rid of any tangles. Then, cut your dog’s hair slowly and carefully, so you don’t accidentally hurt it. Keep a comb between your dog's skin and the scissors, since this will help prevent you from cutting its skin. Be extra careful around your dog’s face, ears, feet, and tail, and save those areas until last. That way, if it gets skittish and you have to stop, you’ll have done most of its fur already. Don’t forget to give your dog lots of praise and treats before, during, and after grooming to make it comfortable and so it’ll be more relaxed next time. For more tips from our Pet Groomer, including how to sharpen your grooming scissors, read on!
