This article was co-authored by Stephen Cardone. Stephen Cardone is the COO of NY Headshots, a New York City-based studio that specializes in shooting and producing headshots for individuals and businesses. Stephen has over four years of professional photography experience and over six years of documentary filmmaking experience. Stephen also works extensively as a photographer at NY Headshots. His work includes events, environmental photography, as well as headshots for actors, models, and corporate. He holds a BA in Non-fiction Writing from The New School.
There are 27 references cited in this article, which can be found at the bottom of the page.
This article has been viewed 29,995 times.
Taking a professional photo can be tricky. Cameras today are incredibly complex, and the variety of features and choices makes selecting the right options a tricky proposition. Add in lighting, focus, posing, framing the photo, and editing, and taking a professional-looking photo begins to feel like it should be left to the professionals. But with a little knowledge and a decent camera, anyone can take a professional looking photo.
Steps
Knowing Your Camera
-
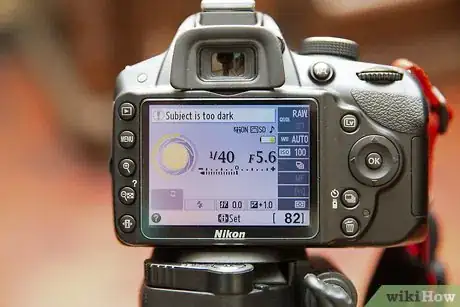
1Invest in an SLR or DSLR camera. (D)SLR stands for (Digital) Single Lens Reflex, and you need an SLR camera to take professional looking photographs. Despite improvements in phone and point-and-shoot cameras, only SLRs have the range of features and photo clarity needed to set your shots apart. They are, of course, more expensive than simpler cameras, but the jump in quality is well worth the money to take good shots.
- SLRs have a viewfinder that allows you to see the exact lighting in your shot as the pictures you take. A mirror reflects the exact shot to your eye, then slides out of the way when you take your photo, capturing the exact same image you saw in the viewfinder.
- SLRs have interchangeable lenses that allow you to fit the right lens to the shot.[1]
-
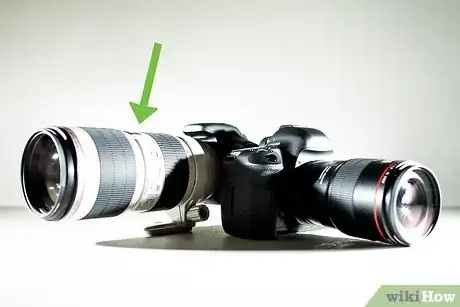
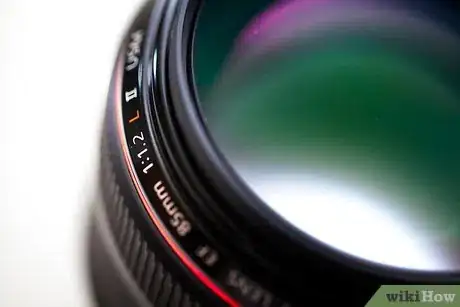
2Use zoom lenses and camera zoom instead of digital zoom. Though digital zoom gets you close to the subject, it distorts the image and keeps it from professional clarity and crispness. This is because a computer inside the camera is enlarging the pixels and guessing what pixels might fill in the blanks. Telephoto lenses work like binoculars or telescopes, bringing you "closer" to the subject without sacrificing quality.[2]
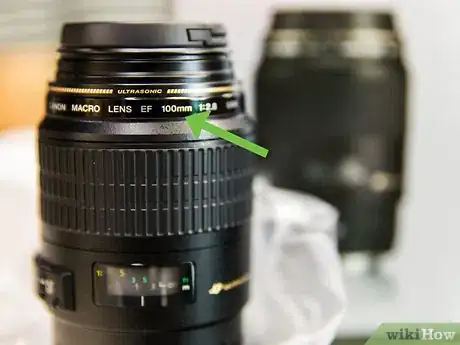
- Zoom lenses have "mm" numbers written on them that indicates the focal points the lens is able to produce. The higher the number, the more you will be able to zoom in.
-
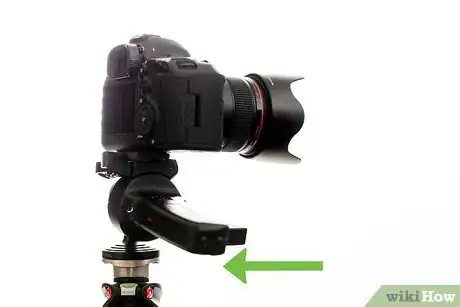
3Invest in a tripod for clear shots in any light. When there is not a lot of light you need to keep the shutter open for longer. This allows you to capture more light and make sure the picture looks good. However, if the camera moves while the shutter is open then the shot will look blurry and even slight shakes will make your photo look amateur. If you have a shutter speed less than 1/125 seconds, you need a tripod.[3]
- All photographers can benefit from a tripod, as sensitive cameras will pick up slight, uncontrollable movements from your hands.
- Time lapse photos are when you leave the camera open for a long period of time to capture movement over time (like the path of stars through the night) or extremely low-light situations, and absolutely require tripods.
-
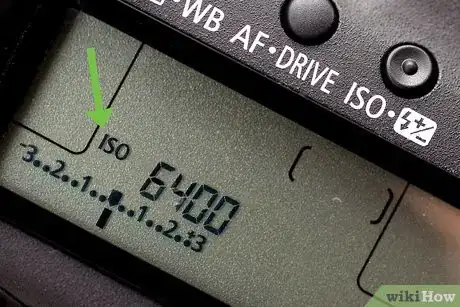
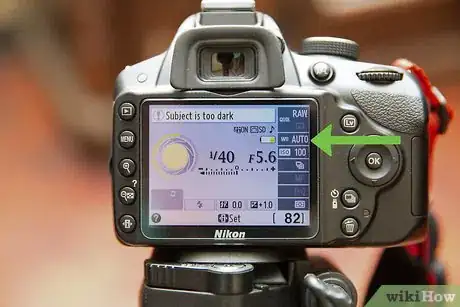
4Know that ISO represents the sensitivity to light in your camera. ISO is represented by numbers (100, 200, 800, 1600, 2000, etc.), where lower numbers represent the need for more light.[4] The higher the ISO, the brighter your photos will appear. However, more ISO means more grain, which looks a little like static, in the shot. Use the lowest ISO possible, preferably 100 or 200, whenever possible.
- If the ISO is doubled (from 100 to 200) then the light sensitivity is doubled as well.Consider using your camera settings to stop down the light by 1 or 2 stops exposure.
- For most outdoor settings, an ISO of 100-200 will suffice.
- For most indoor settings, an ISO of 200-400 will suffice.[5]
-
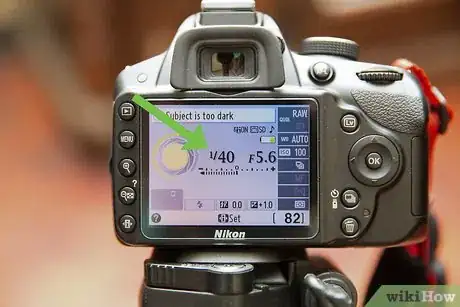
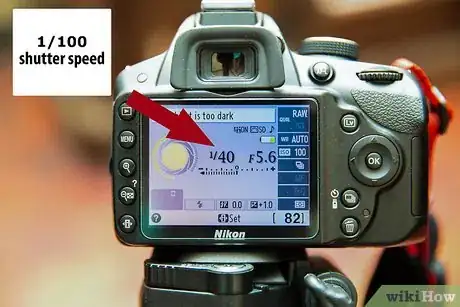
5Set the shutter speed. Shutter speed is how long the camera lens is open and capturing the image.[6] The longer it is open, the more light is let into the shot, but you will also capture any movement as blurriness. Shutter speed is measured by fractions of a second, and speeds range from 1/20 seconds to 1/1000 seconds. Bigger numbers are faster, meaning you capture less light, more quickly. This means that there is more light being allowed to reach the camera sensor for the short time that the shutter is open.[7]
- In most cases, aim for a shutter speed 1/125sec or faster, especially when shooting handheld.
- Every time you cut the shutter speed in half, you're letting in half as much light, because the lens has half the time to capture it. Remember this when setting your ISO, because you'll likely need more light.
- Faster shutter speeds eliminate blur during movement, but some creative photos look great with motion, like the blurring of a bird's wings in flight. Using your camera flash at the same time will also help to freeze the movement.[8]
- If you are using a very fast shutter consider using a very low f-number, the lowest aperture (i.e. f-number) that your lens focus length will give you.[9]
-
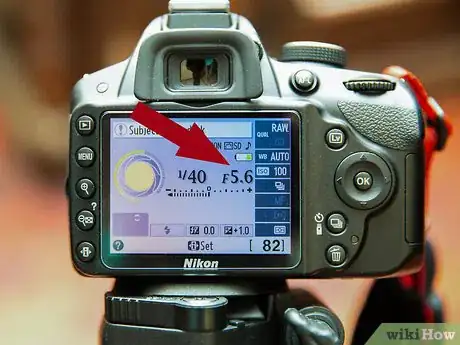
6Alter the aperture. The aperture works, essentially, like your eye's pupil. A wide aperture will let in more light because the "eye" of the camera is more open. Aperture also controls depth of field, which is how much of the picture appears sharp or in-focus. Aperture is measured by f-stop, with numbers like (f/1.4, f/2.8, f/8.0, etc.) The smaller the f-stop, the more of the image will look sharp and in focus, but the less light will be let in. Wide f-stops, in contrast, can be used to keep one specific image in focus.[10]
- The larger the f-stop, the smaller the opening of the aperture. While confusing, this is because "f" stands for fraction. Thus, a larger f-stop is a smaller hole. Think of it this way: 1/8 of an inch is bigger than 1/16 of an inch, so f/8.0 is bigger than f/16.0.[11]
- Use a larger f-stop, like f/32, to keep everything in focus, like a landscape or large scene but remember when using f32 you will need to have the shutter open for longer to let in enough light and it is advisable to use a tripod for clear sharp focus.
- Use a small f-stop, like f/1.4 to make the foreground sharp and the background blurry, like when shooting one specific subject in a crowd.
- Smaller apertures (high f-stop) generally need a longer shutter speed to let enough light.[12]
-
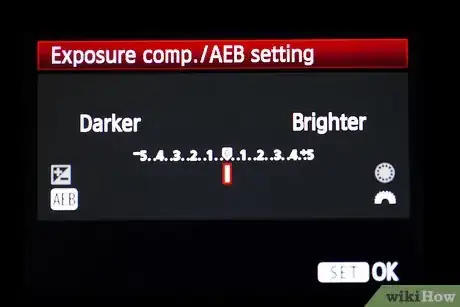
7Optimize your camera exposure. ISO, aperture, and shutter speed work in tandem for proper photo exposure. Balancing these settings is crucial to getting the best shot in any conditions. While you could spend a lifetime studying different combinations, the best way to learn is to practice. Take 5-10 shots of the same subject, in the same light. Change one setting each time and note how it affects the picture. If you need to speed up the shutter speed, how can you compensate for the lack of light, for example? You could raise the ISO, lower the aperture, or a mix of both.[13]
- Don't be afraid to experiment with your settings. It takes years of practice to see a shot and intuitively know how to set ISO, aperture, and shutter speed.
- Doubling the ISO double light sensitivity and halving the shutter speed halves the amount of light. Thus, doing both at once will result in less "motion blur" with the same amount of light in the shot.[14]
- Never overcompensate by changing just one of these three settings. Change each one a little bit to get to the right photo settings.
-
8Choose your local length for the shot. Focal length determines how zoomed in your photos look -- the higher the number the more zoomed in the camera lens will be.[15] Different lenses have different focal lengths, and you need to choose the right one to get a professional shot.
- Wide Angle, 24-35mm: Used to capture a lot of detail without looking stretched, wide angle lenses are commonly used by photojournalists looking to catch a lot of context in the shot, but be careful that when using ultra wide lenses that you do not end up with too much possibly unwanted foreground in the shot.
- Standard, 35-70mm: This lens is closest to what our eyes see, which is commonly around 45-50mm. This is a great all-around lens that functions in a wide variety of situations.[16]
- Mild Telephoto or Portrait, 70-135mm: As subjects get further away, or you want to differentiate the foreground and background, like in a portrait, telephoto lenses become a must. Portrait lenses usually start at 85mm.
- Telephoto, 135-300mm. Best for far-away shots, these are used for sport or animal photography because they can focus on one element from a long distance. They will, however, flatten landscape or wide-angle shots because the struggle to create depth.[17]
-
9Adjust your shutter speed to match your focal length. This is, luckily, an easy calculation to make. If you focal length is 30mm, then 1/30 is the slowest you can make your shutter speed to avoid blur in handheld photography. Simply make the focal length the fraction in your shutter speed to find your slowest possible shutter speed.
- Longer focal lengths will accentuate a shaky camera, making the whole picture blurry if you have too slow a slow shutter speed.[18]
Perfecting your Composition
-
1Learn the rule of thirds. The rule of thirds is a handy way to get good compositions easily and on the fly. Imagine that your picture is broken up by 2 even vertical lines and 2 even horizontal lines so that the whole shot is made up of 9 smaller squares. The rule of thirds simply says that the most pleasing elements of a shot will line up with these imaginary guidelines.[19] Instead of trying to put your subject in the dead center of every shot, try lining it up with one of your vertical or horizontal guidelines.[20]
- The goal is to make photos dramatic and interesting by making them slightly "off-balance." You do not need to have the lines perfect to make the composition striking. Some camera viewfinders have a grid option in the camera menu.
- Try to place horizon lines on the upper or lower guidelines so that they cross the frame on the upper or lower third.
- Feel free to break this rule when you want your shots to have a sense of symmetry.
- Many cameras have an option that shows guidelines for you. Look for it in the menu.
-
2Fill the frame with a big, captivating subject. What is the heart of your photo? What do you want to focus the viewers eye on? Trying to capture everything leads to a chaotic and often unprofessional photo. Good photographers find something to hold the picture together, whether it is a person's face or a mountain lake.[21]
- A subject doesn't have to be a single object, per se. A crowd of people or flock of birds can make a great subject when focused on correctly.
- A subject is usually defined by what is "in-focus." What is sharp and clear, and what is intentionally blurred? What is the largest element of the shot?
-
3Play with the angles and height of your camera. Duck down or get above your subject to give your photograph a dynamic angle that makes it stand out. Too often, photographers rely on straight on, eye-level shots, since this is what most people see naturally. A good photograph illuminates something that you could not otherwise see, so take a variety of shots from different angles.[22]
- Don't be afraid to stretch, move, and get dirty. The more angles you experiment with the better your chances of finding a good shot. Never forget to look behind you as very often your best shot could be there.
- Turn your camera over and take a vertical shots as well, as they can completely change how you look at a photo.
-
4Focus on eliminating distracting elements from the background. Don't just focus on the subject when taking a picture. Think about the things around it and how they add to the composition. Is there a bright glare or flash of light behind the person you're shooting? If so, move the camera or the angle to remove the distraction. You want the focus to be on your subject, not weird things in the background.
- What are the features in the background that add to your subject? Which ones are distracting? Simplify the scene whenever possible.
- Can you zoom in closer to crop out unwanted elements? Can you focus in on the subject and blur out the background with a smaller f-stop?
-
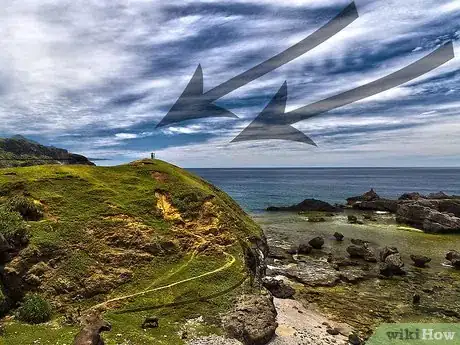
5Use the lines in your shot to lead a viewers eye. Is there a fence trailing off in the background? Where is the gaze of that woman pointing to? Do the branches of a tree strike out towards the setting sun? Lines are everywhere in nature, and a good photo highlights 2-3 of these natural lines to give the picture a sense of order. A viewer will naturally follow lines with their eyes, allowing you to highlight certain elements and create depth and perspective.
- Where do your eyes go when you look at the shot? What draws you into the picture, and what do you naturally gravitate towards?
Getting Good Lighting
-
1Aim for good contrast between your highlights and shadows. Pictures with vibrant brights and clearly delineated shadows will always look better than flatly lit photos. Flat lighting is when you don't have a large difference between your light and dark spots, leading to a lack of contrast. On the other hand, "blowing out" photos, when the highlights bloom unnaturally bright, look amateur as well. Good lighting has clear highs and lows and a nice range of shadows in between.
- Shadows create volume, or the illusion of 3D in a photo. Think of a white ball on a white background. The only way you see that it is a round sphere is if there is a shadow around it. Thus, you need good, deep shadows for good photographs.[23]
-
2Use your camera's "white balance" function. All light has a color, even if it appears white to us. Camera sensors pick up different temperatures of light.[24] White balance automatically adjusts the camera so that it matches our eye, keeping your shots consistent. You can find white balance in your menu, and most "Automatic" modes will automatically balance it for you.
-
3Diffuse light in your photograph. Diffusing the light can soften harsh lighting and "spread out" the light on the subject. Diffuse light is a light that has been bounced around to avoid making nasty shadows or harsh light on your subject. You can diffuse light multiple ways to make it appear more subtle and natural:[25]
- Umbrellas take a light source and spread it out over a larger area.
- Diffuse boxes turn a harsh light into a soft glow.
- When using a flash indoors, point the flash at the ceiling or the wall behind you, by doing this you will not get a shadow halo around the subject.
- Reflectors allow for directional light, like a spotlight, but are much softer than directly shining a spotlight on a subject.
- Cloudy days are naturally diffused.
-
4Utilize natural lighting. Aim to shoot at the beginning or end of the day for outdoor photography. Known as "golden hours" the time right after sunrise and before sunset is the best natural lighting on the planet. There is a soft glow and beautiful shadows, and most nature photographers only shoot during these hours.[26]
- Try to shoot in even, open shade if you are shooting during the middle of the day. As long as you don't have half the photo in shadow and half in direct sunlight, a shady day is the best chance to get even unobtrusive lighting.
- Overcast days, which offer a soft, even light across everything, are great for outdoor photography if you can't get out at sunrise or sunset. While less dramatic, the results will be consistent and clear.[27]
-
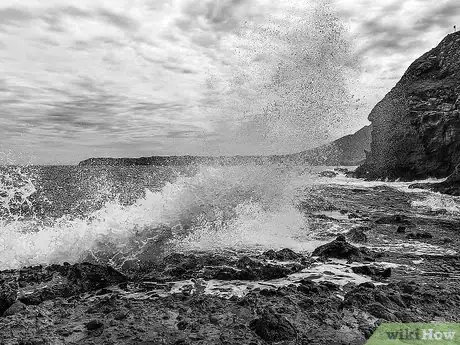
5Try black and white photos. Stripping away color lets you see nothing but light. This is one of the fastest ways to see natural lighting and focus on getting good, high contrast shots without blowing out your highlights or muddying your shadows. A good black and white photo will have a wide range of grays that blend into clear whites and blacks.[28]
- When setting up a shot, switch your camera to black and white and test out a few shots before moving back to color.
-
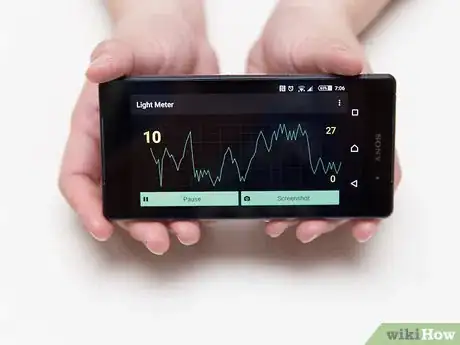
6Use a light meter. To truly take professional photos, you need to understand light completely. Light is photography, as a camera is merely recording the light coming through the lens. A light meter gives you the exact shutter speed you need for your selected ISO and aperture, and can help you prevent glaring bright spots that will ruin pictures.[29]
Editing your Photographs
-
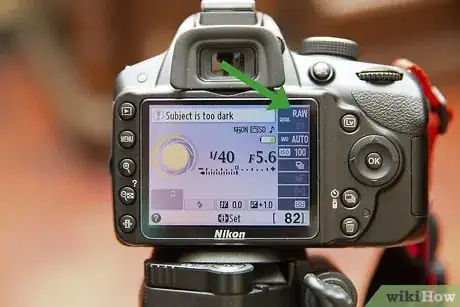
1Shoot in RAW to get the most control over your photos. Professional photographers almost always shoot in RAW, because it lets you change many camera settings after the picture has already been taken. JPGs are set images once they've been taken, limiting your post production capabilities.[30] RAW photos take a lot of space, but the benefits are huge; for example, you have greater control over:
- File size and quality.
- Exposure
- Shadow detail.
- Brightness/Contrast
- Sharpening and blur.[31]
-
2Crop your photo. The simplest edit you can make is a crop, where you redefine the borders of the image to better your composition. Always save two copies of the picture, one before cropping and one after, to avoid losing key parts of the photo you may want later.
- Experiment with different crops of your photographs to see what looks best.
-
3Play with saturation. Saturation is the color quality of the image. An image with high saturation will be vibrant and bright while low saturation is gray and moody.[32] There is usually a small slider on photo editing software that lets you adjust saturation on the fly.
- As a rule of thumb, happy/energetic photos have a higher saturation, while low-key/somber photos have lower saturation.
- Be careful not to overdo it on saturation -- a subtle increase or decrease should create the mood you want without seeming odd or unnatural.
-
4Play with brightness and contrast. This is necessary for almost every photo unless you had perfect lighting when you were shooting. Remember that a good photo has a lot of contrast, with vibrant brights and dark, deep shadows. That said, you still need a wide variety of middle areas in between, and contrast that is too high will look two-tone and flat.
- If you try to brighten a dark image too much, the picture may look rough and grainy. Be careful with drastic changes.
- If you increase the contrast too much, you will lose some of the details in the picture.[33]
- Look at the histogram of the image. The histogram is a line graph of light values. It should have a big peak on the left, and then slowly drop down as it moves the right. The left of the graph is the number of all black pixels in your shot; the right is the number of all white pixels. Any enormous peaks should be toned down using brightness/contrast sliders.
-
5Keep your edits to a minimum. Almost all photographs need a little editing, but you need to be careful not to overdo it and make your photos appear unnatural. A tweak to brightness and contrast, a little boost in saturation, and crop here and there should be enough to make your shots stick out. If you find yourself doing major editing, you need to rethink how you are shooting your photos.[34]
Expert Q&A
-
QuestionCan you take professional photos with a phone?
 Stephen CardoneStephen Cardone is the COO of NY Headshots, a New York City-based studio that specializes in shooting and producing headshots for individuals and businesses. Stephen has over four years of professional photography experience and over six years of documentary filmmaking experience. Stephen also works extensively as a photographer at NY Headshots. His work includes events, environmental photography, as well as headshots for actors, models, and corporate. He holds a BA in Non-fiction Writing from The New School.
Professional Photographer It's true that modern phones have incredible cameras and you can take some great photographs with them, but you aren't going to get nearly the same level of control or freedom that you have with a DSLR.
 -
QuestionWhat kind of background should I use for a headshot?
 Stephen CardoneStephen Cardone is the COO of NY Headshots, a New York City-based studio that specializes in shooting and producing headshots for individuals and businesses. Stephen has over four years of professional photography experience and over six years of documentary filmmaking experience. Stephen also works extensively as a photographer at NY Headshots. His work includes events, environmental photography, as well as headshots for actors, models, and corporate. He holds a BA in Non-fiction Writing from The New School.
Professional Photographer For a professional headshot, you want to keep the focus on the subject. Don't get super busy with it, and don't take the shot in front of anything inappropriate. It may be good to blur out the background a bit by adjusting the aperture.
 -
QuestionWhat is exposure?
 Stephen CardoneStephen Cardone is the COO of NY Headshots, a New York City-based studio that specializes in shooting and producing headshots for individuals and businesses. Stephen has over four years of professional photography experience and over six years of documentary filmmaking experience. Stephen also works extensively as a photographer at NY Headshots. His work includes events, environmental photography, as well as headshots for actors, models, and corporate. He holds a BA in Non-fiction Writing from The New School.
Professional Photographer It's just how much light is coming into the camera. When you change the aperture, shutter speed, or ISO, you're adjusting the exposure. Some cameras even have a tool to adjust the sensor inside of the lens.
References
- ↑ http://www.cambridgeincolour.com/tutorials/compact-vs-digital-slr-cameras.htm
- ↑ http://www.digital-photo-secrets.com/tip/181/when-and-how-to-use-a-telephoto-zoom-lens/
- ↑ Stephen Cardone. Professional Photographer. Expert Interview. 5 May 2020.
- ↑ http://www.nikonusa.com/en/learn-and-explore/article/g9mqnyb1/understanding-iso-sensitivity.html
- ↑ https://photographylife.com/what-is-iso-in-photography
- ↑ http://imaging.nikon.com/lineup/dslr/basics/04/02.htm
- ↑ Stephen Cardone. Professional Photographer. Expert Interview. 5 May 2020.
- ↑ http://digital-photography-school.com/shutter-speed/
- ↑ http://imaging.nikon.com/lineup/dslr/basics/04/05.htm
- ↑ https://photographylife.com/iso-shutter-speed-and-aperture-for-beginners
- ↑ http://photo.stackexchange.com/questions/594/what-does-f-stop-mean
- ↑ https://photographylife.com/iso-shutter-speed-and-aperture-for-beginners
- ↑ https://photographylife.com/iso-shutter-speed-and-aperture-for-beginners
- ↑ https://photographylife.com/what-is-iso-in-photography
- ↑ http://www.cambridgeincolour.com/tutorials/camera-lenses.htm
- ↑ http://photography.tutsplus.com/articles/how-to-take-photos-of-people-like-a-professional--photo-860
- ↑ http://expertphotography.com/understand-focal-length-4-easy-steps/
- ↑ http://digital-photography-school.com/shutter-speed
- ↑ Stephen Cardone. Professional Photographer. Expert Interview. 5 May 2020.
- ↑ http://www.cambridgeincolour.com/tutorials/rule-of-thirds.htm
- ↑ http://www.australiangeographic.com.au/photography/photography-tips/2012/09/photography-tips-choosing-your-subject
- ↑ http://www.fodors.com/travel-photography/article-high-and-low-camera-angles-54/
- ↑ http://www.popphoto.com/gallery/top-10-photography-lighting-facts-you-should-know?image=7
- ↑ http://www.cambridgeincolour.com/tutorials/white-balance.htm
- ↑ http://www.picturecorrect.com/tips/direct-diffused-light-photography/
- ↑ http://www.photoventure.com/2014/05/20/10-easy-ways-to-make-your-photos-look-more-professional/
- ↑ http://mcpactions.com/2011/01/17/the-4-best-types-of-natural-light-for-your-photography/
- ↑ http://www.imagemaven.com/how-to-shoot-like-a-pro/
- ↑ http://www.digital-photo-secrets.com/tip/3335/how-to-use-a-hand-held-light-meter/
- ↑ http://photographyconcentrate.com/10-reasons-why-you-should-be-shooting-raw/
- ↑ http://www.imagemaven.com/how-to-shoot-like-a-pro/
- ↑ http://www.outdoorphotographer.com/how-to/photoshop-and-other-software/hue-and-saturation.html#.VpxL3fkrLIU
- ↑ https://edu.gcfglobal.org/en/imageediting101/fixing-common-problems/1/
- ↑ http://www.photoventure.com/2014/05/20/10-easy-ways-to-make-your-photos-look-more-professional/
About this article
To take a professional photo, focus on a specific person or object as the centerpiece of your photo so it captures the viewer's attention. Additionally, take a variety of shots from different angles to improve your chances of finding a great shot. You should also move the camera to eliminate distractions in the background, such as a glaring light. Alternatively, diffuse any harsh lighting by using your camera's "white balance" function. For tips on how to edit your photos professionally, read on!
