4th Parachute Brigade (United Kingdom)
The 4th Parachute Brigade was an airborne, specifically a parachute infantry, brigade formation of the British Army during the Second World War. Formed in late 1942 in the Mediterranean and Middle East, the brigade was composed of three parachute infantry units, the 10th, 11th and 156th Parachute Battalions.
| 4th Parachute Brigade | |
|---|---|
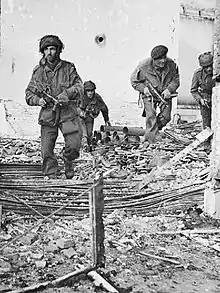 September 1944. Men of the 4th Parachute Brigade (4 Bde) in Oosterbeek during Operation Market Garden (left & second left): John (Jackie) Burns & Lance Corporal Noel Rosenberg (both 10 Platoon/"C" Company, 156 Para. Bn); (third left Alfred John Ward HQ 4th Brigade Driver for Hackett and; (right) Polish paratrooper. | |
| Active | 1942–1944 Photo taken by Sgt Mike Lewis British Army Film Unit |
| Country | |
| Branch | |
| Type | Airborne forces |
| Role | Parachute infantry |
| Size | Brigade |
| Part of | 1st Airborne Division |
| Nickname(s) | Red Devils |
| Engagements | Operation Slapstick Operation Market Garden |
| Commanders | |
| Notable commanders | John Hackett |
| Insignia | |
| Emblem of the British Airborne Forces. |  |
The brigade was assigned to the 1st Airborne Division, just prior to the Allied invasion of Sicily, but played no part in the invasion. Instead the brigade first saw action in September 1943, during Operation Slapstick, an amphibious landing at the port of Taranto, as part of the early stages of the Allied invasion of Italy. Largely unopposed, the brigade captured the ports of Brindisi and Bari before being withdrawn. By the end of the year, the 4th Parachute Brigade was in England, preparing for the Allied invasion of North-West Europe. The brigade did not see action in France, being instead placed on standby for an emergency during the Normandy landings. Between June and August 1944 the speed of the subsequent Allied advance obviated the need to deploy airborne forces.
In September 1944, the brigade formed part of the second day's parachute landings at the Battle of Arnhem, part of Operation Market Garden. Problems reaching the bridges in Arnhem forced the divisional commander, Major-General Roy Urquhart, to divert one of the brigade's battalions to assist the 1st Parachute Brigade. After a short delay the brigade headed out for its objective. When only halfway there, however, the remaining two battalions were confronted by prepared German defences. The brigade, having suffered heavy losses, was eventually forced to withdraw. The next day, weakened by fighting at close quarters and now numbering around 150 men, the brigade eventually reached the divisional position at Oosterbeek.
After a week of being subjected to almost constant artillery, tank and infantry attacks, the remnants of the brigade were evacuated south of the River Rhine. During the battle of Arnhem, the brigade's total casualties amounted to seventy-eight per cent, and the 4th Parachute Brigade was disbanded rather than reformed, the survivors being posted to the 1st Parachute Brigade.
Formation
Impressed by the successful German airborne operations, during the Battle of France, the British Prime Minister, Winston Churchill, directed the War Office to investigate the possibility of creating a corps of 5,000 parachute troops.[1] On 22 June 1940, No. 2 Commando was turned over to parachute duties and, on 21 November, re-designated the 11th Special Air Service Battalion, with a parachute and glider wing.[2][3] This was later to become the 1st Parachute Battalion. It was these men who took part in the first British airborne operation, Operation Colossus, on 10 February 1941.[4] The success of the raid prompted the War Office to expand the existing airborne force, setting up the Airborne Forces Depot and Battle School in Derbyshire, and creating the Parachute Regiment, as well as converting a number of infantry battalions into airborne battalions.[5] These battalions were assigned to the 1st Airborne Division with the 1st Parachute Brigade and the 1st Airlanding Brigade. The first general officer commanding (GOC) of the division, Major-General Frederick "Boy" Browning, expressed his opinion that the fledgling force must not be sacrificed in "penny packets" and urged the formation of more brigades.[6]
The 4th Parachute Brigade was formed at RAF Kibrit in the Middle East on 1 December 1942.[7] Upon formation it consisted of the brigade headquarters, signals company, defence platoon and three parachute battalions.[8] The battalions assigned were the 156th Parachute Battalion (156 Para), raised from British servicemen in India, the 10th Parachute Battalion (10 Para), formed around a cadre from the 2nd Battalion, Royal Sussex Regiment, and the 11th Parachute Battalion (11 Para), created from a cadre of 156 Para.[9] The brigade's battalions all had the same composition: three rifle companies, each comprising a company headquarters, and three platoons. Each had a Support Company of mortar, machine gun and carrier platoons, along with a Headquarters Company.[10] The brigade's first commander, Lieutenant-Colonel Kenneth Smyth, was replaced by Brigadier John Hackett on 4 January 1943.[11]
Facilities and weather conditions at Kibret proved to be unsuitable for airborne operations, so the brigade moved to RAF Ramat David in Palestine to continue their training.[12] The brigade came to full strength in May 1943, and in June was sent to Tripoli, where it joined the 1st Airborne Division.[12] Also assigned to the division were the 1st and 2nd Parachute Brigades and the glider infantry of the 1st Airlanding Brigade.[12]
In 1944, the brigade also had under their command 133 Parachute Field Ambulance, Royal Army Medical Corps, 2nd Airlanding Light Battery, Royal Artillery, 2nd (Oban) Airlanding Anti-Tank Battery, Royal Artillery and 4th Parachute Squadron, Royal Engineers.[13]
Italy
In 1943, the 4th Parachute Brigade, although still part of the 1st Airborne Division, was kept out of the Allied invasion of Sicily by a shortage of transport aircraft. The 1st Airlanding Brigade took part in Operation Ladbroke and the 1st Parachute Brigade in Operation Fustian. Both brigades suffered heavy casualties, so that by the time Operation Slapstick was proposed, only the 2nd and 4th Parachute Brigades were up to strength.[14] Slapstick was in part a deception operation to divert German forces from the main Allied landings and also an attempt to seize intact the Italian ports of Taranto, Bari and Brindisi.[15]
The lack of air transport meant that the division's two available brigades had to be transported by sea. They would cross the Mediterranean in four Royal Navy cruisers with their escorts.[15] If the landing was successful, the British 78th Infantry Division in Sicily and the 8th Indian Infantry Division in the Middle East, under the command of British V Corps, under Lieutenant-General Charles Walter Allfrey, would be sent to reinforce the landings.[15][16]
With 11 Para still in Palestine, the 4th Parachute Brigade only had the 10th and 156th Battalion's vailable to take part in the landings. On 9 September 1943, the same day as the Salerno landings by Lieutenant General Mark W. Clark's U.S. Fifth Army, the brigade landed at Taranto unopposed.[16] Their first objective was the airfield of Gioia del Colle 30 miles (48 km) inland.[17] En route to the airfield near the town of Castellaneta, 10 Para came up against a German roadblock defended by a Fallschirmjäger unit of the German 1st Parachute Division.[18] During the battalion's assault on the roadblock, the division's GOC, Major-General George Hopkinson (who had succeeded "Boy" Browning in command back in April), observing the action, was hit by a burst of machine gun fire and killed.[19] At the same time, the 156th Battalion San Basilio, carried out a successful flanking attack on Fallschirmjäger defending the town.[17] Two days later, having been only involved in minor skirmishes, the brigade occupied Bari and Brindisi.[16]
By 19 September 1943 the 4th Para Brigade had reached Foggia, the northernmost point of their advance, before being ordered back to Taranto.[20] Playing no further part in operations in Italy, the brigade was withdrawn by sea to the United Kingdom, arriving in November 1943.[14] The 4th Parachute Brigade's casualties during the fighting in Italy amounted to 11 officers and 90 other ranks killed in action.[20] In December 1943, the 11th Parachute Battalion, which had been working independently in the Mediterranean, rejoined the brigade. The only operation they had been involved in was a company sized parachute assault on the Greek island of Kos. The Italian garrison surrendered and the company was relieved by men of the 1st Battalion, Durham Light Infantry and the RAF Regiment.[14]
England
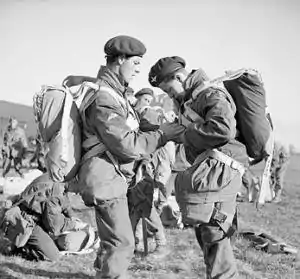
In England the brigade trained for operations in North-West Europe under the supervision of the I Airborne Corps.[12] Although they were not scheduled to take part in the Normandy landings, under Operation Tuxedo the brigade would be parachuted in to support operations if any of the five invasion beaches experienced difficulties.[21][22] Tuxedo was the only operation planned where the brigade would act as an independent formation whereas 13 other operations were prepared which would have deployed the entire 1st Airborne Division. However, the speed of the Allied advance towards the River Seine and then onwards from Paris northwards, was accomplished without airborne assistance and the plans were cancelled.[23]
The brigade's next operation was scheduled for early September 1944. Codenamed Comet, the plan called for the 1st Airborne Division's three brigades to land in the Netherlands and capture three river crossings. The first of these was the bridge over the River Waal at Nijmegen, the second the bridge over the River Maas at Grave and finally the River Rhine at Arnhem.[24] The objective of the 4th Parachute Brigade would be the bridge at Grave.[25] Planning for Comet was well advanced when on the 10 September the mission was cancelled. Instead, a new operation, Market Garden, was proposed whose objectives were the same as those of Comet but would this time be carried out by three divisions of the 1st Allied Airborne Army.[26]
Arnhem
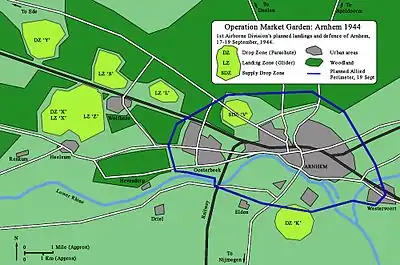
Landings by the 1st Allied Airborne Army's three divisions began in the Netherlands on 17 September 1944. Although allocation of aircraft for each division was roughly similar, the U.S. 101st Airborne Division landing at Nijmegen would use only one lift. The U.S. 82nd Airborne Division at Grave required two lifts while the British 1st Airborne Division at Arnhem would need three lifts. Whereas the two American divisions delivered at least three quarters of their infantry in their first lift, the 1st Airborne's similar drop used only half its infantry capacity and the remainder to deliver vehicles and artillery.[27]
The 1st Airborne Division had the required airlift capacity to deliver all three parachute brigades with their glider borne anti-tank weapons or two of the parachute brigades and the airlanding brigade on day one. However, instead the vast majority of the division's vehicles and heavy equipment, plus 1st Parachute Brigade, most of 1st Airlanding Brigade and divisional troops would be on the first lift.[27] The airlanding brigade would remain at the landing grounds and defend them during the following day's lifts, while the parachute brigade set out alone to capture the bridges and ferry crossing on the River Rhine.[28]
On the second day, 4th Parachute Brigade's lift of ninety-two C-47s (for the paratroops), forty-nine Horsa and nine Hamilcar gliders (for the artillery, vehicles and crews),[29] were scheduled to arrive furthest away from Arnhem on Ginkel Heath drop zone 'Y', as early as possible on Monday 18 September 1944.[30] The brigade's objective was to capture the high ground north-west of Arnhem.[31] In their last briefing before departure, Brigadier Hackett dismissed all officers except for the battalion commanders and the brigade staff and told them;
"They could forget what they had been told. Being put down where we were, with surprise gone and the opposition alerted, and given the German capability for a swift and violent response to any threat to what really mattered, they could expect their hardest fighting and worst casualties, not in defence of the final perimeter, but in trying to get there."[32]
The division's fourth unit, the 1st Polish Parachute Brigade, were to arrive on day three, dropping their glider troops in the north and their paratroops south of the river.[33] Once all units were in place, the division was to form a defensive ring around the Arnhem bridges until relieved by the advance of XXX Corps 60 miles (97 km) to the south.[33]
18 September
Although the first day's landings on 17 September were successful, over the night of 17–18 September, divisional commander Major-General Roy Urquhart was reported missing so Brigadier Philip Hicks of 1st Airlanding Brigade assumed command of the division on September 18.[34] Subsequent problems in Arnhem forced Hicks to change the divisional plan. Only the 2nd Parachute Battalion had reached the road bridge as strong German defences had stopped the other battalions. Hicks decided that the 2nd Battalion, South Staffordshire Regiment and 11 Para would link up with the 1st Parachute Brigade in an attempt to reach their objective.[35][36]
On 18 September, day two of the operation, bad weather over England kept the second lift on the ground and the first troops did not arrive in the Netherlands until 15:00. The delay gave the Germans time to approach the northern landing grounds and engage the defenders from the 7th Battalion, King's Own Scottish Borderers (KOSB).[37] Elsewhere German attacks were only stopped by bombardments from the division's 75 mm artillery guns.[38] The 4th Parachute Brigade's paratroops jumped from between 800 and 100 feet (244 and 30 m) through German machine gun fire, yet despite the enemy having encroached to within range of the drop zone, the brigade landed with only minor casualties.[39]

Once the brigade arrived, many of the Germans around the drop zone withdrew or offered no further resistance.[39] The first unit on the ground, 10 Para, attacked and destroyed the Dutch SS Wachbattalion while Brigadier Hackett personally captured ten Germans shortly after landing.[40] When Hackett arrived at brigade headquarters, he was informed by Lieutenant-Colonel Mckenzie of the division's staff about the change in plans, explaining that 11 Para was to be detached from his brigade to support the push into Arnhem.[40] At the same time the KOSB, until then responsible for defending the northern side of the landing grounds, were attached to 4th Parachute Brigade to replace 11 Para. Meanwhile, the KOSB still had to defend landing-zone 'L', to protect gliders arriving on day three.[41] While Hackett formulated a new plan, Mckenzie returned to divisional headquarters, to be informed on his arrival that 60 German tanks were approaching Arnhem from the north.[40] Transport aircraft passing over occupied channel ports had confirmed German suspicions of a second lift such that they were able to give their troops at Arnhem forty-five minutes advance notice of the allies' arrival. Prepared in advance for such an eventuality, a Waffen SS mobile unit had been dispatched towards the likely landing grounds.[42]
Hackett decided the brigade would advance between the railway line and the Ede–Arnhem road, in order to capture their three objectives, first the high ground overlooking Johanna Hoeve farm, next the woods near to Lichtenbeek House and finally the high ground at Koepel.[43] The delay in England meant it was 17:00 before the brigade started moving.[44] With the element of surprise gone and no intelligence on the German dispositions, 156 Para headed for the first objective. Followed by 10 Para slightly behind and to their left.[45] Bringing up the rear was the brigade reserve 4th Field Squadron, Royal Engineers, acting in an infantry role.[46]
Three hours later 156 Para had covered about 6 miles (9.7 km),[47] and as darkness fell they came up against a strong German defensive position which they were unable to outflank in the dark. The battalion's commanding officer, Lieutenant-Colonel des Voeux, out of contact with brigade headquarters, decided to stay where they were for the night and continue the advance in daylight.[48]
19 September
Early the next day an attack by German 88 mm guns destroyed some of 10 Para's transport. The battalion counterattacked, capturing the guns and a nearby farm building they were using.[46] The brigade advance restarted at 07:00, but by now the 9th SS Panzer Division had established a blocking position between Oosterbeek and the Ede–Arnhem road across the brigade's expected route. Repeated assaults by both battalions could not find a way through.[49] Advancing through heavy woodland, 156 Para were confronted by infantry supported by mortars, self propelled guns (SP gun) as well as fighter aircraft, and the battalion suffered heavy losses. At one stage 'A' Company penetrated the German line, but before they could dig in, all their officers were killed or wounded. Short of ammunition, the remaining men were counter-attacked by the Germans and driven back.[49][50]

In Arnhem at around 03:30, the leading units of 11 Para reached 1st Parachute Brigade and the 2nd South Staffords, just as they started a new attempt to fight through to the bridge. As the battalion had just arrived and had no appreciation of the ground, it was held in reserve and played no part in the attack. By dawn and under intense fire, the attack faltered and 11 Para were ordered to carry out a left flanking attack to relieve the pressure on the South Staffords. Only the intervention of Major-General Urquhart, just freed from where he had been trapped, stopped the 11 Para assault. Having recognised the futility of the battle Urquhart was not prepared to reinforce failure.[51] At 11:00 the Major-General ordered 11 Para still in the outskirts of Arnhem to support the advance of 4th Parachute Brigade by occupying the high ground on the north-west outskirts of Arnhem. At 14:30 the battalion was caught in the open and subjected to a mortar attack. The attacked caused heavy casualties including the commanding officer lieutenant-Colonel George Lea, unable to proceed around 150 of the survivors were forced to withdraw towards Oosterbeek.[52]
By 14:00 the 4th Parachute Brigade was no further forward. With casualties mounting, Brigadier Hackett asked Major-General Urquhart's permission to withdraw south of the railway line. His intention was to move through Wolfheze and into Oosterbeek where the division's support units waited. The change of direction was further complicated by the lack of vehicle crossings along the railway line—there were only two, one at Wolfheze and the other at Oosterbeek.[53]
Both battalions were still in contact with the Germans during the withdrawal with 10 Para to the north having the furthest to travel to reach the relative safety of the rail crossing. By 15:00 it became obvious that the Germans were already in front of the battalion. Now, as well as fighting a rearguard action, they had to capture positions between themselves and the railway line.[53] Captain Lionel Queripel of 10 Para was awarded a posthumous Victoria Cross, the highest British military decoration, for his actions while in command of the battalion's rear guard.[54]
As both battalions headed for the railway line, gliders carrying the 1st Polish Parachute Brigade's vehicles and artillery arrived at landing zone 'L'. The KOSB still defending the area were holding out against repeated German attacks but the landing ground was in range of the Germans guns. At the same time 10 Para, closely followed by German armoured vehicles and under mortar fire, reached the clearing. The leading companies had just cleared the woods and started across open ground when the gliders arrived. In the confusion, with both groups under fire, each thought the other was the enemy and began shooting back.[55] The Polish anti-tank battery was virtually destroyed and although some vehicles got away the majority of their guns were trapped in the burning gliders.[56] Some of the pursuing German troops tried to cross the landing zone only to suffer heavy casualties at the hands of the defending KOSB companies.[57] In the confusion, 'A' Company KOSB, covering the withdrawal of 10 Para, was cut off and eventually forced to surrender.[58]
The buildup of vehicles and men trying to use the crossing at Wolfheze caused a bottleneck and made progress slow. Rather than wait, brigade headquarters, the KOSB and 156 Para chose to head up and over the railway embankment on foot.[58] Once south of the railway line Support and 'B' Company, 156 Para became mixed up with 10 Para making towards Wolfheze, while the battalion headquarters and other two companies headed further south.[58] At 20:30 divisional headquarters issued orders for all units to fall back on a position around the Hartenstein Hotel in Oosterbeek.[59] The Germans continued to pressure 4th Parachute Brigade and 10 Para dug in around Wolfheze. 156 Para to their south came under constant attack leading to fighting at close quarters throughout the night and into the next morning.[60]
20 September
In the east about 400 men, the remnants of 11 Para, the 1st Parachute Brigade and the 2nd South Staffordshires, having failed to break through to the trapped 2nd Parachute Battalion were trickling back towards Oosterbeek. They were gathered together and eventually placed under the command of Major Richard Lonsdale of 11 Para.[61] Known as "Lonsdale Force", in the following day's fighting two of its men would be awarded the Victoria Cross, Lance-Sergeant John Baskeyfield,[62] and Major Robert Cain.[63]
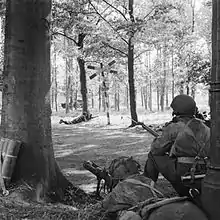
At daylight 4th Parachute Brigade started moving east towards the division at Oosterbeek, where the KOSB, moving through the night, had already arrived. Only the parachute battalions and brigade troops remained outside of the village.[64] The order of march was 10 Para followed by brigade troops then 156 Para bringing up the rear.[65] Virtually surrounded, the brigade fought a running hand-to-hand battle with German infantry supported by armour as they attempted to break through.[66] During the fighting commanding officer Lieutenant-Colonel Des Voeux and the second in command of 156 Para were killed in action.[66][67] Another high ranking casualty was the commanding officer of 10 Para Lieutenant-Colonel Ken Smyth, who was wounded and became a prisoner of war.[66][nb 1] With 156 Para leading, the remnants of the brigade carried out a bayonet charge and cleared the Germans from a large hollow which provided some shelter for the exhausted troops.[69] Pinned down all day and with their numbers dwindling, at 17:00 Brigadier Hackett led a charge towards the divisions position, only the Brigadier and 150 men made it.[66]
The battalions were then allocated positions on the eastern side of the perimeter,[70] but by now they were battalions in name only. 156 Para had just 53 men under Major Geoffrey Powell,[71] while 10 Para were only slightly better off with 60 men although all its battalion officers were missing. As a result, Captain Peter Barron of the brigade's anti-tank battery was given command of 10 Para.[66][72] One of the official war photographers inside the perimeter wrote:
"This is the fourth day of fighting and camera work is almost out of the question. All day we have been under shell, mortar and machine gun fire. We are completely surrounded and our perimeter is becoming smaller every hour, now it is a matter of fighting for our lives. If our land forces don't make contact with us soon then we've had it".[73]
21 September
After holding out in Arnhem for four nights and three days, the 2nd Parachute Battalion surrendered overnight.[74] At Oosterbeek there was around 3,000 men of the 1st Airborne Division dug in to form a perimeter.[74] Everything including ammunition was now in short supply and most of the men had not eaten for over twenty-four hours.[75]
Headquarters 4th Parachute Brigade began to function again and a small number of stragglers from the parachute battalions were reunited with their units.[76] The brigade was now responsible for all units in the eastern half of the perimeter.[77] In descending order from north to south were the 1st Airborne Reconnaissance Squadron, 156 Para, 'D' Squadron GPR, 10 Para at the Oosterbeek crossroads, 'C' Squadron GPR, 21st Independent Parachute Company, the RASC Detachment and finally Lonsdale Force.[70][nb 2]
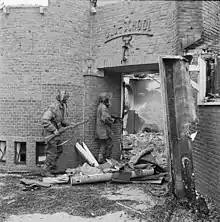
In the south-east Lonsdale Force's Major Cain armed with a PIAT anti-tank projectile engaged in a fight with German armoured vehicles for which he would be awarded the Victoria Cross.[74] Elsewhere around the brigade's positions the Germans mounted a number of small attacks, at times supported by armour. Shortage of ammunition made the defenders hold fire until the Germans got within 20 yards (18 m). The tactic was successful and time after time the Germans were beaten back.[79] In between German infantry attacks, the defenders came under almost constant mortar and artillery bombardment,[80] which was responsible for the destruction of the divisional ammunition dump.[81] At one stage Major Powell of 156 Para discovered that he and his men were surrounded when the British units on either side of them pulled back without informing them. Asking for permission to withdraw, he gained the impression that headquarters had forgotten about them or thought they had been wiped out.[82] The gaps in the perimeter did allow individual German snipers to infiltrate brigade positions and the Glider Pilots had to send out dedicated anti-sniper patrols to hunt them down.[83] Patrols from both sides moved around the brigade's area and anyone caught in the open during daylight was liable to be confronted by the other side and shot.[84] Touring his brigade positions, Brigadier Hackett, Lieutenant-Colonel Thompson of the artillery and the brigade major, Tiny Maddon, were caught in the open by mortar fire. Maddon was killed outright while Hackett and Thompson were both wounded and taken to the house of Mrs Kate ter Horst for treatment.[85]
Two days later than expected, the parachute battalions of the 1st Polish Parachute Brigade landed south of the River Rhine to the east of Driel.[86] Although unable to cross the river, the Poles at least relieved the pressure on the troops at Oosterbeek, when the Germans diverted 2,400 troops to contain them.[87] By now the division had made first contact with XXX Corps 11 miles (18 km) to the south and could call upon the guns of 64 Medium Regiment, Royal Artillery to break up German attacks.[88] The Poles arrival rejuvenated the Germans, at 18:40 Lonsdale Force was attacked. The next attack came at 19:05 in the west and 10 Para were attacked at 20:10. First, houses holding 10 Para were set alight then assaulted by German infantry, but they continued to hold out.[89]
22 September
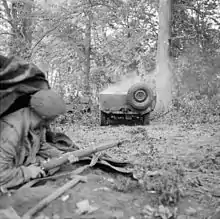
The previous day's attacks had contracted the division's perimeter; it was now about 1,000 yards (910 m) wide at the river, stretching north for 2,000 yards (1,800 m) where it widened out to around 1,200 yards (1,100 m).[90] The brigade's three original parachute battalions now consisted of five officers and sixty men in 156 Para. Two officers with one hundred men in 11 Para and thirty men in 10 Para.[91] With their losses in men and vehicles beginning to tell, German troops attacking the perimeter changed tactics and now tended to rely more on artillery and mortars than on infantry and armour to break through the British line.[87] However, in the attacks on Lonsdale Force, the Germans persisted in attacking in company strength supported by one or two armoured vehicles.[92][nb 3] The method employed by the Germans was a tank or SP gun would move up and down a street blowing holes in the house walls. This would be followed up by supporting infantry who would try and use the holes to gain entry to the houses.[93] During the day men from Lonsdale Force and the 21st Independent Company stalked and destroyed two SP guns then engaged the supporting infantry.[94]
South of the river, the first unit from the Guards Armoured Division, the Household Cavalry, had fought through and linked up with the Poles at Driel.[95] That night the brigade made the first attempt to get men of the Polish Parachute Brigade across the Rhine. Under the command of Captain Harry Brown of the brigade's engineer squadron, fifteen men with a makeshift fleet of six boats, managed to transport fifty-five Poles across the river.[96]
23 September
The day began with a four-hour artillery and mortar bombardment and all indications were of an attack in force on 156 Para and 'D' Squadron GPR.[97] At 07:42 the attack started and at 07:50, by now under intense pressure, Brigade headquarters called down artillery fire almost on top of their own positions which broke up the assault. Attacks continued all morning and a shortage of hand held anti-tank weapons allowed German tanks to safely approach the brigade's positions. The tanks targeted the houses shooting up a room at a time, forcing the defenders out and into trenches dug in the gardens. Both units managed to hold out, however their situation was officially described as "grim".[98] The numbers of British casualties exhausted all available medical supplies and wound dressings. Those wounded who required urgent treatment were now directed to the Schoonoord Hotel, which was in German hands.[99]
A fresh German assault on Lonsdale Force in the south-east saw the Germans demolish defended houses with high explosives or set them on fire with incendiary shells.[100] At midday a German officer under a white flag asked to speak to Brigadier Hackett. He explained they were about to attack the area supported by an artillery and mortar barrage. He knew there were wounded in the nearby Casualty Clearing Station (CCS) and suggested that the brigade's forward positions were moved 600 yards (550 m) back. Hackett refused to move, not least because to do so would have placed divisional headquarters 200 yards (180 m) behind the new German front line.[101] Although the expected artillery barrage did arrive, no rounds landed in the area of the CCS.[102]
24 September
Overnight a second attempt was made to reinforce 1st Airborne Division with Polish paratroops using boats belonging to the 43rd (Wessex) Infantry Division. Those men that did cross the river were to go into the line under command of the 4th Parachute Brigade. Despite the urgent need for reinforcements, the operation did not begin until 03:00.[103] Only twelve boats were available and by dawn, 200 Poles had been carried across the river.[104] While en route to reinforce 'D' Squadron GPR, the Poles were caught in the open by machine-gun fire, killing their commander, Captain Gazurek, and another man. Pinned down all day, the Poles only reached the glider pilots' position after dark.[105] After welcoming the Poles to the brigade, Brigadier Hackett departed for headquarters and was caught in the open during a mortar barrage and wounded again .[106] The seriously injured Hackett was taken to the CCS in the Hartenstein Hotel, and command of 4th Parachute Brigade given to Lieutenant-Colonel Iain Murray of the Glider Pilot Regiment.[107] That afternoon a truce was agreed to allow evacuation of British wounded from inside the perimeter. Over 450 wounded including Brigadier Hackett were taken into German captivity.[108][nb 4]
25 September
By now the perimeter along the river was only about 700 yards (640 m) wide. In the south-east a large force of Germans managed to break through the brigade's perimeter and overran one of the division's artillery batteries, located at the rear of Lonsdale Force. The other artillery batteries opened fire on the Germans from a range of 50 yards (46 m) and requested infantry as well as anti-tank weapons to come to their assistance.[110] The German force including two Panther tanks and SP guns, came close to cutting the defenders off from the river and were only defeated by the artillery, followed up by bayonet and grenade counter-attacks.[111] Lonsdale Force spent the rest of the day in close quarters battles with Waffen SS infantry. The fight was likened to a "snowball fight with grenades" and at least one tank was destroyed with a Gammon bomb.[111] In the afternoon, more Germans managed to infiltrate the perimeter. Only intervention by the guns of 64 Medium Regiment firing on the British positions prevented the division's headquarters from being overrun.[112]

South of the river Lieutenant-General Brian Horrocks, commander of XXX Corps and Lieutenant-General Frederick Browning of I Airborne Corps, decided not to reinforce the position north of the Rhine. Instead they ordered the Corps staff to prepare a plan to withdraw the division (Operation Berlin).[113] The evacuation of the surviving 2,500 men able to make the crossing was to begin at 20:45.[114] The evacuation would be from north to south, and was modelled on the evacuation from Gallipoli in the First World War.[115] During the day's fighting, some units had become isolated and never received the order to evacuate.[116] Those capable of taking part were formed into groups of fourteen (the maximum capacity of the boats) and guided to the river by men from the Glider Pilot Regiment[117] who during the day had reconnoitred and marked out two routes to the river. Under cover of an artillery barrage the evacuation started at 22:00.[118] German infiltration of the perimeter caused problems during the withdrawal and some groups got into fire fights or were captured. When they reached the river, priority was given to the wounded and regardless of rank the soldiers waited in line for their turn to get into the boats.[119]
The crossing was not secure and when the Germans realised something was happening they opened fire with machine-guns and targeted the south bank with artillery fire, sinking some boats or killing their crews.[120] At dawn the evacuation ended with around 500 men still waiting on the north bank. A small number of men tried to swim across and some made it to the far bank.[121] Of the men left behind, 200 evaded capture and reached the safety of the south bank over the following days.[122]
Outcome
The 1st Airborne Division had taken 11,500 men to Arnhem where 1,440 were killed and just over half, some 5,960 men, were prisoners of war of whom 3,000 had been wounded before capture.[122] Of the 4th Parachute Brigade's 2,170 men who arrived in Arnhem, 252 were killed, 462 were evacuated and 1,456 were missing or prisoners of war.[29] Their total casualties amounted to seventy-eight per cent, and while severe they were not the highest in the division.[123] The 1st Airlanding Brigade suffered eighty–one per cent casualties, slightly lower than the eighty–eight per cent figure for the overall division.[123] The 4th Parachute Brigade never recovered from the battle of Arnhem and was disbanded, those men who had been evacuated were used to reform the battalions of the 1st Parachute Brigade.[124]
Territorial Army
In 1947, a new 4th Parachute Brigade was raised as part of Territorial Army and assigned to the 16th Airborne Division. It was composed of the 10th Battalion, Parachute Regiment, the 11th Battalion, Parachute Regiment and the 14th Battalion, Parachute Regiment. In 1950, the brigade was renumbered the 44th Parachute Brigade (TA).[125]
Brigade composition
Commanding officers
- Lieutenant-Colonel Kenneth Smyth
- Brigadier John Hackett
- Lieutenant-Colonel Iain Murray
Units
- 10th Parachute Battalion Lieutenant-Colonel K. Smyth
- 11th Parachute Battalion Lieutenant-Colonel G. Lea
- 156th Parachute Battalion Lieutenant-Colonel Sir W. de Briancourt des Voeux
- 133rd (Parachute) Field Ambulance, Royal Army Medical Corps Lieutenant-Colonel W. Alford
- 2nd (Oban) Airlanding Anti-Tank Battery, Royal Artillery Major A. Haynes
- 4th Parachute Squadron, Royal Engineers Major A. Perkins
- Royal Army Service Corps detachment [13]
Notes Names shown under photo are incorrect. Third from left is Pvt Alfred John Ward HQ 4th Brigade driver for Hackett
- Footnotes
- Lieutenant-Colonel Smyth died of his wounds while in captivity.[68]
- The division used 696 gliders during the operation, each crewed by two pilots who were fully trained soldiers.[78]
- Major-General Urquhart later commented on how surprised he was that the Germans never attempted an overall coordinated attack.[92]
- Hackett was examined by a German doctor who suggested he was put out of his misery, his wounds being inoperable.[109]
- Citations
- Otway, p.21
- Shortt and McBride, p.4
- Moreman, p.91
- Guard, p.218
- Harclerode, p. 218
- Ferguson, pp.7–9
- Rosignoli, p.24
- Guard, p.37
- Ferguson, p.9
- Powell, p.19
- "4 Parachute Brigade appointments". Order of Battle. Retrieved 19 April 2011.
- "1st Airborne Divisional Signals 1942-1944". 216 Parachute Signal Squadron. Retrieved 25 April 2011.
- Urquhart, p.225
- Ferguson, p.13
- Blumenson, p.94
- Blumenson, p.95
- "Obituary, Major John Pott". The Daily Telegraph. 5 July 2005. Retrieved 20 April 2011.
- Dover, p. 82
- Harclerode, p. 262
- Saunders, p.148
- Urquhart, p.16
- Peters and Buist, p.18
- Peters and Buist, pp.20–26
- Peters and Buist, p.28
- Peters and Buist, p.31
- Peters and Buist, pp.40–41
- Tugwell, p.241
- Urquhart, pp.5–10
- Nigl, p.75
- Peters and Buist, p.59
- Peters and Buist, pp.59–60
- Ferguson, p.27
- Peters and Buist, p.60
- Tugwell, p.258
- Urquhart, p.61
- Urquhart, p.76
- Urquhart, p.72
- Peters and Buist, p.127
- Peters and Buist, p.144
- Urquhart, p.75
- Urquhart, p.60
- Urquhart, p.73
- Peters and Buist, p.169
- Powell, p.60
- Urquhart, p.79
- Peters and Buist, p.168
- Powell, p.65
- Powell, pp.74–84
- Peters and Buist, p.173
- Powell, p.120
- Peters and Buist, p.164
- Badsey, p.56
- Peters and Buist, p.174
- "No. 36917". The London Gazette (Supplement). 30 January 1945. p. 669.
- Peters and Buist, pp.183–184
- Powell, p.140
- Peters and Buist, p.184
- Peters and Buist, p.185
- Peters and Buist, p.193
- Peters and Buist, p.186
- Peters and Buist, p.209
- "No. 36807". The London Gazette (Supplement). 23 November 1944. pp. 5375–5376.
- "No. 36774". The London Gazette (Supplement). 2 November 1944. pp. 5015–5016.
- Peters and Buist, pp.197–198
- Powell, p.85
- Peters and Buist, p.207
- "Casualty Details". Commonwealth War Graves Commission. Retrieved 21 April 2011.
- "Casualty Details". Commonwealth War Graves Commission. Retrieved 21 April 2011.
- Powell, pp.198–199
- Clark, p.168
- Powell, p.214
- Peters and Buist, p.224
-
Smith, D M (Sergeant) (20 September 1944). "OPERATION 'MARKET GARDEN' [...] (BU 1121)". archive.iwm.org.uk. Imperial War Museum (IWM). Archived from the original on 23 April 2013. Retrieved 3 April 2013.
See also IWM (2013). "BU 1121". IWM Collections Search. Retrieved 3 April 2013. - Clark, p.194
- Powell, p.246
- Powell, p.244
- Urquhart, p.121
- Nigl, p.76
- Clark, pp.194–195
- Powell, p.237
- Urquhart, p.122
- Powell, pp.237–239
- Clark, p.207
- Powell, p.240
- Urquhart, p.125
- Clark, p.197
- Peters and Buist, p.234
- Clark, p.196
- Urquhart, p.129
- Urquhart, p.132
- Saunders, p.262
- Urquhart, p.124
- Peters and Buist, p.237
- Urquhart, p.137
- Clark, p.202
- Peters and Buist, p.245
- Powell, p.263
- Peters and Buist, pp.250–251
- Peters and Buist, p.249
- Urquhart, p.146
- Urquhart, p.147
- Urquhart, p.148
- Peters and Buist, p.254
- Urquhart, p.152
- Peters and Buist, p.258
- Urquhart, p.153
- Urquhart, pp.153–154
- Urquhart, p.158
- Urquhart, p.159
- Urquhart, p.170
- Peters and Buist, p.270
- Urquhart, p.171
- Clark, p.228
- Peters and Buist, p.274
- Urquhart, p.167
- Peters and Buist, p.273
- Urquhart, p.169
- Urquhart, p.168
- Peters and Buist, p.282
- Peters and Buist, p.283
- Peters and Buist, p.287
- Peters and Buist, p.296
- Nigl, p.77
- Middlebrook, p.455
- "4th Parachute Brigade (Territorial)". Paradata. Archived from the original on 17 December 2013. Retrieved 31 October 2011.
References
- Badsey, Stephen (1993). Arnhem 1944: Operation Market Garden. Campaign Series. Vol. Number 24. Oxford, United Kingdom: Osprey Publishing. ISBN 1-85532-302-8.
- Blumenson, Martin (1969). United States Army in World War 2, Mediterranean Theater of Operations, Salerno to Cassino. Washington D.C.: Defense Department Army, Government Printing Office. OCLC 631290895.
- Clark, Lloyd (2008). Arnhem: Jumping the Rhine 1944 and 1945. St Ives, United Kingdom: Headline Publishing Group. ISBN 978-0-7553-3637-1.
- Dover, Major Victor (1981). The Sky Generals. London, United Kingdom: Cassell. ISBN 0-304-30480-8.
- Ferguson, Gregor (1984). The Paras 1940-84. Volume 1 of Elite series. Oxford, United Kingdom: Osprey Publishing. ISBN 0-85045-573-1.
- Guard, Julie (2007). Airborne: World War II Paratroopers in Combat. Oxford, United Kingdom: Osprey Publishing. ISBN 1-84603-196-6.
- Harclerode, Peter (2005). Wings Of War: Airborne Warfare 1918-1945. London, United Kingdom: Weidenfeld & Nicolson. ISBN 0-304-36730-3.
- Middlebrook, Martin (1994). Arnhem 1944: the Airborne Battle, 17–26 September. New York, New York: Westview Press. ISBN 0-8133-2498-X.
- Moreman, Timothy Robert (2006). British Commandos 1940–46. Oxford, United Kingdom: Osprey Publishing. ISBN 1-84176-986-X.
- Nigl, Alfred J (2007). Silent Wings Savage Death. Santa Ana, California: Graphic Publishers. ISBN 1-882824-31-8.
- Otway, Lieutenant-Colonel T.B.H. (1990). The Second World War 1939-1945 Army — Airborne Forces. London, United Kingdom: Imperial War Museum. ISBN 0-901627-57-7.
- Peters, Mike; Buist, Luuk (2009). Glider Pilots at Arnhem. Barnsley, United Kingdom: Pen & Sword Books. ISBN 1-84415-763-6.
- Powell, Colin (2004). Men at Arnhem. Long Preston, United Kingdom: Magna large print books. ISBN 0-7505-2224-0.
- Rosignoli, Guido (1989). The Allied Forces in Italy, 1943-45. Newton Abbot, United Kingdom: David & Charles. ISBN 0-7153-9212-3.
- Saunders, Hilary Aidan St. George (1950). The Red Beret: the Story of the Parachute Regiment at War, 1940-1945 (4 ed.). Torrington, United Kingdom: Joseph. OCLC 2927434.
- Shortt, James; McBride, Angus (1981). The Special Air Service. Oxford, United Kingdom: Osprey Publishing. ISBN 0-85045-396-8.
- Urquhart, Robert (2007). Arnhem. Barnsley, United Kingdom: Pen and Sword Books Ltd. ISBN 978-1-84415-537-8.
