Light tent
A light tent, a kind of photography light modifier, is a box used for taking photos of objects without casting shadows. It can, for example, be used to take pictures of a physical product for use in an encyclopedia, for documentation[1] or for marketing. The combination of evenly distributed lighting and the diffusing material means that minimal shadows are cast, and it can appear as if the pictured product is "floating in nothing", and a neutral image without a disturbing background can be achieved. Glossy or reflective objects in particular can require a light tent in order to avoid unwanted reflections in the picture.[2]

Walls and materials
The walls in the box is made of a diffusing material such that light spreads well when it hits the surface. White is the most commonly used color, but other colors can also be used.[3] This contributes to uniform lighting of the object. For example, one can use matte white paper sheets, but felt or another types of matte textile can also function as a background and substrate.[3]
Size

Light tents come in various sizes, but typically occupy an area of less than 2×2 metres, and can typically be placed on top of a small table.[3] A rule of thumb is that the tent should be large enough to have at least 10 cm of clearance on all sides of the object to be photographed.[3] Many light tents are portable.[4]
Openings
The box may have one or several openings to the outside so that the photographer can get access for taking a picture with a camera. Some light tents have a completely open front, while others have one or more small hatches that can be opened to insert the camera lens.
Lighting
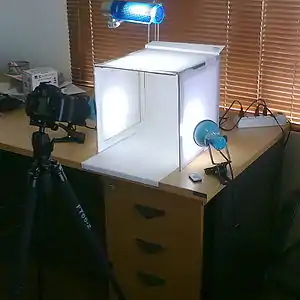
The box can either have integrated lighting or be illuminated by lamps from the outside, for example with one lamp on each side of the light tent.[3] Alternatively, a 3-point lighting can be used:
- Key light: Stands approximately 30 degrees to the side and up from the camera's axis towards the object.
- Fill light: Also stands on the front of the object, but on the opposite side (right versus left) and should ensure that there is not too much shadow. Preferably set a little lower than the key light.
- Back light: Should stand behind the object and slightly to the side, and is used to separate the object from the background.
 Setup
Setup.jpg.webp) Result
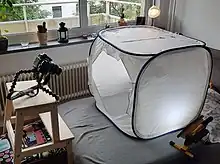
Result
Color temperature
To achieve a good result, it is recommended that the object should be illuminated by lamps with the same color temperature (expressed in kelvin or K).[3] Different color temperatures may occur in cases where, for example, lamps with different types of bulbs are used, or if there is a combination of indoor lighting and natural daylight.
Camera settings
For product photography, high f-numbers (small aperture, long depth of field) are most often used, for example 8 to 16.[3] It is also recommended to use low ISO-values to minimize noise, for example 100 to 200.[3] The white balance may be based on daylight (5000 K to 6500 K) unless the lighting indicates otherwise.[3]
See also
References
- Harnang, Forfatter Harald (2018-03-01). "Produktfotografering" (in Norwegian Bokmål). Retrieved 2022-12-27.
- Harnang, Forfatter Harald (2012-02-06). "Foto av blanke gjenstander krever lystelt" (in Norwegian Bokmål). Retrieved 2022-12-27.
- "Produktfotografering med lystelt - hurtig og enkelt!" (in Norwegian Bokmål). Retrieved 2022-12-27.
- "Et lite fotostudio: Derfor er et lystelt genialt" (in Norwegian Bokmål). 2021-03-04. Retrieved 2022-12-27.