Access XP
Running and Printing Database Reports
Creating a Report Using the Report Wizard
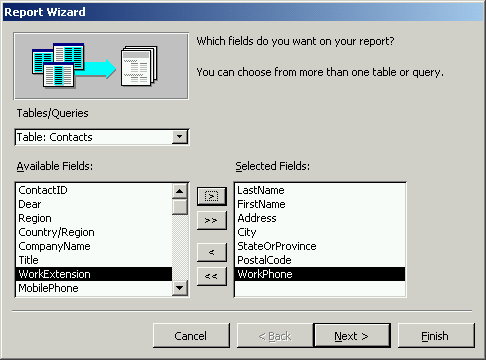
In the Report Wizard's first dialog box:

- Choose the table or query in which you would like to base the report.
- Highlight the first field from the Available Fields that will be included in the report and click the right arrow to move the field to the Selected Fields box.
- Repeat so that each field is included in the report, or the click the double arrow to move all the fields for the report.
- When finished, click the Next button.
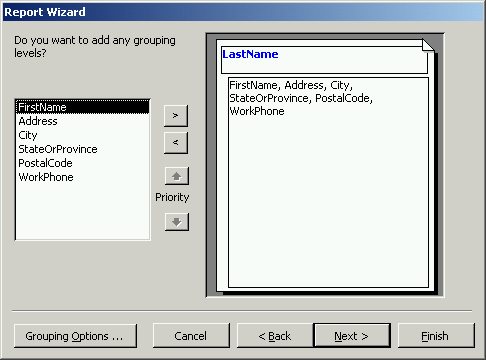
In the Report Wizard's second dialog box, you can select a field name for grouping purposes. For example, by selecting First Name, notice how First Name becomes the group header (blue text) in the right side of the picture. You do not have to select any grouping levels.

- Highlight the field that you would like to use as a group level, and click the right arrow to move the field to the Selected Fields box.
- When finished or to bypass this screen, click the Next button.


