Outlook 2003
Using Distribution Lists
Using distribution lists
In Outlook, you can create distribution lists that allow you to send an email to multiple people without having to type each person's email address or insert each address from your address book. This is especially useful if you typically send emails to the same group of people.
For example, let's say you have a group of eight friends who meet once a month for dinner. Rather than type each person's email address, you can create a distribution list and name it Friends. Now, all you need to do is insert your Friends distribution list into the To... field of my outgoing messages. This is much easier than typing each address individually.
To create a distribution list:
- Click Contacts in the navigation pane.
- Click File
 New
New Distribution Lists from the main menu.
 - Enter a name for the distribution list in the Name: field.
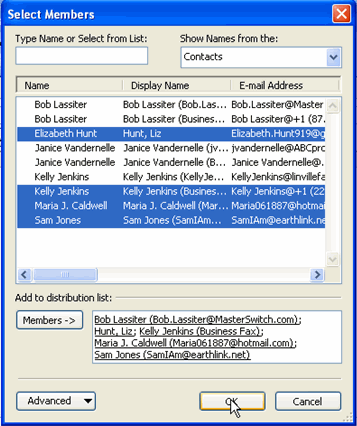
- Click Select Members. The Select Members dialog box appears.
- Double-click a name to add it to the list.
OR - To add multiple names, click the first name, press the Ctrl key on the keyboard, and continue selecting names while pressing the Ctrl key.
- Click the Members button. The names you selected will appear in the field.
- Click OK.

- Click Add New to add someone to your distribution list who is not currently a contact. The Add New Member dialog box will appear.
- Enter the person's display name.
- Enter the person's email address.
- Click OK.
- Click Save and Close. The distribution list will appear in your Contacts section.
To send an email message to a distribution list:
- Click Mail in the navigation pane.
- Click New on the Standard toolbar. The Untitled Message window will appear.
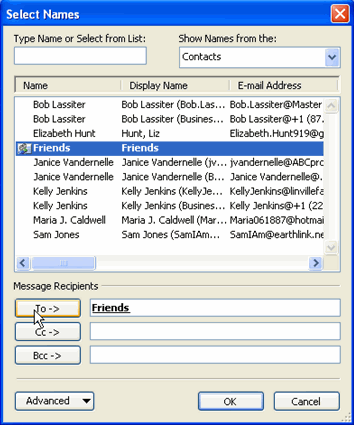
- Click To.... The Select Names dialog box will appear.
- Select the distribution list.
- Click the To button in the Message Recipients section.

- Click OK.
- Enter text into the message window.
- Click Send.


