

/en/access2000/queries/content/
In previous lessons, you learned about tables, forms, and queries. In this lesson, you'll learn about another database object: reports.
Although you can print datasheets and forms in Access, creating a report makes your data more presentable and meaningful. Using Access, you can report your data in variety of ways to make it more accessible to those who need it.
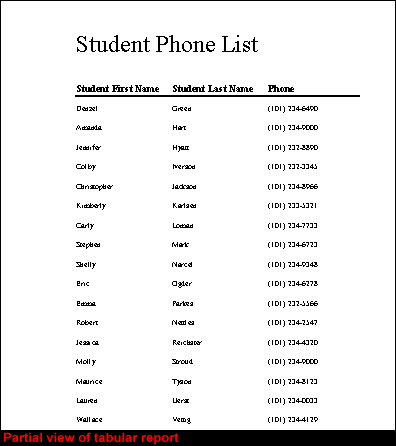
Most reports are either columnar or tabular (as shown below) in design.
You can develop reports in many ways, but in this lesson we'll discuss how to create a report using AutoReport and the Report Wizard.
AutoReports, some of the simplest reports to produce, are extremely useful, especially if all the data you want is in one table or query.

![]()
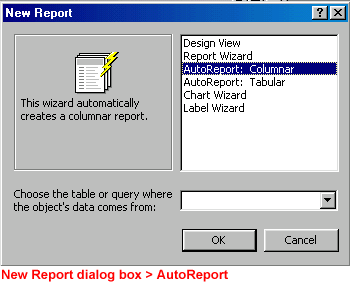


 When you save a report, only the structure of the report is saved, not the underlying data you see in the preview. Data shown in the preview is always as current as the records in the database.
The Report Wizard asks a series of questions and uses responses to create a report.

![]()
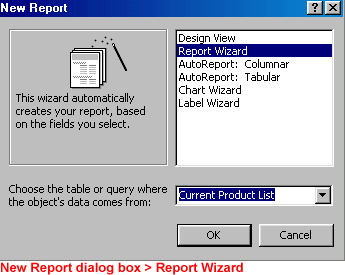

 When you save a report, only the structure of the report is saved, not the underlying data you see in the preview. Data shown in the preview is always as current as the records in the database.
In the Report Wizard's first dialog box, choose the table or query on which to base the report. Click the right arrow to move individual fields to the Selected Fields box or the double arrow to move all the fields. When you have selected all of the fields you want from the first table or query, select the next object from the list. Click Next.
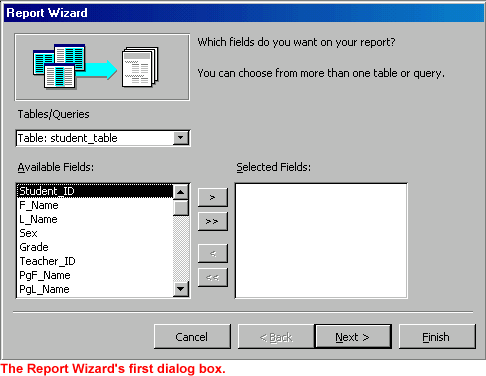
 Follow the Report Wizard's directions carefully. Click Finish to close the Report Wizard and open your report in Print Preview.
 You can decide to include any or all of the Report Wizard's selections in your report.
 Very important! When working in tables, forms, queries, and reports, use the New Object button
  on the toolbar to create new database objects (tables, forms, queries, and reports).
/en/access2000/printing-a-report/content/