Lesson 15: Running Database Queries
/en/access2003/filtering-records/content/
Introduction
By the end of this lesson, you should be able to:
- Run an existing query
- Create a single-table query
- Create a multiple-table query
Run an existing query
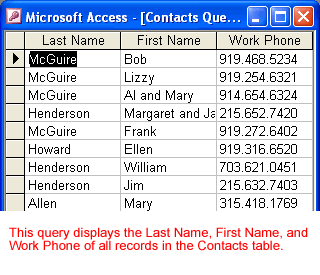
Like tables and forms, a query is another type of database object in Access 2003. A query is a search for records that match the exact criteria you define. In this example, we will run a query against the Contacts table and list all records found by Last Name, First Name, and Work Phone.
To run an existing query:
- Open the Contact Management database.
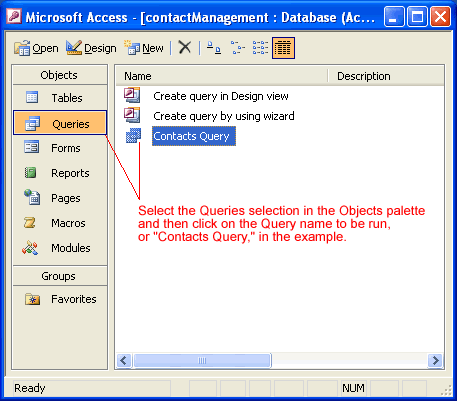
- In the database window, choose the Queries tab from the Objects palette.
- To open a query, double-click the query title, click once on the query title and then click the Open button, or right-click the title and choose Open from the shortcut menu.
- The query searches the database and then displays the results on the screen.
Creating a single-table query
In this example, we will create a new query and run it against that very same Contacts table. We will type the following command in the table: Show me the mailing address of all records in the Contacts table. When we create the query, we need to select the following fields in the Contacts table: Last Name, First Name, Address, City, State/Province, and Postal Code.
To create a simple query:
- Open the Contacts Management database.
- In the database window, choose the Queries tab from the Objects palette.
- Select the Create query by using wizard option, and click the Open button.
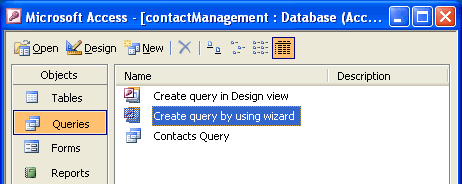
- The Simple Query Wizard opens.
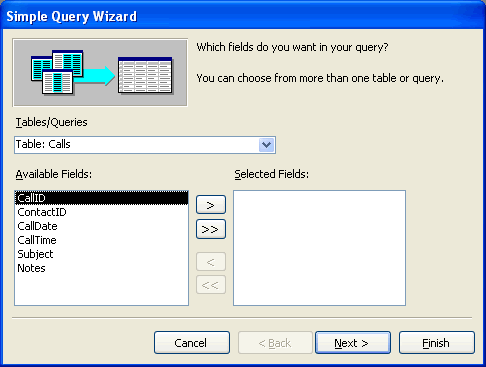
- From the Tables/Queries drop-down list, choose the table/query containing the fields you want to include in the query.
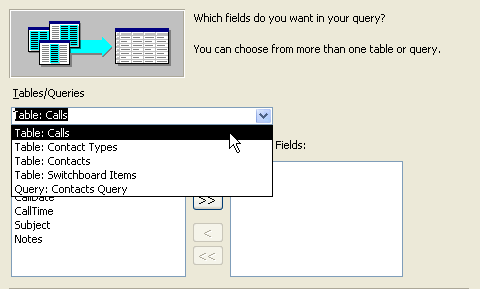
Creating a single-table query
- The Available Fields text box displays all fields contained in the table selected in the Tables/Queries field. Here, you can select the fields to be used in the new query. You can choose one or more, or even all fields in the query.

Click to highlight the first field to be included in the query—Last Name, for example—then click the right arrow button. Repeat until you have selected all fields to be used (First Name, Address, City, State/Province, and Postal Code).

- If the fields you selected include a number field, you are asked to select a summary or detail query. To see each record, choose Detail. To see sums, averages, etc., choose Summary and set the summary options. Click the Next button.
- Type a name for the query (e.g., Contacts Mailing Address) in the What title do you want for your query? field.
(Leave the Open the query to view information radio button turned on.)
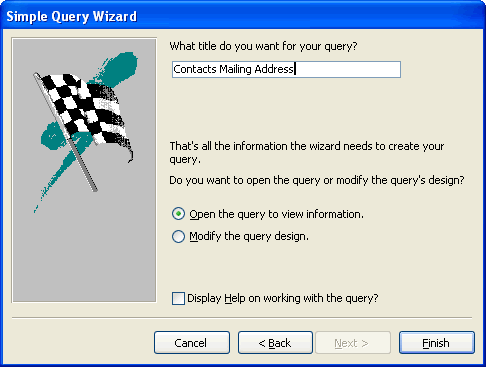
- Click Finish to run the query.
Creating a multiple-table query
Queries are not confined to just a single table. You can create a query that runs against multiple fields in multiple tables. This query is created in an identical manner to the single-table query defined on the previous page. The only difference when creating a multiple-table query is that after selecting the fields in one table, as we saw in the last example, you then select the next table and choose additional fields.
In this query, we will ask for the Name, Contact Type, and Phone Number of all records in the Contacts table. When we create the query, we will select fields from two tables: Contacts table (Last Name, First Name, and Work Phone fields) and Contacts Type table (Contact Type field).
To create a multiple-table query:
- Open the Contacts Management database.
- In the database window, choose the Queries tab from the Objects palette.
- Select the Create query by using wizard options, and click the Open button.
- The Simple Query Wizard opens.
- From the Tables/Queries drop-down list, choose the first table where you would like to perform the query (e.g., Contacts).
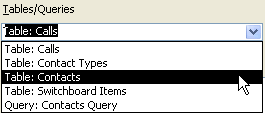
- From the Available Fields, select the fields to be included from this table (e.g., Last Name, First Name, and Work Phone).
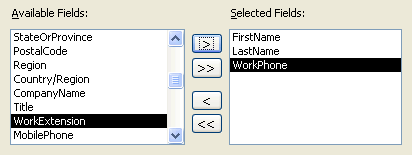
Creating a multiple-table query
- Select the next tables or query from the Tables/Queries drop-down list, and pick the fields in that table in which you would like to perform the query.
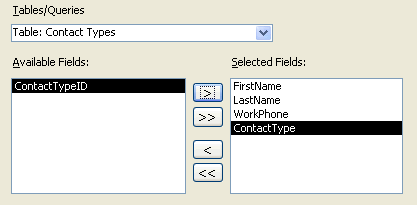
- Type a name for the query (e.g., Contacts by Contact Type) in the What title do you want for your query? field.

- Click Finish to run the query.
Sorting, finding, and filtering query results
Throughout this lesson, we have learned several ways to quickly locate information in the Contact Management database: sort records (lesson 12), find records (lesson 13), filter records (lesson 14), and queries. Can you run a query and then sort, find, or filter records? Absolutely. This is the power of a database.
Everything you previously learned about how to save sorts and filters applies to queries as well. Once a query is defined, you can come back into the database at any time—even after new contact records have been added—and run that query.
After you run a query and defined a sort, you will be asked to save the sort and the query design when you close the query or exit Access. If you save those changes, the sort will be saved to the query the next time you run the query. If you do not save the changes, the query returns to the original order the next time you run it.

When a filter is applied to a query, Access will ask if the changes to the query design are to be saved the next time you close the database or exit Access.
- An answer of "Yes" will save the filter but not the filtered query. The next time the query is run, all records that match the query are visible.
- To apply the saved filter, click the Apply Filter button to reapply the filter. Remember, Access saves only the last filter you create.
Challenge!
- Open the Contact Management database.
- Open the Contacts table in Datasheet view.
- Use the wizard to create a single-table query:
- Select the Contacts table.
- Select the following fields in the Contacts table: Last Name, First Name, Address, City, State/Province, Postal Code, Work Phone, Work Extension, and Email Name.
- When prompted to name the query, call it "Address Book Contacts".
- Use the wizard to create a multiple-table query:
- Select the following fields in the Contacts table: Last Name, First Name, Company Name, Work Phone, and Work Extension.
- Select the following fields in the Calls table: Call Date, Subject, and Notes.
- Select a Detail query.
- When prompted to name the query, call it "Job Search Progress".
- Build onto the sorting, finding, and filtering capabilities learned in previous lessons by applying these techniques to the queries you have created in this challenge.
- Close the Contacts table, and if displayed click the "No" button in response to the Do you want to save changes to the design of table 'Contacts' system prompt.
/en/access2003/running-and-printing-database-reports/content/


