
If you use a Windows computer or a Mac, Microsoft 365 is designed to work the same way on both systems. However, there are some differences to point out, and we’ll go over them in this lesson. To access Microsoft 365, you can purchase an online subscription. With it, you'll have the ability to access your saved files from any device because they are stored in the cloud. Later on, we’ll talk more about this and how it works for Word and PowerPoint.
Watch the video below to see how using Microsoft 365 is different on a Mac.
When you first open Word or PowerPoint on a computer, you’ll see the Home window. From here, you can easily open a new blank file or select a recent file to quickly access it.

On the left side pane, New will give you more template options, Recent has a longer list of files that you have worked on previously, Shared lets you see what people have shared with you, and Open lets you find a file from your OneDrive or computer.

For this example, we'll click New followed by selecting the Menu template. Then, we'll click the Create button.

One of the main differences between using Office for Mac versus a Windows computer is that the File menu is located on the application toolbar at the top of the screen. Depending on which application you are using, the File menu options change accordingly. For example, Word says New Document while PowerPoint would say New Presentation. Generally, this menu is where you can create a new file, open a file already created, save the file you are working on, and print your current file. If you are logged into your OneDrive account, you can easily share a file by saving it there.

Many of the keyboard shortcuts you may be used to on a Windows computer still work on Mac, but instead of using the Ctrl button, you use the Command button on your keyboard. For example, to select all, you’ll hold down Command+A on a Mac. When switching devices, you can use many of the same shortcuts using the Command key.

Word for Microsoft 365 opens without the ruler at the top and side of the page on a Mac. To enable it, click the View Tab; then, check the checkbox for Ruler. Now, you can easily make adjustments to your margins.

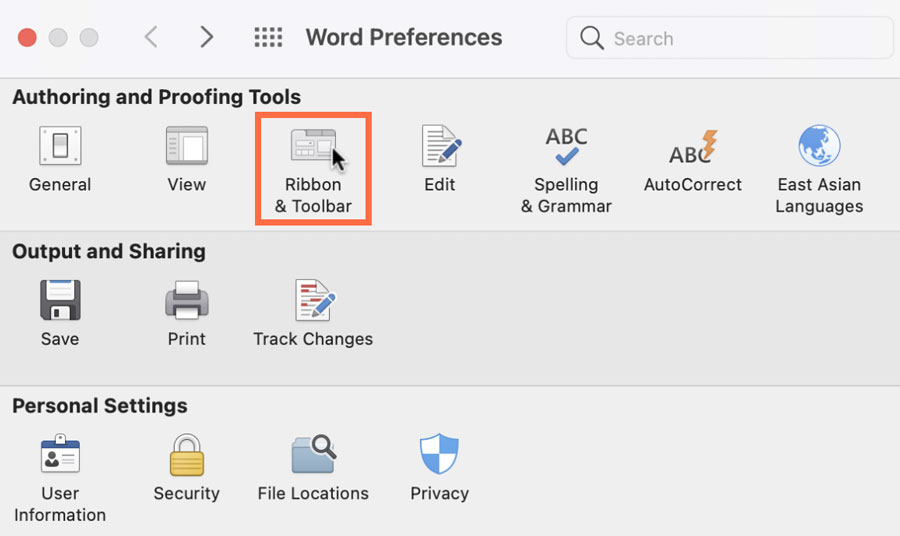
Another feature that could help you create your document is Developer mode. Don’t let the name make you nervous because it is simply used to make documents more interactive. To open it, click Word to have the drop-down menu appear, then click Preferences.

Within Word Preferences, click Ribbon & Toolbar.

Scroll down and check the checkbox for Developer followed by the Save button.

The Developer Tab lets you input checkboxes, date selection calendars, and text boxes.

For PowerPoint for Microsoft 365, these are the main differences. First off, what some may know of as the Dictate feature on the Windows version is not yet available for the Mac version. You’ll have to use Mac’s built-in voice-to-text setting instead located in System Preferences.

Under the Slide Show Tab, in order to present with Presenter View, click the Presenter View button.

To show the ruler to help you align objects on your slides, you can enable it by going to the View Tab; then, check the checkbox for Ruler.

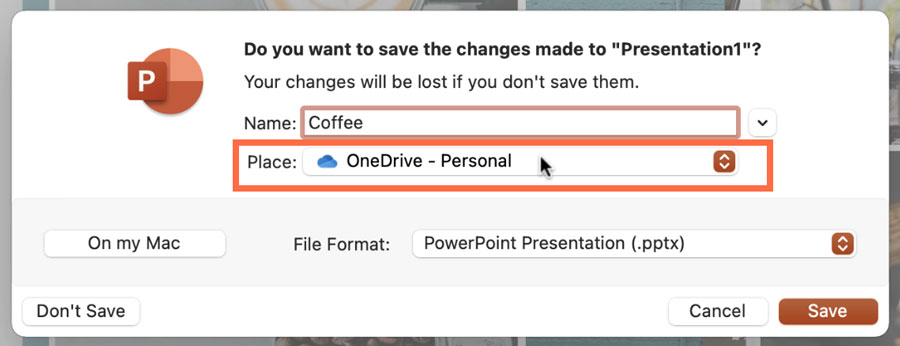
For any Microsoft App on a Mac, when you quit without saving, the dialog box is slightly different. If you are logged into your OneDrive account, the default saving place is OneDrive. Using OneDrive frees up your local hard drive space for files that you don’t want to store on the cloud.

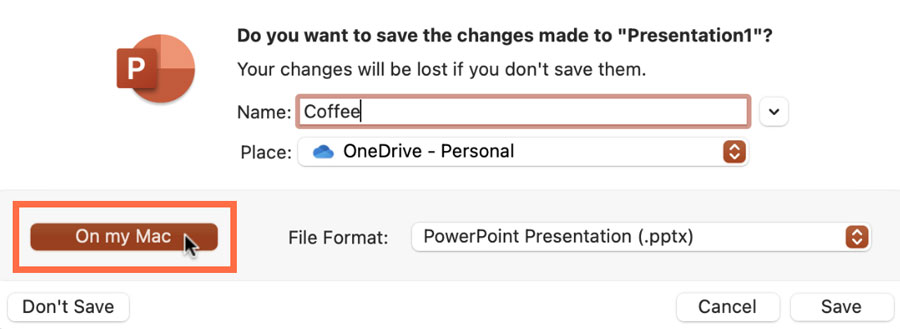
If you simply want to save the file to your Mac, click the On My Mac button.

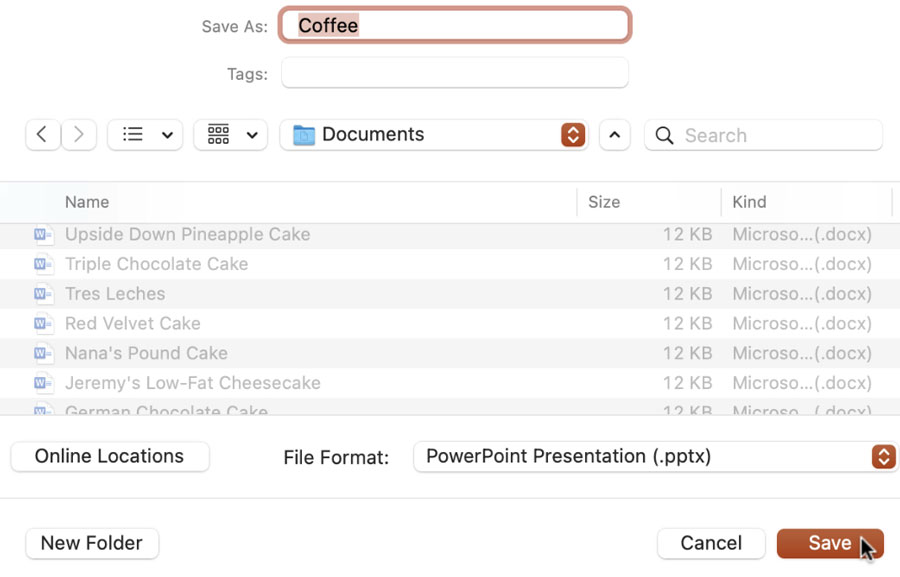
You can fill out and make your selections as you normally would to save your documents.

If you are worried about compatibility, don’t be. As long as you are using Microsoft 365 apps, any files you create will always work on both systems.
As you can see Microsoft 365 for Mac may have some slight differences, but most of the regular functions and features are located on the same tabs and work the same. To learn more, you can check out our other Office lessons and easily follow along using your Mac or MacBook.