This article was co-authored by wikiHow Staff. Our trained team of editors and researchers validate articles for accuracy and comprehensiveness. wikiHow's Content Management Team carefully monitors the work from our editorial staff to ensure that each article is backed by trusted research and meets our high quality standards.
This article has been viewed 19,600 times.
Tutus are a popular way to decorate your little one's high chair on his or her special day. They are typically made out of tulle and ribbon, but you can make yours using different materials. For example, if you want something more rustic, you could use strips of fabric instead. Once you know the basics of making high chair tutus, the possibilities are endless! The best part is that you can make these without knowing how to sew a single stitch!
Steps
Using Tulle
-
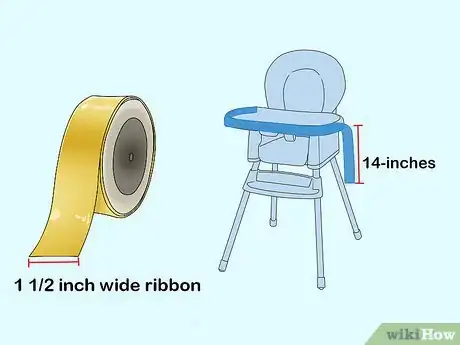
1Cut a long piece 1½-inch (38-millimter) wide ribbon. It needs to be long enough to wrap around the table and back rest of the high chair, plus about 14 inches (35.56 centimeters).
-
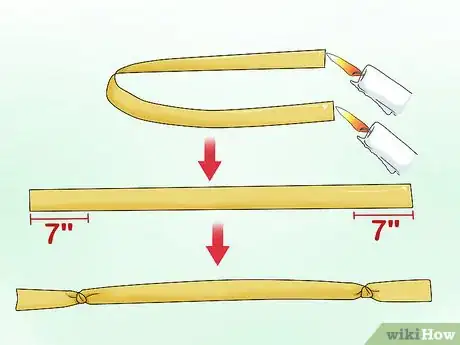
2Seal and knot the ends of the ribbon. Hold the cut ends of the ribbon near a flame for a few seconds. This melts the ribbon and seals them, thus preventing fraying. Tie a knot into the ribbon 7 inches (17.78 centimeters) away from each cut end.[1]
-
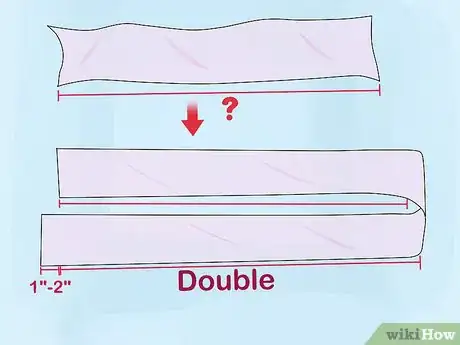
3Determine how long you need to cut the tulle. Decide how long you want the tutu to be. Double that length, then add 1 to 2 inches (2.54 to 5.08 centimeters).
-
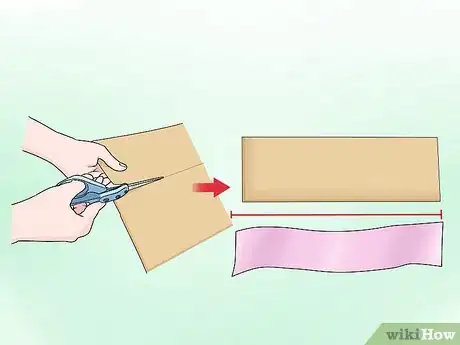
4Cut a cardboard template according to that measurement. The cardboard needs to be a little wider than your tulle. You will be wrapping the tulle around this in the next step.
-
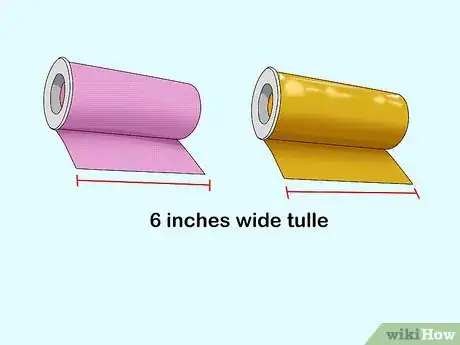
5Buy 2 different colors of tulle ribbon. Tulle ribbon is also called tulle on a spool. It is 6-inch (15.24-centimeter) wide tulle sold on a spool. You can typically find it in the bridal section of an arts and crafts shop. If you can't find any, buy regular tulle, and cut it into 6-inch (15.24-centimeter) wide strips.
- Make sure that the colors go well together. Consider having one solid color and one glittery one.
-
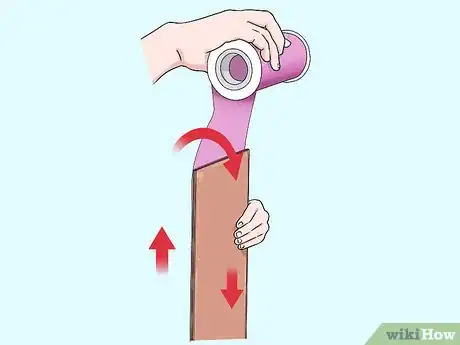
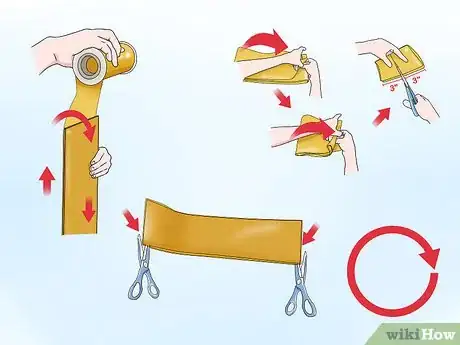
6Wrap the tulle around the cardboard. Place the end of the tulle strip against one of the narrow ends of the cardboard. Wrap the tulle around the cardboard template. Be careful not to pull too hard, or the tulle will stretch.[2]
- Wrap the tulle a few times around the cardboard; you will need to do this process a few times.
- If the tulle slips too much, secure it with double-sided tape.
-
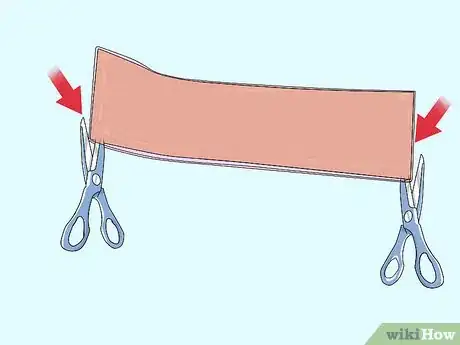
7Cut both ends of the tulle. Slip it off the cardboard when you are done. Now, you will have twice as many strips of tulle. This is just like making a pompom, except that you won't be tying it in the middle.
-
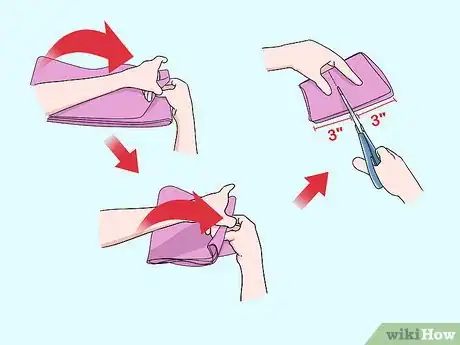
8Cut the tulle strips in half lengthwise. You will end up with 3-inch (7.62-centimeter) wide strips of tulle. A quick way to do this would be to fold it in half a few times widthwise, then cut it in half down the middle.[3]
-
9Repeat the process with your second color. You can have the same amount as your first color, or fewer. You can also do more colors, but make sure that they all go together. Plan on having one strip of tulle per inch (2.54 centimeters) of ribbon.
-
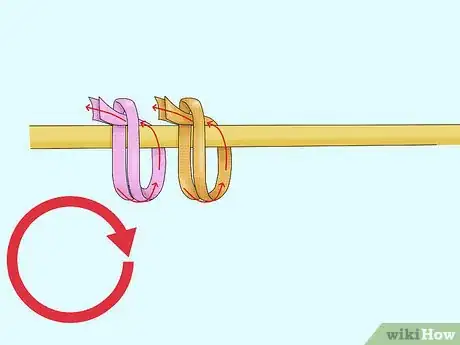
10Loop a tulle strip around the ribbon. Lay the ribbon out in front of you, right-side-up. Fold a tulle strip in half, widthwise. Place it behind the ribbon, with the folded end pointing down. Pull the loose ends of the tulle across the ribbon and down through the loop. Tug on the ends to tighten the knot.[4]
- Start looping the tulle after the first knot on the ribbon.
-
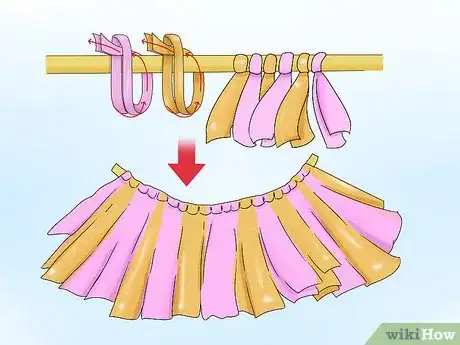
11Loop the rest of the tulle strips around the ribbon. As you finish knotting a tulle strip, push it up against the last one. This will make the tutu nice and fluffy. If you run out of tulle strips, simply make more.
- Finish looping the tulle before the last knot on the ribbon.
- Have a pattern in mind. Try four strips of your base color, then one strip of your accent color.
-
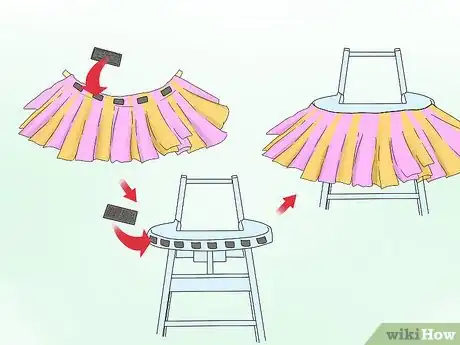
12Secure the tutu to the high chair with Velcro. Place a few self-adhesive Velcro squares or circles onto the back of the tutu. Place the matching Velcro pieces onto the high chair. Wrap the tutu around the high chair, then tie the 7-inch (17.78-centimeter) ends into a bow.[5]
- Use your fingers to comb through the tulle and make it lay nicer.
Using Fabric
-
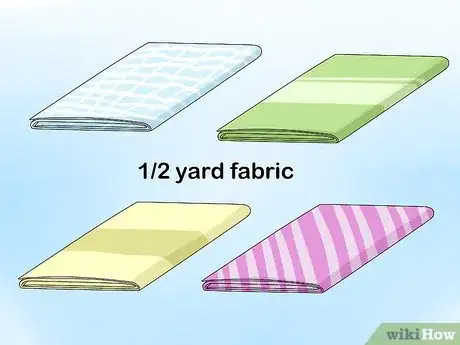
1Choose your fabric. You will need ½ yard (0.46 meters) of four different types of fabric. Cotton fabric works the best for this project. Choose colors and prints that go well together. It might be a good idea to have a solid color in there as well.[6]
-
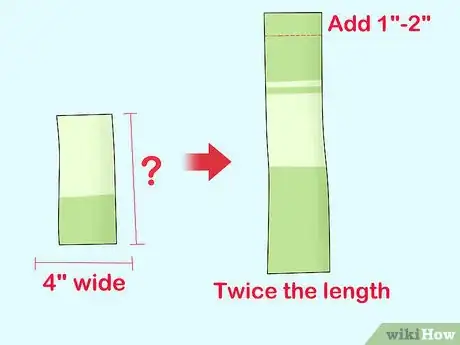
2Cut the fabric into 4-inch (10.16-centimeter) wide strips. How long you cut the strips depends on how long you want the tutu to be. The strips need to be twice the length you want them to be, plus an extra 1 to 2 inches (2.54 to 5.08 centimeters).[7]
- Use a sharp part of fabric scissors or a rotary cutter.
-
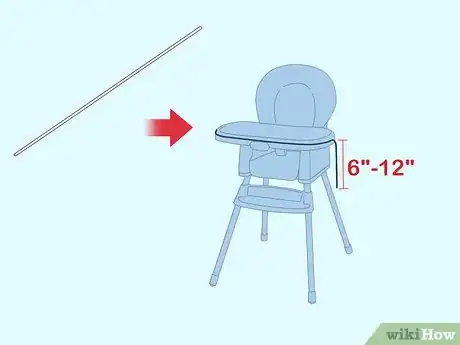
3Cut a long piece of cording. The cord needs to be long enough to wrap around the table and back of the high chair, plus about 6 to 12 inches (15.24 to 30.48 centimeters). Choose a color that goes well with your fabric. White is always a safe bet, however.[8]
-
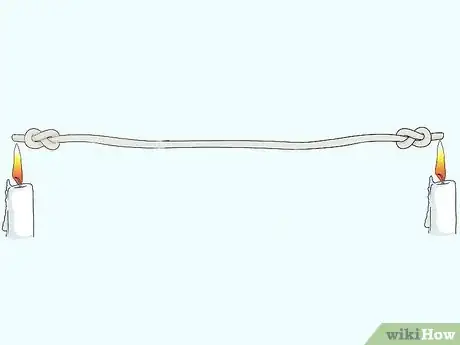
4Tie a knot into each end of the cord. This will keep the fabric strips from slipping off. You can seal the ends of the cord with glue or tape to prevent fraying. If the cord is made out of a synthetic material, you can heat-seal it by holding it close to a flame.
-
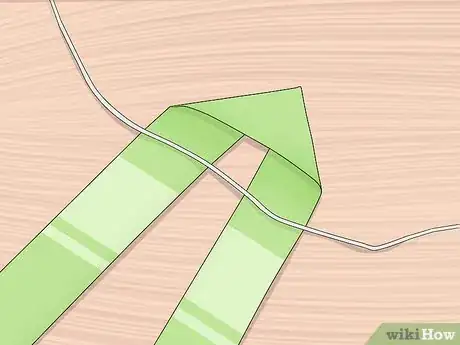
5Fold a fabric strip in half, and place it behind the cord. Fold a fabric strip in half with the right side facing out. Place it behind the cord, with the folded part sticking down, forming a loop.
-
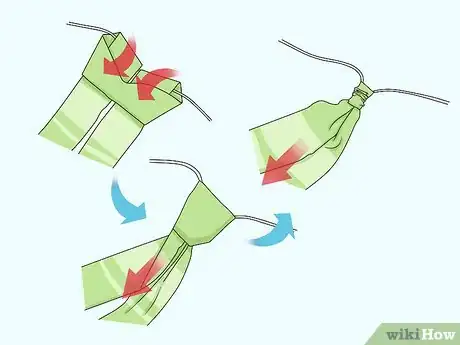
6Pull the loose ends of the strip through the loop. Gently tug on the loops to tighten the knot. Make sure that the right side of the fabric is facing out. Don't let the fabric twist too much.
-
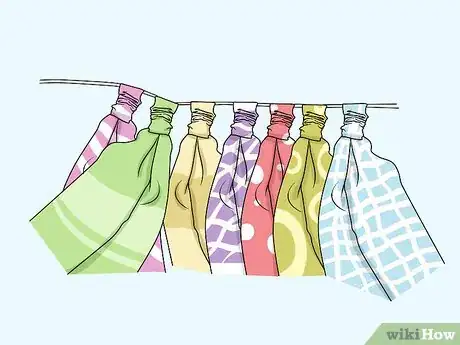
7Continue tying the strips to the cord in a similar fashion. You can tie the strips on randomly or use a pattern. Keep going until you have the entire cord filled.[9]
- Leave a few inches/centimeters at each end blank.
-
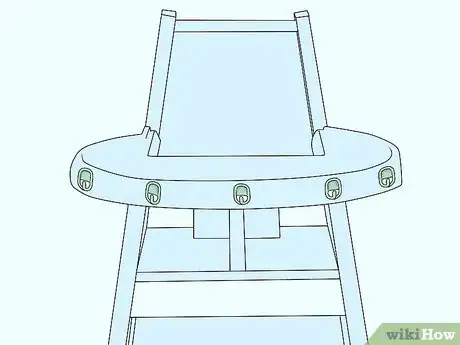
8Stick 5 clear, plastic hooks onto the chair. Purchase a set of clear, plastic, self-adhesive hooks. Stick them around the table and back part of the high chair.[10]
-
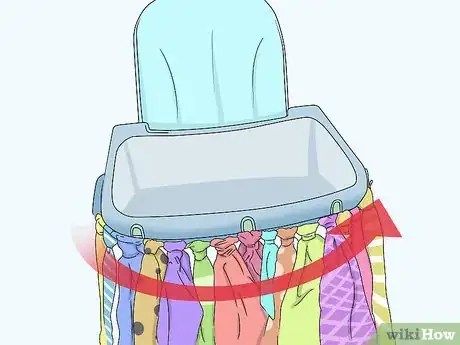
9Wrap and tie the tutu around the high chair. Wrap the tutu around the highchair, allowing it to settle into the hooks. Tie the ends of the cord together so that the tutu doesn't fall off.
Using Ribbon
-
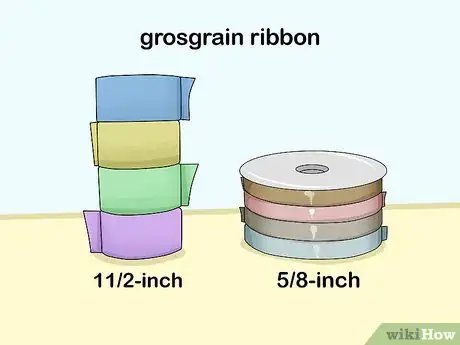
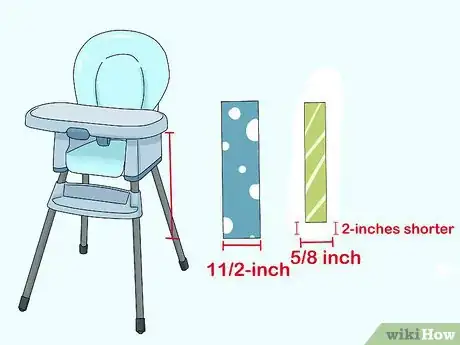
1Choose a variety of grosgrain ribbon in. You will need 1½-inch (38-millimeter) ribbon in four different colors. You will also need ⅝-inch (16-millimeter) ribbon in four different colors as well. You can use the same colors for both sets of ribbon.[11]
- The ribbons can be solid-colored or patterned.
- Use matching patterns to prevent clashing.
-
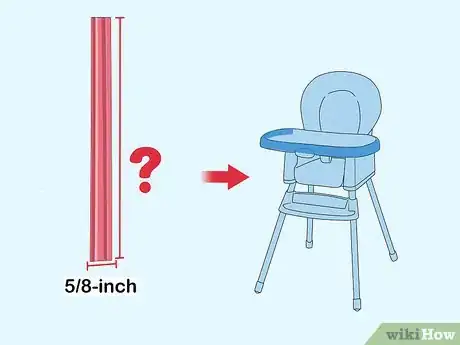
2Cut a piece of ribbon long enough to wrap around the high chair. This includes the table part and the back of the chair, plus a few inches/centimeters. ⅝-inch (16-millimeter) ribbon would work the best for this. This is your base ribbon.[12]
- It is always better to cut the ribbon longer than you need to in case it ends up being too short in the end.
-
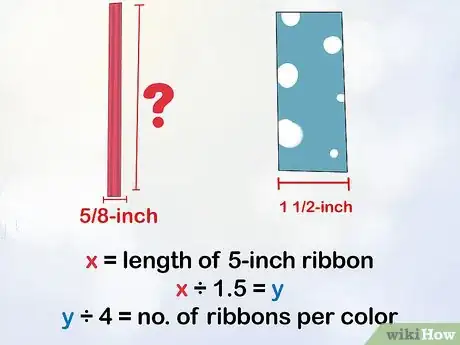
3Determine how many ribbons you need to cut. Take the length of your ⅝-inch (16-millimeter) ribbon, and divide it by 1.5. Next, divide the answer by 4. The answer you get are how many ribbons you need to cut of each color. This includes the 1½-inch (38-millimeter) ribbon and the ⅝-inch (16-millimeter) ribbon.[13]
-
4Cut the ribbons down to the length you want. Measure down from the high chair's table to where you want the tutu to end. Cut the 1½-inch (38-millimeter) ribbons down to that length. Next, cut the ⅝-inch (16-millimeter) ribbons down 2 inches (5.08-centimeters) shorter than the 1½-inch (38-millimeter) ribbons.[14]
-
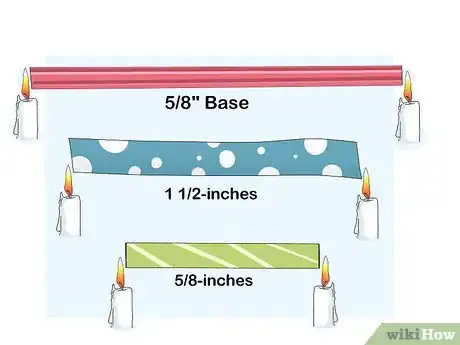
5Heat seal the end of each ribbon. If you don't do this, the ribbon may fray. Light a candle, then hold the end of each ribbon close to it for a few seconds. This will melt the end of the ribbon and seal it, preventing it from fraying.
-
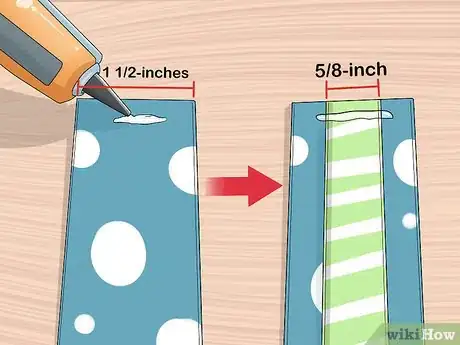
6Hot glue the narrower ribbons to the wider ones. Place a ⅝-inch (16-millimeter) ribbon on top of a 1½-inch (38-millimeter) ribbon. Make sure that it is centered and that the top edges of both ribbons are aligned. Secure both ribbons along the top edge with hot glue or fabric glue. Repeat this step for all of the ribbons.[15]
- Make sure that the right side of each ribbon is facing out.
- Don't glue down the entire length of the narrower ribbon. You want it to be loose so that it can flap around.
- Mix and match different colors and patterns.
-
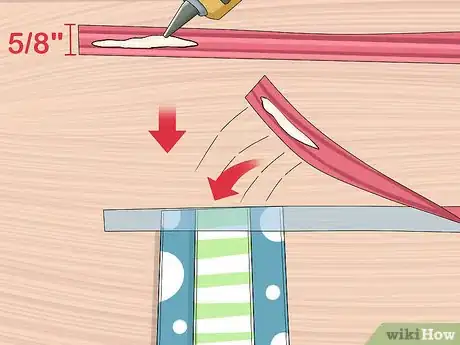
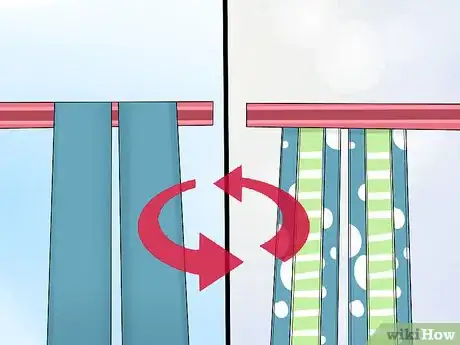
7Hot glue the layered ribbons to the back of the base ribbon. Take the long, ⅝-inch (16-millimeter) base ribbon from before. Flip it over so that the back is facing you. Hot glue the layered ribbons to the base ribbon, right-side-down. Make sure that they are all facing in the same direction and that the top edges are aligned.
- You can leave small gaps between the ribbons. ¼-inch (0.64-centimeter) would be ideal.[16]
- You should only be seeing the backs of the ribbons now.
-
8Flip the tutu over. You should now have the base ribbon on top, and the layered ribbons hanging down from underneath it.
-
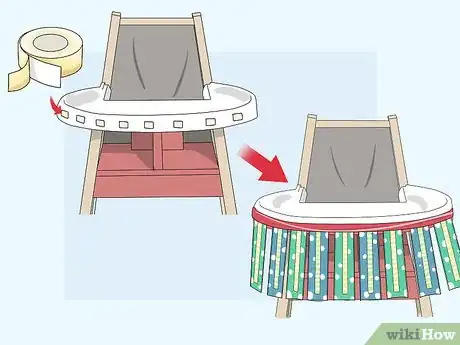
9Secure the tutu to the high chair with double-sided tape. Place small strips of double-sided tape around the table and back parts of the high chair. Wrap the tutu around the high chair. Press the ribbon into the tape so that it is secure.[17]
- If the tape is not strong enough, use self-adhesive Velcro. You can remove any residue later using an adhesive remover, such as Goo Gone.
- If you have excess base ribbon, overlap the two ends, and secure them with another strip of double-sided tape.
Things You'll Need
Using Tulle
- 2 spools of tulle ribbon
- 1½-inch (38-millimter) ribbon
- Self-adhesive Velcro
- Fabric scissors
Using Fabric
- ½ yard (0.64 meters) of 4 different types of fabric
- Fabric scissors or rotary cutter
- Cording
- 5 clear, plastic self-adhesive hooks
- High chair
Using Ribbon
- 1½-inch (38-millimter) ribbon, 4 different colors
- ⅝-inch (16-millimeter) ribbon, 4 different colors
- Hot glue
- Double-sided tape
- Scissors
- High chair
References
- ↑ https://www.youtube.com/watch?v=8qh5N-SxnJo
- ↑ https://www.youtube.com/watch?v=8qh5N-SxnJo
- ↑ https://www.youtube.com/watch?v=8qh5N-SxnJo
- ↑ https://www.youtube.com/watch?v=8qh5N-SxnJo
- ↑ https://www.youtube.com/watch?v=8qh5N-SxnJo
- ↑ http://www.twotwentyone.net/highchair-fabric-garland/
- ↑ http://www.twotwentyone.net/highchair-fabric-garland/
- ↑ http://www.twotwentyone.net/highchair-fabric-garland/
- ↑ http://www.twotwentyone.net/highchair-fabric-garland/
- ↑ http://www.twotwentyone.net/highchair-fabric-garland/
- ↑ http://www.theribbonretreat.com/blog/high-chair-ribbon-skirt.html
- ↑ http://www.theribbonretreat.com/blog/high-chair-ribbon-skirt.html
- ↑ http://www.theribbonretreat.com/blog/high-chair-ribbon-skirt.html
- ↑ http://www.theribbonretreat.com/blog/high-chair-ribbon-skirt.html
- ↑ http://www.theribbonretreat.com/blog/high-chair-ribbon-skirt.html
- ↑ http://www.theribbonretreat.com/blog/high-chair-ribbon-skirt.html
- ↑ http://www.theribbonretreat.com/blog/high-chair-ribbon-skirt.html
