This article was co-authored by wikiHow Staff. Our trained team of editors and researchers validate articles for accuracy and comprehensiveness. wikiHow's Content Management Team carefully monitors the work from our editorial staff to ensure that each article is backed by trusted research and meets our high quality standards.
The wikiHow Video Team also followed the article's instructions and verified that they work.
This article has been viewed 34,970 times.
Painting rocks with acrylic paint is a fun, inexpensive craft you can do with anyone. Make sure you have the right supplies — smooth rocks, brightly colored acrylic paints, and a variety of brushes. Your rocks should be nice and clean before you start, to ensure the paint adheres easily to the surface. You can practice your design before you start working on your rock. Make sure you use 1 brush per paint color and let the paint completely dry before you spray your rock with sealant.
Steps
Choosing and Cleaning Your Rocks
-
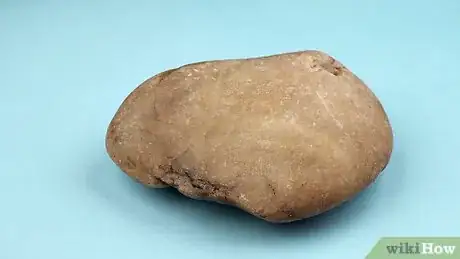
1Look for smooth rocks. A rock that has too many cracks or divots will be hard to paint. Look instead for rocks that have a smooth surface. You can find smooth rocks perfect for painting at home improvement stores with garden centers, landscaping supply stores, and craft stores. You can also take a walk in your neighborhood — you'll be surprised by what you can find![1]
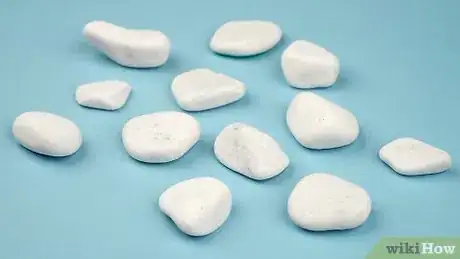
- If you're purchasing your rocks, make sure they have a natural finish. Some rocks will have a waxy finish on them, which makes it difficult for the paint to adhere. Rocks with a waxy finish will feel smooth and almost plastic-like.
-
2Choose rocks that are round. The rounder the rock, the prettier! It's also easier to draw out a complete design on a round rock with even edges.
-
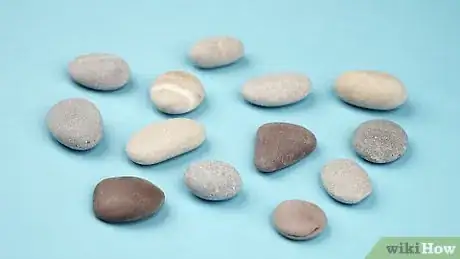
3Look for rocks that are gray in color. Gray rocks will show your acrylic paint the best. They aren't so light that the paint colors will wash out, and they're not so dark that outlining your design is impossible.
-
4Wash dirt off of your rocks. This step is especially important if you found your rocks outside. Run your rocks under clear water until they look clean. You can wash them in your sink inside or outside with a garden hose.[2]
- If there is stubborn dirt on your rocks, it might not come off just with water. Hold the rock under water and use either your hand or an old toothbrush to rub the dirt off.
- Don't use soaps or solvents on your rocks — they can break down the structure of your rock.
-
5Let your rocks completely air dry. If your rocks aren't dry when you begin painting, the paint can run or lose some of its brightness. Once your rocks are clean, let them dry. If you can leave them outside in the sun, it should only take a few hours. Otherwise, let them dry overnight.
Creating a Design
-
1Choose simple designs. There isn't much room for detail when you're panting on a rock, so keep your design simple. Simple shapes, silhouettes, and patterns are best, especially when you're beginning. As you get more experienced, you can try more complicated designs.
- For example, simple geometric shapes like hearts, stars, squares, circles, or triangles work well.
- You can also combine simple shapes into a larger pattern. For example, you could begin with a ring along the edge of the rock, and move toward the center of the rock, creating a ring of circles, followed by a ring of hearts, and then another solid ring.
-
2Practice your design on paper. Draw a circle with the same circumference of your rock and then draw your design within that circle. This gives you the chance to perfect your design. Once you have the design down, decide which colors you'll paint the different parts of the design.
- The colors you choose are up to you, but complementary colors often look best together. A complementary color is the one that appears on the opposite side of the color wheel from the first color you chose. You can also choose to go with all very bright, neon colors.
-
3Outline your design in chalk or pencil if you're using one. If you're working on a dark rock, use chalk for your outline. If you're working on a lighter rock, pencil will let you create more detail. Your design is totally up to you — you can create something abstract or an actual drawing.[3]
Painting Your Design
-
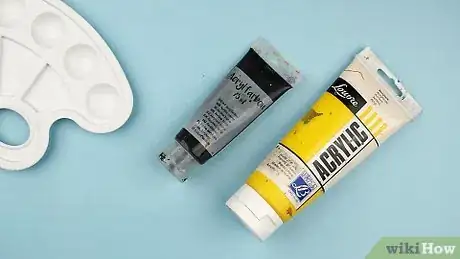
1Select brightly colored acrylic paints. Acrylic paints are long-lasting and thick, making them perfect for using on rocks. Make sure you choose bright colors. That way, even if you find or buy dark rocks, the paint will be easy to see.[4]
-
2Choose acrylic or watercolor brushes in a variety of shapes and sizes. Although you might find some variation in rock size, most will be pretty small. In order to get detail in your painting, you'll need small brushes. Look for brushes in a variety of shapes, too, especially round, rigger, and liner.[5]
- The exact sizes will vary depending on the type of brush. For round brushes, look for sizes smaller than a seven. For rigger brushes, look for sizes smaller than a 2/0. For liner brushes, look for sizes smaller than 3/0.
-
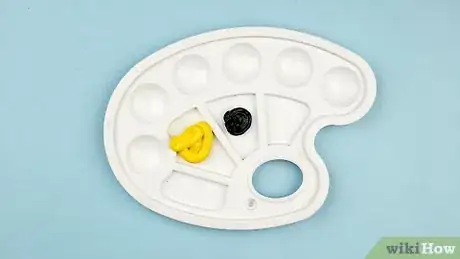
3Pour your paint into a palette or onto a plate. If you have a paint palette, squeeze out a quarter-sized amount of each paint color into its own section. If you're using a plate, make sure you leave about 2 in (5.1 cm) between each color so the colors don't bleed into each other.
- If you do want to combine colors, make sure they're next to each other. Then use separate brush to scoop up each color and put one on top of the other on another plate or in the mixing section of your palette. Then use a third brush to mix the colors.
-
4Use one paintbrush per color. If you use just one paintbrush for the whole project, the brightness of the colors will be muted and you'll end up with mixed colors. Before you begin painting, look at your design and which colors you're using where. Use small, thin brushes for small detail work and larger brushes for larger areas. Assign your brushes by color.[6]
-
5Paint in your design. Exactly how you paint in your design is up to you. You can paint by color — painting everything that's the same color before moving on to the next color. You can also paint by design — beginning at the top (or the side) and changing your brush and paint color as you move through the design.[7]
- If you're using a lot of one color, let that color dry before you continue. That way you avoid smearing any paint.
Signing and Sealing Your Rocks
-
1Let your rocks dry. Once you're done painting your rocks, let them dry completely. Depending on how much paint you've used and how intricate your design is, this can take anywhere from a few hours to overnight.[8]
- To test your paint, use the tip of your finger to gently touch the paint. If paint comes away on your finger, it's not dry yet.
-
2Sign your rocks. Once your rocks are dry, you'll want to sign them, particularly if you're selling them. Use a thin brush and black paint to sign the bottom of your rock. You can also add the date and/or a hashtag that you can then use on your social media accounts.
- If you're selling your rocks or participating in the hiding-and-finding rock painting community, consider adding a label to your rock. Print out labels with contact information for your rock painting community and instructions for the finder. Then apply a layer of Mod Podge to the rock, stick on the label, and cover with Mod Podge.
-
3Seal your rocks in a well-ventilated area. Once all of the paint is dry, spray your rocks with sealant. Make sure you spray them in a well-ventilated area since the sealant can irritate your nose and lungs. Then let them dry according to the instructions on the can of sealant.[9]
- You can choose shiny or matte finishes. If you're planning on leaving your rocks outdoors, look for a sealant made specifically for use outside.
- Depending on the size of your rocks, the sealant will take an hour up to overnight to dry.
-
4Display your rocks. Once your rocks are finished, there are plenty of places you can display them. Indoors on shelves or tables or outdoors in your garden or potted plants are great places to display your rocks. If you're part of the rock painting community in your area, you can also hide your rocks in nearby parks and public places so other people can find them!
- You can also post pictures of your rocks on your social media accounts.
Community Q&A
-
QuestionCan you use acrylic paint on rocks?
 wikiHow Staff EditorThis answer was written by one of our trained team of researchers who validated it for accuracy and comprehensiveness.
Staff Answer wikiHow Staff EditorStaff AnswerYes, you can use acrylic paint on rocks––it is a recommended choice for painting rocks. Just be sure to use the right kind of acrylic paint for the intended use; for example, if the rock is to spend its days as outdoor artwork, choose an acrylic paint suitable for the outdoors. It can also be a good idea to test different paints to determine which results you prefer; different paints will produce different colors, texture or end appearance.
 -
QuestionCan you spray paint rocks?
 wikiHow Staff EditorThis answer was written by one of our trained team of researchers who validated it for accuracy and comprehensiveness.
Staff Answer wikiHow Staff EditorStaff AnswerYes, you can spray paint rocks and this can be an effective method for very large garden rocks. You’ll need to select a suitable outdoor acrylic paint for the paint sprayer and protect anything around the rock from being sprayed. The rock itself needs to be clean, so a good scrub might be needed, as well as letting it completely dry before you start. Follow the manufacturer’s instructions for spraying and spray on a still day, to avoid the paint going elsewhere. Allow to dry, then seal the whole rock to ensure the paint lasts.
 -
QuestionWhat do you seal painted rocks with?
 wikiHow Staff EditorThis answer was written by one of our trained team of researchers who validated it for accuracy and comprehensiveness.
Staff Answer wikiHow Staff EditorStaff AnswerTry matching the sealant to the paint you’ve used, if at all possible. The sealant should be able to handle outdoor conditions if the rock is to remain outside. Sealants can be brushed or sprayed on, according to your preference. Suitable sealants may include: Acrylic sealant, Mod Podge or varnish.
Things You'll Need
- Smooth rocks
- Acrylic paint
- Variety of paint brushes
- Pencil or chalk for outlining
- Black pens for detail outlining
- Sealant
References
- ↑ https://colormadehappy.com/2017/07/best-painting-rocks-supplies-guide/
- ↑ https://modpodgerocksblog.com/2017/08/rock-painting-ideas.html
- ↑ http://petarock.homestead.com/howto_what_you_need.html
- ↑ https://colormadehappy.com/2017/07/best-painting-rocks-supplies-guide/
- ↑ https://colormadehappy.com/2017/07/best-painting-rocks-supplies-guide/
- ↑ https://modpodgerocksblog.com/2017/08/rock-painting-ideas.html
- ↑ https://modpodgerocksblog.com/2017/08/rock-painting-ideas.html
- ↑ https://modpodgerocksblog.com/2017/08/rock-painting-ideas.html
- ↑ https://modpodgerocksblog.com/2017/08/rock-painting-ideas.html
About this article
If you want to paint rocks with acrylic paint, choose clean, dry rocks with a smooth surface that’s free of cracks. Outline a simple design on your rock, using chalk for darker-colored rocks and pencil for lighter-colored ones. Pour your brightly-colored acrylic paint into a palette or on a plate, then paint your design onto the rock. If you’re using more than one color, use a separate paintbrush for each color. After you’re done painting, let the rock dry overnight, then spray it with a sealant to lock in the paint and let it dry again. If you want to learn how to practice your design on a piece of paper first, keep reading the article!
