93rd Siege Battery, Royal Garrison Artillery
93rd Siege Battery was a unit of Britain's Royal Garrison Artillery (RGA) formed during World War I. It served on the Western Front, including the Attack on the Gommecourt Salient, the Battle of Passchendaele, and the crushing victories of the Allied Hundred Days Offensive in 1918.
| 93rd Siege Battery, RGA | |
|---|---|
 Cap Badge of the Royal Regiment of Artillery | |
| Active | 16 December 1915–1919 |
| Country | |
| Branch | |
| Role | Siege Artillery |
| Part of | Royal Garrison Artillery |
| Garrison/HQ | Plymouth |
| Engagements | Gommecourt Passchendaele Amiens St Quentin Canal Selle Sambre |
Mobilisation
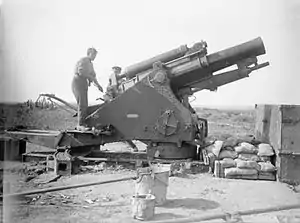
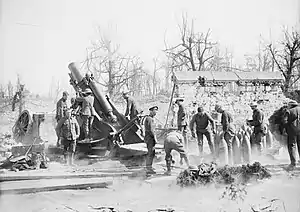
93rd Siege Battery was formed under War Office Instruction 181 of 16 December 1915 from a cadre of three officers and 78 other ranks (the establishment of a TF garrison company) supplied by the Cornwall (Duke of Cornwall's) Royal Garrison Artillery, a coast defence unit of the Territorial Force based in Falmouth, Cornwall. It was formed at Plymouth and equipped with four 9.2-inch howitzers, carrying out its final training at Avonmouth during April 1916.[1][2][3][4][5]
Service

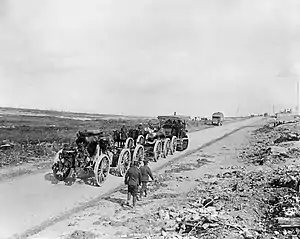
The battery left for the Western Front on 5 May, the men sailing from Folkestone to Boulogne where they were joined on 8 May by the guns and lorries from Avonmouth. They then had to drag their heavy howitzers by road to Bayencourt; the Commanding Officer (CO) noted that the caterpillar tractor drivers appeared not to have had any training with the guns attached. The gun platforms were constructed and the guns mounted by 27 May and the gunners spent the next three weeks preparing their positions, digging 10 dugouts and four shell shelters.[3][4][5]
Gommecourt
On 29 May the battery was assigned to 35th Heavy Artillery Group (HAG) which was due to support VII Corps' Attack on the Gommecourt Salient in the forthcoming 'Big Push' (the Battle of the Somme). Its main role was to use the high-angle fire of its howitzers to bombard German trenches and strongpoints facing 46th (North Midland) Division's attack frontage. Firing from the south-west of the Gommecourt salient they could take the trench lines in enfilade. The specific targets assigned to 93rd Siege Bty were the German support and reserve trenches from Gommecourt Road to a position known as the 'Little Z', the western edge of Gommecourt Wood, and Fortune, Form and Force trenches. (The divisional commander requested that the German front trench should not be bombarded because he wanted it kept intact for use by his own troops.) The howitzers joined in the bombardment on 25 June ('V' Day, four days before 'Z' day, the date set for the attack). Ammunition for the modern howitzers like the 9.2-inch was in short supply, and had to be carefully rationed during the preliminary bombardment: The planned rate of fire was 50 rounds per gun on V to X days, then 70 rounds on Y day. At all times during daylight, No 8 Squadron Royal Flying Corps had a BE2c observation aircraft in the air spotting fall of shot for 35th HAG's batteries. Because of poor weather for observation, the attack was postponed for two days, and the additional days (Y1 and Y2) were used for further bombardment, although the lack of ammunition resulted in a reduced rate of fire. There were also many 'duds' among the 9.2-inch shells, despite the care taken over fuzes at the insistence of the CO of 35th HAG.[3][6][7][8]

A final bombardment began at 06.25 on Z Day (1 July), with 65 minutes of intense fire before H Hour at 07.30. The 9.2-inch howitzers fired at a rate of nearly two rounds per minute for this period (120 rounds per gun). At 07.28 the heavy howitzers lifted onto their pre-arranged targets in the German support and reserve lines as the infantry got out of their forward trenches and advanced towards Gommecourt behind a smoke screen. The attack of 139th (Sherwood Foresters) Brigade on the left, south of The Z, was initially successful, the leading waves getting into the first German trench (albeit with heavy casualties) and some parties entering the second line. But they were hit by enfilade fire from The Z, even though the RFC observers reported British troops in the Z and Little Z.[9][10]
There was little that the battery could do to help: communication with its Forward Observation Officer (FOO) was broken for most of the day, and the 9.2s had few shells left. They had been allocated 10 rounds per gun for the first pre-arranged lift, 15 for the second, and their last 25 rounds for the third and final lift. After the initial phase of the attack, therefore, the intensity of the shelling the Germans received, and the direct support that the heavies could offer, was severely limited. Fire from the Z positions and unsuppressed German artillery prevented 139th Brigade's follow-up waves and ammunition carrying parties from crossing No man's land. 139th Brigade's attack had been halted by 09.00 and the leading attack waves were destroyed or driven out of their small gains by the end of the day.[11][12]
1916–17

The Gommecourt attack had only been a diversion for the main attack of the First day on the Somme, and it was not renewed after the failure on 1 July. Third Army was not involved in any major operations for the rest of the year. 93rd Siege Bty remained with Third Army during the summer, but the practice was to move batteries between HAGs as required: it joined 46th HAG on 7 July, then 19th HAG on 18 July, before moving on to 48th HAG. The battery then reverted to 19th HAG on 19 October and remained with it when it came under Fifth Army in December.[3][13][14][15]
Fifth Army carried out a series of small Operations on the Ancre, January–March 1917. 93rd Siege Bty then transferred to 1st HAG on 26 March as Fifth Army followed the German Army's retreat to the Hindenburg Line (Operation Alberich). It moved back to 19th HAG on 18 May (arriving on 23 May) while Fifth Army was engaged in actions against the Hindenburg Line on the fringe of the Arras Offensive.[3][14][16]
Ypres

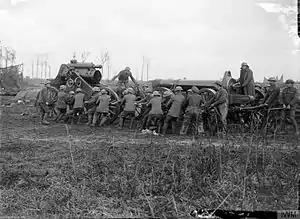
On 19 June 93rd Siege Bty joined 10th HAG with Third Army, but was actually at rest until 11 July. Then on 11 July it switched to 33rd HAG, which was moving to Second Army in the Ypres Salient. From 1 August Second Army carried out operations in support of the Third Ypres Offensive. During the summer and autumn of 1917 the command of 93rd Siege Bty shifted constantly, though the heavy howitzers were moved less often. It was under 76th HAG from 24 August, 51st HAG from 27 August, 86th HAG from 5 September and 9th HAG from 22 September. Meanwhile, Fifth Army's Ypres offensive was making little progress, and Second Army took over its direction. The Battles of the Menin Road, Polygon Wood and Broodseinde were highly successful because of the weight of artillery brought to bear on German positions. But as the offensive continued with the Battle of Poelcappelle and First and Second Battles of Passchendaele, the tables were turned: British batteries were clearly observable from the Passchendaele Ridge and were subjected to counter-battery (CB) fire, while their own guns sank into the mud and became difficult to aim and fire.[17][18][19][20]
During these battles 93rd Siege Bty had transferred back to 86th HAG on 27 September. After the campaign ground to a halt, the battery was sent to 57th HAG on 19 November, arriving on 24 November. From 28 November it was resting and training in VIII Corps area, where on 14 December it was joined by a section from 183rd Siege Bty, which was being broken up.[lower-alpha 1] This brought 93rd Siege Bty up to a strength of six howitzers. On 24 December it joined 69th HAG, now under Fourth Army (which had taken over from Second Army HQ).[2][3][14][17][22]
Spring Offensive

By now HAG allocations were becoming more fixed, and on 1 February 1918 the 69th was converted into a permanent RGA brigade. The battery stayed with 69th Bde until the Armistice a year later. Because of the inclusion of 93rd Siege Bty it was defined as a 9.2-inch Howitzer Brigade, though the other three batteries were each equipped with 6-inch howitzers.[3][15][23] On 1 February 69th HAG was transferred to Fifth Army, which took over a wide front near Amiens.[14][16]
Fifth Army was attacked on 21 March 1918, the first day of the German spring offensive. FOOs were blinded by early morning mist and many were overrun along with the infantry in the forward zone. The German bombardment was savage. Some heavy artillery units were caught in the fighting or forced to abandon their guns as the Germans advanced rapidly. Over following days the RGA struggled to get their guns back during the 'Great Retreat'.[16][24][25][26] Fourth Army HQ took over all of Fifth Army's formations and units on 2 April. The last attack in the first phase of the German offensive came in on 4 April (the Battle of the Avre) and it was stopped dead by the guns.[22][16][27][28] Further attacks came on other parts of the front for several months, but none broke through completely.
Hundred Days Offensive

The Allied counter-offensive (the Hundred Days Offensive) opened with Fourth Army's attack at the Battle of Amiens at 04.20 on 8 August. 69th Brigade was supporting the Australian Corps on whose front the barrage fired by field and heavy artillery was so thick and accurate that scarcely a German shell fell after 05.40, and all the Australian objectives were secured.[22][29][30][31]
By the end of September Fourth Army had closed up to the Hindenburg Line. On 29 September IX Corps carried out an assault crossing of the St Quentin Canal, with 69th Bde specially attached to 46th (North Midland) Division. The canal defences had largely been destroyed by the heavy guns, which continued firing on the canal banks until the last possible moment as 137th (Staffordshire) Brigade stormed the outpost line and then scrambled across the canal in the morning mist. The objectives were taken by 15.30. 69th Brigade moved its battery positions forward during the night of 30 September/1 October.[32][33]
On 8 October, IX Corps attacked the next German defensive position, the Beaurevoir Line. This time 6th Division attacked, supported by 69th Bde. Harassing fire (HF) had been carried out on the night of 6/7 October, and all through 7 October and up to Zero the heavies carried out CB fire and shelled important localities. Once the attack went in the heavies continued intense CB and long-range HF fire until the infantry were on the objective. The brigade's lighter howitzers (not 93rd's 9.2s) then followed up.[34]
On 11 October preparations began for IX Corps' assault on the German line along the River Selle. CB fire began on 13 October, together with bombardment by the heavy howitzers of important localities chosen by Corps HQ. On 15 and 16 October mist and rain disrupted air reconnaissance, but Zero for the Battle of the Selle was fixed on 16 October for 05.20 the next day. The first day of the battle went well, one German counter-attack being broken up when all available guns were turned onto it, but the attackers were still short of their objective, the Sambre Canal. Steady progress was also made on the second and third days as Fourth Army closed up to the canal.[35][36][37]
IX Corps renewed its advance on 23 October, with 69th Bde part of a massive corps artillery reserve. The attack went in at 01.20 in moonlight, after the heavy guns had done the usual CB and HF bombardments, and the results were extremely satisfactory.[38] As the regimental historian relates, 'The guns of Fourth Army demonstrated, on 23 October, the crushing effect of well co-ordinated massed artillery. they simply swept away the opposition'.[39] After a pause to regroup and reconnoitre, IX Corps stormed across the canal on 4 November (the Battle of the Sambre). After that the campaign became a pursuit of a beaten enemy, in which the slow-moving siege guns could play no part. The war ended with the Armistice with Germany on 11 November.[40][41][42]
In the interim order of battle for the postwar army the battery was supposed to form 127th Bty in XXXII Brigade, RGA, but this was rescinded after the signing of the Treaty of Versailles, and the remaining cadre of the battery was disbanded in 1919.[2][43]
See also
- Newsreel film of a 9.2-inch howitzer being fired.
Footnotes
- 183rd Siege Battery had been formed on 23 June 1916 from units in the Portland garrison, probably including Territorials of the Dorsetshire RGA.[2][21] It had served with Third Army during the Battle of Arras.[13][14]
Notes
- WO Instructions for December 1915.
- Frederick, pp. 702–3.
- 'Allocation of Siege Batteries RGA', The National Archives (TNA), Kew, file WO 95/5494/4.
- MacDonald, Lack of Offensive Spirit, pp. 104–5.
- MacDonald, Pro Patria, pp. 174–6.
- Edmonds, 1916, Vol I, pp. 460–1.
- MacDonald, Lack of Offensive Spirit, pp. 216–25, 254–6, 262–3.
- MacDonald, Pro Patria Mori, pp. 188, 191–2.
- Edmonds, pp. 461, 465–7.
- MacDonald, Lack of Offensive Spirit, pp. 295–6, 361–400.
- Edmonds, pp. 468–71.
- MacDonald, Lack of Offensive Spirit, pp. 296–7, 401–7, 425.
- Becke, Pt 4, pp. 92–98.
- 'Headquarters Heavy Artillery Groups', TNA file WO 95/5494/1.
- Farndale, Western Front, Annex E.
- Becke, Pt 4, pp. 114–20.
- Becke, Pt 4, pp. 82–7.
- Farndale, Western Front, pp. 201–214, Maps 28–31.
- Edmonds, 1917, Vol II, pp. 237–62, 280–309, 323–34, 338–60.
- Wolff, pp. 223–35, 249–51.
- Army Council Instruction 1307, 30 June 1916.
- Becke, Pt 4, pp. 102–9.
- Farndale, Western Front, Annex M.
- Blaxland, pp. 35–68.
- Farndale, Western Front, pp. 262–74.
- Murland.
- Blaxland, pp. 98, 103–6.
- Farndale, Western Front, pp. 276–9.
- Blaxland, pp. 167–71.
- Edmonds, 1918, Vol IV, pp. 61–73.
- Farndale, Western Front, p. 290.
- Blaxland, pp. 232-7.
- Edmonds & Maxwell-Hyslop, pp. 101–6, 139.
- Edmonds & Maxwell-Hyslop, pp. 189–92.
- Blaxland, pp. 251–2.
- Edmonds & Maxwell-Hyslop, pp. 295–305, 318, 325.
- Farndale, Western Front, pp. 307–9.
- Edmonds & Maxwell-Hyslop, pp. 352–61.
- Farndale, Western Front, pp. 311–2.
- Blaxland, pp. 254–6.
- Edmonds & Maxwell-Hyslop, pp. 386–8, 463–71.
- Farndale, Western Front, pp. 318–20.
- Frederick, p. 720.
References
- Maj A.F. Becke,History of the Great War: Order of Battle of Divisions, Part 4: The Army Council, GHQs, Armies, and Corps 1914–1918, London: HM Stationery Office, 1944/Uckfield: Naval & Military Press, 2007, ISBN 1-847347-43-6.
- Gregory Blaxland, Amiens: 1918, London: Frederick Muller, 1968/Star, 1981, ISBN 0-352-30833-8.
- Brig-Gen Sir James E. Edmonds, History of the Great War: Military Operations, France and Belgium, 1916, Vol I, London: Macmillan,1932/Woking: Shearer, 1986, ISBN 0-946998-02-7.
- Brig-Gen Sir James E. Edmonds, History of the Great War: Military Operations, France and Belgium 1917, Vol II, Messines and Third Ypres (Passchendaele), London: HM Stationery Office, 1948//Uckfield: Imperial War Museum and Naval and Military Press, 2009, ISBN 978-1-845747-23-7.
- Brig-Gen Sir James E. Edmonds, History of the Great War: Military Operations, France and Belgium 1918, Vol IV, 8th August–26th September: The Franco-British Offensive, London: Macmillan, 1939/Uckfield: Imperial War Museum and Naval & Military, 2009, ISBN 978-1-845747-28-2.
- Brig-Gen Sir James E. Edmonds & Lt-Col R. Maxwell-Hyslop, History of the Great War: Military Operations, France and Belgium 1918, Vol V, 26th September–11th November, The Advance to Victory, London: HM Stationery Office, 1947/Imperial War Museum and Battery Press, 1993, ISBN 1-870423-06-2.
- Gen Sir Martin Farndale, History of the Royal Regiment of Artillery: Western Front 1914–18, Woolwich: Royal Artillery Institution, 1986, ISBN 1-870114-00-0.
- J.B.M. Frederick, Lineage Book of British Land Forces 1660–1978, Vol II, Wakefield: Microform Academic, 1984, ISBN 1-85117-009-X.
- Alan MacDonald, Pro Patria Mori: The 56th (1st London) Division at Gommecourt, 1st July 1916, 2nd Edn, West Wickham: Iona Books, 2008, ISBN 978-0-9558119-1-3.
- Alan MacDonald, A Lack of Offensive Spirit? The 46th (North Midland) Division at Gommecourt, 1st July 1916, West Wickham: Iona Books, 2008, ISBN 978-0-9558119-0-6.
- Jerry Murland, Retreat and Rearguard Somme 1918: The Fifth Army Retreat, Barnsley: Pen & Sword, 2014, ISBN 978-1-78159-267-0.
- War Office, Instructions Issued by The War Office During December, 1915, London: HM Stationery Office, 1919.
- Leon Wolff, In Flanders Fields: The 1917 Campaign, London: Longmans, 1959/Corgi, 1966.