Battle of Jonesborough
The Battle of Jonesborough (August 31–September 1, 1864) was fought between Union Army forces led by William Tecumseh Sherman and Confederate forces under William J. Hardee during the Atlanta Campaign in the American Civil War. On the first day, on orders from Army of Tennessee commander John Bell Hood, Hardee's troops attacked the Federals and were repulsed with heavy losses. That evening, Hood ordered Hardee to send half his troops back to Atlanta. On the second day, five Union corps converged on Jonesborough (modern name: Jonesboro). For the only time during the Atlanta Campaign, a major Federal frontal assault succeeded in breaching the Confederate defenses. The attack took 900 prisoners, but the defenders were able to halt the breakthrough and improvise new defenses. Despite facing overwhelming odds, Hardee's corps escaped undetected to the south that evening.
| Battle of Jonesborough | |||||||
|---|---|---|---|---|---|---|---|
| Part of the American Civil War | |||||||
 Ruins of rolling mill and railroad cars destroyed by Confederates on evacuation of Atlanta, Georgia | |||||||
| |||||||
| Belligerents | |||||||
|
|
| ||||||
| Commanders and leaders | |||||||
| Units involved | |||||||
|
Army of the Tennessee Army of the Cumberland | Army of Tennessee | ||||||
| Strength | |||||||
|
Campaign: 85,000 Aug. 31: 14,170–19,500 Sept. 1: 20,460[note 2] |
Campaign: 55,000 Aug. 31: 20,000–23,811 Sept. 1: 12,000–12,661 | ||||||
| Casualties and losses | |||||||
|
Aug. 31: 172–179 Sept. 1: 1,272–1,274 |
Aug. 31: 1,700–2,200 Sept. 1: 1,400, 8 guns | ||||||
Thwarted in his earlier attempts to force Hood to abandon Atlanta, Sherman resolved to make a sweep to the south with six of his seven infantry corps. His objective was to block the Macon and Western Railroad which was the last uncut railroad leading into Atlanta. Three corps from Sherman's army got within artillery range of the railroad at Jonesborough and Hood reacted by sending two of his three infantry corps to drive them away. While the fighting at Jonesborough was going on, two more Union corps blocked the railroad on August 31. When Hood found that Atlanta's railroad lifeline was severed, he evacuated the city on the evening of September 1. Atlanta was occupied by Union troops the next day and the Atlanta campaign was concluded. Although Hood's army was not destroyed, the fall of Atlanta had far-reaching political as well as military effects on the course of the war.
Background
Armies
In the Atlanta campaign, William T. Sherman commanded the Military Division of the Mississippi, which included elements of three Union armies. At the start of the campaign, George H. Thomas led the Army of the Cumberland, James B. McPherson directed the Army of the Tennessee, and John Schofield commanded the Army of the Ohio.[1] The death of McPherson at the Battle of Atlanta on July 22 led to significant changes. Sherman named Oliver Otis Howard, formerly the IV Corps leader, to replace McPherson. Joseph Hooker, the XX Corps, believed that he should have been chosen, so he resigned and was replaced by Henry Warner Slocum. David S. Stanley assumed command of IV Corps.[2] Later, John M. Palmer asked to be relieved of command of XIV Corps and was replaced by Jefferson C. Davis.[3] Just before Jonesborough, Grenville M. Dodge, who led the Left Wing of the XVI Corps, was wounded and replaced by Thomas E. G. Ransom.[4] George Stoneman, Schofield's cavalry commander, was captured during a raid and his division wrecked.[5]
Thomas' army consisted of Stanley's IV Corps, Davis' XIV Corps, Slocum's XX Corps, and the 1st, 2nd, and 3rd Cavalry Divisions led by Edward M. McCook, Kenner Garrard, and Hugh Judson Kilpatrick, respectively. Howard's army was made up of John A. Logan's XV Corps, Ransom's Left Wing of the XVI Corps, and Francis Preston Blair Jr.'s XVII Corps. Schofield's small army included XXIII Corps and the remnant of a cavalry division led by Horace Capron.[6] At the beginning of August, Thomas' army numbered 45,000 troops, Howard's army counted 21,000 soldiers, and Schofield's army mustered 12,000 men. Blair's XVII Corps had only 6,400 soldiers left after suffering serious losses at the Battle of Atlanta. Sherman's forces numbered 85,000 soldiers at the most.[7] According to Battles and Leaders, on August 1, Sherman's armies counted 75,659 infantry, 5,499 artillery, and 10,517 cavalry, for a total of 91,675. On September 1, they mustered 67,674 infantry, 4,690 artillery, and 9,394 cavalry, for a total of 81,758.[8]
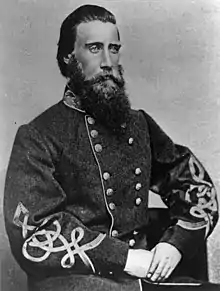
In May 1864, the Confederate Army of Tennessee under Joseph E. Johnston included three infantry corps, the Georgia militia under Gustavus Woodson Smith, a cavalry corps led by Joseph Wheeler and an independent cavalry division under William Hicks Jackson. At the start of the campaign, the infantry corps commanders were William J. Hardee, John Bell Hood, and Leonidas Polk.[9] Polk was killed at Pine Mountain on June 14[10] and replaced by Alexander P. Stewart on July 7. Henry D. Clayton took command Stewart's former division. Meanwhile, Edward C. Walthall took over James Cantey's division and John C. Brown assumed command of Thomas C. Hindman's division.[11] Johnston was replaced in army command by Hood on July 17.[12] Stephen D. Lee took over Hood's former corps. William H. T. Walker was killed at the Battle of Atlanta and his division divided among the divisions of Hardee's corps.[13]
Hardee's corps consisted of the divisions of William B. Bate, Benjamin F. Cheatham, and Patrick Cleburne. Lee's corps was made up of the divisions of Brown, Carter L. Stevenson, and Clayton. Stewart's corps included the divisions of Walthall, Samuel Gibbs French, and William Wing Loring. Wheeler's corps consisted of cavalry divisions led by William T. Martin, John H. Kelly, and William Y. C. Humes.[9] Author Albert E. Castel estimated Hood's strength in August as 30,000 less than Sherman's, or about 55,000.[7] Mark M. Boatner III estimated that Hood had 37,000 infantry and 5,000 Georgia militia at the start of August.[14]
Operations
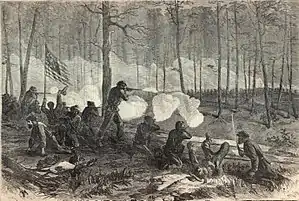
The Atlanta Campaign began in early May 1864 when Sherman's 100,000 men moved against Johnston's 62,000. During the campaign, both sides were reinforced. Union General-in-chief Ulysses S. Grant ordered Sherman, "to move against Johnston's army, to break it up, and to get into the interior of the enemy's country as far as you can, inflicting all the damage you can against their war resources". Atlanta was a critical Confederate railroad hub, manufacturing center, and supply point, so Sherman chose it as his objective. The major confrontations were the battles of Rocky Face Ridge on May 5–9, Resaca on 13–16 May, New Hope Church and Dallas on May 25–27, and Kennesaw Mountain on June 27. Johnston was driven steadily back toward Atlanta. Johnston was replaced by Hood after Sherman's forces flanked the Confederate army out its Chattahoochee River defenses on July 9. Hood attacked Thomas' army at the Battle of Peachtree Creek on July 20 and attacked McPherson's army at the Battle of Atlanta on July 22. Both assaults failed with heavy Confederate losses.[15]
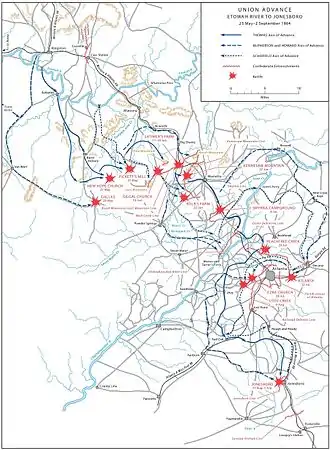
While occupying Decatur, Sherman's troops wrecked the Georgia Railroad which ran east from Atlanta to Augusta. Union cavalry under Lovell Rousseau joined Sherman's army after a successful raid to cut the Montgomery and West Point Railroad at Opelika, Alabama.[16] By July 25, William Wierman Wright's railroad construction gangs rebuilt the Chattahoochie bridge and repaired the railroad as far as Sherman's camps. Sherman brought the Army of the Tennessee, now commanded by Howard, from the east side of Atlanta, to the west side. Sherman wanted Howard's army to cut the Macon and Western Railroad which ran south from Atlanta to Macon. On July 27, Sherman also ordered McCook's and Stoneman's cavalry to launch raids against the Macon railroad.[17] Howard's army was blocked at the Battle of Ezra Church on July 28.[14] However, Ezra Church was a Union tactical victory; while Union losses numbered 632, Confederate casualties were nearly five times greater.[18]
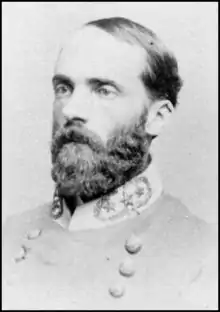
The Union cavalry raids were a fiasco. McCook's cavalry reached Lovejoy's Station after destroying several hundred wagons on the way. His troopers temporarily damaged the railroad, but on their return route they were surrounded by Confederate cavalry at Newnan. In the Battle of Brown's Mill they escaped after sustaining a loss of 600 men.[19] Stoneman was supposed to damage the railroad, but instead he rode to Macon in an attempt to liberate the Union captives at Andersonville Prison. His 2,200-man division was surrounded by three of Wheeler's brigades; Stoneman was captured with 700 men and his division dispersed.[20] Kilpatrick's cavalry division, which previously guarded the railroad, was now brought forward. Sherman sent the XXIII and XIV Corps southward to cut the Macon railroad but this operation failed at the Battle of Utoy Creek on August 5–7.[14] After Utoy Creek, Sherman tried to bombard Atlanta into submission with 20-pounder Parrott rifles from Francis DeGress' Battery H, 1st Illinois Artillery and three 4.5-inch Ordnance rifles. This plan also ended in failure on August 12 when two of the Parrotts burst and the Ordnance rifles ran out of ammunition.[21]
Hood ordered Wheeler to destroy the railroad supplying Sherman's army. On August 10, Wheeler set out with eight cavalry brigades from Covington. He inflicted minor damage to the railroad at several places and captured some small garrisons.[22] Wheeler was repulsed in the Second Battle of Dalton and then moved his cavalry into east Tennessee where he was no threat to Sherman's railroad.[23] Boatner concluded that Wheeler's raid had "no significant effect on Sherman's operations".[22] With Wheeler out of the way, Sherman ordered Kilpatrick to break the Macon railroad. On the evening of August 18, Kilpatrick left Sandtown with 4,700 cavalry and two artillery batteries. Kilpatrick's division made slow progress though opposed by only 400 Confederate cavalry and two guns under Lawrence Sullivan Ross. When Kilpatrick finally drove Ross out of Jonesboro late on August 19, it began to rain so hard that the Union cavalrymen were unable to start fires to burn ties and bend the rails. Kilpatrick headed for Lovejoy's Station where his division ran into an ambush. In the Battle of Lovejoy's Station, Kilpatrick's troopers broke out of the trap by overrunning Ross' brigade with a saber charge. The Union troopers escaped into friendly lines after losing 237 men. Confederate railroad gangs quickly repaired the track so the raid was another failure.[24]
Jonesborough maneuver
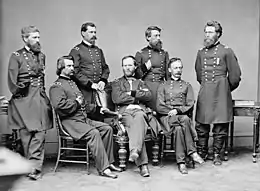
Sherman knew that the Macon and Western Railroad was operable on August 23 when a train was observed coming into Atlanta. He asked his three army commanders when they would be ready to carry out the plan that he already discussed with them and Thomas replied in two days.[25] After filling the wagons with 15-days rations, the Union army began pulling out of its positions on August 25. On that day, the XX Corps withdrew to entrenchments that covered the railroad bridge across the Chattahoochie. Thomas' other two formations, the IV and XIV Corps pulled out of their trench lines and moved south to Utoy. Howard's three corps also fell back from their defenses and marched south. Only Schofield's XXIII Corps remained in position near East Point. Garrard's cavalry guarded Sherman's northern flank while Kilpatrick's cavalry covered the southern flank. Hood detected the movement but did not try to disrupt it. On the evening of August 28, Thomas's two corps reached Red Oak and Howard's three corps arrived at Fairburn farther west. Both places were on the Atlanta and West Point Railroad which went west from Atlanta. Schofield withdrew from East Point to connect with Thomas' left flank. Sherman's forces spent all of August 29 wrecking the railroad.[26]

Both Jacob Dolson Cox and Shelby Foote asserted that a deluded Hood believed that the Union withdrawal meant that Sherman was about to retreat. Hood was convinced in his delusion by exaggerated reports of Wheeler's success and the report of a local woman who was denied food by Union troops who claimed they did not have enough for themselves.[27][28] On the contrary, Castel argued that Hood was not fooled at all, but that he understood that Sherman was launching a major offensive toward the south. Hood's dilemma was that he did not know if Sherman was heading for Jonesborough or Rough and Ready. Or, Sherman's plan was a ruse to draw away Atlanta's defenders so that the XX Corps could seize the city.[29] Hood understood that Jonesborough was a likely target of Sherman's maneuver. Hood's error was not realizing that Sherman's forces would reach it, "so soon, so close, and so strong".[30]
At 7 am on August 30, Howard's Army of the Tennessee began marching south with Kilpatrick's cavalry leading the way. The XV Corps was on the left and the XVI Corps on the right, followed by the XVII Corps. Confederate cavalry under Ross and Frank Crawford Armstrong initially put up such tough resistance that Kilpatrick was reinforced by Wells S. Jones' brigade of William Babcock Hazen's XV Corps division. As per Sherman's orders, Howard halted at Renfroe Place in mid-afternoon, but discovered there was no local water source for his soldiers. Howard decided to advance 3 mi (4.8 km) to the Flint River, since Sherman gave him the option to march as far as Jonesborough. Howard's leading troops pressed onward against weaker opposition and reached the Flint River where the Union cavalry and Jones' brigade seized a bridge before the Confederate horsemen could burn it. Logan's XV Corps advanced across the river and entrenched on a ridge 0.5 mi (0.8 km) west of Jonesborough at dusk. The XVI and XVII Corps had fallen behind, so Howard declined to attack. Unknown to him, there were only 2,500 Confederates in Jonesborough.[31]
As late as 1 pm on August 30, Hood telegraphed Hardee that he did not believe that there was a threat to Jonesborough. Hood only realized that the situation was critical at 6 pm when Armstrong and infantry brigade commander Joseph Horace Lewis reported to him that Jonesborough was in immediate danger. Hood ordered Lewis to hold the place "at all hazards" and sent Hardee's corps, followed by Lee's corps marching in the night to Jonesborough. Hood instructed Hardee to assume command of both corps, attack the Union forces in the morning, and drive them into the Flint River. On the following day, while cavalry held the Atlanta fortifications, Hood's army would throw itself on Sherman's left flank and crush his army. In case Hardee's attack failed, Lee's corps was to march back to Rough and Ready in order to cover the retreat of the army from Atlanta. Hood's chief of staff, Francis A. Shoup directed that military equipment and ammunition be assembled and prepared for evacuation from Atlanta by train.[32]
Opposing forces
Union
Confederate
Battle
August 31 preparations
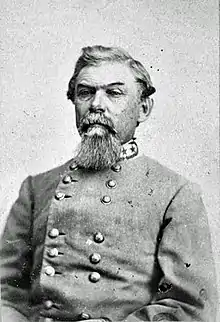
At 9 am, Howard received a message from Sherman who instructed him, "I want you to get possession and fortify some one point on the road [i.e. railroad] itself", and, "We must have that road, and it is worth to us a heavy battle". Howard replied that the Confederates were, "shoving troops down here with great rapidity", and that he believed they intended to attack him. Howard observed that the Confederates in Jonesborough were by this time too strong to be attacked. Hardee found that it was not possible to attack the Union forces in the morning. Misdirected by a false report, Hardee's corps did not arrive until dawn and it was 9 am before it was all in position at Jonesborough. Lee's corps was not expected until noon. Informed that he was facing three Union corps and that two more were nearby, Hardee asked Hood to come to Jonesborough to assume command. Hood responded by reiterating his order to attack, "with bayonets fixed". Meanwhile, Howard's troops were busily improving their field fortifications.[33]
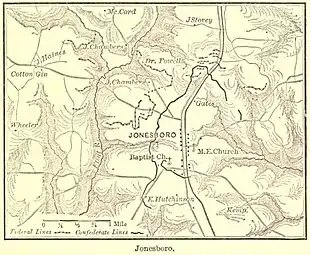
The divisions in Logan's XV Corps were arranged with William Harrow's on the right, Hazen's on the left, and Peter J. Osterhaus' in reserve.[34] John M. Corse's division of XVI Corps was on Logan's right and George E. Bryant's brigade of XVII Corps was on Logan's left.[35] The remainder of Ransom's XVI Corps was on the west bank of the Flint River behind Logan's right flank and the rest of Blair's XVII Corps was on the west bank behind Logan's left flank. Bridges were built so that the three corps were mutually supporting.[36] John W. Fuller led the other XVI Corps division and the two XVII Corps divisions were commanded by Giles Alexander Smith and Charles R. Woods.[37] One of Kilpatrick's cavalry brigades was deployed farther south on the east bank covering Anthony's Bridge, backed by a 4-gun battery on the west bank. Altogether, Howard counted 12,000 troops in line and 7,500 in reserve. He also had the 1st Missouri Engineer Regiment from the Army of the Cumberland on call, 1,000-strong.[35]
By 1:30 pm, S. D. Lee's corps finally reached Jonesborough in its entirety, its soldiers having gotten very little sleep in the last two days. A brigade detailed to escort Lee's ammunition train had to make a detour because the direct road was blocked by Federals. Though Hardee's and Lee's corps had a "present for duty" strength of 26,000 infantry, Castel estimated that only 20,000 were available to fight. Hundreds of men fell out along the way and one general reported that he had never seen so much straggling. Hardee arranged his forces with his own corps under Patrick Cleburne on the left and Lee's on the right. In Hardee's corps, Cleburne's division under Mark Perrin Lowrey was on the left, Bate's division under Brown was on the right, and Cheatham's division under George Earl Maney was behind Lowrey. A battalion of sappers and horseless cavalrymen led by John McGuirk supported Cleburne. In Lee's corps, Stevenson's division was on the left, Brown's division under James Patton Anderson was on the right, and Clayton's division was behind Anderson. Jackson's cavalry protected both flanks.[38]
Hardee prescribed that the two-corps assault would be made in echelon from left to right. Hardee wanted Lowrey's division to attack first, followed by Brown's and Maney's divisions. Next to attack, Stevenson's division would engage Logan's center, while Anderson and Clayton delivered a crushing blow against the Federal left.[39] In short, Cleburne's corps would move north on the left and attack the Federal line held by Ransom's soldiers, while Lee's corps was to make the attack on the right against Logan's line.[40] Hardee reminded his generals that the troops must attack with fixed bayonets, but brigade commander Arthur Middleton Manigault recalled that when his soldiers were informed, they seemed apathetic.[39]
August 31 attack

Hardee's artillery opened fire at 3 pm and Cleburne's skirmishers went into action about ten minutes later. Lee prematurely ordered his corps to attack, mistaking the skirmisher fire for the signal.[35] Lee's main effort fell on Hazen's division.[36] Lee's first line troops overran the Union picket lines and were brought to a stop by intense rifle and artillery fire. Much of Zachariah C. Deas' brigade fled from the battlefield. The second line attacked and suffered the same fate. It was a one-sided slaughter. Though urged to continue by their generals and officers, the Confederate rank and file went to ground and declined to charge. Once the attack was halted, Logan's infantry began firing deliberately and "with terrible accuracy".[35] Watching from the Federal lines, Logan admired Anderson's bravery in the battle before the Confederate general was shot and wounded.[41] Hardee wished to renew the attack, but Lee informed him that his troops were in no condition to do so.[42]
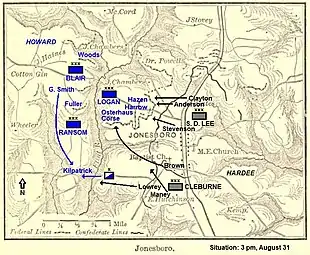
Meanwhile, Lowrey's division moved northwest, and just as it was turning north toward the Federal lines, it was unexpectedly hit by fire from Kilpatrick's dismounted cavalry, concealed behind fence rails and armed with Spencer repeating rifles. The cavalry's fusillade was so effective that Lowrey's men broke off from the attack against Ransom's main line and charged west against the Union cavalry.[40] Kilpatrick's men repelled two attacks but the Confederates captured two guns and forced them to retreat across Anthony's Bridge.[44] Instead of returning to its original goal, Lowrey's division pressed the cavalry across the Flint River and was eventually stopped by Giles A. Smith's division from the XVII Corps west of the river.[40] Smith's division also recaptured the two guns.[44] Howard remarked, "Nothing, even if I planned it, could have been better done to head an entire Confederate division away from the battlefield".[45]
Brown's division rushed the left flank of Corse's division, but ran into a deadly hail of bullets and artillery projectiles. The survivors of Jesse J. Finley's and Thomas Benton Smith's (Tyler's) brigades took cover in a ravine and refused to advance any farther. Finding that his division was all alone, Maney ordered a halt and sent a courier to Cleburne asking for further orders. Lowrey finally managed to retrieve his troops, but a look at the Federal positions convinced him that they were unassailable. A staff officer reported that Lee's corps was demoralized. Therefore, Hardee canceled the assault of Cleburne's corps, authorized its withdrawal, and ordered Lowrey's division to march to the support of Lee's troops. Howard reported sustaining 172 casualties, all but 18 in Logan's corps. According to Castel, Hardee's Confederates suffered 2,200 casualties, including 1,400 from Lee's corps and 800 from Cleburne's corps.[45] Author Ronald H. Bailey wrote that Lee's troops lost 1,300 casualties and Cleburne's soldiers lost 400, while the Federal total was 179.[42] Boatner stated that the Federals lost 179 out of 14,170 engaged on August 31, while the Confederates lost 1,725 out of 23,811 engaged.[46]
At 3:45 pm, Howard wrote a message to Sherman that the Confederates had attacked and were "handsomely repulsed". Even though half his soldiers were not engaged, Howard declined to mount a counterattack. About an hour later, Sherman received Howard's note at Renfroe Place. At the same time, Sherman received even more momentous news. Schofield reported that his corps reached a position squarely on the Macon and Western Railroad and that Stanley's corps was moving up on his right flank. Sherman jumped up and raised his right arm; at last, he severed the railroad line between Atlanta from Macon.[47] Schofield's XXIII Corps marched that morning and at 3 pm its lead division under Cox arrived at the railroad 1 mi (1.6 km) south of Rough and Ready. Finding his division opposed by dismounted cavalry in field works, Cox's troops stormed them and then marched north to Rough and Ready. Schofield's other division under Milo S. Hascall soon arrived at the railroad. Stanley's IV Corps marched from Morrow's Mill and struck the railroad south of Schofield at 4 pm. Caleb H. Carlton's brigade of Absalom Baird's XIV Corps division reached the railroad 4 mi (6.4 km) north of Jonesborough at 6 pm.[48]
Sherman instructed Schofield and Stanley to move south toward Jonesborough, destroying the railroad as they went. In Atlanta, Hood got reports that the railroad was blocked and he feared that Sherman was about to attack the city from the south. At 6 pm he sent an order to Hardee that Lee's corps must to return to Atlanta, the march to start at 2 am. Meanwhile, Hardee's corps was ordered to "protect Macon and communications in rear". When Hardee received the order, he sent Lee's corps away and shifted Lowrey's division to hold his right flank.[49] Hood later described the fighting on August 31 as a "disgraceful effort" because the number of Confederate dead was minimal compared to the forces engaged.[50]
September 1 preparations
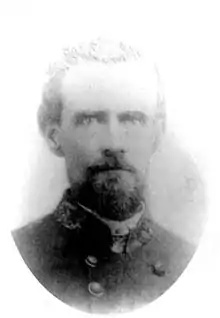
Around midnight, Hood finally got news from Hardee that his attack failed. He realized that this meant that Atlanta must be abandoned and issued the necessary orders.[51] When Lee's corps marched away from Jonesborough, Lowrey's (Cleburne's) division replaced it on Hardee's right flank. Hardee had 12,000 troops to defend a 2 mi (3.2 km) front. Brown's division held the center, and John C. Carter's division was deployed on the left flank. Carter replaced Maney, who was relieved for not attacking on August 31. Lowrey's troops, holding the area previously occupied by Lee's corps, were spread out in a single rank, 6 ft (1.8 m) apart. Since Lee's troops never properly fortified their front, Lowrey's men were compelled to construct field fortifications, but for some unknown reason they failed to prepare abatis. The division's four brigades were deployed from left to right, as follows: Charles H. Olmstead, John Weir (Lowrey's), Hiram B. Granbury, and Daniel Govan.[52]
At dawn on September 1, Stanley began carrying out Sherman's orders to destroy the railroad. By 10 am Stanley's corps reached Morrow's Station, about 4 mi (6.4 km) north of Jonesborough, and at noon it was 2 mi (3.2 km) away. Hascall's division was north of Stanley and Cox's division was still near Rough and Ready, wrecking the railroad there. Sherman planned to place Davis' XIV Corps on Howard's left and wait for Stanley and Schofield to come down from the north to crush Hardee's right flank. Hardee detected that the XIV Corps was facing his right flank, so he reinforced it with two brigades. The right flank was bent back to defend against an attack from the north and northeast.[53] The apex of the salient was held by Govan's brigade.[54] Lewis' brigade took position facing north on the west side of the railroad, while James McCulloch's (formerly States Rights Gist's) brigade was on the east side of the railroad facing almost east. Lewis' and McCulloch's men created barricades and an abatis. Govan ordered the consolidated 6th/7th Arkansas Infantry Regiment on his right flank to withdraw 50 yd (46 m) and build new field works, but the unit was caught in a crossfire by Union guns, and its new fortifications damaged.[55]
September 1 attack
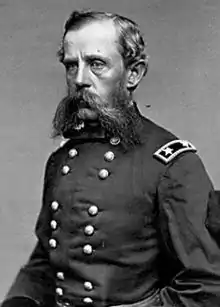
At 2:30 pm, Thomas ordered Stanley's corps to march immediately for Jonesborough. The arrival of XIV Corps pinched out Blair's corps on Howard's left flank. Howard ordered Blair to march down the west bank of the Flint River, cross to the east bank at Anthony's Bridge, and menace the Confederate left flank. Just after 4 pm, Davis' XIV Corps began its attack.[56] The corps had divisions led by William P. Carlin (ex-Richard W. Johnson), James D. Morgan (ex-Davis), and Baird. Logan's XV Corps moved up on Davis' right.[57] On the right, slowed by swampy terrain, Morgan's division advanced east to a ravine where the soldiers prepared rifle pits. On the left, Carlin moved south with two brigades, since his third brigade was guarding the wagon train at Renfroe Place. On Carlin's right was a brigade of 500 U.S. Regulars under John Rufus Edie and on his left was Marshall Moore's (ex-Benjamin Scribner's) brigade. Very dense underbrush slowed both brigades. Moore's troops were supposed to be supported by Stanley's troops, but they did not appear. Moore's brigade encountered the abatis in front of Lewis' Confederates and was repulsed. Edie's regulars reached a low ridge and overran the original breastworks built by the 6th/7th Arkansas, but were unable to push any farther.[58]

Carlin's unsuccessful advance made Davis comprehend that the Confederate right flank was not "in the air" as reported, but bent back across the railroad. Salients are vulnerable and Davis decided to exploit this fact. He ordered Baird to have George P. Estey's brigade attack the salient from the north. Baird was smarting under criticism from Sherman over his division's supposed "lack of offensive spirit". To ensure that the attack would be carried out, Baird accompanied Estey's brigade on horseback. Estey's 1,139 soldiers deployed in two lines behind Edie's men, the 10th Kentucky and 74th Indiana Infantry Regiments on the right and the 38th Ohio and 14th Ohio on the left.[60] The fire of Mark H. Prescott's Battery C, 1st Illinois Light Artillery was especially destructive.[61] At 5 pm, when Davis ordered the assault to begin, Estey's men ascended the ridge, threw themselves to the ground to avoid a Confederate volley, and charged. The two right-hand regiments overran the 6th/7th Arkansas, but the Ohio regiments on the left were stopped in Lewis' abatis.[60]
By this time, Morgan's division was attacking. Estey asked for assistance from the 17th New York Infantry from Charles M. Lum's brigade, one of Morgan's units. Joined by the 17th New York, the 14th and 38th Ohio also broke into the Confederate defenses. Now supported on their left, the 10th Kentucky and 74th Indiana circled behind Govan's brigade just as Morgan's division struck it from the west.[62] In the melee, Govan and 600 of his men were captured. Baird earned the Medal of Honor for his role in the success.[63] The eight guns of Key's Arkansas Battery and Swett's Mississippi Battery were taken. Farther east, Estey's Ohio regiments, the 17th New York, and Moore's brigade overwhelmed Lewis' brigade and part of McCulloch's brigade, capturing a few hundred more Confederates. According to Castel, this was the only successful large-scale frontal attack in the Atlanta campaign.[64]
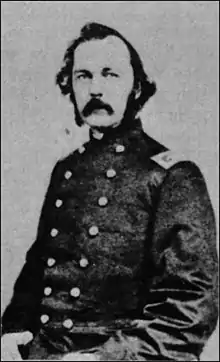
Responding to the emergency, Granbury realigned his right flank units to face north. Cleburne led Alfred Jefferson Vaughan Jr.'s Tennessee brigade into the gap and halted the Federal advance on the west side of the railroad. On the east side, McCulloch's brigade rallied and drove back Moore's brigade. Davis made no attempt to exploit his success even though two of Baird's brigades were fresh. Sherman also did not expect anything more from Davis. Instead, he wondered what Stanley's corps was doing. The IV Corps began advancing east of the railroad when Davis' men made their climactic assault, but was slowed by extremely thick underbrush. With Nathan Kimball's division on the right and John Newton's division on the left, the IV Corps captured a Confederate field hospital, but came up against a line of breastworks facing northeast. These were manned by the remaining brigades of Carter's division, those of Maney, Carter, and Otho F. Strahl. When Hardee got news of Stanley's advance, he hustled these units into position to defend his right flank. Stanley, who was slightly wounded, approved the decision of Kimball and Newton to construct their own field fortifications and it was soon too dark to do anything more.[65]
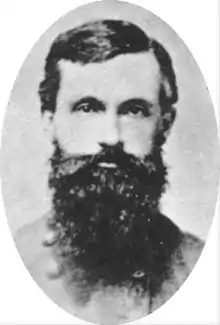
During the day, Howard's XV and XVI Corps remained largely quiet while Hardee reinforced his right flank by shifting troops from his left. Because it was misdirected, Blair's XVII Corps only marched as far as Anthony's Bridge where it built field works on the east bank of the Flint River. Nevertheless, Sherman blamed Stanley for his failure to destroy Hardee's force. For September 2, Sherman planned to surround Hardee if he remained in Jonesborough or to pursue him as far as Griffin if needed. Castel wrote that Sherman was still under the misapprehension that both Hardee's and Lee's corps were at Jonesborough.[66] However, Cox asserted that Sherman knew that Lee's corps was no longer at Jonesborough during the afternoon of September 1.[67]
The XIV Corps lost 1,272 men killed, wounded, and missing on September 1. Castel pointed out that these casualties were pointless, since the Macon and Western Railroad was cut on the afternoon of August 31 by Schofield and Stanley, rendering Atlanta indefensible.[68] According to Cox, Carlin's division sustained 371 casualties, Estey's brigade of Baird's division had 330 casualties, and Morgan's division lost a similar number. Meanwhile, the Federals captured 865 Confederates.[69] According to Castel, Confederate losses on September 1 numbered about 1,400, including 900 prisoners. In addition, 200 badly wounded were captured the following day.[70] Boatner stated that on September 1, Union losses were 1,274 out of 20,460 engaged, while Cleburne's division lost 911, including 659 missing. Losses in Hardee's other two divisions were unknown.[46] The National Park Service called the battle a Union victory and listed 1,149 Union and 2,000 Confederate casualties, but did not specify if this was for one or two days of battle.[71]
On the night of September 1, Hardee's corps slipped out of Jonesborough and marched to Lovejoy's Station, completely undetected by their opponents. Castel claimed that the fighting on September 1 was a Confederate tactical and strategic victory because Hardee's successful defense with 3 divisions against 12 divisions allowed Hood to safely evacuate Atlanta.[72] On the evening of September 1, Stewart's corps and Smith's Georgia militia left Atlanta via the McDonough Road, heading south-southeast. Lee's corps covered the movement from a position 6 mi (9.7 km) south of Atlanta. Acting as rearguard, French's division pulled out of Atlanta at 11 pm. Five locomotives and 81 boxcars were trapped inside Atlanta and put to the torch by the Confederates. Since 28 boxcars were filled with ammunition, the resulting pyrotechnic display was spectacular.[73] The explosions were heard for miles. Union troops under the command of Slocum occupied Atlanta on September 2.[74] At 2 pm that day, Slocum entered Atlanta and sent a telegram to his government, "General Sherman has taken Atlanta."[75]
Aftermath

Sherman's troops marched south and found Hardee's 10,000 troops entrenched 1 mi (1.6 km) north of Lovejoy's Station in the afternoon of September 2. Minor skirmishing failed to induce Hardee to retreat during the day. On the morning of September 3, Sherman received an official message from Slocum that Atlanta was in Federal hands and decided that it was time to end the campaign. The Union army confronted Hardee until September 5, then withdrew to Atlanta.[76] On September 4, General Sherman issued Special Field Order # 64. General Sherman announced to his troops that "The army having accomplished its undertaking in the complete reduction and occupation of Atlanta will occupy the place and the country near it until a new campaign is planned in concert with the other grand armies of the United States."[77] In his official dispatch to Union Army Chief of Staff Henry Halleck, Sherman wrote, "Atlanta is ours and fairly won. I shall not push farther on this raid, but in a day or so will march to Atlanta and give my men some rest."[78]
Several times between August 27 and September 3, Sherman had opportunities to destroy all or a large part of Hood's army, but failed to do so. Sherman passed up these chances and single-mindedly focused on his original goal of capturing Atlanta by severing its rail connections to the rest of the Confederacy. Hood's army survived to fight another day though in diminished form because of casualties and desertions. However, Sherman's capture of Atlanta proved to be a strategic-political triumph. Because Grant's Overland campaign reached a bloody stalemate with its Siege of Petersburg, the North needed a victory before the 1864 election.[79] To the people of the North, the capture of Atlanta signaled that the war was being won. Only in late August, the Democratic Party adopted a platform that asserted the war was a failure. This was seen to be a false narrative. Supporters of the Republican Party and President Abraham Lincoln were cheered by the victory. In the South, the fall of Atlanta was cause for dismay. Lincoln went on to win the 1864 United States presidential election by 212 electoral votes to 21 for George B. McClellan, the Democratic candidate.[80]
In 1872 many of the fallen soldiers were disinterred and reburied in the Patrick R. Cleburne Confederate Cemetery.[81]
In popular media
Famous scenes in the 1939 American film Gone with the Wind depict the conflagration in Atlanta after the evacuation of the city by the Confederate army.[82]
See also

Notes
- Footnotes
- Hood evacuated Atlanta on September 1, conceding a Union victory in the Atlanta Campaign. One author argued that the September 1 battle was a Confederate victory (Castel, p. 525).
- Boatner stated that 20,460 were engaged (Boatner, p. 445). Presumably this was XIV Corps and part of IV Corps. Howard had 19,500 on August 31 and his losses were negligible (Castel, p. 502), but was not engaged on September 1. Thomas had 45,000 troops including cavalry (Castel, p. 453). The XX Corps was far away, observing Atlanta, while both IV and XIV Corps were present. Sherman could have had 40,000–50,000 troops at Jonesborough, but this is only a guess.
- Citations
- Castel 1992, p. 112.
- Cox 1882, pp. 178–179.
- Cox 1882, p. 190.
- Cox 1882, p. 197.
- Cox 1882, pp. 188–189.
- Battles & Leaders 1987, pp. 284–289.
- Castel 1992, p. 453.
- Battles & Leaders 1987, p. 289.
- Battles & Leaders 1987, pp. 289–292.
- Cox 1882, p. 98.
- Castel 1992, p. 98.
- Cox 1882, pp. 147–148.
- Cox 1882, p. 181.
- Boatner 1959, p. 33.
- Boatner 1959, pp. 30–33.
- Cox 1882, p. 177.
- Cox 1882, pp. 181–182.
- Castel 1992, p. 434.
- Cox 1882, p. 188.
- Boatner 1959, pp. 801–802.
- Castel 1992, pp. 462–467.
- Boatner 1959, p. 991.
- Cox 1882, p. 196.
- Castel 1992, pp. 471–475.
- Castel 1992, p. 475.
- Cox 1882, pp. 196–199.
- Cox 1882, p. 198.
- Foote 1986, p. 522.
- Castel 1992, p. 487.
- Castel 1992, p. 495.
- Castel 1992, pp. 494–495.
- Castel 1992, pp. 495–496.
- Castel 1992, pp. 497–498.
- Cox 1882, p. 200.
- Castel 1992, p. 502.
- Cox 1882, p. 201.
- Battles & Leaders 1987, p. 288.
- Castel 1992, p. 499.
- Castel 1992, p. 500.
- Bailey 1985, p. 145.
- Bailey 1985, p. 144.
- Bailey 1985, p. 146.
- Castel 1992, p. 501.
- Boatner 1959, p. 444.
- Castel 1992, p. 503.
- Boatner 1959, p. 445.
- Castel 1992, p. 504.
- Cox 1882, p. 202.
- Castel 1992, pp. 504–505.
- Bailey 1985, p. 147.
- Castel 1992, p. 509.
- Castel 1992, pp. 510–511.
- Castel 1992, pp. 511–512.
- Bailey 1985, p. 151.
- Castel 1992, pp. 512–513.
- Castel 1992, p. 513.
- Bailey 1985, pp. 150–151.
- Castel 1992, pp. 515–516.
- Castel 1992, p. 514.
- Castel 1992, pp. 516–517.
- Cox 1882, p. 206.
- Castel 1992, p. 517.
- Bailey 1985, p. 150.
- Castel 1992, pp. 517–518.
- Castel 1992, pp. 518–520.
- Castel 1992, pp. 520–522.
- Cox 1882, p. 204.
- Castel 1992, p. 526.
- Cox 1882, p. 207.
- Castel 1992, p. 524.
- NPS 2021.
- Castel 1992, pp. 524–525.
- Castel 1992, pp. 522–524.
- Garrett 2011, pp. 433–434.
- Castel 1992, p. 529.
- Castel 1992, pp. 529–535.
- Official Records 1891, p. 801.
- Castel 1992, p. 534.
- Castel 1992, pp. 539–542.
- Castel 1992, pp. 543–545.
- GBA 1997.
- Bauer 2017.
References
- Bailey, Ronald H. (1985). Battles for Atlanta: Sherman Moves East. Alexandria, Va.: Time-Life Books. ISBN 0-8094-4773-8.
- Battles and Leaders of the Civil War. Vol. 4. Secaucus, N.J.: Castle. 1987 [1883]. ISBN 0-89009-572-8.
- Bauer, Patricia (2017). "Gone with the Wind". Britannica. Retrieved November 12, 2021.
- Boatner, Mark M. III (1959). The Civil War Dictionary. New York, N.Y.: David McKay Company Inc. ISBN 0-679-50013-8.
- Castel, Albert E. (1992). Decision in the West: The Atlanta Campaign of 1864. Lawrence, Kansas: University Press of Kansas. ISBN 0-7006-0562-2.
- Cox, Jacob D. (1882). "Atlanta". New York, N.Y.: Charles Scribner's Sons. Retrieved October 17, 2021.
- Foote, Shelby (1986). The Civil War: A Narrative. Vol. 3. New York, N.Y.: Random House. ISBN 0-394-74622-8.
- Garrett, Franklin M. (2011) [1969]. Atlanta and Environs: A Chronicle of Its People and Events 1820s–1870s. University of Georgia Press. ISBN 978-0820339030.
- "Patrick R. Cleburne Confederate Cemetery" (PDF). Georgia Building Authority. 1997. Retrieved November 11, 2021.
- "The Civil War Battle Detail: Jonesborough". National Park Service. 2021. Retrieved November 5, 2021.
- "The War of the Rebellion: A Compilation of Official Records of the Union and Confederate Armies, Vol. XXXVII Part 5". Washington, D.C.: Government Printing Office. 1891. p. 801. Retrieved November 12, 2021.
External links
- 10th Kentucky Volunteer Infantry at the Wayback Machine (archived March 7, 2016) This source includes two detailed maps.
- Infantry Battle at Lovejoy, September 2–5, 1864 at the Wayback Machine (archived April 13, 2016) This details the action at Lovejoy Station.
- Jonesborough and the Fall of Atlanta at the Wayback Machine (archived March 21, 2012)
- Seibert, David (2014). "Battle of Jonesboro The First Day historical marker". Retrieved November 5, 2021.
- Seibert, David (2014). "Battle of Jonesboro The Second Day historical marker". Retrieved November 5, 2021.
- Seibert, David (2014). "Enroute to Jonesboro historical marker". Retrieved November 5, 2021.
- Seibert, David (2014). "Howard's March to Jonesboro historical marker". Retrieved November 5, 2021.
- Seibert, David (2014). "Jonesboro Threatened historical marker". Retrieved November 5, 2021.
- Seibert, David (2014). "Two Days of Battle at Jonesboro historical marker". Retrieved November 5, 2021.
- Siedor, Collin (2021). "Did Jonesboro Change the Civil War?". Georgia Public Broadcasting PBS. Retrieved November 11, 2021.
_(cropped).jpg.webp)
