Canterbury Mounted Rifles Regiment
The Canterbury Mounted Rifles Regiment was a mounted infantry regiment from New Zealand, raised for service during the First World War. It was assigned to the New Zealand Mounted Rifles Brigade, and formed part of the New Zealand Expeditionary Force.
| Canterbury Mounted Rifles Regiment | |
|---|---|
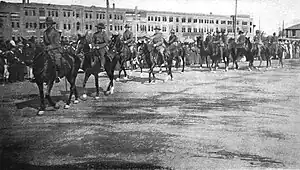 Regimental Headquarters marching through Cairo 1914 | |
| Active | August 1914 – June 1919 |
| Country | New Zealand |
| Allegiance | |
| Branch | New Zealand Army |
| Role | Mounted infantry |
| Size | Regiment |
| Part of | New Zealand Mounted Rifles Brigade |
| Nickname(s) | Canterburys Mounteds[1] |
| March | D'ye ken John Peel[2] |
| Engagements | First World War Egyptian Revolution of 1919 |
| Commanders | |
| (1914–1919) | John Findlay |
| Insignia | |
| Pugaree flash worn on the hat-band | |
The regiment, with an establishment of twenty-six officers, 523 other ranks and 600 horses, was formed from three squadrons belonging to pre-war Territorial Force regiments: the 1st Mounted Rifles (Canterbury Yeomanry Cavalry), the 8th (South Canterbury) Mounted Rifles and the 10th (Nelson) Mounted Rifles. It also included a small headquarters and, until 1916, a Maxim machine-gun section. The Maxim guns were withdrawn but the regiment's fire-power increased during the war, and by the end of the conflict each squadron had four Hotchkiss machine-guns, one per troop.
Being mounted infantry the regiment rode into battle on their horses, but were expected to dismount and fight on foot. The regiment fought predominantly against the forces of the Ottoman Turkish Empire. Their first involvement came in the Gallipoli Campaign between May and December 1915, during which they participated in the largest battle of that theatre at Chunuk Bair and the fighting for Hill 60. Evacuated to Egypt, they then took part in the Sinai and Palestine Campaign from 1916 to 1918. The early battles they were involved in included those at Romani, Gaza and Beersheba. Later in the war they were part of the force that occupied the Jordan Valley, and took part in the raids on Amman and Es Salt. Their final wartime operation was in connection with the capture of the Turkish Fourth Army. During the four years of war the regiment lost 334 men dead from all causes, while another 720 were wounded or debilitated. After the war, the regiment played a minor role in the Egyptian Revolution of 1919, before being disbanded in June 1919.
History
Formation
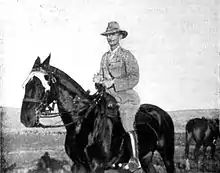
Raised on 12 August 1914, at the start of the First World War, the Canterbury Mounted Rifles Regiment came from the Canterbury region on the South Island of New Zealand.[3] Commanded by Lieutenant-Colonel John Findlay, it was composed of a headquarters, a machine-gun section and three squadrons, formed from Territorial Force regiments.[4][5] The New Zealand Territorial Force included a compulsory training system, and the four Military Districts were required to supply a mounted regiment for the New Zealand Expeditionary Force. To meet that obligation, the Territorial Force regiments each provided a squadron, which kept their own regimental badges and traditions.[6] The regiment's squadrons came from the 1st Mounted Rifles (Canterbury Yeomanry Cavalry) (1st Squadron), the 8th (South Canterbury) Mounted Rifles (8th Squadron) and the 10th (Nelson) Mounted Rifles (10th Squadron).[7] The establishment was fixed at twenty-six officers and 523 other ranks, who used 528 riding horses, seventy-four draught horses and six pack horses.[8] Each squadron, of 158 men, had a field headquarters and four troops. The Machine-Gun Section, with two Maxim Guns, had one officer, twenty-six other ranks, twenty riding horses and sixteen draught horses.[9] Even though the regiment used horses, they were not cavalry but mounted infantry, and expected to ride to the battlefield, dismount and then fight as traditional infantry.[10] Attached to, but not part of, the regiment were medical and veterinary officers, an artificer, three more other ranks and another eighteen horses.[9] The regiment was assigned to the New Zealand Mounted Rifles Brigade, serving alongside two other regiments: the Auckland Mounted Rifles and the Wellington Mounted Rifles.[11][12]
Embarkation
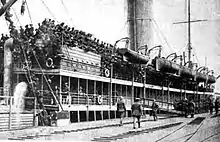
On 23 September the regiment left their camp for Lyttelton and embarked on the transport ships HMNZT Tahiti and HMNZT Athenic.[13] Leaving the same day, they arrived at Wellington the next afternoon, and disembarked the troops. On 14 October they boarded the transports again and set sail.[14] With a short stop at Hobart, on 28 October they arrived at Albany, and anchored waiting to be joined by the Australian contingent. The combined convoy sailed on 1 November and reached Colombo on 15 November. Two days later it sailed into the Red Sea, and the Suez Canal.[15] Docking at Port Said on 2 December and Alexandria the next day, the regiment disembarked on 4 December and boarded a train for their camp in the Cairo suburb of Zeitoun where they started a training programme, using the desert for manoeuvres, during both day and night.[16]
Gallipoli
In Egypt the regiment continued its training programme, working from reveille at 05:00 to 17:30 when they stabled their horses at the end of the working day. Every third or fourth night the soldiers performed guard duty or looked after the horses. It was in Egypt that the regiment, and brigade, came under command of the newly formed New Zealand and Australian Division which, along with the 1st Division, made up the Australian and New Zealand Army Corps (ANZAC).[17] In April 1915, the division's infantry units left Egypt for an undisclosed destination, and it was not until 1 May that the regiment learned about the Gallipoli landings. Four days later the regiment received news that it would also deploy to Gallipoli, but in a dismounted role without their horses. On 7 May, twenty-six officers and 482 other ranks (some men remaining behind to look after their horses) boarded trains for Alexandria to board their transports.[18] They arrived off the Gallipoli peninsula on 12 May, and started to disembark, landing at Anzac Cove.[19] By now the troops had been re-equipped for their dismounted role, and carried a rifle with two hundred rounds of ammunition, a small pack, a haversack, mess tins, a bayonet, and an entrenching tool. Once ashore, the regiment camped that night behind the front line.[20]
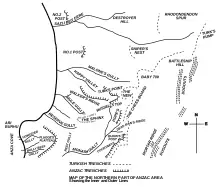
The next day, they moved to the left flank in the north to relieve the Royal Naval Brigade. Their trenches stretched from the sea to Walkers Ridge and included two outposts, No.1 Post and No.2 Post.[21] The regiment took over on the extreme right, with one squadron in the front line, one squadron in the support trench and the third squadron as the reserve. Next in line to their right, was the Auckland Mounted Rifles, and then the Wellington Mounted Rifles on the left.[22][23] However, the regiment had to wait until it got dark before sending men forward to man the two outposts.[24]
First combat
The regiment's first experience of combat started at midnight on 18/19 March when their Turkish opponents opened fire on their trenches.[25][nb 1] The main assault, in the brigade's sector, was against the Auckland Mounted Rifles; to support them the regiment sent two troops from the 1st and 10th Squadrons and one troop from the 8th Squadron to form their reserve. At daylight, the men manning No.1 Post could see a group of Turks concentrating around "The Nek" and opened fire on them with a machine-gun, forcing them to withdraw. The Turkish attack continued until that afternoon, when it gradually petered out. It was later estimated that 42,000 Turkish troops had been involved in the attack on the ANZAC beach-head, and by the end of the day 10,000 of them had become casualties. Later that day white flags were observed over the Turkish trenches, and some of their men wandered into no man's land. This was considered a ruse to retrieve arms and ammunition off the dead and to bring forward reinforcements, so the Turks were warned to return to their trenches as the New Zealanders were going to open fire again. A real armistice was arranged for 24 May, between 07:30 and 16:30, when the wounded were brought to safety and the dead buried.[27][28] Squadrons settled into a routine with twenty-four hours in No.1 and No.2 Posts, twenty-four hours in the main trenches and twenty-four hours in support, then back to the outposts. Their first offensive action came on 28 May, when it was still dark. The Turks had built an outpost only 450 yards (410 m) from No.2 Post, so the 1st Squadron charged and captured the position.[29] Once it was secured, the 6th Squadron from the Wellington Mounted Rifles provided the garrison for what was now called No.3 Post. They had some difficulties defending it, as the Turks launched a counter-attack to recapture it.[30] After a battle lasting until the next day the 10th Squadron and two troops from the 8th Squadron managed to relieve the Wellington Regiment's survivors and take over the defence of the post.[31] Shortly after the relief, it was decided that the position was untenable and it was abandoned.[32][33] Casualties gradually mounted and the regiment's first replacements, three officers and forty-four other ranks, arrived at the end of June.[34]
Chunuk Bair
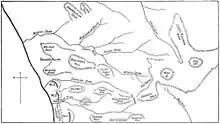
The objective of the British August offensive was to seize Chunuk Bair, a high point in the Sari Bair mountain range. The New Zealand and Australian Division would provide the attacking force. The initial attack was to clear the Turks from the foothills; this task was given to the New Zealand Mounted Rifles Brigade, reinforced by the Maori Pioneer Battalion. The regiment, together with the Otago Mounted Rifles, was to clear Chailak Dere valley, then advance to Aghyl Dere in the north. They also had to capture Taylor's Hollow and Walden's Point, then turn east to capture Beauchop Hill. To reduce noise and maintain stealth, they were ordered to use only their bayonets.[35] At 20:00 on 5 August, the 296 men of the regiment moved forward to No.2 Post in preparation for the attack, which was due to start at 21:00 the next night.[36] Their assault started on time, with the 1st and 10th Squadrons forward, followed by the 8th Squadron and Machine-Gun Section in reserve. The leading men met and killed four Turks in an observation post. Then with still around two hundred yards (180 m) to go, a destroyer's searchlight beam lit up the advancing men, and a Turkish machine-gun opened fire on them. The 10th Squadron charged straight into the Turkish trench, while the 1st Squadron managed to manoeuvre around and attack the machine-gun from the rear. They achieved this without firing a shot or making a sound, and then advanced towards their last objective, Beauchop Hill. The hill was also captured, and the survivors started to dig in.[37] Although it had taken all its objectives, the regiment had around forty per cent casualties, including the commanding officer, who was wounded, and the second in command, Major Overton, who had been killed.[38] While digging in they were able to observe the rest of the battle, which did not seem to be going well. By the next day, 7 August, Turkish reinforcements were arriving at Chunuk Bair and the attack had failed. Since the start of the battle they had lost twenty-four men dead and sixty men wounded.[33][39] Now commanded by Major Hutton, from the 10th Squadron, the regiment remained on Bauchop Hill in defence until 15 August, when they moved back to the entrance of Aghyl Dere, then later moved forward two hundred yards (180 m) and occupied an old Turkish trench.[40]
Hill 60
At 15:30 on 21 August the Battle for Hill 60 began. Charging straight at the hill, the regiment suffered sixty per cent casualties, among them Hutton in command. He was replaced by Major Hurst, from the 1st Squadron, and they succeeded in capturing the Turkish trench within fifteen minutes of going over the top. But on either side of them the rest of the attack had failed, leaving the regiment and the Otago Mounted Rifles isolated from the rest of the force. Not having the manpower to continue the assault, they were ordered to dig in and hold the position.[41][42] They held on until 23 August when they were relieved by the Auckland and Wellington Mounted Rifles.[43]
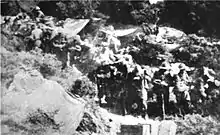
Three days later the regiment returned to their previous position to continue the assault. The attack began at 17:00 on 27 August with the regiment leading the brigade. They charged across the sixty yards (55 m) of open ground and into the first Turkish trench. Within minutes they were up and on their way again, and captured the second and third trenches, which they defended all night and through the next day. Casualties had been high; from the 119 men who had started the assault there were now only eighteen left, commanded by the only officer, Captain Gibbs. The brigade's other regiments were in a similar state, but they remained in the trenches until they were relieved after dark on 29 August.[44]
Lemnos
On 13 September, the brigade, less its machine gunners, was relieved by the 5th Australian Brigade and sailed to the island of Lemnos to rest and recuperate. The regiment's strength was now just one officer and thirty-nine other ranks, twelve of whom were machine-gunners who had to remain at Gallipoli. By now, including the original contingent and their replacements, a total of thirty-two officers and 645 other ranks had served with the regiment at Gallipoli.[45] On arrival the regiment came under the command of Lieutenant-Colonel George Stewart. By early October, replacements started arriving to bring the regiment back up to almost full strength. At the end of the month Stewart was evacuated sick, and Major John Studholme, the senior officer with the replacements, assumed temporary command of the regiment. On 10 November they returned to Gallipoli, camping that first night at Bauchop Hill.[46]
Evacuation
The regiment spent their time building winter quarters, and tunnelling into the hillside to provide protection against shellfire, doing so until 27 November when they moved back into the front line. On 9 December, Major Christopher Powles, the Brigade-Major, took over command of the regiment, with Studholme as the second in command.[47] Three days later, the order for the complete evacuation of the peninsula was issued. Men with minor ailments left first, followed by one regiment or battalion from each brigade. The Auckland Mounted Rifles were chosen as the first regiment to leave from the New Zealand Mounted Rifles Brigade,[48] which meant that the Canterbury Mounted Rifles had to extend its lines to cover for the Aucklanders. The last men were due to leave over the night of 19/20 December.[49]
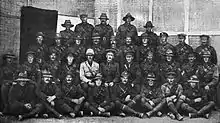
The regiment now numbered fourteen officers and 290 other ranks, which was to be reduced to nine officers and 163 men, the rest being among the first batch to be evacuated on 18 December. The remainder were divided in three groups. The first group, of three officers and ninety men, left the front for the embarkation beach at 17:30 the next day. They were followed by the second smaller group of three officers and forty-two men at 21:35. The last group, three officers and thirty-one men, had to cover for the whole regiment, keeping up a steady rate of fire and moving their one Maxim-gun around the position to support the deception that all defences were fully manned. This last group was also divided into three parts, the first of which left at 01:45 on 20 December. They were followed by the next group who waited ten minutes before withdrawing. The last small group of men left at 02:05, and reached the beach, without incident, at 03:30. The regiment sailed again to Lemnos, and on 22 December to Egypt, arriving at Alexandria on 26 December, and eventually returned to their old camp at Zeitoun.[33][50]
Sinai
In Egypt reinforcements brought the regiment back up to full strength plus an added ten per cent, and the Machine-Gun Section was doubled in size from two to four guns.[51] Another change was the appointment of Major James Whyte of the Wellington Mounted Rifles as commanding officer.[52] On 23 January 1916 the regiment left Zeitoun to take up a new defensive post on the Suez Canal eighty-seven miles (140 km) to the east. While there, Findlay, having recovered from his wounds, returned as commanding officer on 19 February.[53] By 7 March the regiment was once more ready for operations and moved into the front line, at Railhead Ferrypost on the canal. Later that month, the brigade was assigned to the ANZAC Mounted Division.[54]
Katia
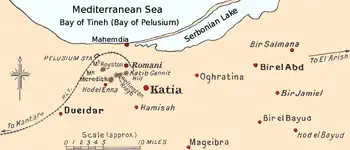
Without any notice the regiment, and brigade, was ordered to Kantara, thirty-two miles (51 km) away on the Suez Canal, at 20:00 on 23 April. The reason was not then known by the troopers, but it later transpired that a Turkish force in the Sinai Desert had attacked British yeomanry positions at Katia and Oghratina.[55] They reached Kantara at 07:00 and an hour later moved into the desert, camping at Hill 70 for the night. They sent reconnaissance patrols out into the desert, and manned observation posts. On 10 May the regiment was ordered to Romani and the next day to El Maler.[56] Patrol activity was kept up, most of the time at troop strength, but sometimes involving the complete brigade.[57] On 15 May the regiment carried out a reconnaissance of Oghratina and Bir el Abd, and for the first time sighted a hostile force in the desert; they did not manage to engage them. The next day several men had to be evacuated, suffering from heat exhaustion, as temperatures reached 129 °F (72 °C). This convinced Findlay to cut their patrol short, and travelling overnight they arrived back at Maler early on 17 May.[58] Over the next weeks their patrols continued, to acclimatise the men to desert travel and conditions.[59] Early in July, the regiment lost its machine-gun section when it was transferred to form the brigade Machine-Gun Squadron. On 19 July reconnaissance aircraft spotted a large Turkish force moving west across the desert.[60]
Romani
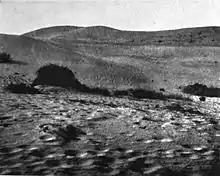
Just after midnight on 4 August the 1st and 2nd Light Horse Brigades were attacked at Romani. At 08:00, the regiment, acting as the brigade vanguard, advanced towards Dueidar; at the same time they could hear firing in the distance from Romani.[61] By 10:30 they were approaching the Turkish position on Mount Royston, and the regiment opened out to attack, with the 8th Squadron positioned on the left, the 1st in the centre, and the 10th on the right, with the Auckland Mounted Rifles following in support. The 5th Light Horse Regiment, who were supposed to be to the left of the 8th Squadron, had not yet arrived.[61][nb 2] The assault commenced at 15:00, supported by the Somerset Battery Royal Horse Artillery, and by 17:30 they had driven the Turks off Mount Royston. The brigade captured an artillery battery and over 1,000 prisoners.[62] The regiment's casualties during the battle were one dead and fifteen wounded.[51] The next day at 03:30 they moved to Katia, which was believed to be occupied by a large Turkish force. On arrival, the brigade galloped forward, attacking from the south. When they got close the regiment dismounted and continued on foot. Fighting all day, they waited in vain for the 3rd Light Horse Brigade to support the assault. Still holding their ground at 20:00, they had to retire and return to Bir et Maler to water their horses.[63] Their casualties were two dead and fifteen wounded.[51]
The Turkish force withdrew towards Katia, which by the time the regiment's reconnaissance patrol got there had been abandoned; the Turks were heading towards Oghratina. Once the enemy were located, the regiment kept patrols in contact with them overnight and all during the next day while the Turks withdrew to Negilia. By 8 August the enemy had reached Bir el Abd, where they established defences and were waiting for the New Zealanders.[64]
Abd
Before dawn on 9 August the regiment was behind the Auckland Mounted Rifles heading towards Abd. The brigade was to attack head on, while the rest of the division circled around to attack the flanks. At 05:30 the Aucklands were engaged by the Turkish defenders, so the 8th Squadron was sent forward on their left to assist, and immediately came under fire. To support them the 1st and 10th Squadrons moved up on the left. The 8th Squadron advanced and captured a ridge line facing east, followed soon after by the other squadrons occupying the high ground to the west of Abd. From there they could see the Turkish defences, which consisted of trenches and redoubts, supported by artillery that kept up a steady rate of fire on the regiment. At 06:00 the Turks left their trenches to counter-attack the regiment, but were stopped by small arms fire and the attached Somerset Battery Royal Horse Artillery.[65] The regiment then moved downhill towards Abd, but were faced with heavy Turkish artillery fire, which by 10:30 had stopped the 1st and 2nd Light Horse Brigades to their left. At noon a second Turkish counter-attack came in waves towards the regiment's lines. They managed to fight them off, with heavy casualties. By 14:00 the Turks were attacking all the division's brigades in strength. The 1st and 2nd Light Horse in the north and the 3rd in the south began to retire, leaving the New Zealanders' position exposed on the flanks. Only by keeping up a heavy rate of small arms and artillery fire did they hold off the enemy. At 17:30, the divisional commander Harry Chauvel called off the attack and ordered a withdrawal, but as the New Zealanders were in danger of being overrun the withdrawal was postponed until dark, with the regiment forming a rearguard.[66] The battle cost the regiment nine dead, twenty-two wounded and six men missing in action.[51]
The brigade withdrew to Debabis, caring for their wounded and resting for the next two days. On 12 August, they moved back to Abd, which had been evacuated by the Turks. Sending out reconnaissance patrols, they located the Turkish rearguard two miles (3.2 km) west of Salamana. Not being in a position to attack, they observed them until dusk, when the Turks moved further east to El Arish.[67]
Magdhaba
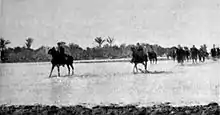
On 20 December, in response to reports that the Turks had evacuated El Arish, the regiment started moving overnight towards the village. Advance patrols discovered that the Turks had withdrawn along the Wadi el Arish to Magdhaba. By dawn 23 December the regiment reached the wadi and joined up with the rest of the division, now heading towards Magdhaba.[68]
By 05:00 they could see the Turkish position; the brigade was ordered to move around and approach it from the north. Five hours later the brigade had reached a position to start their attack, with the Canterbury regiment on the brigade's left.[69] Dismounted, the squadrons advanced in turn, covered by their machine-guns. At 15:00, when they were within five hundred yards (460 m) of the Turkish lines, they were able to charge, with bayonets fixed, and captured the Turkish trench. One by one the Turkish redoubts were captured, before nightfall.[69] The regiment's casualties were light, at two dead and eleven wounded.[51]
Rafa
By the end of the year the Turkish forces had been pushed out of the Sinai, and in January 1917, orders were given for the division to attack Rafa on the Egyptian–Palestine border. By dawn on 9 January, the regiment and division had reached the border, and the brigade manoeuvred to attack Rafa from the north-east.[70] The 8th Squadron, leading the regiment, was moving around to the north of village, when the Turkish defenders opened fire on them. The regiment galloped forward, and one of their troops captured fifty prisoners at a police post. The remainder captured an uncompleted trench system, and another 171 prisoners, six of them German officers. The regiment was now position to block the Turkish withdrawal east, and were also able to observe the main Turkish defences.[71]
The regiment started advancing towards the village, the 8th Squadron on the left, and the 10th with the 1st Squadron on the right. Covered by their machine-guns, but under heavy Turkish fire, they gradually moved forward on foot. Troops took turns to run forward while the rest of the squadron covered them.[72] The intensity of the battle was demonstrated by the Inverness Battery Royal Horse Artillery, which was supporting the brigade and ran out of ammunition at 14:00. Two hours later the division's covering force reported Turkish reinforcements approaching, and Lieutenant-General Philip Chetwode, who was commanding the attack, decided to call it off. Almost simultaneously Edward Chaytor, commanding the brigade, ordered another attack. Covered by their machine-guns the men carried out a bayonet charge and the Turks to their front surrendered. By this time the other brigades had started to withdraw, but seeing what had happened, they turned back and also charge, capturing the position.[72] The battle cost the regiment six dead and nineteen wounded.[73]
Palestine
Gaza
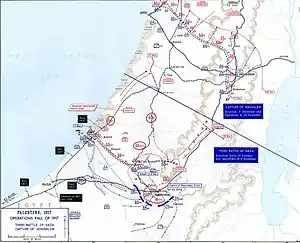
The British plan for Gaza required the ANZAC Mounted Division to circle around by night and block Turkish reinforcements getting to the town. On 26 March at 02:30, the brigade left camp in a heavy fog and crossed the Wadi Ghuzze two miles (3.2 km) south-east of Gaza. They soon reached their positions with the brigade, between the 2nd Light Horse and 22nd Mounted Brigades, and waited for the infantry divisions to assault the town. At 14:00, as the infantry were having problems, the brigade were ordered to attack.[74] The regiment galloped towards the town, with the Wellington Mounted Rifles on their right and the Auckland Mounted Rifles in reserve. Once there, the regiment moved south along a ridge and attacked the garrison at Ali Muntar. This hilltop could command the approaches into Gaza. They soon captured the outlying Turkish trenches, forcing the defenders back towards the town. At 18:40 the 10th Squadron reached the hill top at the same time as the 53rd (Welsh) Division, who had been trying all day to take the position from the other side.[75] Despite having captured a commanding position, both the regiment and the infantry division were ordered to withdraw. Turkish reinforcements had been reported en route, and the overall commander did not believe they could hold what they had captured. The regiment retired back the way they had come, and reached Belah just after midnight the next day.[75] Casualties for the day were one dead and six wounded.[73]
Wadi Ghuzee line
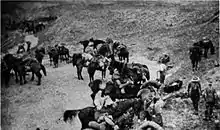
On 3 April the squadrons were issued Hotchkiss machine-guns, one per troop.[76] After the British withdrawal, the Turks built a defensive line of trenches and redoubts, from the sea south of Gaza to Beersheba, following the route of the road. The British plan for the second attack involved the ANZAC Mounted Division providing flank protection, intercepting any reinforcements, and pursuing the retreating Turkish forces if required.[77]
The regiment moved out at 18:30 on 16 April, forming the vanguard for the division. At 04:30 the next morning the 10th Squadron, in the lead, crossed the Wadi Ghuzee at Shellal. Their only opposition came from enemy aircraft which bombed the division. Breaking out into an extended line, they reconnoitred towards Sharia and Beersheba, reporting on Turkish movements. At nightfall they withdrew back to Shellal.[78] The next day was a repeat of the previous day.[79] Then, after dark, the division was ordered to march overnight to support the Imperial Mounted Division. The regiment set out at 23:00, and by 09:00 on 18 April were the brigade reserve for their assault on "Sausage Ridge". At 14:30 the regiment was called upon, and galloped forward under an artillery bombardment. Dismounting, a machine-gun section set up just in time to stop a Turkish counter-attack.[80] However, the British attack all along the line had faltered and was called off that night, and they withdrew back behind the Wadi Ghuzee.[81] The three days of fighting cost the regiment three dead and twenty-eight wounded.[73]
Beersheba
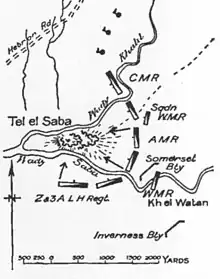
The regiment's involvement in the attack on Beersheba began at 18:00 on 30 October, when the ANZAC Mounted Division set off along the Wadi el Imshash towards the village. By 08:00 the brigade had reached its starting position at Bir Salim Irgeig, ready to begin their assault on Tel el Saba. Moving around the open Turkish flank they managed to approach the mound from the east. The regiment were to the right of the brigade line with the Auckland Mounted Rifles on their left. The regiment intended to move around and outflank the Turkish position from the north.[82] Once the assault started they slowly moved up the hill, and eventually they passed the Wadi Khalil and were able to engage the rear of the Turkish position. Confronted by Turkish artillery and machine-gun fire coming from their north, they could advance no further. At 15:00 the Aucklanders managed to charge and capture the hill top.[83] Elsewhere, Beersheba was captured following a mounted charge by the 4th Light Horse Brigade.[84] The regiment's casualties during the battle were one dead and six wounded.[73]
Khuweilfe
The next day, 1 November, the brigade moved north-east following the withdrawing Turks. The regiment, forming the vanguard, came under machine-gun fire so the 10th Squadron charged directly at the position while the 1st Squadron moved around and attacked from the flank. The position was quickly captured with thirteen prisoners and a machine-gun taken. That night, they returned to Beersheba for water. Following two days of rest, they moved out on 4 November, to relieve the 5th Mounted Brigade in the Ras el Nagb mountains.[85] Turkish artillery fired on them en route, wounding five men.[73] Once in position, they were attacked at 03:00 the next morning by a small Turkish force, which was forced to retire. Then a Turkish cavalry force was sighted assembling in a valley, which the regiment opened fire on; they galloped away.[85] At 11:00 the Turkish returned to the attack, supported by artillery and machine-gun fire, and managed to get to within two hundred yards (180 m) of the regiment's lines before being stopped. Turkish artillery continued to bombard the regiment for the rest of the day, only stopping after dark.[86] The day's fighting cost the regiment six dead and forty-nine wounded.[73] As there was no trace of their relief, and the horses had not been watered for forty-eight hours, they were sent back to Beersheba. Eventually relieved, on 6 November, by the Imperial Camel Corps Brigade, the men set out to the rear on foot, meeting their returning horses at Kh el Ras.[86]
Ayun Kara
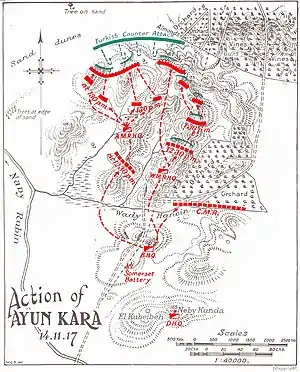
On 11 November, the brigade was ordered to move to the western flank and rejoin the division. It was not an easy task due to the difficult terrain, and one stage of thirty-one miles (50 km) took them thirty hours to cross. They eventually met with the division at Hamame the next day and had to rest and recuperate until moving out again on 13 November and camping for the night at Yebna.[87]
The next morning, 14 November, the regiment crossed the River Rubin, and at 12:30 located a Turkish position at Ayun Kara.[73][88] The regiment was on the left front of the brigade advance, with the Wellington Mounted Rifles on their left and the Aucklanders in reserve. As the regiment advanced through orange groves, they were engaged by the Turkish defenders. The regiment then held a fire support position while the other two regiments attacked on the left. Fighting off several counter-attacks the brigade eventually, at nightfall, won the battle and held their ground overnight.[89] Not being involved in the main assault, the regiment's casualties were rather light at one dead and six wounded.[73] The next day the Turkish force had withdrawn, and the regiment advanced first to Beit Dejan, and then occupied the port of Jaffa on 17 November, where the commanding officer established the regimental headquarters in the German Consulate.[89]
River Auja
Around four miles (6.4 km) to the north of Jaffa is the River Auja, along which the withdrawing Turkish Fourth Army had formed a defence line. The only crossing points were a bridge at Khurbet Hadrah, and three fords. One of these was about two miles (3.2 km) to the east of Hadrah, another was at Jerisheh and the third at the river mouth.[90]
The brigade was ordered to assault the river and capture a crossing. On 24 November the regiment, with the 8th Squadron leading, crossed the ford at the river mouth. Taken by surprise, the Turkish defenders retired, and were followed by the regiment, who galloped into the nearby foothills and captured the village of Sheikh Muannis. The rest of the brigade continued the attack along the river, capturing the other crossings. To support their defence, the 161st (Essex) Brigade moved to the north of the river and dug in. The regiment sent mounted patrols forward to observe the surrounding country.[91]
The next day the Turkish counter-attacked the bridge-head at Khurbet Hadrah in force. Their first attempt failed, but after being reinforced they tried again the same day. Eventually the Essex Brigade were forced to withdraw back across the river. The regiment, to assist them, crossed at the river mouth and attacked the Turkish right, with the 10th Squadron heading, on foot, for Sheikh Muannis to assist the Wellington Mounted Rifles. Now defended by the 10th Squadron, the village's defenders withdrew across the river, and once clear they were followed by the squadron. Meanwhile, the 1st and 8th Squadrons, which had moved into the northern hills, were heavily attacked by the advancing Turks. They managed to hold a line, supported by their machine-guns, as they slowly retired, troop covering troop, back to the river. The Turkish force, now back in control of the northern river bank, made no attempt to force a crossing.[92] Despite the nature of the battle, with the regiment withdrawing in daylight, their casualties were again rather light at two dead and four wounded.[73]
Jordan Valley
Jericho
The British captured Jerusalem in December, but the Turkish forces still held the Jordan Valley and the area around the Dead Sea, putting the British right flank in danger of a counter-attack. As a result, the regiment's next operation involved the capture of Jericho in the east.[93]

On 16 February the regiment started their move towards Bethlehem, arriving there the next day. Two days later the brigade started over the hills towards the River Jordan, marching overnight. The tracks forced them into single file, but by daylight they were at El Muntar. From there the terrain dropped three thousand feet (910 m) to the Jordan Valley. As soon as the brigade's vanguard appeared they were engaged by the Turkish defences. It was not until 07:00 that the regiment came into the open to assist the attack.[94] The regiment was sent against a Turkish strong point at Hill 288, the 8th and 10th Squadrons leading with the 1st in reserve. The 10th Squadron had problems continuing their attack so the 1st was sent forward by a different route, and by noon the Turkish defenders were withdrawing to Nebi Musa. Here, using their artillery and machine-guns, the Turks held up the regiment's advance along a narrow defile until nightfall. The next morning the 10th Squadron were sent forward again, but the Turks had withdrawn during the night.[95] At 05:30 on 21 February the regiment formed the brigade's vanguard as it started out again, reaching the Jordan Valley at 09:00. The regiment pushed ahead towards Jericho, leaving the 8th Squadron behind to repair the road they were using. Jericho was occupied by the 1st Light Horse Brigade, so the regiment deployed along the River Jordan, from the Dead Sea to a pontoon bridge at Ghoraniyeh, which was still held by the Turks.[96] The next day was spent patrolling the vicinity of the river, and at 15:00 on 22 February the western side was declared clear of all Turkish forces. The brigade did not linger in the valley, and at 18:00 the same day they started back to Jerusalem.[97][98]
Amman
A raid on Amman was the next operation for the regiment. The ANZAC Mounted Division, 60th (London) Division and the Imperial Camel Corps Brigade would all take part.[99] On 13 March the regiment started back to the Jordan Valley through heavy rain. Orders for the raid were issued; the brigade would advance on mountain tracks, via the village of Ain Es Sir, then to Amman.[100] The rains postponed the raid, and it was not until 01:30 on 24 March that the brigade crossed the river Jordan, by a pontoon bridge at Hajlah. At 09:30 the regiment, the Wellington Mounted Rifles and the 181st (2/6th London) Brigade started clearing the area between the river and the foothills.[101] The vanguard, formed by the 1st Squadron and the Auckland Mounted Rifles, had by 16:30 left the Wadi Jeria and started up into the hills.[102] In the wet and cold weather progress was slow. The narrow tracks meant that all wheeled transport, including artillery and supply wagons, had to be left behind.[103] They reached Ain Es Sir at 14:00, two hours behind the vanguard. Out of contact with the division, they remained at the village for the remainder of that day and the next. Patrols checked the area between the village and Amman, which was around six miles (9.7 km) away. The remainder of the division, which had travelled by a different route, arrived later that day. They were in no physical condition to attack, so the advance was postponed until the next day.[104]
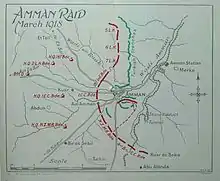
The assault began at daylight on 27 March; the 8th Squadron moved across the plain to Kusr, where their progress was stopped by heavy Turkish small arms fire. The squadron formed a defensive line, while the 1st Squadron moved past them on the right and captured a small hill.[105] Turkish artillery and machine-gun fire grew heavier all day, and another attempt by the 8th Squadron to move forward at 16:00 also failed. At 19:25 the Turks counter-attacked the 1st Squadron, but were forced to retire. That night patrols were sent to reconnoitre the Turkish positions, so they could be more easily attacked the next day. At dawn on 28 March the entire division tried another attack. The 1st Squadron managed to capture a small trench, but without their artillery support they were unable to move any further forward in the face of heavy Turkish machine-gun fire. All that day and night they managed to hold onto what they had won, waiting for reinforcement to continue the attack.[106]
The next day it was decided to make a dismounted attack on Hill 3039, outside Amman. The regiment, while still holding its own lines, provided eleven officers and 102 other ranks to take part in the assault. At 02:00 they formed up and started forward, the regiment's contingent forming the second line with the Wellington Mounted Rifles. The assault was successful, the first line capturing their objectives.[107] The second line passed through them onto their objectives. With around three hundred yards (270 m) to go, Turkish machine-guns opened fire on them, but they pressed on, capturing a machine-gun and fourteen prisoners. Then the 8th Squadron moved forward with the 4th (ANZAC) Battalion, Imperial Camel Corps Brigade, and captured the last Turkish position on the hill. The brigade settled in to defend the hill, the regiment located between the brigade's other two units. At dawn Turkish artillery targeted the hill, and at 09:30 the Turks counter-attacked the New Zealanders. They were stopped by the brigade, using captured machine-guns in addition to their own weapons.[108] Turkish artillery continued to bombard the hill until 16:00, when another counter-attack began, mostly to the regiment's left; this was driven off. The third counter-attack came an hour later but was also defeated. Elsewhere the rest of the division had been trying to reach Amman but could not make any progress.[108]
Unable to continue the attack, and with a shortage of ammunition and rations, the division was ordered to withdraw back to the River Jordan.[109] The brigade was ordered at 18:00 to retire back to Ain Es Sir. On arrival the 1st Squadron formed a defensive line, while the rest of the regiment rested. However, the 1st Squadron were soon engaged by a Turkish force, and the regiment and the Auckland Mounted Rifles moved up to support them. For the remainder of the night, the division retired through the line held by the regiment, until 04:00 on 1 April when the Wellington Mounted Rifles took over from the regiment, which then followed the division back to the river. They reached the Jordan Valley at dusk and moved back across the river.[110] During the operation, the regiment lost eighteen dead, thirty-seven wounded and one man missing in action.[98]
The brigade crossed the Jordan and the regiment camped two miles (3.2 km) to the south-east of Jericho. Not all of the ANZAC Mounted Division moved west of the river; the 1st Light Horse Brigade remained on the eastern bank forming a bridge-head. On 19 April the regiment crossed back over the river to conduct a reconnaissance of Shunet Nimrin. Advancing through Turkish artillery fire they got to within one thousand yards (910 m) of the Turkish lines in the foothills, and remained there all day, before returning to the western bank at 21:00.[111]
Es Salt
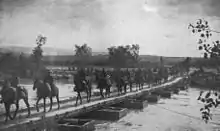
On 30 April the second raid across the Jordan began, their objective to capture Es Salt. This time a much larger force was involved under command of the Desert Mounted Corps. The regiment and brigade were part of the force assigned to attack Shunet Nimrin.[112] Once again they advanced through Turkish artillery fire, and confronted by Turkish strong points in the foothills, were unable to make any progress. That night they moved back across the Jordan, having suffered three dead and eleven wounded.[98][113]
On 1 May the brigade became the corps reserve and at noon were ordered to assist the 179th (2/4th London) Brigade in their attack on El Haud. The regiment crossed the bridge and started forward, through artillery fire, first walking then increasing their pace to a canter, until they reached cover. But then they were ordered back and had to return to Umm Es Shert, so they headed back through the shellfire until they reached the village. They remained there overnight until ordered forward to support the 4th Light Horse Brigade defending the road from the Ed Damieh ford to Es Salt, which was the only route back for the rest of the force attacking Es Salt.[114] For the next day the regiment held a defensive position along the road, and then moved, dismounted, into the mountains to help the Australian Mounted Division extricate themselves. On 3 May, once the Australians had moved past them, the regiment walked back down the track behind them, shelled by Turkish artillery. They then moved into the lines held by the infantry until the other forces had reached safety, before forming the rearguard back to Ghoraniyeh, arriving at 16:00 on 5 May.[115]
Chaytor's Force
The next months were spent training and refitting, until August when the brigade formed the divisional reserve located around Jericho. In September they moved forward to form the left (northern) flank of the Jordan Valley defences. At the same time, the regiment took command of the 1st and 2nd Battalions British West Indies Regiment and the 38th and 39th Battalions Royal Fusiliers, which were part of a larger deception force commanded by the divisional commander, Chaytor.[116][117] They were tasked with convincing the Turks that the next British attack would be from the Jordan Valley, while the forces were actually being realigned to attack in the west. The regiment was heavily involved in the deception, carrying out offensive patrolling, constructing dummy camps, and moving back and forwards behind the lines to give the impression of a much larger force than was actually present.[118]
The main British attack started in the west on 19 September; the regiment remained in the Jordan Valley keeping patrols close to the Turkish positions to watch for any withdrawal. The first evidence of that was observed the next day, when the Turks retired from their forward positions. The regiment then moved to join the rest of the brigade at Khubret Fusail on the western bank of the Jordan.[119]

The next day the brigade started towards their first objective, the bridge at Damieh. At 10:30 the Auckland Mounted Rifles, assisted by the 1st Squadron, assaulted and captured the Damieh bridge with a bayonet charge.[120] The 10th Squadron arrived after the bridge was secured, and followed the Aucklanders pursuing the withdrawing Turks into the hills. That night the regiment moved back across the bridge, leaving the 1st Squadron behind to guard it. The next day the brigade was ordered to resume the advance, so with the regiment as the vanguard, overcame the first obstacle, a Turkish machine-gun post. At 15:30 they reached Es Salt, passed through the town to the east, and formed a defensive position in the hills for the night. During the day they had captured 250 men, three artillery pieces and several machine-guns.[121] The next day, 24 September, the regiment continued their advance, heading towards Suweile where they were joined by the 1st and 2nd Light Horse Brigades.[122] The next day about two miles (3.2 km) north-west of Amman they came upon two Turkish redoubts covering the road to the town. While the brigade's other regiments deployed to attack them, the regiment, with a section from the Machine-Gun Squadron, were ordered to manoeuvre around to assault them from the rear. At midday they were confronted by around two hundred Turkish troops defending a ridge line. The regiment, through artillery and machine-gun fire, assaulted and captured the ridge. Not stopping to consolidate the position, they continued forward towards Amman. Once there the 10th Squadron, and part of the 8th Squadron, assaulted the Citadel in a bayonet charge, capturing 119 German prisoners and six machine-guns.[123] The regiment then charged through the town, capturing the railway station at 16:30. All told the regiment took 1,200 prisoners, fourteen machine-guns, and other military stores.[124] Their own casualties were one dead and two wounded.[98] Casualties and illness had reduced the regiment's strength to only 350 men, many of whom were struck down with malaria.[124] The regiment remained in the Amman area until the night of 29/30 September when they moved south to Kastel and secured a large number of prisoners from the Turkish II Corps. On 3 October they were relieved by the 3rd Light Horse Regiment, and started back towards the Jordan Valley.[125] By 9 October they had crossed the valley and had reached Jerusalem; they then went back to Ayun Kara, their part in the war being over.[126]
Post war
The war in the Middle East ended on 31 October 1918, following the signing of the Armistice of Moudros.[127] In November the regiment was selected to be part of the Allied force of occupation for the Dardanelles peninsula.[128] They would again be going in a dismounted role, but only twenty-five officers and 464 other ranks were involved. Leaving Egypt on 28 November they disembarked on 5 December and moved into their camps at Maidos and Kilid Bahr.[129] On 19 January 1919, the majority of the regiment returned to Egypt, rejoining the brigade at Kantara.[130]
On 17 March the whole brigade was ordered to deploy to assist the civil authorities dealing with growing unrest among the Egyptian civilian population. The regiment moved to the Nile Delta on 23 March, forming a column with four armoured cars and an armoured train.[131] Any one found rioting was arrested and tried in front of a court headed by the commanding-officer, who also imposed sentences. Within weeks the rioting was quelled and the regiment returned to their camp, remaining there until 17 June when they were ordered to send their horses to the remount depot and move to Ismailia on the Suez Canal. On 30 June they embarked on the transport ship HMNZT Ulimaroa for New Zealand and the regiment was disbanded.[131][132]
Casualties
During the war 334 men from the regiment died from all causes. In the seven months of the Gallipoli Campaign they had 127 dead; fourteen of those died of illness and 113 were killed in action.[8][45] Another forty-six, not included in that total, were reported missing believed dead.[8][45] The two years of the Sinai and Palestine Campaign accounted for another 127 dead.[8][45] At the same time 466 men were debilitated or wounded in action at Gallipoli, and another 254 were wounded during the later campaign, a total of 720 wounded for both campaigns.[8][45]
Many of the Gallipoli dead have no known grave; the Commonwealth War Graves Commission Chunuk Bair Cemetery, constructed on the site where the Turks buried Allied war dead following the evacuation, has 632 graves of which only ten men have been identified.[133] At the nearby Hill 60 Cemetery, which has another 788 graves, only seventy-six were identified.[134]
Honours
Several men of the regiment were recognised for their service by the British Empire awards system. Captain Robin Harper, later commander of the brigade machine-gun squadron, was perhaps the most decorated, being awarded the Distinguished Service Order (DSO), Military Cross (MC), Distinguished Conduct Medal (DCM) and being mentioned in despatches three times. Findlay was invested as a Companion of the Order of the Bath and awarded a DSO, alongside six other officers who were also invested with the DSO. One officer was appointed an Officer of the Order of the British Empire, and another a Member of the Order of the British Empire. Another eleven officers were awarded the MC, while the other ranks received a total of twelve DCMs and twenty-three Military Medals. There were also a total of sixty mentions in despatches, some men being mentioned more than once.[8][135]
References
- Footnotes
- At the time of the First World War, the modern Turkish state did not exist, and instead the territory was part of the Ottoman Turkish Empire. While the terms have distinct historical meanings, within many English-language sources the terms "Turkey" and "Ottoman Empire" are used synonymously, although many academic sources differ in their approaches.[26] The sources used in this article predominantly use the term "Turkey".
- The Wellington Mounted Rifles were attached to the 2nd Light Horse Brigade.[61]
- Citations
- Kinloch 2005, p.32
- Wilkie 1924, p.10
- Powles 1928, p.1
- "Lieutenant-Colonel John Findlay". New Zealand Electronic Text Collection. Retrieved 24 November 2013.
- "Auckland Mounted Rifles Regiment". New Zealand History. Retrieved 5 November 2013.
- Waite 1919, p.6
- Kinloch 2005, p.30
- "Canterbury Mounted Rifles Regiment". New Zealand History. Retrieved 24 November 2013.
- Wilkie 1924, p.3
- Stack 2011, p.1883
- Kinloch 2005, p.4
- Gullet 1923, p.58
- Powles 1928, p.3
- Powles 1928, p.4
- Wilkie 1924, pp.8–9
- Wilkie 1924, p.11
- Powles 1928, p.12
- Powles 1928, p.22
- Waite 1919, p.134
- Powles 1928, p.25
- Powles 1928, p.27
- Wilkie 1924, pp.15–18
- Nicol 1921, p.33
- Powles 1928, p.29
- Waite 1919, pp.138–139
- Fewster, Basarin, Basarin 2003, pp.xi–xii
- Waite 1919, p.143
- Powles 1928, p.32
- Waite 1919, p.149
- Powles 1928, pp.36–37
- Waite 1919, p.150
- Powles 1928, p.37
- "1915 – Canterbury Mounted Rifles Regiment timeline". New Zealand History. Retrieved 25 November 2013.
- Powles 1928, p.41
- Powles 1928, pp.45–46
- Powles 1928, p.47
- Powles 1928, p.48
- Powles 1928, p.51
- Powles 1928, pp.53–54
- Powles 1928, p.55
- Powles 1928, pp.56–57
- Waite 1919, p.252
- Powles 1928, p.59
- Powles 1928, pp.60–62
- Powles 1928, p.65
- Powles 1928, pp.67–68
- Powles 1928, p.69
- Waite 1919, p.280
- Powles 1928, pp.71–72
- Powles 1928, pp.72–75
- "1916 – Canterbury Mounted Rifles Regiment timeline". New Zealand History. Retrieved 26 November 2013.
- Powles 1928, p.80
- Powles 1928, p.84
- Gullet 1923, p.57
- Powles 1928, pp.90–91
- Powles 1928, pp.92–93
- Powles 1928, p.95
- Powles 1928, pp.98–99
- Powles 1928, pp.100–101
- Powles 1928, p.103
- Powles 1928, p.106
- Powles 1928, p.107
- Powles 1928, pp.108–109
- Powles 1928, pp.109–110
- Powles 1928, pp.110–112
- Powles 1928, pp.112–114
- Powles 1928, p.115
- Powles 1928, pp.122–124
- Powles 1928, p.124
- Powles 1928, pp.131–132
- Powles 1928, pp.132–133
- Powles 1928, p.134
- "1917 – Canterbury Mounted Rifles Regiment timeline". New Zealand History. Retrieved 28 November 2013.
- Powles 1928, pp.146–147
- Powles 1928, p.148
- Nicol 1921, p.140
- Nicol 1921, p.142
- Powles 1928, p.151
- Powles 1928, p.152
- Powles 1028, p.154
- Nicol 1921, p.145
- Powles 1928, p.169
- Powles 1928, p.170
- Wilkie 1924, p.162
- Wilkie 1924, p.170
- Wilkie 1924, p.171
- Powles 1928, pp.174–175
- Powles 1928, p.175
- Powles 1928, p.176
- Nicol 1921, pp.168–171
- Powles 1928, pp.177–178
- Powles 1928, pp.180–181
- Powles 1928, p.192
- Powles 1928, pp.192–194
- Powles 1928, p.195
- Powles 1928, p.196
- Powles 1928, p.199
- "1918 – Canterbury Mounted Rifles Regiment timeline". New Zealand History. Retrieved 1 December 2013.
- Nicol 1921, p.189
- Wilkie 1924, pp.189–190
- Wilkie 1924, p.193
- Powles 1928, p.204
- Powles 1928, p.205
- Powles 1928, p.206
- Powles 1928, p.208
- Powles 1928, pp.208–209
- Powles 1928, p.210
- Powles 1928, p.211
- Wilkie 1924, p.213
- Powles 1928, pp.214–215
- Powles 1928, pp.219–221
- Wilkie 1924, p.210
- Powles 1928, p.221
- Powles 1928, pp.221–222
- Powles 1928, p.223
- Wilkie 1924, p.218
- General Edmund Allenby (4 February 1922). "Supplement to the London Gazette, 4 February, 1920" (PDF). London Gazette. Retrieved 24 November 2013.
- Wilkie 1924, p.219
- Powles 1928, pp.222–223
- Powles 1928, p.233
- Powles 1928, p.234
- Powles 1928, pp.234–235
- Powles 1928, pp.235–236
- Powles 1928, p.237
- Powles 1928, p.238
- Powles 1928, p.239
- Waite 1919, p.295
- Waite 1919, p.298
- Powles 1928, p.245
- Powles 1928, p.247
- Powles 1928, p.248
- "1919 – Canterbury Mounted Rifles Regiment timeline". New Zealand History. Retrieved 4 December 2013.
- "Chunuk Bair (New Zealand) Memorial". Commonwealth War Graves Commission. Retrieved 26 November 2013.
- "Hill 60 Cemetery". Commonwealth War Graves Commission. Retrieved 26 November 2013.
- Powles 1928, pp.253–264
- Bibliography
- Fewster, Kevin; Basarin, Vecihi; Basarin, Hatice Hurmuz (2003). Gallipoli: The Turkish Story. Crows Nest, New South Wales: Allen and Unwin. ISBN 1-74114-045-5.
- Gullett, Henry Somer (1923). The Australian Imperial Force in Sinai and Palestine, 1914–1918. Official History of Australia in the War of 1914–1918. Vol. VII. Sydney: Angus and Robertson. OCLC 59863829.
- Kinoch, Terry (2005). Echoes of Gallipoli: In the Words of New Zealand's Mounted Riflemen. Wollombi: Exisle Publishing. ISBN 0-908988-60-5.
- Luxford, J. H. (1923). With the Machine Gunners in France and Palestine. Auckland: Whitcombe and Tombs. ISBN 1-84342-677-3.
- Nicol, C.G. (1921). The Story of Two Campaigns: Official War History of the Auckland Mounted Rifles Regiment, 1914–1919. Auckland: Wilson and Horton. ISBN 1-84734-341-4.
- Powles, Charles Guy (1928). The History of the Canterbury Mounted Rifles 1914–1919. Auckland: Whitcombe and Tombs. ISBN 978-1-84734-393-2.
- Powles, Charles Guy; A. Wilkie (1922). The New Zealanders in Sinai and Palestine. Official History New Zealand's Effort in the Great War. Vol. III. Auckland: Whitcombe and Tombs. OCLC 2959465.
- Stack, Wayne (2011). The New Zealand Expeditionary Force in World War I. Men-at-arms series. Vol. 473. Oxford: Osprey Publishing. ISBN 1-84908-888-8.
- Waite, Fred (1919). The New Zealanders at Gallipoli. Christchurch: Whitcombe and Tombs. ISBN 1-4077-9591-0.
- Wilkie, A. H. (1924). Official War History of the Wellington Mounted Rifles Regiment, 1914–1919. Auckland: Whitcombe and Tombs. ISBN 978-1-84342-796-4.
