Matilda II
The Infantry Tank Mark II, best known as the Matilda, is a British infantry tank of the Second World War.[1]
| Infantry Tank Mark II | |
|---|---|
.jpg.webp) A Matilda II on display at TankFest 2019 | |
| Type | Infantry tank |
| Place of origin | United Kingdom |
| Service history | |
| In service | 1939–1955 |
| Used by | United Kingdom Australia Soviet Union Nazi Germany (captured) Egypt |
| Wars | Second World War 1948 Arab–Israeli War |
| Production history | |
| Designer | Mechanization Board and Vulcan Foundry |
| Designed | 1937[1] |
| Manufacturer | Vulcan Foundry and others |
| Produced | 1937–1943 |
| No. built | 2,987 |
| Variants | see Variants below |
| Specifications | |
| Mass | 25 tons[2] |
| Length | 18 ft 5 in (5.61 m)[3] |
| Width | 8 ft 6 in (2.59 m)[4] |
| Height | 8 ft 3 in (2.51 m) |
| Crew | 4 (driver, gunner, loader, commander)[4] |
| Armour | 20 to 78 mm (0.79 to 3.07 in)[4] |
Main armament | QF-2 pounder (40 mm) gun, 93 armour-piercing rounds[5] |
Secondary armament | 7.92 mm Besa machine gun 2,925 rounds[5] |
| Engine | 2×diesel 6-cylinder 7-litre engines: 2×AEC[lower-alpha 1][5] or 2×Leyland[2] 190 bhp (140 kW) Leyland engine[6] |
| Power/weight | 7.5 bhp (5.6 kW) / tonne |
| Transmission | 6 speed Wilson epicyclic pre-selector gearbox |
| Suspension | Coil spring[2] |
| Fuel capacity | 181.8 litres (40.0 imp gal; 48.0 US gal) Internal + 163.3 litres (35.9 imp gal; 43.1 US gal) auxiliary tank [7] |
Operational range | 80 kilometres (50 mi) With Internal + 157 kilometres (98 mi)with auxiliary tank [7] |
| Maximum speed | 15 mph (24 km/h) Mk III on road [7] 9 miles per hour (14 km/h) off road |
Steering system | Rackham clutches[8] |
The design began as the A12 specification in 1936, as a gun-armed counterpart to the first British infantry tank, the machine gun armed, two-man A11 Infantry Tank Mark I. The Mark I was also known as Matilda, and the larger A12 was initially known as the Matilda II or Matilda senior. The Mark I was abandoned in 1940, and from then on the A12 was almost always known simply as "the Matilda".
With its heavy armour, the Matilda II was an excellent infantry support tank but with somewhat limited speed and armament. It was the only British tank to serve from the start of the war to its end, although it is particularly associated with the North Africa Campaign. Only two were available for service by the outbreak of the World War II in 1939.[9] It was replaced in front-line service by the lighter and less costly Infantry Tank Mk III Valentine beginning in late 1941.
Development history
The split between the infantry tank and cruisers had its origins in the First World War division between the first British heavy tanks and the faster Whippet Medium Mark A and its successors the Medium Mark B and Medium Mark C. During the interbellum, British tank experiments generally followed these basic classifications, which were made part of the overall doctrine with the work of Major-General Percy Hobart and the influence of Captain B.H. Liddell Hart.
In 1934, Hobart, the then "Inspector, Royal Tank Corps", postulated in a paper two alternatives for a tank to support the infantry. One was a very small, heavily armoured, machine gun-armed model that would be fielded in large numbers to overwhelm the enemy defences. The other was a larger vehicle with a cannon as well as machine guns and heavier armour proof against enemy field artillery.[10] Vickers designed a tank to a General Staff specification based on the first option as the A11 Matilda. Within the limitations of military finances, the Master-General of the Ordnance, Hugh Elles, went for the smaller machine gun tank and the larger cannon-armed version did not proceed.[11] This requirement was passed to Vickers-Armstrongs which had a prototype (A11E1) but with armour proof against current anti-tanks guns ready by September 1936.[12]
The first suggestion for a larger Infantry Tank was made in 1936, with specification A12. The design was produced by the Royal Arsenal, Woolwich, and Vulcan Foundry was selected as the manufacturer.[13][1] A12 used a number of design elements of the A7, a medium tank that was built in limited numbers in the early 1930s whose mechanical layout was used for many following designs.[14][15] With its greatly increased armour, a lack of power was seen as a problem. The solution was to use two AEC straight-six water-cooled diesel engines, used in London buses, providing up to 87 hp each. These were linked along a common shaft. Suspension was to use the "Japanese Type" bell crank suspension used on the A7.
Vulcan received a contract for two wooden mock-ups and two mild-steel prototypes in November 1936. The first mock-up was delivered in April 1937 and the A12E1 prototype in April 1938. The prototypes proved excellent in a 1,000 miles (1,600 km) test, resulting in only a few changes to improve the gearbox, suspension and cooling. When war was recognised as imminent, production of the Matilda II was ordered and that of the Matilda I curtailed. The first order was placed shortly after trials were completed, with 140 ordered from Vulcan in June 1938.[16]
Design

The Matilda Senior weighed around 27 long tons (27 t; 30 short tons), more than twice as much as its predecessor, and was armed with an Ordnance QF 2-pounder (40 mm) tank gun in a three-man turret.[17] The turret traversed by hydraulic motor or by hand through 360 degrees; the gun could be elevated through an arc from −15 to +20 degrees.[5][lower-alpha 2] One of the most serious weaknesses of the Matilda II was the lack of a high-explosive round for its main gun. A high-explosive shell was designed for the 2-pounder but was rarely issued, as the bursting charge was so small.[18] The main weapon against unarmoured targets was its machine gun.[19]
The Matilda II had a conventional layout, with the driver's compartment located at the front of the tank's hull, the fighting compartment with the turret in the centre and the engine and transmission housed in the rear. The driver's position was normally accessed by a single hatch in the roof of the hull, and protected by a rotating armoured cover which could be held locked in either fully open or closed positions; emergency egress was made possible by a large escape hatch under the driver's seating position. The driver also had a direct vision viewing port with manually operated armoured shield and a single Mk IV periscope to use when buttoned up.
Like many other British infantry tanks, it was heavily armoured. The front glacis was up to 78 mm (3.1 in) thick; the nose plates top and bottom were thinner but angled. The sides of the hull were 65 to 70 millimetres (2.6 to 2.8 in) and the rear armour, protecting the engine to sides and rear, was 55 millimetres (2.2 in).[5][lower-alpha 3]
The cast, cylindrical three-man turret was seated on ball-bearing ring mount and its armour was 75 mm (2.95 in) all round. The turret was laid out such that the gunner and commander were seated in a laddered arrangement on the left side of the gun, and the loader on the right. The commander was given a rotating cupola with a two-piece hatch and a single panoramic Mk IV periscope installed in the forward-facing hatch door. The same device was also mounted in a fixed position in the turret roof, forward of the commander's cupola, and giving the gunner some situational awareness and target finding capabilities. The loader used a single, rectangular hatch in the turret's roof on the right side. The turret was equipped with a basket around which much of the ammunition stowage was contained. The turret had a power traverse system used under normal conditions, and a manually-operated mechanical emergency assist.
The turret roof, hull roof and engine deck were 20 millimetres (0.79 in).[3] The armour varied in strength from IT.80 to IT.100[16]
The armour of the Matilda was the heaviest of its era. Contemporary German Panzer III and Panzer IV tanks had 30 to 50 millimetres (1.2 to 2.0 in) hull armour, while the T-34 had 40 to 47 millimetres (1.6 to 1.9 in) (angled at 60 degrees). Matilda's side and rear armour was relatively heavy even at the end of the war when tanks like the M4 Sherman carried about 40 mm, and late models of the Panther carried 50 mm. The shape of the nose armour was based on Christie's designs and came to a narrow point with storage lockers added on either side.[20] The heavy armour of the Matilda's cast turret became legendary; for a time in 1940–1941, the Matilda earned the nickname "Queen of the Desert".[21]
While the Matilda possessed a degree of protection that was unmatched in the North African theatre, the sheer weight of the armour on the vehicle contributed to a very low average speed of about 6 mph (9.7 km/h) on desert terrain and 16 miles per hour (26 km/h) on roads. At the time, this was not thought to be a problem, since British infantry tank doctrine valued heavy armour and trench-crossing ability over speed and cross-country mobility (which was considered to be characteristic of cruiser tanks such as the Crusader). The slow speed of the Matilda was further exacerbated by a troublesome suspension and a comparatively weak power unit, which was created from two AEC 6-cylinder bus engines linked to a single shaft.[8] This arrangement was complicated and time-consuming to maintain, as it required mechanics to work on each engine separately and subjected automotive components to uneven wear-and-tear. It did provide some mechanical redundancy, since failure in one engine would not prevent the Matilda from using the other.[8] The combined power of the engines went through a six-speed Wilson epicyclic gearbox, operated by compressed air.[8]
The tank's suspension system was that which had been developed by Vickers for their Medium C prototype in the mid-1920s[20] The tank was carried by five double wheels bogies on each side. Four of the bogies were on bellcranks in pairs, with a common horizontal coil spring. The fifth bogie at the rear was sprung against a hull bracket. Between the first bogie and the idler wheel, was a larger diameter vertically sprung "jockey wheel". The first Matildas had return rollers; these were replaced in later models by track skids, which were far easier to manufacture and to service in the field.
The turret carried the main armament, with the machine gun to the right in a rotating internal mantlet. Traverse was by a hydraulic system. As the gun was balanced for ease of movement by the gunner, much of the breech end was behind the trunnions. Two smoke grenade launchers were carried on the right side of the turret.[16] The grenade launcher mechanisms were cut down Lee–Enfield rifles, each loaded with a smoke grenade. Its camouflage scheme was designed by Major Denys Pavitt of the Camouflage Development And Training Centre[22] based on the dazzle patterns of First World War ships. The design incorporated block colours, visually breaking the tank in half.
Production history
The first Matilda was produced in 1937, but only two were in service when war broke out in September 1939. Following the initial order from Vulcan Foundry, a second order was placed shortly after with Ruston & Hornsby.[16] Some 2,987 tanks were produced by the Vulcan Foundry, John Fowler & Co. of Leeds, Ruston & Hornsby, and later by the London, Midland and Scottish Railway at Horwich Works; Harland and Wolff, and the North British Locomotive Company Glasgow. The last were delivered in August 1943.
Peak production was 1,330 in 1942, the most common model being the Mark IV.[3]
The Matilda was difficult to manufacture. For example, the pointed nose was a single casting that, upon initial release from the mould, was thicker than required in some areas. To avoid a needless addition to the tank's weight, the thick areas were ground away. This process required highly skilled workers and additional time. The complex suspension and multi-piece hull side coverings also added time to manufacturing.[20]
Combat history
Battle of France 1940
The Matilda was first used in combat by the 7th Royal Tank Regiment in France in 1940. Only 23 of the unit's tanks were Matilda IIs; the rest of the British infantry tanks in France were the smaller machine-gun armed A11 Matilda.[23] Its 2-pounder gun was comparable to other tank guns in the 37 to 45 mm range. Due to the thickness of its armour, it was largely immune, but not impervious, to the guns of the German tanks and anti-tank guns in France.[24] The Germans found the 88 mm anti-aircraft guns were the only effective counter-measure. In the counter-attack at Arras of 21 May 1940, 18[9] British Matilda IIs (and Matilda Is) were able to briefly disrupt German progress, but, being unsupported, they sustained heavy losses (30 tanks lost) after breaking through to the rear area of 7th Panzer Division. A gun line of artillery and later 88mm flak guns, personally organised by the divisional commander General Erwin Rommel was needed to repel the attack.[25] All vehicles surviving the battles around Dunkirk were abandoned when the British Expeditionary Force evacuated.
North Africa 1940 to 1942
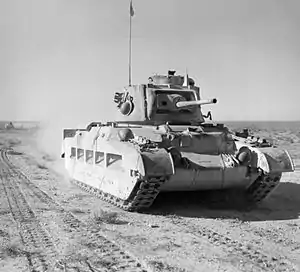
Up to early 1942, in the war in North Africa, the Matilda proved highly effective against Italian and German tanks, although vulnerable to the larger calibre and medium calibre anti-tank guns.
In late 1940, during Operation Compass, Matildas of the British 7th Armoured Division wreaked havoc among the Italian forces in Egypt. The Italians were equipped with L3 tankettes and M11/39 medium tanks, neither of which had any chance against the Matildas. Italian gunners were to discover that the Matildas were impervious to a wide assortment of artillery. Matildas continued to confound the Italians as the British pushed them out of Egypt and entered Libya to take Bardia and Tobruk. Even as late as November 1941, German infantry combat reports show the impotence of ill-equipped infantry against the Matilda.[26]
Ultimately, in the rapid manoeuvre warfare often practised in the open desert of North Africa, the Matilda's low speed and unreliable steering mechanism became major problems. Another snag was the lack of a high-explosive shell (the appropriate shell existed but was not issued). When the German Afrika Korps arrived in North Africa, the 88 mm anti-aircraft gun was again pressed into service against the Matilda, causing heavy losses during Operation Battleaxe, when sixty-four Matildas were lost. The arrival of the more powerful 5 cm Pak 38 and 7.5 cm Pak 40 anti-tank guns also provided a means for the German infantry to engage Matilda tanks at combat ranges. Nevertheless, during Operation Crusader Matilda tanks of 1st and 32nd Army Tank Brigades were instrumental in the break-out from Tobruk and the capture of the Axis fortress of Bardia.[27] The operation was decided by the infantry tanks, after the failure of the cruiser tanks of the 7th Armoured Division to overcome the Axis tank forces in the open desert.[28]
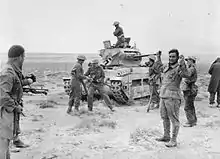
As the German army received new tanks with more powerful guns, as well as more powerful anti-tank guns and ammunition, the Matilda proved less and less effective. Firing tests conducted by the Afrika korps showed that the Matilda had become vulnerable to a number of German weapons at ordinary combat ranges.[29] Due to the small size of the turret and the need to balance the gun in it, up-gunning the Matilda, without developing a larger turret, was impractical. There was at least one instance of the turret from the A24/A27 cruiser tank series being fitted to a Matilda, complete with 6-pounder gun. As the size of the Matilda's turret ring was 54 inches (1.37 m) vs. the 57 inches of the A27, it was possible that a larger turret ring had been superimposed on the hull. The Churchill Mark III also had a 54-inch turret ring but was armed with a 6-pounder and that might have offered an alternative route.[21] It was also somewhat expensive to produce. Vickers proposed an alternative, the Valentine tank, which had the same gun and a similar level of armour protection but on a faster and cheaper chassis derived from that of their "heavy cruiser" Cruiser Mk II. With the arrival of the Valentine in autumn 1941, the Matilda was phased out by the British Army through attrition, with lost vehicles no longer being replaced. By the time of the Second Battle of El Alamein (October 1942), few Matildas were in service, with many having been lost during Operation Crusader and then the Gazala battles in early summer of 1942. Around twenty-five took part in the battle as mine-clearing Matilda Scorpion mine flail tanks.
Minor campaigns
In early 1941, a small number of Matildas were used during the East Africa Campaign at the Battle of Keren. However, the mountainous terrain of East Africa did not allow the tanks of B Squadron 4th Royal Tank Regiment to be as effective as the tanks of the 7th Royal Tank Regiment had been in Egypt and Libya.
A few Matildas of the 7th RTR were present during the Battle of Crete and all of them were lost.[30]
Australian use in the Pacific theatre
.jpg.webp)
.jpg.webp)
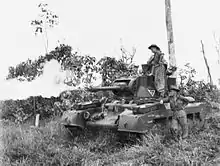
A total of 409 Matilda IIs were supplied by Britain to the Australian army between 1942 and 1944,[31] and a further 33 close-support Matildas were transferred from New Zealand to the Australian army in 1944, as New Zealand made the decision to use only close-support Valentine tanks in the Pacific theatre, to minimise supply problems.[32] The Australian 4th Armoured Brigade used them against Japanese forces in the South West Pacific Area, first in the Huon Peninsula campaign in October 1943. Matilda II tanks remained in action until the last day of the war in the Wewak, Bougainville and Borneo campaigns, which made the Matilda the only British tank to remain in service throughout the war.[4]
The tanks were often employed in dense jungle with limited visibility, and could be subject to point-blank fire from hidden Japanese heavy artillery pieces. The Matilda's heavy armour (enhanced by the crews with spare track links) proved to be reasonably effective protection against this.[33] In this fighting, the close-support version of the Matilda, armed with an Ordnance QF 3-inch howitzer, was preferred by the Australians as it was more effective against Japanese bunkers.[33] Local modifications to the tanks included improving the waterproofing, and adding an outside infantry telephone so supporting troops could more easily communicate with the tank crew.[33] Guards were fitted to the suspension to stop it from being tangled with jungle undergrowth, and metal panels fitted to make it harder for Japanese soldiers to attach adhesive demolition charges to the hull.[31]
The Matilda Frog, an Australian-modified version of the tank that replaced the gun with a flamethrower saw some successful use against the Japanese on Borneo. Another Australian version, the Matilda Hedgehog, which could fire seven 65-pound (29 kg) mortar shells, was successfully tested but was developed too late to see combat service.[34]
Matilda IIs remained in service with the Australian Citizen Military Forces until about 1955.[35]
Soviet use
The Red Army received 918 of the 1,084 Matildas sent to the USSR.[4] The Soviet Matildas saw action as early as the Battle of Moscow and became fairly common during 1942. Unsurprisingly, the tank was found to be too slow and unreliable. Crews often complained that snow and dirt were accumulating behind the "skirt" panels, clogging the suspension. The heavy armour on the Matilda was comparable to that of the Red Army's KV-1 heavy tanks, but the Matilda had nowhere near the firepower of the KV. Most Soviet Matildas were expended during 1942 but a few served on as late as 1944. The Soviets modified the tanks with the addition of sections of steel welded to the tracks to give better grip.[36]
Captured use
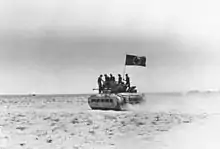
Following Operation Battleaxe a dozen Matildas left behind the Axis lines were repaired and put into service by the Germans.[37] Several vehicles were transported to Kummersdorf where they were evaluated, including trials by live fire. The German designation was Infanterie Panzerkampfwagen Mk.II 748(e) translating roughly as "Infantry Tank Mk.II Number 748 (English)". The Matildas were well-regarded by their German users[38] although their use in battle caused confusion to both sides, despite extra-prominent German markings.[37] Czech historian Ivo Pejčoch writes that the Romanians had also captured some Soviet Matildas,[39] but no other source mentions this, so it may be a confusion.
Egyptian use
Egypt used Matildas against Israel during 1948 Arab–Israeli War.[40]
Variants
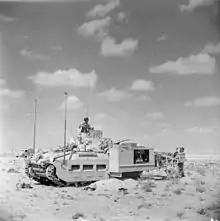
Major variants
- Infantry Tank Mark II (Matilda II) [5]
- First production model[41] armed with a Vickers machine gun.[5]
- Vickers machine gun replaced by Besa machine gun. The "A" denoted a change in armament.[5]
- New Leyland diesel engine used in place of AEC engines.[5]
- Infantry Tank Mark II (Matilda II Mk IV) [41]
- With improved engines, rigid mounting and no turret lamp[42]
- Matilda II Mk IV Close Support (CS)
- Variant with QF 3 inch (76 mm) howitzer,[lower-alpha 4] firing high explosive or smoke shells. In British service these were generally used by HQ units (usually a single command vehicle),[43] whereas entire Australian squadrons often appear to have used them – frequently in a direct fire role, against Japanese strong points.
- Infantry Tank Mark II (Matilda II Mk V) [41]
Other variants, field modifications and prototypes
- UK
- Baron I, II, III, IIIA
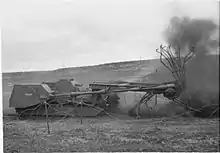
- Experimental Matilda chassis with mine flail – never used operationally.
- Matilda Scorpion I / II
- Matilda chassis with a mine flail. Used in North Africa, during and after the battle of El Alamein.[44]
- Matilda II CDL/Matilda V CDL Canal Defence Light
- The normal turret was replaced by a cylindrical one containing a searchlight (projected through a vertical slit) and a BESA machine gun. The searchlight was intended to disorientate and confuse enemy at night.
- (Prototype) Matilda with A27 turret
- Matilda II with modified chassis and Ordnance QF 6 pounder in an A27 turret.[45] One produced, no documentation other than photographs of it remain.[21]
- (Prototype) Matilda II "Black Prince"
- Radio-controlled prototype produced in 1941 using A12E2 with Wilson transmission. Planned uses included use as a mobile target, for drawing fire and so reveal hidden anti-tank guns, or for demolition missions. Planned order for 60 cancelled as it would require conversion of Rackham clutch transmission to the Wilson type. Used a QF 6-pdr Mk. V A gun.[46]
- USSR
- Field modification of Matilda Mark III with 76mm ZiS-5 (redesignated as F-96) gun
- One Matilda Mk.III supplied to the USSR was refitted with the 76.2mm ZiS-5 gun as used on the KV-1. This modification was found to be unsuccessful due to the space taken up by the breech of the ZiS-5 in the Matilda's turret, no production was started.[47]
- Australia
.jpg.webp)
- Matilda Frog (25)
- A flamethrower tank, this was fitted with a flame projector in place of the main gun, disguised with a tube to make the Frog resemble a normal, gun-tank. To avoid the complication of engineering a rotating, high-pressure joint, the flamethrower's fuel was in an 80-imperial-gallon (360 L) tank inside the turret along with the tank of high-pressure air, which propelled the fuel. This left space for only a single crewman who operated the flamethrower. Several other flame-fuel tanks, totalling 162 imperial gallons (740 L) were fitted in the hull and used to replenish the turret tank. The flame projector had a range of 90 yards (82 m) and fired about 10 imperial gallons (45 L) with each shot. A problem with the system was that it required a thirty-second interval between shots to build up pressure. The Frog tanks saw action on Borneo and were considered very effective.[34]
- Murray and Murray FT
- Flamethrower tank. Similar to the Frog but with a larger turret fuel tank - 130 imperial gallons (590 L). It used cordite instead of compressed air as a flame-fuel propellant. The type never saw action.[34]
- Matilda Tank-Dozer
- Bulldozer tank. A hydraulic operated bulldozer blade of similar design to those fitted to the American M3s.
- Matilda Hedgehog (6)
- Officially known as the "Matilda Projector, Hedgehog, No. 1 Mark I",[34] this fitted a Hedgehog 7-chambered spigot mortar in an armoured box on the rear hull of several Australian Matilda tanks. The projector was elevated by hydraulics adapted from the Logan traversing mechanism used in M3 Medium tank turrets.[34] The mortars were fired electrically either individually or as a salvo of six (from the 12 o'clock position;[48] the fifth tube could not be fired unless the turret was traversed to move the radio antenna out of the bomb's flightpath.[48] Each bomb weighed 65 lb (29 kg) and contained 30 to 35 lb (14 to 16 kg) of high explosive. The range was up to 400 m (440 yd). Aiming was accomplished by pointing the entire tank; the mounting had no independent traverse,[49] so accuracy was not spectacular, but adequate for the task.[48] Trials at Southport, Queensland, in May 1945 were pronounced a complete success, and the Projector would have been impressive against enemy bunkers, but the war ended before it was used operationally.[48]
Surviving tanks

Around 70 Matilda IIs survive in various degrees of preservation. Around 30 are in Australia, either in museums, displayed as public monuments or in private ownership. A notable collection is that of the Royal Australian Armoured Corps Memorial and Army Tank Museum, at Puckapunyal, Australia, which has five Matilda IIs on display, including a Matilda Frog flame tank, a Matilda Hedgehog and a Matilda Bulldozer.[50]
Tanks in running condition are owned by The Tank Museum Bovington in the United Kingdom, the American Heritage Museum in the United States, and several private owners in Australia. The Tank Museum completely restored a Matilda II tank from 2015 to 2018, with updates provided through YouTube.[51] While a gearbox fault prevented it running at the 2018 Tankfest (its first advertised running event since 2013), the issue was corrected and the tank has run at several events since. The Tank Museum at Bovington also displays the only surviving Matilda Canal Defence Light, currently housed in the Vehicle Conservation Centre. The WW2 Tank Stories display has a Matilda in desert Caunter camouflage scheme[lower-alpha 5] In the UK, the Imperial War Museum also has a Matilda - listed as a Mk V - with additional turret ring armour on display in the Land Warfare Hall at their Duxford site. The Royal NSW Lancers Museum in Parramatta in Sydney has a MKII "ACE" fitted with a 3 in. howitzer in place of the 2 pounder.
Other examples are displayed at the Kubinka Tank Museum in Russia, the Royal Museum of the Armed Forces and Military History in Belgium, the Yad La-Shiryon museum in the Latrun, the Musée des Blindés in France, and the Cavalry Tank Museum at Ahmednagar in India.[52]
See also
Notes
- Footnotes
- AEC engine model A183 on the left hand side and A184 on the right hand side.
- The WWII Equipment states that the gun could move through an elevation arc of −20° to +20°.[3]
- The 65 mm was made up of the hull and the side skirt armour.[3]
- The shell cartridge was 76.2 x 134R. On the Infantry Tank Mk IV, the Churchill tank, the gun was used for HE
- This tank has additional steel bars welded to some track link faces, Russian style, despite not being an ex-Russian tank.
- Citations
- Jentz, p. 11.
- Jentz, p. 13.
- Boyd (2008).
- Bean & Fowler (2002), pp. 147–148.
- Jentz (1998), p. 12.
- Jentz (1998), pp. 12–13.
- Fletcher (1994), p. 28.
- Fletcher (1994), p. 6.
- Tank Chats #19 Matilda II. The Tank Museum. 28 April 2016. Retrieved 7 December 2020 – via YouTube.
- Chamberlain & Ellis, p. 54.
- Fletcher (1989), p. 3.
- Chamberlain & Ellis (1981), p. 54.
- Fletcher (1989), p. 4.
- "A12, Infantry Tank Mark II, Matilda II". Arcane Fighting Vehicles - AFVs. Graham Matthews. Archived from the original on 28 October 2009. Retrieved 15 February 2010.
- "Britain's A7 Medium Tanks - World War II Vehicles, Tanks, and Airplanes". wwiivehicles.com. Archived from the original on 10 June 2011. Retrieved 15 February 2010.
- Fletcher (1994), p. 8.
- Fletcher (1994), p. 5.
- "Tank Chats #19 Matilda II". The Tank Museum. 28 April 2016.
- Hogg, Ian (1996). Tank Killing. Sidgwick & Jackson. pp. 138–139. ISBN 1-885119-40-2.
- Fletcher (1994), p. 7.
- Fletcher (1994), p. 14.
- Newark, Tim. Camouflage. Thames & Hudson.
- Fletcher (1994), p. 10.
- Sebag-Montefiore (2006), pp. 149, 153.
- Panzer Commander - The Memoirs of Hans Von Luck, pp. 33
- "Defending Position 19". The Crusader Project. 12 October 2008.
- Orpen (1971), p. .
- Murphy (1961), p. , Chapter 14 and 15.
- "German Firing Trials against the Matilda II". The Crusader Project. 27 April 2010.
- Handel, Paul. "Matilda Tanks at Retimo on the Island of Crete" (PDF). Australian Army. Archived from the original (PDF) on 19 May 2009.
- Fletcher (1994), p. 33.
- Fletcher (1994), p. 24.
- Fletcher (1994), p. 34.
- Fletcher (1994), p. 42.
- Fletcher (1994), p. 35.
- Hill (2007).
- Tucker-Jones (2007), p. .
- Tucker-Jones (2007), p. 47.
- Pejčoch & Pejs (2005), p. 330.
- Tucker, Spencer C; Roberts, Priscilla Mary (2008). The Encyclopedia of the Arab-Israeli Conflict: A Political, Social and Military History. p. 520.
- Fletcher (1994), pp. 12–14.
- Mark Bannerman, Robert Oehler. Modelling the Matilda Infantry tank. Osprey. p. 6.
- Fletcher (1994), p. 12.
- Fletcher, David (2017). British Battle Tanks: British-made Tanks of World War II. Bloomsbury. p. 37. ISBN 978-1-4728-2003-7.
- "Photo". Archived from the original on 31 October 2005.
- Fletcher (1994), p. 40.
- Юрий Пашолок (17 October 2016). "Новый "меч" для "Матильды"". warspot.ru. Retrieved 29 September 2018.
- Fletcher (1994), p. 43.
- Paul Handel—Dust, Sand and Jungle, 2003 RAAC Memorial and Army Tank Museum, ISBN 1-876439-75-0.
- "Vehicle Displays and Exhibits". RAAC Memorial and Army Tank Museum. Archived from the original on 17 October 2002. Retrieved 15 February 2010.
- "The Matilda Diaries". YouTube. Tank Museum. Retrieved 23 March 2018.
- "Matilda Infantry tanks (A11 and A12)" (PDF). Surviving Panzers. 13 January 2013. Retrieved 8 May 2013.
References
- Bean, Tim; Fowler, Will (2002). Russian Tanks of World War II Stalin's Armoured Might. Ian Allan. ISBN 0-7110-2898-2.
- Boyd, David (31 December 2008). "Matilda Mk II Infantry Tank (A.12)". WWII Equipment.
- Chamberlain, Peter; Ellis, Chris (1981), British And American Tanks Of World War II (Second US ed.), Arco, ISBN 0-668-04304-0
- Fletcher, David (1994). Matilda Infantry Tank 1938–45. New Vanguard (8). Illustrated by P. Sarson. Oxford: Osprey. ISBN 1-85532-457-1.
- Fletcher, David (1989). The Great Tank Scandal: British Armour in the Second World War - Part 1. HMSO. ISBN 978-0-11-290460-1.
- Hill, Alexander (2007). "British Lend Lease Aid and the Soviet War Effort, June 1941 – June 1942". The Journal of Military History. 71 (3): 773–808. doi:10.1353/jmh.2007.0206. ISSN 0899-3718. JSTOR 30052890. S2CID 159715267.
- Jentz, Thomas L. (1998). Tank Combat in North Africa: The Opening Rounds, Operations Sonnenblume, Brevity, Skorpion and Battleaxe, February 1941 – June 1941. New York: Schiffer. ISBN 0-7643-0226-4.
- Kiński, Andrzej (2002). "Czołg piechoty A 12 Matilda cz. 1" [Infantry tank A 12 Matilda pt. 1]. Nowa Technika Wojskowa [New Military Technology] (in Polish) (6): 27–30. ISSN 1230-1655.
- Kiński, Andrzej (2002). "Czołg piechoty A 12 Matilda cz. 2" [Infantry tank A 12 Matilda pt. 2]. Nowa Technika Wojskowa [New Military Technology] (in Polish) (7): 25–29. ISSN 1230-1655.
- Murphy, W. E. (1961). Fairbrother, M. C. (ed.). The Relief of Tobruk. Official History of New Zealand in the Second World War 1939–45 (online ed.). War History Branch. OCLC 846906679 – via New Zealand Electronic Text Centre.
- Orpen, Neil (1971). War in the Desert. Cape Town: Purnell. ISBN 978-0-360-00151-0.
- Pejčoch, Ivo; Pejs, Ondřej (2005). Obrněná technika 6: Střední Evropa 1919–1945 (II. část) [Armoured Vehicles 6: Central Europe 1919–1945 (Part 2)] (in Czech). Prague: Vašut. ISBN 8072364294.
- Perrett, Bryan (1973). The Matilda. Armour in Action. Ian Allan. ISBN 0-7110-0405-6.
- Sebag-Montefiore, Hugh (2006). Dunkirk: Fight to the Last Man. Cambridge, MA: Harvard University Press. ISBN 978-0-674-02439-7.
- Tucker-Jones, Anthony (2007). Hitler's Great Panzer Heist. Pen and Sword Military. ISBN 978-1-84415-548-4.
- "Britain's Matilda tanks". WWII Vehicles, Tanks and Airplanes. Archived from the original on 24 March 2019.
{{cite web}}: CS1 maint: unfit URL (link)
External links
- OnWar - Matilda III
- Photo Gallery of Matilda Tanks in Soviet service (armchairgeneral.com/rkkaww2)
- PDF document listing surviving Matilda tanks.
- video of Matilda II at Bovington Tankfest 2008
- Popular Mechanics, March 1943, Tank Crew Rub Elbows In British Fortress cutaway drawing of Matilda II