Battle of Beersheba (1917)
The Battle of Beersheba (Turkish: Birüssebi Muharebesi, German: Schlacht von Birüssebi)[Note 1] was fought on 31 October 1917, when the British Empire's Egyptian Expeditionary Force (EEF) attacked and captured the Yildirim Army Group garrison at Beersheba, beginning the Southern Palestine Offensive of the Sinai and Palestine campaign of World War I. Infantry from the 60th (London) and the 74th (Yeomanry) Divisions of the XX Corps from the southwest conducted limited attacks in the morning, then the Anzac Mounted Division (Desert Mounted Corps) launched a series of attacks against the strong defences which dominated the eastern side of Beersheba, resulting in their capture during the late afternoon. Shortly afterwards, the Australian Mounted Division's 4th and 12th Light Horse Regiments (4th Light Horse Brigade) conducted a mounted infantry charge with bayonets in their hands, their only weapon for mounted attack, as their rifles were slung across their backs. Part of the two regiments dismounted to attack entrenchments on Tel es Saba defending Beersheba while the remainder of the light horsemen continued their charge into the town, capturing the place and part of the garrison as it was withdrawing.
| Battle of Beersheba | |||||||
|---|---|---|---|---|---|---|---|
| Part of the Middle Eastern theatre of World War I | |||||||
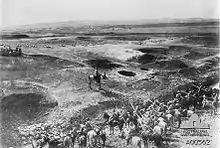
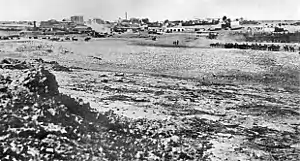 Beersheba in 1917 | |||||||
| |||||||
| Belligerents | |||||||
|
| ||||||
| Commanders and leaders | |||||||
|
|
| ||||||
| Units involved | |||||||
|
Egyptian Expeditionary Force
Desert Mounted Corps
|
Yildirim Army Group
| ||||||
| Strength | |||||||
| 47,500 rifles, 15,000 troopers | 4,400 rifles, 60 machine guns, 28 field guns | ||||||
| Casualties and losses | |||||||
| 171 killed in action |
~ 1,000 killed or wounded[1] 1,947 prisoners | ||||||
German General Friedrich Freiherr Kress von Kressenstein was commander of the three divisions of the Fourth Army. He further strengthened his defensive line stretching from Gaza to Beersheba after the EEF defeats at the first and second battles of Gaza in March and April 1917, and received reinforcements of two divisions. Meanwhile, Lieutenant General Philip Chetwode (commanding the EEF's Eastern Force) began the Stalemate in Southern Palestine, defending essentially the same entrenched lines held at the end of the second battle. He initiated regular mounted reconnaissance into the open eastern flank of the Gaza to Beersheba line towards Beersheba. In June, the Ottoman Fourth Army was reorganized when the new Yildirim Army Group was established, commanded by German General Erich von Falkenhayn. At about the same time, British General Edmund Allenby replaced General Archibald Murray as commander of the EEF. Allenby reorganized the EEF to give him direct command of three corps, in the process deactivating Chetwode's Eastern Force and placing him in command of one of the two infantry corps. At the same time, Chauvel's Desert Column was renamed the Desert Mounted Corps. The stalemate continued through the summer in difficult conditions on the northern edge of the Negev Desert, while EEF reinforcements began to strengthen the divisions which had suffered more than 10,000 casualties during the two battles for Gaza.
The primary functions of the EEF and the Ottoman Army during this time were to man the front lines and patrol the open eastern flank, although both sides conducted training of all units. The XXI Corps maintained the defences in the Gaza sector of the line by mid-October, while the battle of Passchendaele continued on the Western Front. Meanwhile, Allenby was preparing for the manoeuvre warfare attacks on the Ottoman defensive line, beginning with Beersheba, and for the subsequent advance to Jerusalem, and he was nearing completion with the arrival of the last reinforcements.
Beersheba was defended by lines of trenches supported by isolated redoubts on earthworks and hills, which covered all approaches to the town. The Ottoman garrison was eventually encircled by the two infantry and two mounted divisions, as they and their supporting artillery launched their attacks. The 60th (London) Division's preliminary attack and capture of the redoubt on Hill 1070 led to the bombardment of the main Ottoman trench line. Then a joint attack by the 60th (London) and 74th (Yeomanry) Divisions captured all their objectives. Meanwhile, the Anzac Mounted Division cut the road to the northeast of Beersheba, from Beersheba to Hebron and continuing to Jerusalem. Continuous fighting against the main redoubt and defenses on Tel el Saba which dominated the eastern approaches to the town resulted in its capture in the afternoon.
During this fighting, the 3rd Light Horse Brigade had been sent to reinforce the Anzac Mounted Division, while the 5th Mounted Brigade remained in corps reserve armed with swords. With all brigades of both mounted divisions already committed to the battle, the only brigade available was the 4th Light Horse Brigade, which was ordered to capture Beersheba. These swordless mounted infantrymen galloped over the plain, riding towards the town and a redoubt supported by entrenchments on a mound of Tel es Saba south-east of Beersheba. The 4th Light Horse Regiment on the right jumped trenches before turning to make a dismounted attack on the Ottoman infantry in the trenches, gun pits, and redoubts. Most of the 12th Light Horse Regiment on the left rode on across the face of the main redoubt to find a gap in the Ottoman defenses, crossing the railway line into Beersheba to complete the first step of an offensive which culminated in the EEF's capturing Jerusalem six weeks later.[Note 2]
Background

After their second defeat at Gaza in April, General Archibald Murray sacked the commander of Eastern Force, Lieutenant General Charles Dobell. Lieutenant General Philip Chetwode was promoted to command Eastern Force, while Harry Chauvel was promoted to Lieutenant General with command of the Desert Column. Major General Edward Chaytor was promoted from the New Zealand Mounted Rifles Brigade, to command the Anzac Mounted Division replacing Chauvel. With the arrival of General Edmund Allenby in June, Murray was also relieved of command of the Egyptian Expeditionary Force (EEF), and sent back to England.[2][3][4][5]
Although the strategic priorities of Enver Pasha and the Ottoman general staff, were to push the EEF back to the Suez Canal and retake Baghdad, Mesopotamia, and Persia,[6] the EEF was fortunate that the victorious Ottoman forces, were not in a position in April 1917, to launch a large-scale counterattack immediately after their second victory at Gaza. Such an attack against rudimentary EEF defences on the northern edge of the Negev could have been disastrous for the EEF.[7] Instead, both sides constructed permanent defences stretching from the sea west of Gaza to Shellal on the Wadi Ghazzeh. From Shellal, the lightly-entrenched EEF line extended to El Gamli before continuing south 7 miles (11 km) to Tel el Fara. The western sector (stretching from Gaza to Tel el Jemmi) was strongly entrenched, wired and defended by EEF and Ottoman infantry. The eastern sector, stretching east and south across the open plain, was patrolled by Desert Column's mounted infantry and yeomanry. At every opportunity patrols and outposts harassed opposing forces, while wells and cisterns were mapped.[8][9][10]
The town of Gaza was strongly defended, having been developed into "a strong modern fortress, well entrenched and wired, with good observation and a glacis on its southern and south–eastern face."[11] From Gaza, the formidable 30-mile-long (48 km) Ottoman front line stretching eastwards, dominated the country to the south, where the EEF was deployed in open, low-lying country cut by deep wadis.[12] The Ottoman defences in the centre of the line, at Atawineh and Hairpin redoubts (at Hareira and Teiaha), supported each other as they overlooked the plain, making a frontal attack virtually impossible.[13] Between Gaza and Hareira, the Ottoman defences were strengthened and extended along the Gaza-to-Beersheba road, east of the Palestine Railway line from Beersheba. Although these trenches did not extend to Beersheba, strong fortifications made the isolated town into a fortress.[14][Note 3]
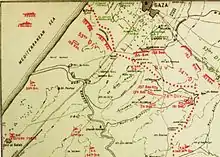
The open eastern flank was dominated by the Wadi Ghazzeh, which, at the beginning of the stalemate, could only be crossed in five places. These were at the mouth on the Mediterranean coast, the main Deir el Belah-to-Gaza road crossing, the Tel el Jemmi crossing (used during the first battle of Gaza), the Shellal crossing on the Khan Yunis-to-Beersheba road, and the Tel el Fara crossing on the Rafa-to-Beersheba road. The difficulty of crossing the wadi elsewhere was due to the 50–60 feet (15–18 m) perpendicular banks cut into the Gaza–Beersheba plain by regular floods. Additional crossings were constructed during the stalemate.[9][15]
Beersheba (Hebrew: Be-er Sheva; Arabic: Bir es Sabe) at the foot of the Judean Hills, was built on the eastern bank of the Wadi es Saba, which joins the Wadi Ghazzeh at Bir el Esani, before stretching to the Mediterranean Sea. Located at the north-west end of a flat, treeless plain about 4 miles (6.4 km) long by 3 miles (4.8 km) wide, the town is surrounded by rocky hills and outcrops. To the north–north–east, 6 miles (9.7 km) away on the southern edge of the Judean Hills, the Tuweiyil Abu Jerwal rises to 1,558 feet (475 m) behind the town, overlooking it by 700 feet (210 m); lower hills range east and south, with a spur of the plateau of Edom on the south-east, extending towards the town.[16][17]
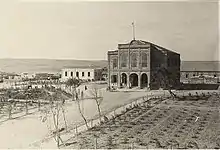
Since ancient times, the town had been a trading centre, with roads radiating from it in all directions. To the north-east the only sealed, metalled motor road in the region, stretched along a spine of the Judean Hills to Jerusalem, via Edh Dhahriye, Hebron and Bethlehem, along the Wadi el Khalil (a tributary of the Wadi es Saba). To the north-west the road to Gaza 26 miles (42 km) away crossed the open plain, to the west the track to Rafa via Tel el Fara (on the Wadi Ghazzeh), while the southern road to Asluj and Hafir el Auja continued the metalled road from Jerusalem.[18][19]
Beersheba was developed by the Ottoman Empire from a camel-trading centre on the northern edge of the Negev, halfway between the Mediterranean and the Dead Sea. It was on the railway line which ran from Istanbul to Hafir el Auja (the main Ottoman desert base during the raid on the Suez Canal in 1915 until the EEF advance to Rafa outflanked it), and which was damaged beyond repair in May 1917 during an EEF raid. Beersheba's hospital, army barracks, railway station (with water tower), engine sheds, large storage buildings, and a square of houses, were well-designed and strongly-constructed stone buildings, with red tiled roofs and a German beer garden.[16][20][21] The inhabitants of the region from Beersheba northwards varied; the population consisted mainly of Arabs adhering to Sunni Islam, with some Jewish and Christian colonists.[22]
The EEF had already decided to invade Ottoman territory before the first battle of Gaza, on the basis of Britain's three major war objectives: to maintain maritime supremacy in the Mediterranean, preserve the balance of power in Europe, and protect Egypt, India and the Persian Gulf. Despite the EEF's defeats during the first two battles of Gaza (with about 10,000 casualties),[23] Allenby planned an advance into Palestine and the capture of Jerusalem to secure the region and cut off the Ottoman forces in Mesopotamia from those in the Levant and on the Arabian Peninsula. The capture of Gaza, which dominated the coastal route from Egypt to Jaffa, was a first step towards these aims.[24]
Lines of communication
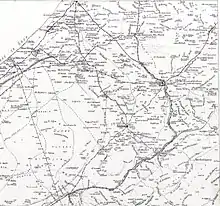
During the stalemate from April to the end of October 1917 the EEF and the Ottoman Army improved their lines of communication, laid more railway and water lines and sent troops, guns and ammunition forward to defend their front lines.[25] While the Ottoman lines of communication were shortened by the retreat across the Sinai, the EEF advance across the Sinai Peninsula into southern Palestine lengthened theirs, requiring a large investment in infrastructure. Since a brigade of light horse, mounted rifles, or mounted yeomanry (including infantry divisions) consisted of about 2,000 soldiers requiring ammunition, rations and supplies, this was a major undertaking. By March 1917, 203 miles (327 km) of metalled road, 86 miles (138 km) of wire-and-brushwood roads and 300 miles (480 km) of water pipeline had been constructed, and 388 miles (624 km) of railway lines laid at a rate of one kilometre a day. The railhead had been 30 miles (48 km) from Gaza, but by mid-April the line had reached Deir el Belah, with a branch line to Shellal completed. Since the Egyptian Camel Transport Corps alone could not support a large offensive in advance of the railhead, horse- and mule-drawn wagon trains were established. Supply columns were designed to support military operations by infantry and mounted troops for about 24 hours beyond the railhead.[3][26][27][28][29]
Prelude
Ottoman force
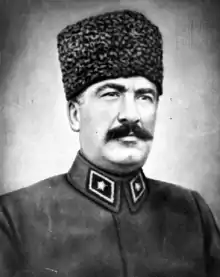
Several weeks after the Ottoman victory at the Second Battle of Gaza, General Friedrich Freiherr Kress von Kressenstein (commander of the victorious 3rd, 16th and 53rd Divisions of the Fourth Army) was reinforced by the 7th and 54th Divisions.[30][31] Until June 1917, Sheria was the headquarters of the German commanded Ottoman force defending the Gaza-Beersheba line, but as a consequence of EEF aerial bombing, it was moved to Huj in July.[32] This force was reorganised into two corps to hold the Gaza-to-Beersheba line: the XX Corps (16th and 54th Infantry Divisions with the 178th Infantry Regiment and the 3rd Cavalry Division), and the XXII Corps (3rd, 7th, and 53rd Infantry Divisions). By July, the Ottoman force defending the Gaza-to-Beersheba line had increased to 151,742 rifles, 354 machine guns and 330 artillery guns.[33] While the XXII Corps defended Gaza with the 3rd and 53rd Divisions, the XX Corps was headquartered at Huj.[34]
Beersheba was defended by the III Corps; it was commanded by the recently arrived Ismet (or Esmet) Bey, who had his headquarters in the town.[35] The III Corps had defended Gallipoli in 1915. "[T]he Ottoman Army could still hold its own against the British Army ... [and] showed a high level of operational and tactical mobility" during the battles for the Gaza to Beersheba line.[36] This corps consisted of the 67th and 81st Regiments (27th Division), a total of 2,408 rifles (of whom 76 percent were Arab), the 6th and the 8th Regiments of Lancers (3rd Cavalry Division),[Note 4] the 48th Regiment (16th Division) and the 2nd Regiment (24th Divisions). The 143rd Regiment of the Ottoman XX Corps was about 6 miles (9.7 km) north-north-west of Beersheba in the Judean Hills, but took "no part in the action".[37] A total of 4,400 rifles, 60 machine guns and 28 field guns in these lancer and infantry regiments were available for the defence of Beersheba.[21][38][Note 5]
The tactical deployment of the Ottoman III, XX and XXII Corps defending the Gaza-to-Beersheba line did not change when Enver Pasa activated the Yildirim Army Group (also known as Thunderbolt Army Group and Group F) in June 1917. This new group (commanded by German General and Ottoman Marshal Erich von Falkenhayn, former Prussian Minister of War, Chief of Staff of the German field armies and commander of the Ninth Army) was reinforced by surplus Ottoman units transferred from Galicia, Romania and Thrace after the collapse of Russia.[39][40] Yildirim Army Group consisted of the Fourth Army headquarters and Syrian units commanded by Cemal Pasa which remained in Syria, and the Fourth Army headquarters in Palestine commanded by Kress von Kressenstein. The Fourth Army headquarters in Palestine was inactivated on 26 September 1917 to be reorganised into two armies and renamed. Six days later it was reactivated as the new Ottoman Eighth Army headquarters, still commanded by Kress von Kressenstein and responsible for the Palestine front. The new Seventh Army was also activated, commanded by Fevzi Pasa after the resignation of Mustafa Kemal.[39]
Beersheba defences
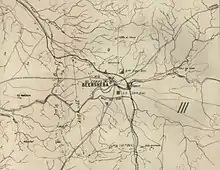
The natural features around the town favoured defence. Beersheba, on a rolling plain devoid of trees or water to its west, was dotted with hills and tells to its north, south and east. These geographic features were strengthened by a series of entrenchments, fortifications and redoubts.[41][42] Well-constructed trenches, protected by wire, fortified defences north-west, west and south-west of Beersheba. This semicircle of entrenchments included well-sited redoubts on a series of high points extending up to 4 miles (6.4 km) from the town.[18][41][Note 6]
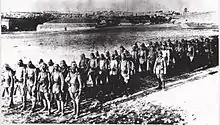
Defending the east of Beersheba, Tel el Saba redoubt was manned by a battalion of the 48th Regiment and a machine-gun company, while the 6th and 8th Regiments of the 3rd Cavalry Division were deployed on the high ground to the north-east (in the foothills of the Judean Hills) to guard the Jerusalem road and keep Beersheba from being surrounded.[43] To the west and south-west of the town, the 27th Division's 67th and 81st Infantry Regiments were deployed in a fortified semicircular line of deep trenches and redoubts strengthened by barbed wire. These regiments consisted primarily of "Arab farmers from the surrounding region, and although inexperienced fighters they were defending their own fields".[21]
The defenders were deployed as follows:
- the 67th Infantry and the 81st Infantry Regiments (27th Division), defended Beersheba from the west and from south of the Wadi el Saba,
- the 3rd Cavalry Division was deployed in the high ground northeast of the town,
- one battalion of the 48th Infantry Regiment (16th Division) and a machine gun company defended Tel es Saba, with the remainder of the regiment deployed to the south from the Khalasa road to Ras Ghannam,[43]
- two battalions of the 2nd Regiment of Anatolian riflemen from Chanak (commanded by German officers) were deployed in trenches defending the south-east, facing the open plain south of Tel el Saba.[21][43]
EEF
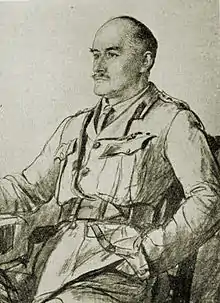
The EEF was reinforced by the arrival in June and July of the 7th and 8th Mounted Brigades and the 60th (London) Division, transferred from Salonika; the 75th Division was formed in Egypt from Territorial and Indian battalions.[44][45] The arrival of the two mounted brigades, made it possible to expand and reorganise the Desert Column into three divisions (with the establishment of the Yeomanry Mounted Division).[46][47][48] However, 5,150 infantry and 400 yeomanry reinforcements were still needed in July to bring the infantry and mounted divisions that had taken part in the first two battles for Gaza, back up to strength.[49] The last reinforcements to arrive before the battle, the 10th (Irish) Division, were marching north from Rafa on 29 October.[50]
After General Edmund Allenby took command of the EEF at midnight on 28 June,[51][52] he reorganised the force to reflect contemporary thinking and to resemble the organisation of Allenby's army in France. He deactivated Eastern Force, establishing in its place two infantry and one mounted corps under his command:[53][54] the XX, the XXI Corps and the Desert Mounted Corps (formerly the Desert Column).[55]

By 30 October there were 47,500 rifles in the XX Corps' 53rd (Welsh) Division, the 60th (London) Division, and the 74th (Yeomanry) Division (with the 10th (Irish) Division and the 1/2nd County of London Yeomanry attached); and about 15,000 troopers in two divisions of the Desert Mounted Corps deploying for the attack on Beersheba.[56][57][58] Most of Allenby's infantry were Territorial Force divisions mobilised following the outbreak of the war. Several of the divisions had fought in the Gallipoli Campaign, the 52nd (Lowland) at Cape Helles, 53rd (Welsh) at Suvla Bay along with the 54th (East Anglian) Division. The 60th (London) Division had served on the Western Front and at Salonika. The 74th (Yeomanry) Division had recently been formed from 18 under–strength yeomanry regiments which had fought dismounted at Gallipoli. The 10th (Irish) Division, a New Army (K1) division, had also fought at Gallipoli, at Suvla Bay and Salonika. The light horse and mounted rifle brigades in the Anzac and the Australian Mounted Divisions had also fought dismounted on Gallipoli.[59][Note 7]
Plan of attack
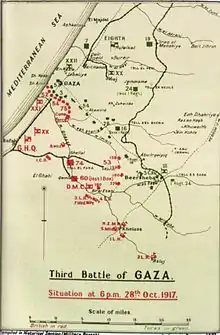
Chetwode's XX Corps (with the Imperial Camel Corps Brigade attached) and Chauvel's Desert Mounted Corps (less the Yeomanry Mounted Division at Shellal), would make the main attack on Beersheba, while Bulfin's XXI Corps held the Gaza sector entrenchments and the front line to the Mediterranean coast.[60][61] Success at Beersheba depended on an attack with "resolution and vigour" because if unsuccessful, the dry, inhospitable country on the northern edge of the Negev would force attacking divisions to retire.[42][62]
Allenby's army-level and corps-level plans set out their objectives.[63] The XX Corps would advance from the south and south-west towards Beersheba, with the 60th (London) and 74th (Yeomanry) Divisions attacking the defences between the Khalassa-to-Beersheba road and the Wadi Saba.[64][65] Beginning immediately after dawn, the two infantry divisions would attack the outer defences on the high ground west and south-west of Beersheba in two stages, preceded by a bombardment. The left of the 60th (London) Division was to capture Hill 1070 (also known as Point/Hill 1069, part of the outer defences), while the main attack would begin when commanders of the 60th (London) and 74th (Yeomanry) Divisions were "satisfied that the wire was adequately cut". Their objectives were the trenches defending Beersheba and the Ottoman artillery batteries supporting them. Subsequently, they would hold the high ground on the west side of the town.[41][65][66][67]
Their left flank would be protected by "Smith's Group", consisting of the 158th Brigade (53rd Division) minus two battalions and the Imperial Camel Brigade. This group, under orders from the 74th (Yeomanry) Division, held the section of the Beersheba defence stretching north from the Wadi es Saba towards the Beersheba-to-Tel el Fara road.[41][66][67] The 53rd (Welsh) Division (with a brigade of the 10th (Irish) Division attached) was deployed on a 7-mile-long (11 km) line stretching west to about 1 mile (1.6 km) from the Karm railway station. They would watch for a counterattack from Hareira to the north, and capture the Beersheba garrison if it attempted to retreat along the road to Gaza. The remainder of the 10th (Irish) Division in XX Corps reserve was deployed east of the Wadi Ghuzzee at Shellal, where the Yeomanry Mounted Division (under Allenby) was to deploy a line of outposts connecting the XX and XXI Corps (holding the Gaza end of the line near el Mendur).[41][66][67]
The first stage of the attack by the Anzac Mounted Division, with the Australian Mounted Division in reserve, was to seize the Ottoman garrison's northern line of retreat by cutting the road to Jerusalem. Secondly, the mounted divisions were to attack and capture Beersheba (and its water wells) as quickly as possible to prevent the retreat of the Ottoman garrison.[65] On their left, the 7th Mounted Brigade's two regiments would link the XX Corps with the Desert Mounted Corps and attack the defences south of the town.[64][65]
Preliminary moves
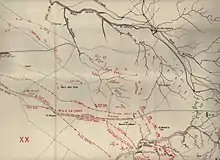
Beginning on 24 October the Australian Mounted Division moved to Rashid Bek; the New Zealand Mounted Rifles Brigade moved to Esani, following the 2nd Light Horse Brigade's move to Bir 'Asluj 15 miles (24 km) away, to develop the water supply, which remained inadequate on 27 October (when two regiments of the brigade at Asluj were sent back to water at Khalasa—returning at dawn on 29 October—so there would be enough water for the Anzac Mounted Division at Asluj).[68][69][70][71] Allenby inspected the three projects to expand the water supply, at Khalasa 10 miles (16 km) from Esani, at Asluj, and the project at Shellal. He inspected preparations for the building of the forward railway (to begin simultaneously with the attack), and the rear units working in the deserted camps, making them appear still in use. He also inspected EEF formations as they made their way towards their assembly places, and while they waited in the forward areas. Allenby instilled in all a sense of the importance he attached to their work.[68] However, the Ottoman forces were informed of the build-up: "There is evidence that they [Yildirim Army Group] were fairly accurately informed of the British dispositions".[72] This was confirmed on 28 October when the Yildirim Army Group knew that the camps at Khan Yunis and Rafa were empty. They placed three infantry divisions east of the Wadi Ghuzzee with a fourth—the 10th (Irish) Division—approaching the wadi, estimating more cavalry at Asluj and Khalasa.[73]
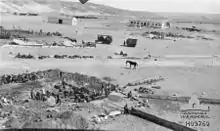
Reconnaissance continued on Sunday, 28 October when the 5th Mounted Brigade rode to Ras Hablein, south of the Ras Ghannam area, reporting Ottoman troops occupying redoubts and a trench line east of Abu Shar and tents at Ras Hablein. The 6th Light Horse Regiment of the 2nd Light Horse Brigade, reconnoitred the Wadi Shegeib el Soghair area, reporting that the Ras Ghannam entrenchments were occupied by Ottoman Army soldiers.[69][71][74] By 13:15 on 29 October, the water supply at Asluj was reported capable of providing one "drink per day per horse for the whole division". An hour later the Desert Mounted Corps ordered the Anzac Mounted Division (less two brigades) to move from Esani to Asluj "tonight", and at dusk the Australian Mounted Division began their night march (following the Anzac Mounted Division) to Esani.[69][71][74][75][76]
While the Australian Mounted Division and the Anzac Mounted Division prepared to move east on 29 October,[75][76] the guns of British and French naval ships on the Mediterranean Sea joined in the bombardment of Gaza (which had begun two days earlier).[77] Under orders from XX Corps the Yeomanry Mounted Division, detached from the Desert Mounted Corps, moved from the Mediterranean coast to the Wadi Ghuzzee between Shellal and Tel el Fara; the infantry brigades of the 74th (Yeomanry) Division advanced to the right of the 53rd (Welsh) Division, holding the line in front of el Buqqar while the leading units of the 60th (London) Division approached Maalaga and the 10th (Irish) Division approached from Rafa. By 21:15 on 29 October, the Anzac Mounted Division (Desert Mounted Corps) had assembled at Asluj, while the Australian Mounted Division began to arrive at Khalasa from Esani.[50][71]
Approach marches, 30–31 October
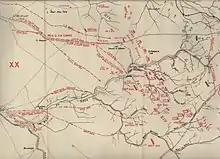
The extensive and complex arrangements required to support the infantry attack from the west and the mounted attack from the east were completed by 30 October, when these attacking forces moved to positions within a day's march of their deployment.[78] Three divisions of XX Corps were concentrated in position: the 53rd (Welsh) Division at Goz el Geleib, the 60th (London) Division at Esani and the 74th (Yeomanry) Division at Khasif.[79] In preparation for their final approach march, the Civil Service Rifles and the Queen's Westminster Rifles (179th Brigade, 60th Division) were supplied with tea and rum for the following day. In their haversack rations were five onions, a tin of bully beef, a slice of cooked bacon, biscuits and dates.[80][81]
Chetwode opened his advance XX Corps headquarters at 17:00 at el Buqqar, and a half-hour later the infantry approach marches began. The 74th (Yeomanry) Division advanced along the Tel el Fara-to-Beersheba road led by the 229th Brigade, with one brigade following to the north and another to the south of the road. The 60th (London) Division advanced from Abu Ghalyun, Bir el Esani and Rashid Bek in three brigade groups, the 181st Brigade (on the left) advanced north and south of the Wadi es Saba, while the 179th Brigade (on the right) advanced towards the Khalasa-to-Beersheba road. Their advance guard, the 2/13th Battalion, London Regiment, was attacked as they crossed the Wadi Halgon. Behind the 179th Brigade, the 180th Brigade in reserve advanced straight across from Esani. The XX Corps Cavalry Regiment, the Westminster Dragoons concentrated to the south-east, covering the corps' right flank with orders to connect with the Desert Mounted Corps south of Beersheba. In the rear, the 53rd (Welsh) Division dug in along the Wadi Hanafish; the XX Corps artillery, the last to move, approached from el Buqqar to the Wadi Abushar, arriving at 03:15 on 31 October.[82][Note 8] Reconnaissance had established that the Tel el Fara-to-Beersheba track (via Khasif and el Buqqar) could be used by the mechanical transport required to move the heavy gun battery and ammunition into position before the attack. This job was done by 135 lorries in three companies which travelled across the Sinai from Cairo. In addition, ammunition was hauled forward by 134 Holt tractors.[83]
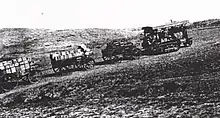
The deployment of the infantry divisions was completed by the light of a full moon.[84] The 60th (London) Division linked with the 74th (Yeomanry) Division, after reaching their line of deployment at 03:25 while being targeted by rifle and shell fire.[85] As the Civil Service Rifles battalion approached to between 2,000 and 2,500 yards (1,800 and 2,300 m) from the Ottoman trenches, snipers fired on them.[80]
Before they could deploy, the two mounted divisions of Desert Mounted Corps had to ride between 25 to 35 miles (40 to 56 km), to bring them within striking distance of Beersheba at dawn on 31 October. Chauvel arrived at the Asluj Desert Mounted Corps headquarters during the afternoon of 30 October, when arrangements were completed for the continuation of the marches by the Anzac and Australian Mounted Divisions.[86][87] The Anzac Mounted Division was at Asluj, the Australian Mounted Division was at Khalasa (three hours' march behind) and the 7th Mounted Brigade was at Bir el Esani.[88][Note 9] The No. 11 Light Armoured Motor Battery (LAMB) was sent ahead of the Anzac Mounted Division to a position on the north slopes of the Gebel el Shereif to guard their flank as they moved forward. The divisional headquarters at Asluj closed at 17:30, and the last Anzac divisional troops left the railway station a half-hour later.[58][71][74][77]

From Asluj, the Anzac Mounted Division rode along the banks of the Wadi Imshash for about 15 kilometres (9.3 mi), arriving about midnight at the crossroads east of Thaffha. Here, the division paused for two hours before continuing in two columns. The 2nd Light Horse Brigade column rode northeast, following the track to Bir Arara where the leading regiment, the 7th Light Horse arrived at 02:00. They waited until 04:00 for the remainder of the brigade to arrive before continuing the advance towards Bir el Hamman. The 2nd Light Horse Brigade encountered an Ottoman outpost, occupying Hill 1390 1 mile (1.6 km) south-west of Hamam, which fired on a screen of the New Zealand Mounted Rifle Brigade. The 7th Light Horse Regiment moved forward to occupy the Hill 1200-to-Hill 1150 line 1.5 miles (2.4 km) north of Hamam, at 07:00, while the brigade remained at Bir el Hamam until 09:30.[69][71][89] The Anzac Mounted Division (less the 2nd Light Horse Brigade)—led by the Wellington Mounted Rifles Regiment (New Zealand Mounted Rifles Brigade) in the second column—rode north from the crossroads east of Thaffha past Goz Esh Shegeib. Here a small force of Ottoman soldiers were "brushed aside" before the advance continued to Iswaiwin. As the New Zealand Mounted Rifles Brigade approached Iswaiwin at 06:45, the 2nd Light Horse Brigade could be seen arriving at Bir el Hamman. Opposition units were seen in trenches near Hill 1070 (also known as Hill 1069, the EEF infantry's first objective on the western side of Beersheba), and about two hostile squadrons were seen moving north from Beersheba towards Kh el Omry. Dust and smoke were also seen rising from Chetwode's XX Corps artillery bombardment, west and south-west of Beersheba. After passing Iswaiwin, the Anzac Mounted Division concentrated near Khashim Zanna, on a line from Bir el Hamman to Bir Salim Abu Irgeig.[19][71][90][91][Note 10]
Following in reserve, the Australian Mounted Division marched out of Khalasa at 17:00 to arrive at Asluj at 20:30 on 30 October. After watering only their transport animals, they began their approach march from Asluj at 24:00 (following the Anzac Mounted Division on their 32 to 34 miles (51 to 55 km) ride) arriving at 04:50 on 31 October at the Thaffha crossroads. The division continued, until linking with Desert Mounted Corps headquarters at 10:15 and establishing their divisional headquarters at Khashim Zanna (on Hill 1180) at 12:30.[76][92] Khashm Zanna, 5 miles (8.0 km) from Beersheba and 3 miles (4.8 km) south of the main Ottoman defence on the eastern side of Beersheba at Tel el Saba, gave a clear view of the Beersheba plain and the battlefield. Their headquarters joined the headquarters of the Anzac Mounted Division and the Desert Mounted Corps, which had arrived at dawn on 31 October.[91][93][94][95]
The 7th Mounted Brigade advanced direct from Bir el Esani to the vicinity of Goz en Naam, cutting the Khalasa-to-Beersheba road and holding a line connecting the XX Corps on their left and the Australian Mounted Division on their right.[88][92][96] At 07:45 the brigade reported to the EEF by pigeon that they were holding a position from Goz el Namm to Point 1210, and that Ras Harlein and Ras Ghannan were held by unknown numbers of defenders.[97]
Battle
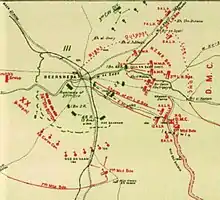
Bombardment
The coordinated EEF bombardment began a "multiple–dimensional phased attack"[63] at 05:55, including successful wire-cutting on two divisional fronts. The artillery was to subsequently shift its fire to target the Ottoman fortifications, trench lines and rear areas. During these bombardments, the newly organised Heavy Artillery Groups were to conduct counter–battery work targeting Ottoman guns.[63][98] During this bombardment, shells from Ottoman counter-battery artillery fire fell on some of the assembled infantry; the 231st Brigade, 74th (Yeomanry) Division, and the 179th Brigade, 60th (London) Division, suffered severely:[99][100]
High explosive is bursting between us and the guns. Shrapnel comes over. Burst above us and rains down on us. Steady stream of wounds. Young Morrison, elbow. Brown, arm. Low, head, and so on and so on. We ought to move back to our old position. Stupid to be in front of these guns which are banging away all the time, kicking up hells delight, and drawing fire which we are a catching.
— Calcutt, Queen's Westminster Rifles, 179th Brigade, 60th (London) Division[100]
The EEF bombardment was suspended to allow dust to settle and artillery observers to check their targets; the wire appeared to be still intact,[Note 11] The bombardment resumed at 07:45.[98]
Preliminary attacks
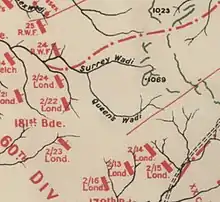
At 08:20 a final, intense ten-minute bombardment targeted the Ottoman trenches 30 yards (27 m) in front of the infantry, to cover the work of wire-cutting units. They cut gaps in the barbed wire entanglements so the battalions of the 181st Brigade, 60th (London) Division could launch their attack on Hill 1070 (also known as Hill 1069). Then the 2/22nd Battalion, London Regiment advanced to attack the redoubt on the hill, while the 2/24th Battalion, London Regiment attacked some defences just to the north. The 181st Brigade quickly captured both objectives, taking 90 prisoners while suffering about 100 casualties.[101][102]
Our guns give a bang followed by another and we are smothered with flying bits. A PREMATURE BURST from our guns 200 yards (180 m) away. Cries of that's got us. Several casualties. One fellow (Rogers) jaw all blown to fragments. Blood spurting from nose. Gives one or two heaves. Is bound up but expires and is carried away. High explosive busting lower down near the guns does not get them and they continue to bark in our ears. We [are] getting not only the report but the hungry rasp of the flame. Ground and stones and tunics spattered with blood but we still stay in front of the guns! I take cover behind my spare water bottle and gas helmet so far as head is concerned ... We wonder how things are going. We have heard the bombardment and the machine guns, and the Stokes gun barrage of ten minutes which was to precede the assault by the 15th and 14th [Regiments, 179th Brigade] so presumably the dominating hill on our left, Hill 1070, has come off all right.
— Calcutt Queen's Westminster Rifles 179th Brigade 60th (London) Division[100]
During this attack, the leading brigades of the 74th (Yeomanry) Division advanced to conform to the 181st Brigade's advance. As a consequence of accurate shrapnel fire the 231st Brigade moved slightly to the right forcing the 230th Brigade (on the left), to fill the gap with two supporting companies of the 10th Buffs. As the 74th (Yeomanry) Division's advance approached the Ottoman trenches, heavy machine-gun fire slowed their progress. By 10:40, the 231st Brigade was within 500 yards (460 m) of the front line; the 230th Brigade was about 400 yards (370 m) behind. These advances (and the capture of Hill 1070) made it possible for the EEF's heavy guns to move forward, to target barbed wire protecting the main Ottoman defensive line and Ottoman observation posts.[101][103]
XX Corps attack
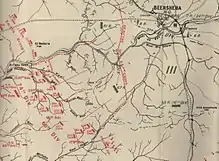
With the EEF guns moved forward into captured Ottoman positions, shelling recommenced at 10:30, continuing with pauses to let the dust settle until noon, when there was still some concern that the wire in front of the 74th (Yeomanry) Division had not been cut. "In practice, much of the barbed wire had to be cut by the advancing troops as they came across the obstacle."[104]
The commanders of the 60th (London) and 74th (Yeomanry) Divisions decided to begin the main assault at 12:15, screened by dust and smoke from another bombardment. Four brigades—the 179th, the 181st, (60th Division) the 231st and the 230th (74th Division)—launched the attack with two battalions in the first line (except the 181st Brigade, which deployed three). The first-line battalions were mainly organised with two of their "four companies in first line, each on a front of two platoons, the companies in two 'waves' each of two lines", advancing between 50 and 100 yards (46 and 91 m) apart with a third wave to follow (if required) 300 yards (270 m) behind. The 2/22nd Battalion, London Regiment remained to guard Hill 1070.[104][105]
At 12 o'clock we heard that Hill 1070 had been taken and at 12.15 we went over the top. I was in the front of the first assaulting wave as platoon runner to Sergeant Boasted. We were in a little wadi behind a ridge. It was necessary to get over the ridge, and off the skyline as quickly as possible. Once over the ridge it was a rush down the valley and a charge up the opposite ridge where the Turkish trenches were at the top. Over the ridge I noticed at once that there were scattered groups of machine gunners ... in emplacements of rocks and shallow trench. They were out there to keep a protecting fire on the Turkish trenches. To me they seemed to be right in the open and in suicide position ... Once over the ridge we all rushed down the slope past the machine gunners. Bullets were falling everywhere ... I just went on running, yelling, cheering and shouting out the Sergeant's orders at the top of my voice. Every minute I was expecting a bullet to get me but my good luck stuck to me ... When we got to the Turkish trenches we jumped straight in and shot or bayoneted or took prisoner all that were there. I was lucky, the section of trench I jumped in was empty. On either side I could hear shooting and fighting but it was soon all over ... We advanced about 300 yards beyond the trenches where we worked "like hell" with our entrenching tools digging ourselves in.
The 2/15th Battalion, London Regiment on the right of the 179th Brigade, suffered severely from machine-gun fire; however, when the machine-gun positions were captured all resistance ceased.[108] The 24th and 25th Battalions of the Royal Welch Fusiliers of the 231st Brigade (74th Division) "met with stout resistance" at one location, where the Ottoman soldiers fought to the last man.[108] Intense hand-to-hand fighting in the trenches continued until 13:30, when the Ottoman trench line on the western side of Beersheba (stretching from the Khalasa-to-Beersheba road in the south to the Wadi es Saba in the north) was captured.[109] For his actions Corporal John Collins was later awarded the Victoria Cross.[110] During this fighting, the two Royal Welch Fusiliers battalions captured three-quarters of the prisoners (and suffered two-thirds of the casualties) of the XX Corps.[108] The XX Corps captured 419 prisoners, six guns, "numerous machine guns" and materiel; casualties included 136 killed, 1,010 wounded and five missing (most casualties from shrapnel from Ottoman artillery and machine guns during the preliminary bombardment).[107][109][111][112][Note 12]
The final objective of the XX Corps, as described in the "XX Corps Instructions", was to destroy the opposition units at Beersheba, in cooperation with the Desert Mounted Corps.[113] The instructions continued, "The objective of the attack by the XX Corps on Z day is the capture of the line of works between the Khelasa–Beersheba road and the Wadi esh Sabe, the capture of the enemy guns between Beersheba and the trenches west of the town, and in co-operation with the cavalry to drive the enemy from the remainder of his defences at Beersheba".[114] However, it is claimed, "West of Beersheba the XX Corps had all its objectives and could without doubt have captured Beersheba itself before the mounted troops."[115] The objective of the infantry divisions was not to capture Beersheba, but to keep the main garrison occupied while the Desert Mounted Corps captured the town.[116] The official British historian stated, "The capture of Beersheba itself was the task of the Desert Mounted Corps, which required the water in the town for its horses".[117] "XX Corps Instructions" stated: "outposts will be placed approximately on the 'Blue Line' (Tracing "A") to cover the consolidation of the position and reorganization of the attacking troops." No units were to go beyond the 'Blue Line' without orders or to capture guns.[118]
After the capture of the main trenches, some guns from the 60th (London) and 74th (Yeomanry) Divisions were to target defences north and south of the main attack; others were deployed forward into the captured position to pursue the Ottoman forces with fire, attack stubborn defenders and deal with counterattacks.[119] A further advance by the 2/13th Battalion, London Regiment, 60th (London) Division, through the forward infantry battalions, attacked and captured two field guns beyond the final objective with Lewis Guns after forcing the Ottoman detachments to retreat.[108] Desert Mounted Corps headquarters reported seeing Ottoman troops retiring into Beersheba at midday,[120] but it was not until late in the afternoon that two infantry brigades of the 54th (East Anglian) Division and the Imperial Camel Brigade, monitoring these defences north of the Wadi es Saba, became uncertain that the trenches were still defended. The 230th Brigade (74th Division) was ordered to launch an attack at 18:00 and an hour later, the reserve 230th Brigade occupied the northern trenches "with little difficulty". They had been abandoned by all but a few snipers, since Beersheba had already been captured by the light-horsemen's charge which had begun at 16:30.[109][121][122] The 60th (London) and 74th (Yeomanry) Divisions bivouacked on the battlefield behind a line of outposts; the 53rd (Welsh) Division remained, covering the western flank while the 10th (Irish) Division bivouacked at Goz el Basal.[123]
Ottoman reinforcements and withdrawals
With the loss of two battalions of the 67th Regiment defending the western side of Beersheba, Ismet Bey (commanding the Beersheba garrison) sent in his last reserve (the third battalion of the 2nd Regiment) to reinforce the south-western sector. At the same time, he withdrew two companies of the 81st Regiment (defending the area north of the Wadi es Saba) back into Beersheba.[43]
Desert Mounted Corps attacks
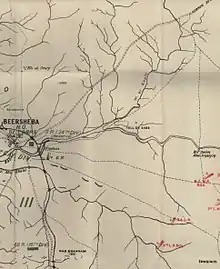
The Anzac and the Australian Mounted Divisions rode between 25 and 35 miles (40 and 56 km) from Asluj and Khalasa respectively, circling south of Beersheba during the night of 30–31 October to get into position to attack from the east.[124] The Australian Mounted Division (in Desert Mounted Corps reserve) deployed southeast of Beersheba (near Khashim Zanna) to support the Anzac Mounted Division's attacks.[109] The 8th Light Horse Regiment (3rd Light Horse Brigade, Australian Mounted Division) was deployed as a screen, linking with the 7th Mounted Brigade on their left and the New Zealand Mounted Rifle Brigade on their right, in front of the Australian Mounted Division.[125]
The first objective of the Anzac Mounted Division was to cut the road from Beersheba to Hebron and Jerusalem, about 6 miles (9.7 km) north-east of the town at Tel el Sakaty (also known as Sqati), to prevent reinforcement and retreat in that direction. The second objective, the redoubt on the height of Tel el Saba (which dominated the east side of Beersheba north and south) had to be captured, before an attack across the open ground could be launched.[126][127] By dawn the Anzac Mounted Division was deployed with the New Zealand Mounted Rifles Brigade at Bir Salim abu Irqaiyiq, and the 1st Light Horse Brigade in support behind the New Zealanders, with the 2nd Light Horse Brigade concentrated near Bir Hammam.[76][128][129][Note 13]
While the infantry battle was being fought on the west side of Beersheba, Edward Chaytor (commanding the Anzac Mounted Division) ordered the 2nd Light Horse Brigade to attack Tel el Sakaty at 08:00 and gain control of the Jerusalem road. At the same time, he ordered the New Zealand Mounted Rifles Brigade (with the 1st Light Horse Brigade in support) to attack the Ottoman garrison holding fortifications on Tel el Saba. These hard-fought attacks continued into the afternoon, when two regiments of the 3rd Light Horse Brigade (Australian Mounted Division) were ordered to reinforce the Anzac Mounted Division's attack on Tel el Saba.[95][130][131][132][133]
If there was one lesson more than another I had learned at Magdhaba and Rafa, it was patience, and not to expect things to happen too quickly. At Beersheba, although progress was slow, there was never that deadly pause which is so disconcerting to a commander.
— Lieutenant General Chauvel, commanding Desert Mounted Corps[96]
Tel el Sakaty
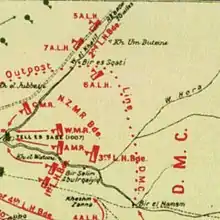
Soon after the Anzac Mounted Division's 2nd Light Horse and the New Zealand Mounted Rifle Brigades advances began at 09:00, they were targeted by heavy artillery fire from the hills on the north side of the Beersheba-to-Jerusalem road. The two brigades were also forced to slow their advance across the plain, cut by a number of narrow, deep wadis, which made fast riding impossible. At this time, shells from the XX Corps' bombardment could be seen bursting on the hills west of Beersheba.[134][135]
At 10:05, the leading troops of the 7th Light Horse Regiment (2nd Light Horse Brigade; not to be confused with the 7th Mounted Brigade near Ras Ghannam to the south of Beersheba), were seen approaching Tel el Sakaty. By 11:17, they reported their advance was increasingly difficult due to hostile units defending the high ground south of Sakaty. An Ottoman convoy of 10 wagons was seen leaving Beersheba on the road to Jerusalem, and the regiment was ordered to cut the road before the convoy escaped. Through heavy shell and shrapnel bombardment and point-blank machine-gun fire, they galloped to a position just south of the road. While an artillery battery got into position to support the light-horse regiment's attack on Tel el Sakaty, at 11:40 the 5th Light Horse Regiment (2nd Light Horse Brigade) was ordered to engage the Ottoman left flank. As they crossed the Wadi Khalil and the road to Jerusalem, the 5th Light Horse Regiment was also heavily shelled by artillery and fired on by machine guns from the high ground north and northwest overlooking the area. Five minutes later, the 7th Light Horse Regiment cut the road and captured the convoy (47 prisoners, eight horses and eight wagons loaded with forage). However, the regiment was pinned down just beyond, in a small wadi in the rough country north of Wadi Khalil by the gun battery and machine guns located on Tel el Sakaty (above the road). With the arrival of the 5th Light Horse Regiment, by 13:30 the two regiments (supported by artillery) were advancing to attack the high ground northeast of Sakaty. At 14:45, the 2nd Light Horse Brigade reported that three Ottoman guns appeared to have been put out of action by EEF artillery fire. While they continued to hold the road to Jerusalem, the 5th and 7th Light Horse Regiments found cover in the Wadi Aiyan (although targeted from the high ground north of Sakaty by five Ottoman machine guns) where they remained until evening. The 1,100-strong Ottoman 3rd Cavalry Division defended this hilly area north of Beersheba.[69][71][89][131][136][137]
The 5th and 7th Light Horse Regiments (2nd Light Horse Brigade) continued to hold an outpost line during the night, covering the Beersheba-to-Jerusalem road and the northeastern approaches behind Tel el Sakaty. The remainder of the 7th Light Horse Regiment withdrew 1 mile (1.6 km) south at 18:00 to bivouac for the night, with the 5th Light Horse Regiment on the right. One squadron at a time was sent to water at Bir el Hamam, and a good water supply was also found in the Wadi Hora by the 2nd Light Horse Brigade. The 7th Light Horse Regiment with two men injured (one wounded in action), captured a total of 49 prisoners (39 of whom were captured in the Wadi Aiyan).[71][89][137][Note 14]
Tel el Saba
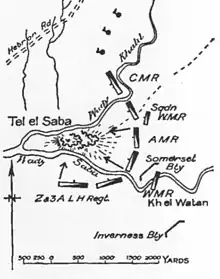
At about 08:55, some 200 Ottoman cavalry with transport and guns were seen moving north from Beersheba along the road to Jerusalem; shortly afterwards, an aircraft reported seeing a large camp at Tel el Saba.[71] This was the main Ottoman defensive position on the east side of Beersheba, located on the prominent 20 acres (8.1 ha) of Tel el Saba and dominating the eastern side of the town. With its steep sides littered by boulders, this flat–topped hill was strongly garrisoned by a battalion (described as 300 rifles and a machine gun company of eight machine guns) deployed for general defence.[134][138][139] Without trees or scrub for cover, the area "was swept by the fire of numerous machine guns and field guns concealed in the town ... [and] on the strongly entrenched hill of Tel el Saba." Enfilade fire from two directions would have annihilated attackers.[139]
At 09:10 the Anzac Mounted Division's New Zealand Mounted Rifle Brigade advanced towards Tel el Saba with the intention of enveloping it from the north, supported by Royal Horse Artillery (RHA) (which came into action at a range of 3,000 yards (2,700 m)). However, at that distance the artillery was unable to make a dent on the Ottoman defence.[140][Note 15] The brigade advanced with the Canterbury Mounted Rifle Regiment on the right and the Auckland Mounted Rifle Regiment on the left, each supported by four machine guns.[141] Receiving heavy machine-gun and artillery fire, the Auckland Mounted Rifles Regiment formed an advance guard and rode to within 1,800 yards (1,600 m) of Tel el Saba across open country to the Wadi Saba. Here excellent cover for horses and machine guns was found, as well as good positions from which machine gunners could provide effective suppressive fire. The frontal attack would be launched on foot, since mounted attack from any direction was impossible. The Auckland regiment launched their attack under the north bank of the wadi, advancing on a narrow front under the good cover provided by the wadi. Due to heavy Ottoman machine-gun fire, from a point 800 yards (730 m) from the Ottoman position the attack was slowed; one troop at a time advanced under cover from New Zealand machine guns.[140][142][143]
By 10:00, Chaytor ordered the 1st Light Horse Brigade to reinforce the attack on Tel el Saba from the south and cooperate in the attack. The brigade sent the 3rd Light Horse Regiment (1st Light Horse Brigade), with one subsection of a machine-gun squadron, to cover the New Zealanders' left flank. At 10:15 they made a "dashing advance" across the plain against artillery and machine-gun fire. Shortly afterwards two of the squadrons took up an exposed position on the bank of the wadi, covering the attackers' left flank. Heavy machine gun, Hotchkiss and rifle fire targeted the Ottoman position, providing covering fire for the Auckland Mounted Rifles Regiment attack.[144][145]
The Auckland and Canterbury Mounted Rifles Regiments engaged Ottoman soldiers near a bend in the Wadi Saba southeast of Tel el Saba at 11:00; a dismounted attack was launched by the 3rd Light Horse Regiment (with one troop from the Auckland Mounted Rifle Regiment) along the south bank of the Wadi Saba. This force covered the main attack by the rest of the Auckland Mounted Rifles Regiment, which advanced on the north bank supported by machine-gun cover fire.[71][142][146] At the same time, the Inverness Battery attached to the 1st Light Horse Brigade came into action against Tel el Saba; it covered the advances of the 3rd Light Horse Regiment and the Somerset Battery, which had moved to within 1,300 yards (1,200 m) of Tel el Saba. By now, the attacking artillery was heavily shelling both Ottoman defensive positions and the hard-to-find Ottoman machine-gun positions. Their positions were communicated to the artillery by flags, and accurate shelling targeted them. Hostile aircraft began to circle the battlefield, dropping bombs on groups of led horses with many casualties.[140][142][147]
By 13:00 the 2nd Light Horse Regiment (1st Light Horse Brigade) was ordered to reinforce the left of the 3rd Light Horse Regiment. About a half-hour later, the Australian Mounted Division's 9th and 10th Light Horse Regiments (3rd Light Horse Brigade) and two artillery batteries were also ordered to reinforce the Anzac Mounted Division's attack on Tel el Saba.[131][132][148][149][Note 16] The horses of the New Zealand Mounted Rifle Brigade were all watered at 13:10 in the Wadi Saba.[71]
Orders for a general attack on Tel el Saba issued at 13:55, while the 3rd Light Horse Brigade and B Battery, Honourable Artillery Company (HAC) moved to reinforce the attack at 14:00. At 14:05, a squadron of the 2nd Light Horse Regiment (1st Light Horse Brigade) was deployed to give effective covering fire on the right flank with machine and Hotchkiss guns and rifles, while the rest of the 2nd Light Horse Regiment attacked and captured two blockhouses. From these recent captures, they targeted the flank of the Tel el Saba defences, causing the defenders' fire to "slacken". The Canterbury Mounted Rifles Regiment was, by now across the Wadi Khalil and firing on the rear of the Tel el Saba position, but they were held up by Ottoman defenders on the slopes of the hills overlooking the Beersheba-to-Jerusalem road. The Australian and New Zealand troops from across the Wadi Saba covered the attack on Tel el Saba by the 3rd Light Horse Regiment (1st Light Horse Brigade) on the left, while the Auckland Mounted Rifles Regiment on the right closed in from the northeast.[71][142][149][150][151]
The Auckland Mounted Rifles Regiment began their frontal assault at 14:05, advancing steadily in short rushes under cover of all available guns and machine guns, to gain the trenches on a hill on the eastern flank 400 yards (370 m) east of Tel el Saba at 14:40. Here, they captured 60 prisoners and three machine guns. Two of the captured machine guns were turned against the main Ottoman redoubt, greatly weakening their position. The attacking troops of the Auckland Mounted Rifles Regiment reorganised before launching their final assault. They "moved forward steadily, and then rushed Tel el Saba, which fell at 15:00" when a machine gun and several prisoners were captured.[142][145] This captured machine gun was turned on escaping Ottoman soldiers running towards Beersheba. They killed about 25 Ottoman defenders on Tel el Saba and several others in the surrounding country; while 132 prisoners, four machine guns, rifles, ammunition and horses were captured. The Auckland Mounted Rifles Regiment had seven killed and 200 wounded.[142] One squadron of the 2nd Light Horse Regiment and one squadron of 3rd Light Horse Regiment (1st Light Horse Brigade) followed the retreating Ottoman soldiers to take up a position near the junction of the wadis to the west of Tel el Saba. From there, they fired on the retiring Ottoman units moving northwest over the high ground. At the same time, one squadron of the 2nd Light Horse Regiment (1st Light Horse Brigade) advanced against a counterattack launched from Beersheba, "and drove it off".[142][143][149][151][152] Orders were received by the New Zealand Mounted Rifle Brigade at 17:50 to put Tel el Saba "in a state of defence" against the possibility of more counterattacks.[141]
Chaytor began to move his headquarters to Tel el Saba when he saw that it had been captured at 15:00. Ottoman artillery began to target Tel el Saba a quarter-hour after its capture, and several hostile aircraft bombed the Tel. The attacks continued throughout the afternoon, and when the rest of the Anzac Divisional Headquarters moved to Tel el Saba at 18:00, they were machine-gunned by hostile aircraft.[71][145] Hostile aircraft dropped five bombs at 17:00 on the 3rd Light Horse Brigade, killing four and wounding twenty-eight Australians. Forty-six horses were killed, and sixteen wounded.[153] A bomb was dropped on the 4th Light Horse Field Ambulance about the same time: "[s]ome six horses lay disembowlled, blood running everywhere".[154]
Just before sunset, the bearers returned from watering their horses ... 16 men with two horses each. As they dismounted, a German Taube came over – for the third time in 24 hours! With the setting sun behind him, and flying very low, it was impossible to see him until he was right overhead. I then saw the observer leaning out of the cockpit and the bomb leave the plane a few hundred feet up. The bomb burst on impact with the hard ground ... a direct hit on our bearer lines! He then turned and machine-gunned the camp, which added to the confusion. In the black dust and smoke, horses were rearing and neighing, while a few galloped madly away. Men were running and shrieking. Grabbed my medical haversack and ran about 20 yards to reach Brownjohn. His left leg had been blown off ... bleeding badly. His hand was also wounded. Staff Sergeant Stewart came running and together we got a tourniquet on his thigh in about 90 seconds ... Others were attending Oates, high right arm blown off, and Hay with his left buttock cut clean away. I found Hamlyn being dressed, with a bad wound over his heart, and in great pain. Gave him a shot of morphia. Cogan, Brown and Whitfield also slightly wounded. Bill Taylor was one of the worst types of casualty – shell shock. Apparently standing between two horses, only a few feet from the bomb, he was not hit. But we placed him on a stretcher, a pathetic, incoherent, weeping wreck, unable to walk.
— Warrant Officer P. M. Hamilton, 4th Light Horse Field Ambulance[155]
Ottoman response
During the final attack and capture of Tel el Saba, the 1st Light Horse Brigade reported at 14:20 a squadron of Ottoman cavalry leaving Beersheba and heading north.[71] At about 14:30, they targeted the Anzac divisional headquarters with high-explosive shells fired from Ottoman field guns.[71] However, after the capture of Tel el Saba "Beersheba was now untenable and, unknown to the attackers, a withdrawal was ordered".[156] German commander of the Eighth Army Kress von Kressenstein explained:
The understrength Turkish battalion entrusted with its defence doggedly held out with great courage and in so doing fulfilled its obligation. They held up two English cavalry divisions for six hours and had prevented them from expanding their outflanking manoeuvres around the Beersheba-Hebron road.[157]
Ismet Bey, commanding the Beersheba garrison, ordered a general retirement north from Beersheba at 16:00. He withdrew to the headquarters of the 143rd Regiment (XX Corps), located about six miles (9.7 km) north of Beersheba in the Judean Hills. At the same time, the 27th Division's engineers were ordered to destroy the Beersheba water supply.[158] The 48th Regiment, which had been deployed to defend the southern sector of the Beersheba defences from the Khalasa road to Ras Ghannam with one battalion and a machine-gun company defending Tel el Saba, was the first unit to retire. They moved to establish a rearguard position on the Wadi Saba before the Australian light horsemen captured the town.[158]
Beersheba
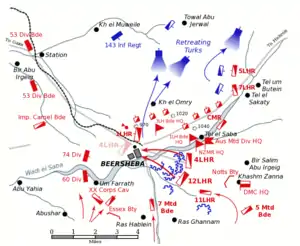
When Tel el Saba was captured at 15:00, the Anzac Mounted Division ordered an attack on the final objective: the town of Beersheba.[145] Chaytor ordered the 1st and the 3rd Light Horse Brigades to make a dismounted advance to the Beersheba Mosque in the northern outskirts of Beersheba, on a line stretching from Point 1020 2 miles (3.2 km) northwest of Tel el Saba to Point 970 south of the town.[19][159] These brigades were deployed with the 9th and 10th Light Horse Regiments (3rd Light Horse Brigade) on the right, the 1st Light Horse Brigade in the centre, and the 4th Light Horse Brigade (Australian Mounted Division) on their left.[149][151][153]
As the 1st and 3rd Light Horse Brigades continued their dismounted attacks, they were shelled by Ottoman artillery.[160] By 17:30 the 1st Light Horse Brigade had blocked all exits from Beersheba in the mosque area, including the hospital and barracks, capturing 96 prisoners, hospital staff, a priest, medical-corps details and 89 patients. The brigade established an outpost line in this sector, having suffered seven men killed and 83 wounded, 68 horses killed and 23 wounded.[149] The 10th Light Horse Regiment (3rd Light Horse Brigade) held an outpost line north of Beersheba during the night, when a group of Ottoman soldiers approached the line at about 21:00. They were surrounded on three sides before the regiment fired on them with machine-guns, killing 50.[161]
Light Horse charge
Allenby was at Chetwode's XX Corps headquarters at el Buqqar when he sent a telegram to Chauvel, ordering the capture of Beersheba "before nightfall".[145] However, before the telegram reached Chauvel, the 4th Light Horse Brigade was preparing for their mounted attack.[122][Note 18] Aerial reconnaissance had established the feasibility of such an attack, since the trenches stretching across the direction of the charge were not reinforced by barbed wire or horse pits.[162] The commander of the 12th Light Horse Regiment said:
It was clear to me that the job had to be done before dark, so I advised galloping the place as our only chance. I had some experience of successful mounted surprise attacks on the Boer camps in the South African war.
— Donald Cameron letter written in 1928 to Dr. C. E. W. Bean, official Australian historian[163]
When the possibility of a charge by mounted infantry riding home was raised in the Australian Mounted Division's Preliminary Instruction No. 1 (dated 26 October 1917), it suggested the bayonet was equal to the sword as a weapon for mounted attack "if used as a sword for pointing only". The Preliminary Instruction advised that the bayonet be hand-held, since controlling a horse during a charge would be difficult if the bayonet was fixed to the rifle.[Note 19] Divisional armourers were ordered to sharpen all bayonets "at once."[164][165] With a 17 inch blade, the 1907 pattern bayonet practically was a small sword.
At 11:30 Brigadier William Grant's 4th Light Horse Brigade arrived at Iswaiwin, where men and horses rested while the battle was being fought by the XX Corps and the Anzac Mounted Division, until 15:45 when they were ordered to saddle up "at once".[166][167] At 16:00 Grant sent for the commanders and seconds-in-command of the 4th and 12th Light Horse Regiments, issuing orders for their attack on Beersheba.[168][Note 20] The 4th Light Horse Regiment of Victorians and the New South Wales' 12th Light Horse Regiment were 4 miles (6.4 km) from Beersheba when they formed up behind a ridge about 1 mile (1.6 km) north of Hill 1280.[122][Note 21] On the left of the Anzac Mounted Division, the 4th Light Horse Regiment deployed north of the Iswaiwin-to-Beersheba road (also known as the Black W road), with the 12th Light Horse Regiment south of the road on their left. They were armed with "neither sword nor lance [but] ... with bayonets in their hands".[162][168] The regiment's "A", "B" and "C" squadrons formed three squadron lines (in that order) between 300 and 500 yards (270 and 460 m) apart, each squadron line extended to 5 yards (4.6 m). One subsection of the 4th Machine Gun Squadron was attached to each regiment,[162][167][169][Note 22] although Lieutenant Colonel Murray Bourchier (commander of the 4th Light Horse Regiment which fought in the trenches and redoubt) said "The Hotchkiss guns were useless, the fast pace affording no time to get them into action".[170]
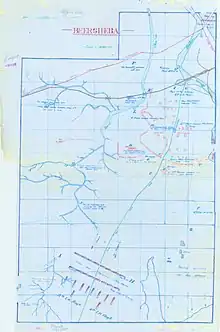
While "direction was given to the movement" by Grant[Note 24] and his brigade major, with Bourchier and Cameron leading their regiments[171] the first half-mile was covered at a walk.[172] Afterwards, Grant joined the reserve squadrons and regimental headquarters, while the regimental commanders remained "never far behind the vanguard";[173] "[a]t 16:30 the two regiments moved off at the trot, deploying at once".[162] As the leading squadrons, preceded by scouts 70 to 80 yards (64 to 73 m) in front, came within range of Ottoman riflemen manning the defences "directly in their track" a number of horses were hit by sustained rapid fire.[174]
In these Ottoman trenches (primarily facing south, with a few shallow trenches facing east),[175] the defenders saw the light horsemen charge and "opened fire with shrapnel on the 4th and 12th Regiments immediately they deployed".[173] As the advance became a gallop, the 12th Light Horse Regiment was fired from the trenches on Ras Ghannam.[176] The Notts Battery opened fire on machine-gunners in the trenches at Ras Ghannam; after a second shot, the Ottoman soldiers were seen in retreat.[169][177] The two regiments had ridden nearly 2 miles (3.2 km) when the 12th Light Horse Regiment (on the left) was targeted by heavy machine-gun fire from the direction of Hill 1180, "[c]oming from an effective range which could have proved destructive; but the vigilant officers of the Essex Battery ... got the range at once, and ... put them out of action with the first few shells".[173] The charging regiments were again fired on about 1 mile (1.6 km) east of Beersheba. Here the Notts Battery silenced and drove out a garrison in a redoubt at Point 980 (indicated in red on the brigade's war-diary sketch map) which was enfilading the charge.[178] The remainder of the 4th Machine Gun Squadron and the reserve squadron of the 12th Light Horse Regiment, advanced towards Point 980 and the town in the wadi on the left, to protect the left flank of the charging regiments.[169]
I consider that the success was due to the rapidity with which the movement was carried out. Owing to the volume of fire brought to bear from the enemy's position by machine-guns and rifles, a dismounted attack would have resulted in a much greater number of casualties. It was noticed also that the morale of the enemy was greatly shaken through our troops galloping over his positions thereby causing his riflemen and machine gunners to lose all control of fire discipline. When the troops came within short range of the trenches the enemy seemed to direct almost all his fire at the horses.
— Lieutenant Colonel M. Bourchier, commander of the 4th Light Horse Regiment[179]
4th Light Horse Regiment attacks trenches
.jpg.webp)
[A] great sight suddenly sprung up on our left, lines and lines of horsemen moving. The Turks were on the run and the Aus. Div. was after them. We could see the horses jumping the trenches, dust everywhere.
— James McCarroll (New Zealand Mounted Rifles Brigade) at the time on Tel el Saba[181]
As the 4th Light Horse Regiment approached the fortifications directly in front of them, their leading squadron jumped the advance trenches at the gallop and the main 10-foot-deep (3.0 m), 4-foot-wide (1.2 m) trenches, defended by Ottoman soldiers. The leading squadron then dismounted in an area of tents and dugouts in the rear, where they were joined by a troop of the 12th Light Horse Regiment. While the led horses were galloped to cover, the troopers launched a dismounted attack on the trenches and dugouts, killing between 30 and 40, before the remainder surrendered.[182] The defenders "fought grimly, and a considerable number were killed",[175] while four Gallipoli veterans were shot dead as they dismounted a few feet from the Ottoman trenches.[183] As the second line of squadrons approached the Ottoman trenches, one of the troops in "B" squadron dismounted, to attack and capture the advance trench before continuing to support the attack on the main trenches.[184] Stretcher-bearers rode forward, working amidst the dismounted fighting around the earthworks, where one was shot dead at close range.[183] After capturing the redoubt east of Beersheba, it was consolidated by the 4th Light Horse Regiment, which held the area overnight in case of counterattack.[168]
12th Light Horse Regiment captures Beersheba
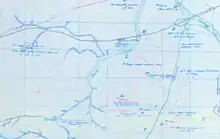
When the leading squadrons charged up to the trenches and the redoubt, the squadron commander and about 12 troopers of 12th Light Horse Regiment dismounted to attack with rifle and bayonet, while the remainder of the regiment continued to gallop past the redoubt on the right, to ride through a gap in the defensive line.[184][Note 25] When the second line squadron of the 12th Light Horse Regiment approached the trenches and redoubt, most of the squadron continued mounted riding through the gap. However, as both squadron commanders had dismounted to fight in the trenches and earthworks, the troopers who continued mounted were led by Captains Robey and Davies. These leading troops stopped to assemble at a point near where the road from Asluj crossed the Wadi Saba,[Note 26] behind the main Ottoman defences. When Robey and Davies mounted troopers were reorganised, they rode along the Asluj road into Beersheba in force, to capture the town.[168][184]
When they reached a red brick building in Beersheba near the Mosque, Robey's squadron rode towards the western side of the town, towards the north, to reach a point about 200 yards (180 m) south of the railway station, then they proceeded across the railway line before turning to the right, to finish up near an oval roofed building on the northern outskirts of the town. Meanwhile, Davies' squadron rode up the main street to join Robey on the northern outskirts. Here both squadrons turned about, to stop and capture an Ottoman column, attempting to escape Beersheba. Most of the column surrendered along with nine guns. One troop "silenced" Ottoman soldiers holding trenches east of Beersheba when about 60 of them tried to escape. They were recaptured by a troop from the 12th Light Horse Regiment's "C" Squadron. A large proportion of the Ottoman troops in the town, were eventually killed or captured.[168][185][186] It has been estimated more than half the Ottoman dismounted troops in Beersheba, were captured or killed, while 15 of the 28 guns in the town were captured.[187] The 12th Light Horse Regiment handed over 37 officers and 63 other ranks prisoners to Brigade Headquarters at 23:00 with four guns and transport.[166] Together the 4th and 12th Light Horse Regiments captured 1,148 prisoners, 10 field guns, four machine guns, a huge quantity of military stores, an aerodrome, and railway rolling stock. Total captures by Desert Mounted Corps for the day amounted to 1,528 prisoners.[188] All available engineer units were sent to develop the wells in the town but the supply was not great. Fortunately on 25 October there had been thunderstorms which left pools of water over a wide area from which the horses were watered.[189]
The prisoners were moved to an area, near the railway viaduct on the outskirts of Beersheba, where they were assembled and counted. Only the 3rd Cavalry Division had managed to withdraw earlier in the day. Meanwhile, the 12th Light Horse Regiment established all round defensive positions, including picquets guarding the pumping station which were withdrawn at 23:00, when brigade headquarters arrived, and took over garrisoning duties. A patrol of one NCO and eight men made a reconnaissance at 23:00, towards the southwest returning at 03:00, with 23 prisoners to report "All Clear." The 12th Light Horse Regiment bivouacked at 24:00 in Beersheba before being ordered at 04:00 to stand to arms and saddled up.[168][185][186]
The capture of Beersheba by the 12th Light Horse Regiment has been largely written out of history. "The honor and the glory of securing the town went to the 4th Australian Light Horse in a cavalry charge that in notoriety ranks with the Charge of the Light Brigade at Balaklava in 1854."[190] Allenby overlooks the 12th Light Horse Regiment's capture of Beersheba in his report to Wigram intended for the King. According to him, only the 4th Light Horse Regiment, charged and captured the town. "Time was short, and the Brigade Commander, Brigadier–General Grant DSO, sent his leading regiment to charge the trenches. This Regiment, the 4th Light Horse, galloped over the trenches, which were 8 feet deep and 4 feet wide, and full of Turks. This ended all resistance, and put a neat finish to the battle."[191] His Despatches of 16 December 1917 to the Secretary of State for War, republished in The London Gazette do not identify further, the "Australian Light Horse," be they regiments or brigades.[192]
Supporting units
Chauvel ordered the 5th and 7th Mounted Brigades to move in support by following the charge, with the 7th Mounted Brigade covering the left as it advanced from the direction of Ras Ghannam; and at 16:40, the 11th Light Horse Regiment was ordered by the 4th Light Horse Brigade to advance in support.[169][176][193] These supporting units have been described as the 11th Light Horse Regiment "follow[ing] at the trot, and then came FitzGerald's 5th Mounted Brigade, while away on the left the 7th Mounted Brigade advanced briskly along the Khalasa road", there was no "substantial following in close support.[173]
The 11th Light Horse Regiment's 489 troopers and 23 officers were about 2 miles (3.2 km) to the southwest, covering the outpost line connecting the Australian Mounted Division with the 7th Mounted Brigade across the Iswaiwin-to-Beersheba road. They had replaced the 8th Light Horse Regiment (3rd Light Horse Brigade) at 15:45.[122][169][193] At 17:30 the 11th Light Horse Regiment moved to rejoin the 4th Light Horse Brigade headquarters, arriving in Beersheba at 19:30. The regiment then moved to the western and northern edges of the town, to man an outpost line against a counterattack.[194]
The 5th Mounted Brigade, trained and armed for a mounted attack, was "close behind Chauvel's headquarters," while the 4th Light Horse Brigade was "nearer Beersheba", when the decision to charge was made.[195][196] "Chauvel had hesitated for a moment whether to employ the 5th Mounted Brigade, which was in reserve and was armed with the sword unlike the Australians, but as the 4th Light Horse Brigade was close in he decided that it should attack."[197] Although the 5th Mounted Brigade was ordered to advance on Beersheba in the rear of the 4th Light Horse Brigade, the Worcestershire Yeomanry saddled up and rode to water at Hannam at 16:00. The regiment eventually "moved off as rearguard to Bde (5th Mounted Brigade)" at 21:30, arriving in Beersheba at 00:30 on 1 November.[176][198]
The 7th Mounted Brigade, with one section of the Light Armoured Motor Battery and one Ford car attached, had ridden out of Esani at 20:00 on 30 October across country (via Itweil el Semin) to Ras Ghannam on the Asluj-to-Beersheba road. They were about 3 miles (4.8 km) south of Beersheba, when they established links with the Desert Mounted Corps on the right and the XX Corps on the left, at the Khalasa-to-Beersheba road.[19][199][200][201] Their orders were to hold a line covering Point 1210, 1.5 miles (2.4 km) south of Ras Ghannam and Gos en Naam.[202] They established observation posts on a line 1 mile (1.6 km) south of Ras Ghannam stretching to Gos en Naam, established communications with the Australian Mounted Division south-west of Khashim Zanna at 09:00, and was in close touch with the XX Corps Cavalry Regiment. The remainder of the brigade assembled south of their outpost line, "ready to act."[201][203] At about 10:00 the 8th Light Horse Regiment (3rd Light Horse Brigade) reported that its headquarters were at Point 1180, that Ras Ghannam was strongly defended, and that they were in touch with the 7th Mounted Brigade on their left. The 7th Mounted reported at 13:45 that their battery had shelled the opposition en masse on the northern slopes of Ras Ghannam.[71]

At 16:00, when the Ottoman garrison was reported to have begun its retreat from Beersheba, the 7th Mounted Brigade received orders to cooperate (from the direction of Ras Ghannam) in the Australian Mounted Division attack on Beersheba. Verbal orders to cooperate in the attack were also received by the 7th Mounted Brigade from the 4th Light Horse Brigade half-an-hour later. The leading squadron of the Sherwood Rangers Regiment pushed forward with a squadron of the Notts Hussars, which had been holding the line from Point 1210 to Ras Ghannam. They arrived at Ras Ghannam at 16:50 to find the defenders gone "without firing a shot".[158][178][201][204] The rest of the Sherwood Rangers Regiment were occupying the trenches east of Ras Ghannam when they were informed that Beersheba had been captured by the 4th Light Horse Brigade. Then the 7th Mounted Brigade rode unopposed down the Asluj road into Beersheba to water their horses at about 23:00.[178][201][Note 27]
Casualties
The XX Corps captured 419 prisoners while Desert Mounted Corps captured 1,528 Ottoman soldiers.[205] Ottoman casualties were believed to be about half that number,[1] while around 500 dead were found on the battlefield.[206]
The heaviest Allied losses were suffered by the British infantry of XX Corps (which lost 116 killed in action),[207] although the total number of the British force killed during the battle was 171.[208] The 4th Light Horse Brigade suffered a total of 35 killed and 39 wounded; of these, the 12th Light Horse Regiment suffered 20 killed and 19 wounded.[166][178] Most of the wounded light horsemen fell during the charge, with the high percentage of killed-to-wounded occurring during hand-to-hand fighting in the trenches.[187][209]
Aftermath
The XX Corps and Desert Mounted Corps won a tactical victory of manoeuvre, forcing the Ottoman garrison at Beersheba to withdraw.[175][210] However, although the 53rd (Welsh) Division—with one brigade of the 10th (Irish) Division attached—had been deployed to prevent Ottoman units escaping the battle, the Beersheba garrison was able to withdraw "up the Gaza road and to the north" into the Judean Hills, along the road towards Hebron, Bethlehem and Jerusalem.[211] And although the Beersheba garrison suffered many casualties; "stubborn fighting" by strong Ottoman rearguards at Hareira, Tel es Sheria and Tel el Khuweilfe, delayed the EEF for seven days, as they continued to hold the remainder of the Gaza line.[212] The Ottoman III Corps headquarters (which had withdrawn from Beersheba to Tel es Sheria during the battle) moved back to support the defence of the road to Hebron at Dhahriye, followed by the 143rd Regiment (24th Division) and 1,500 rifles of the former Beersheba Group (which had been reorganised at Tel es Sheria). The latter group moved to reinforce the defence of Tel el Khuweilfe, where the battle began on 1 November.[213]
On 1 November attacks by the Anzac Mounted Division towards Tel el Khuweilfe and the road to Hebron and Jerusalem concerned the Ottoman defenders, who feared that a major cavalry attack could breakthrough the Ottoman line and capture the Seventh Army headquarters at Hebron.[214] However, the EEF planned to break the Ottoman line in the centre, at Hareira and Sheria.[215] As the fighting at Khuweilfe continued, a minor attack on Gaza was made overnight on 1/2 November, while the main attacks on the centre at the Battle of Hareira and Sheria began on 6 November. Gaza was found to have been evacuated by its Ottoman defenders early on 7 November and Hareira was also captured that morning. After strong resistance against the 60th (London) Division's attacks against the Ottoman defenders at Sheria (supported by a light-horse charge on 7 November), the position was captured by infantry just before dusk on 7 November.[216]
The British Foreign Secretary Arthur Balfour contacted Baron Rothschild, a wealthy banker and head of the British branch of European Jewish causes, on 2 November (two days after the capture of Beersheba). In the Balfour Declaration, he proposed a national home for the Jewish people in Palestine, published in The Times on 9 November 1917.[217] Also on 2 November, while congratulating Allenby for the victory at Beersheba, the War Office informed him that he was unlikely to receive reinforcements:
I wish to congratulate you, all concerned upon your success, which it is to be hoped you will be able to develop ... to press the Turks opposed to you to the fullest extent of your resources, so as to force the enemy to divert troops to Palestine and thus relieve pressure upon Maude [in Mesopotamia], and to take advantage of Arab situation. In deciding on the extent to which you will be able to carry out safely the policy, you will be guided by the fact that an increase in the forces now at your disposal, is improbable.
— Robertson to Allenby (received 2 November 1917)[218]
Henry Gullett's claim that "[f]rom then on to the end of the war the Turks never forgot Beersheba" and that the German and Ottoman infantry, "when galloped, as ... they frequently were, invariably shot wildly and surrendered early in the conflict,"[219] was disproved when solid Ottoman defence met the 11th and 12th Light Horse Regiments' charge during fighting for Sheria on 7 November, and the yeomanry's charge at Huj on 8 November 1917.[220][221][222]
After Gaza was occupied on 7 November, the Imperial Service Cavalry Brigade (XXI Corps) rode through the ruins of Gaza to reach Beit Hanun at 13:00;[223] and the 157th Brigade (52nd Division) began the infantry pursuit along the Mediterranean shore, to reach Sheikh Hasan by 12:15.[224] In the centre of the line the Anzac Mounted Division found a gap on the eastern side of Sheria to begin their pursuit at daylight on 7 November.[225] After being held up at Sheria, the Australian Mounted Division and the 60th (London) Division advanced to capture Huj on 8 November.[226][227] By that evening, all the Ottoman positions which had made up the Gaza-to-Beersheba line had been captured, and the erstwhile defenders were in full retreat.[228]
Legacy
Australian identity
The Battle of Beersheba is a significant event in Australian history. It has been called "Australia's first big achievement on the world stage".[229] Jonathan King has argued that "the Battle of Beersheba should be the cornerstone of our Australia identity, replacing Gallipoli. Gallipoli was a British-led defeat. Beersheba was an Australian-led victory."[230]
Evangelical Christianity
Some Evangelical Christians have viewed the light-horsemen at the Battle of Beersheba as "fulfilling a biblical prophecy by helping return Israel to the Jews."[231]
In Israel
- On 28 April 2008, Australia's Governor-General Major General (ret) Michael Jeffery and Israeli President Shimon Peres unveiled a monument to the Light Horse in Beersheba, Israel.[232] It was made by Australian sculptor Peter Corlett with funding support from businessman Richard Pratt.[233]
- On 31 October 2017, the Beersheba ANZAC Memorial Center was inaugurated in the presence of Israeli Prime Minister Benjamin Netanyahu and Australian Prime Minister Malcolm Turnbull,[234] The memorial center was built within the grounds of the British war cemetery in Beersheba and the building resembles a horse head, commemorating tens of thousands of horses that served and died throughout the war. It also holds a small collection of war remnants dated back to the British conquest of Palestine.[235]
- On 26 September 2019, a life-size sculpture, 'The Aborigine and His Horse,' was dedicated at Tzemach, commemorating Aborigine ANZAC members, dubbed the "Queensland Black Watch", including cavalrymen who fought at Tzemach and Be'er Sheva. Descendants of those horsemen travelled from Australia to participate in the statue's inauguration, "another stage in the historic correction that Australian society is undergoing in their relations with the Aborigines."[236]
See also
- Horses in World War I
- Waler
- Forty Thousand Horsemen and The Lighthorsemen are movies based on the events; as is the episode "Palestine 1917" of The Young Indiana Jones Chronicles, later released as the direct-to-video film "Daredevils of the Desert".
Notes
- The several battles fought for the Gaza to Beersheba line between 31 October and 7 November were all assigned the title Third Battle of Gaza, although they took place many miles apart, and were fought by different corps. [Battles Nomenclature Committee 1922 p. 32, Falls 1930 Vol. 2 Sketch Maps 1–9]
- Some claim that this was the last successful mounted cavalry charge in the history of modern warfare, but this overlooks the 4th Light Horse Brigade Charge at Sheria on 7 November 1917, the 5th Mounted Brigade Charge at Huj on 8 November 1917 and in 1918, the 10th Cavalry Brigade Charge at Irbid on 26 September, the 14th Cavalry Brigade Charge at Kiswe, and the 4th Light Horse Brigade Charge at Kaukab on 30 September, the day before the Capture of Damascus during the Sinai and Palestine campaign. [Falls 1930 Vol. 2 pp. 95–595]
- One historian claims the Gaza to Beersheba line "stretch[ed] continuously for almost fifty kilometres". [Erickson 2001 p. 163]
- The third regiment of the 3rd Cavalry Division was deployed at the time east of the Jordan River. [Falls 1930 Vol. 2 p. 42 note]
- The force defending Beersheba has been described as "40,000 rifles (their maximum strength was later found to amount to no more than 33,000), 1,400 sabres, four batteries and some 50 machine guns of the defending Turkish garrison."[Bruce 2002 p. 127] But according to the official British historian these figures relate to the whole of the Gaza to Beersheba line. [Falls 1930 Vol. 2 p. 35]
- It has been stated that the eastern side of Beersheba "was scarcely defended at all, a few narrow, un-wired trenches being the only artificial obstacles on that side, though the Wadi es Sabe itself afforded a good fire position from which to sweep the flats to the south." [Falls 1930 Vol. 2 p. 34]
- Erickson overlooked the recent battle experience of the 52nd (Lowland) Division at Romani, the Anzac Mounted Division at Romani, Magdhaba, and Rafa, both divisions also fighting in the first two battles for Gaza. [Erickson 2007 pp. 111–2]
- The XX Corps began their approach marches at 20:00 on 30 October from two railheads at Karm and Gamli. [Kinloch 2007 p. 199]
- On 30 October, no water was available at Asluj for the horses of the 11th and 12th Light Horse Regiments. [11th Light Horse Regiment War Diary October 1917 AWM4-10-16-25, 12th Light Horse Regiment War Diary October 1917 AWM4-10-17-9]
- Ottoman posts at G. el Shegeib and Arara had been located on 25 October, the New Zealand Mounted Rifles and the 2nd Light Horse Brigades receiving instructions to "deal" with them during the approach march. [Anzac Mounted Division General Staff War Diary October 1917 AWM4-1-60-20 Part 1]
- It has been suggested the pause was let a "small dust storm" disperse. [Bruce 2002 p. 129]
- The XX Corps "could without doubt have captured Beersheba itself before the mounted troops." But this objective had "been allocated to Desert Mounted Corps." [Falls 1930 Vol. 2 p. 57] The infantry divisions could not continue their advance because of lack of water, and "a further advance would disorganise the next stage in the operations." [Gullett 1941 p. 392]
- The 6th Light Horse Regiment (2nd Light Horse Brigade, Anzac Mounted Division) formed divisional reserve for the day. [6th Light Horse Regiment War Diary October 1917 AWM4-10-11-35]
- Its claimed the 2nd Light Horse Brigade controlled the road at 11:00, and captured Tel el Sakaty at 12:30. [Powles 1922 p. 136]
- The lightweight 13-pounder guns of the four gun horse battery had replaced the Anzac and Australian Mounted Division's 18-pounder guns in September 1917. [Bou 2009 p. 173]
- The 2nd and 3rd Light Horse Regiments (1st Light Horse Brigade) have been described making a charge across the plain together, which resembles descriptions of the later charge by the 4th and 12th Light Horse Regiments (4th Light Horse Brigade). [Preston 1921 p. 27] According to the 1st Light Horse Brigade's War Diary Report, there was a gap of several hours between the advance of the 3rd Light Horse Regiment which took place between 10:15 and 11:00 and the 2nd Light Horse Regiment, which advanced between 13:00 and 14:00. [1st Light Horse Brigade War Diary November 1917 AWM4-10-1-40, Appendix 5 Report on operations against Beersheba on 31 October 1917 p. 2]
- This map is based on Gullett's Map 15. Neither map locates the headquarters of Anzac Mounted Division, Australian Mounted Division and Desert Mounted Corps at Kashim Zanna despite numerous sources placing them there. [Preston 1921 pp. 25–6, Powles 1922 pp. 136–7, Hill 1978 p. 126]
- Gullett noted that "[h]ad Tel el Sabe fallen earlier, as had been anticipated, a dismounted attack would doubtless have been decided upon." [Gullett 1941 p. 393]
- The 1st, 2nd Light Horse and the New Zealand Mounted Rifle Brigades (Anzac Mounted Division) had charged mounted, holding fixed bayonets on 5 August 1916, on the third day of the Battle of Romani. [Powles 1922 p. 34, Falls 1930 Vol. 1 pp 193–4]
- The 12th Light Horse Regiment consisted of 498 troopers including 19 officers on 27 October 1917 when the regiment marched out from Tel el Fara. [12th Light Horse Regiment War Diary October 1917 AWM4-10-17-9 Appendix XII Marching out state.] The 4th Light Horse Regiment does not give its marching-out strength in October but on 30 November it consisted of 25 officers and 450 troopers. [4th Light Horse Regiment War Diary November 1917 AWM4-10-9-35]
- Gullett states they formed up at 16:30 and a page later, moved off at the trot, both at 16:30. [Gullett 1941 pp. 394, 395]
- The Massie sketch map by the 12th Light Horse Regiment's adjutant who also wrote up the regimental war diary at the time, attached to the 4th Light Horse Brigade's March 1918 War Diary and reproduced above, shows the first two squadrons in lines of squadron while the third squadrons are shown deployed in line of column. Hand-drawn map of the 4th LHB prior to charging into Beersheba, Australian Light Horse Studies Centre
- The original of this map is held in the State Library of New South Wales. It was available online at
- Grant claimed sole responsibility for the charge, "that Hodgson took him to the corps commander, who directed him to 'take the town before dark,' without giving him instructions as to how the attack was to be carried out." [Falls 1930 Vol. 2 p. 58 note] However it has been claimed Chauvel told Hodgson commanding Australian Mounted Division, "Put Grant straight at it." "Put Grant straight at it.", Australian Light Horse Studies Centre
- Preston describes advances, by the 2nd and 3rd Light Horse Regiments (1st Light Horse Brigade), which according to their brigade war diary took place hours apart, in terms more appropriate to the simultaneous charge of the 4th and 12th Light Horse Regiments. [Preston 1921 pp. 27–8] [1st Light Horse Brigade War Diary November 1917 AWM4-10-1-40, Appendix 5 Report on operations against Beersheba on 31 October 1917 p. 2]
- The 400-yard (370 m)-long bridge across the Wadi Saba was part of the Palestine Railway to Hafir el Auja, constructed by Meissner who had built the Baghdad Railway. [Preston 1921 p. 35]
- The 7th Mounted Brigade has been described as being held up by flanking fire from Ras Ghannam during the afternoon, that after this was silenced, the brigade assisted in the occupation of Beersheba at nightfall. [Massey 1919 p. 33]
- Citations
- Grainger 2006, p. 121
- Grainger 2006 pp. 61–2
- Powles 1922 pp. 108–9
- Falls 1930 Vol. 1 p. 351
- Erickson 2007 p. 99
- Erickson 2001 p. 159
- Moore 1920 pp. 71–3
- Preston 1921 p. 12
- Massey 1919 p. 15
- Powles 1922 pp. 106,108–9
- Falls 1930 Vol. 2 p. 9
- Hamilton p.28
- Massey 1919 p. 16
- Falls 1930 Vol. 1 p. 353
- Powles 1922 p. 106
- Falls 1930 Vol. 2 pp. 19, 33
- Preston 1921 p. 20
- Falls 1930 Vol. 2 p. 34
- Powles 1922 p. 135
- Massey 1919 p.33
- G. Massey 2007 p. 9
- British Army Handbook 9/4/18 p. 61
- Falls 1930 Vol. 1 pp. 315, 348 note
- Woodward 2006, pp. 68–9
- Cutlack 1941 p. 64
- Mounted Service Manual 1902, p. 10
- Falls 1930 Vol. 1 p. 280
- Hill 1978, pp. 99–100
- Gullett 1941, pp. 337–8, 347
- Bruce 2002 p. 106
- Woodward 2006 pp. 88–9
- Cutlack 1941 p. 57 note
- Erickson 2001 p. 163
- Falls 1930 Vol. 2 p. 35
- Falls 1930 Vol. 2 p. 42 note
- Erickson 2007 p. 158
- Falls 1930 Vol. 2 pp. 35, 42 note, 61 note
- Erickson 2007, p. 110
- Erickson 2001 pp. 159, 171, 2007 p. 115
- Falls 1930 Vol. 2 pp. 3–4
- Bruce 2002 p. 127
- G. Massey 2007 p. 7
- Falls 1930 Vol. 2 p. 61 note
- Keogh 1955 pp. 122, 124
- Falls 1930 Vol. 1 pp. 319 note, 357
- Falls 1930 Vol. 1 p. 357
- Hill 1978 p. 116
- Keogh 1955 pp. 125–6
- Allenby to Robertson 12 July 1917 in Hughes 2004 pp. 34–5
- Falls 1930 Vol. 2 p. 39
- Wavell 1968 pp. 91–2
- Falls 1930 Vol. 2 p. 7
- Allenby to Robertson 12 July 1917 in Hughes 2004 p. 35
- Erickson 2007 pp. 112–3
- Falls 1930 Vol. 2 p. 16
- Wavell 1968 pp. 112–3
- Falls 1930 Vol. 2 pp. 662–64
- Dennis et al 2008 p. 84
- Erickson 2007 pp. 111–12
- Massey 1919 p. 26
- Falls 1930 Vol. 2 p. 28
- Preston 1921 p. 10
- Erickson 2007 p. 115
- Downes 1938 p. 661
- Keogh 1955 p. 152
- Falls 1930 Vol. 2 pp. 44–5, 677
- Preston 1921 p. 18
- Keogh 1955 pp. 151–2
- 2nd Light Horse Brigade War Diary October 1917 AWM4-10-2-34
- Falls 1930 Vol. 2 pp. 37–8
- Anzac Mounted Division General Staff War Diary October 1917 AWM4-1-60-20 Part 1
- Falls 1930 Vol. 2 p. 40
- Falls 1930 Vol. 2 pp. 40–1
- 1st Light Horse Brigade War Diary AWM4-10-1-39
- Preston 1921 pp. 22–3
- Australian Mounted Division War Diary October 1917 AWM4-1-58-4 Part 1
- Falls 1930 Vol. 2 p. 41
- Falls 1930 Vol. 2 p. 44
- Bruce 2002 p. 126
- Woodward 2006 p. 104
- Falls 1930 Vol. 2 p. 46
- Falls 1930 Vol. 2 pp. 41, 46–8
- Falls 1930 Vol. 2 p. 21
- Bruce 2002 p. 128
- EEF War Diary October 1917 AWM4-1-6-18 Part 1
- Gullett 1941 pp. 379–80
- Blenkinsop 1925 p. 203
- Powles 1922 pp. 133–4
- 7th Light Horse Regiment War Diary October 1917 AWM4-10-12-25
- Kinloch 2007 p. 199
- Hill 1978 p. 126
- Hill 1978 pp. 125–6
- Preston 1921 pp. 25–6
- Powles 1922 pp. 136–7
- Cutlack 1941 p. 77
- Gullett 1941 p. 392
- Egyptian Expeditionary Force General Staff Headquarters War Diary October 1917 AWM4-1-6-18 Part 1
- Falls 1930 Vol. 2 p. 48
- Falls 1930 Vol. 2 pp. 48, 51
- Woodward 2006 p. 106
- Bruce 2002 pp. 128–9
- Falls 1930 Vol. 2 p. 48, 663
- Falls 1930 Vol. 2 pp. 48–9, 51, 663
- Bruce 2002 p. 129
- Falls 1930 Vol. 2 p. 49
- Bruce 2002 pp. 129–30
- Woodward 2006 pp. 106–7
- Falls 1930 Vol. 2 p. 50
- Bruce 2002 p. 130
- "No. 30433". The London Gazette (Supplement). 14 December 1917. p. 13223.
- Wavell 1968 p. 119
- Falls 1930 Vol. 2 pp. 50–1
- Falls 1930 Vol. 2 Appendix 8 p. 680
- Falls 1930 Vol. 2 Appendix 8 p. 681
- Falls 1930 Vol. 2 pp. 57, 682
- Keogh 1955 p. 153
- Falls 1930 Vol. 2 p. 45
- Falls 1930 Vol. 2 Appendix 8 p. 682
- Falls 1930 Vol. 2 Appendix 8 p. 684
- Preston 1921 p. 25
- Wavell 1968 pp. 106–7
- Gullett 1941 p. 394
- Falls 1930 Vol. 2 p. 51
- Preston p. 18
- 8th Light Horse Regiment War Diary October 1917 AWM4-10-13-28
- G. Massey 2007 p. 10
- Falls 1930 Vol. 2 pp. 55, 677
- Kinloch 2007 pp. 199–200
- Preston 1921 pp. 23, 25–6
- Hill 1978 p. 125–7
- Kinloch 2007 p. 202
- G. Massey 2007 p. 12
- Preston 1921 p. 24
- Falls 1930 Vol. 2 p. 55
- Powles 1922 pp. 135–6
- Falls 1930 Vol. 2 pp. 55–6
- 5th Light Horse Regiment War Diary October 1917 AWM4-10-10-34
- Bou 2009 pp. 172–3
- Preston 1921 p. 26
- Powles 1922 p. 137
- New Zealand Mounted Rifle Brigade War Diary October 1917 AWM4-35-1-30
- Auckland Mounted Rifle Regiment War Diary October 1917 AWM4-35-2-39
- Pugsley 2004 pp. 139–40
- 1st Light Horse Brigade War Diary November 1917 AWM4-10-1-40 Appendix 5 Report on operations against Beersheba on 31 October 1917 pp. 1–2
- Falls 1930 Vol. 2 p. 57
- 1st Light Horse Brigade War Diary November 1917 AWM4-10-1-40 Appendix 5 Report on operations against Beersheba on 31 October 1917 p. 1
- Falls 1930 Vol. 2 p. 56
- Hill 1978 pp. 126–7
- 1st Light Horse Brigade War Diary November 1917 AWM4-10-1-40 Appendix 5 Report on operations against Beersheba on 31 October 1917 p. 2
- Preston 1921 pp. 27–8
- Powles 1922 p. 138
- Kinloch 2007 p. 203
- 3rd Light Horse Brigade War Diary October 1917 AWM4-10-3-33
- Hamilton 1978 p. 70
- Hamilton 1978 pp. 70–1
- Bou 2009 p. 173
- Kressenstein, Friedrich Freiherr Kress von, Mit den Tèurken zum Suezkanal, 1938, p. 279
- Falls 1930 Vol. 2 pp. 61 note, 62 note
- Kinloch 2007 p. 204
- Gullett 1941 p. 405
- Gullett 1941 p. 407
- Gullett 1941 p. 395
- Colonel Cameron, 12th LHR, letter to Dr Bean, Australian Light Horse Studies Centre
- Australian Mounted Division War Diary October 1917 AWM4-1-58-4 Part 3 Appendix 40 p. 4 Subsection 12
- 4th Light Horse Brigade War Diary October 1917 AWM4-10-4-10 Appendix 187 No. 2
- 12th Light Horse Regiment War Diary October 1917 AWM4-10-17-9
- 4th Light Horse Regiment War Diary October 1917 AWM4-10-9-34
- 12th Light Horse Regiment War Diary AWM4-10-17-9 Appendix XIV Report p. 1
- 4th Light Horse Brigade War Diary AWM4-10-4-10 Appendix 188 p. 1
- stated on 20 December 1917 in Bou 2009 pp. 191–2
- Gullett 1941 pp. 395–6
- "An Account of the Charge at Beersheba". Australian Light Horse Association. Archived from the original on 18 January 2012. Retrieved 11 January 2012.
- Gullett 1941 p. 396
- Gullett 1941 pp. 396, 400
- Falls 1930 Vol. 2 p. 59
- Falls 1930 Vol. 2 p. 58
- Falls 1930 Vol. 2 pp. 58–9
- 4th Light Horse Brigade War Diary October 1917 AWM4-10-4-10
- Bou 2006 pp. 99–125
- Jones 2007 p. 82
- Kinloch 2007 p. 205
- Gullett 1941 p. 397
- Gullett 1941 p. 401
- Gullett 1941 p. 398
- Gullett pp. 398–9
- Falls 1930 Vol. 2 p. 61
- Falls 1930 Vol. 2 p. 60
- Powles 1921 p. 139.
- Gullett 1941 p. 406.
- Woodward 2006 p.108
- Allenby letter to Wigram 7 November 1917 intended for the King in Hughes 2004 p. 77
- Allenby, Pirie-Gordon 1919 p. 3
- 11th Light Horse Regiment War Diary October 1917 AWM4-10-16-25
- 11th Light Horse Regiment War Diary October 1917 AWM4-10-16-25 Appendix XV p. 2
- Gullett 1941 p. 393
- Preston 1921 pp. 55–56
- Falls 1930 Vol. 2 pp. 57–8
- 1/1st Worcestershire Yeomanry Regiment War Diary October 1917 AWM4-9-5-9
- Preston 1921 pp. 23–4
- Falls 1930 Vol. 2 p. 687 Appendix 10, Map 5
- 1/1st Nottingham Sherwood Rangers Yeomanry War Diary October 1917 AWM4-9-10-1-1
- Australian Mounted Division War Diary October 1917 AWM4-1-58-4 Part 3 Appendix 40 p. 2
- Falls 1930 Vol. 2 p. 687 Appendix 10
- 11th Light Horse Regiment War Diary October 1917 Appendix XV Report p. 1
- Falls 1930 Vol. 2 pp. 51, 59
- Lucas 1926, p. 113
- Falls Account of the Battle of Beersheba, Australian Light Horse Studies Centre
- Roll of Honour, British Forces, Australian Light Horse Studies Centre
- 4th Light Horse Brigade War Diary AWM4-10-4-10 Appendix 188 p. 5 (Second report page 3)
- Erickson 2007 p. 125
- Falls 1930 Vol. 2 pp. 45, 59
- Wavell quoted in Erickson 2007 p. 124
- Falls 1930 Vol. 2 pp. 105–6
- Grainger p. 135
- Grainger p. 136
- Falls 1930 Vol. 2 pp. 69–105, 110, 115–116
- Grainger 2006 p. 178
- Hughes 2004 p. 72
- Gullett 1941 p. 404
- Falls 1930 Vol. 2 p. 115
- Wavell 1968 p. 147
- Cutlack 1941 p. 79
- Falls 1930 Vol. 2 p. 130
- Falls 1930 Vol. 2 pp. 75–6
- Falls 1930 Vol. 2 p. 112
- Bruce 2002 p. 144
- Egyptian Expeditionary Force General Staff Headquarters War Diary 8 November 1917 AWM4-1-6-19 part 2
- Powles 1922 p. 144
- King, Jonathan (18 October 2017). "One hundred years since Beersheba, Australia's first big achievement on the world stage". Sydney Morning Herald. Retrieved 8 July 2018.
- Mason, Brett (30 October 2017). "Battle of Beersheba 'should be the cornerstone of Australia's identity'". SBS. Retrieved 8 July 2018.
- Daley 2009, p. 306
- "Beersheba memorial honours Light Horsemen". The Advertiser. 28 April 2008. Retrieved 7 February 2021.
- Koutsoukis, Jason (30 April 2008). "Bronze for Light Horse". Retrieved 7 February 2021.
- Kraft, Dina (1 November 2017). "In Israel's South, Australians Ride and Remember the Path of Their Ancestors". Haaretz. Retrieved 29 April 2020.
- "The Story of the ANZAC Memorial Center". ANZAC Memorial Center in Be’er Sheva. Retrieved 30 December 2020.
- Aderet, Ofer (26 September 2019). "Israel Honors WWI Australian Aborigine Fighters at Center Near Sea of Galilee". Haaretz. Retrieved 7 February 2021.
References
- "1/1st Nottinghamshire Sherwood Rangers Yeomanry Regiment War Diary (7th Mounted Brigade)". First World War Diaries AWM4, 9-10-1. Canberra: Australian War Memorial. October 1917. Archived from the original on 19 April 2012. Retrieved 17 July 2013.
- "1/1st Worcestershire Regiment War Diary (5th Mounted Brigade)". First World War Diaries AWM4, 9-5-9. Canberra: Australian War Memorial. October 1917. Archived from the original on 19 April 2012. Retrieved 17 July 2013.
- "4th Australian Light Horse Regiment War Diary". First World War Diaries AWM4, 10-9-35. Canberra: Australian War Memorial. October 1917.
- "5th Australian Light Horse Regiment War Diary". First World War Diaries AWM4, 10-10-34. Canberra: Australian War Memorial. October 1917.
- "6th Australian Light Horse Regiment War Diary". First World War Diaries AWM4, 10-11-35. Canberra: Australian War Memorial. October 1917.
- "7th Australian Light Horse Regiment War Diary". First World War Diaries AWM4, 10-12-25. Canberra: Australian War Memorial. October 1917.
- "8th Australian Light Horse Regiment War Diary". First World War Diaries AWM4, 10-13-28. Canberra: Australian War Memorial. October 1917.
- "11th Australian Light Horse Regiment War Diary". First World War Diaries AWM4, 10-16-25. Canberra: Australian War Memorial. October 1917.
- "12th Australian Light Horse Regiment War Diary". First World War Diaries AWM4, 10-17-9. Canberra: Australian War Memorial. October 1917.
- "1st Australian Light Horse Brigade War Diary". First World War Diaries AWM4, 10-1-39. Canberra: Australian War Memorial. October 1917.
- "2nd Australian Light Horse Brigade War Diary". First World War Diaries AWM4, 10-2-34. Canberra: Australian War Memorial. October 1917.
- "4th Australian Light Horse Brigade War Diary". First World War Diaries AWM4, 10-4-10. Canberra: Australian War Memorial. October 1917.
- "Auckland Mounted Rifles Regiment War Diary". First World War Diaries AWM4, 35-2-29. Canberra: Australian War Memorial. October 1917. Archived from the original on 19 April 2012. Retrieved 27 February 2013.
- "New Zealand Mounted Rifles Brigade Headquarters War Diary". First World War Diaries AWM4, 35-1-30. Canberra: Australian War Memorial. October 1917. Archived from the original on 19 April 2012. Retrieved 27 February 2013.
- "Anzac Mounted Division General Staff War Diary". First World War Diaries AWM4, 1-60-20 Part 1. Canberra: Australian War Memorial. October 1917. Archived from the original on 21 March 2011.
- "Australian Mounted Division General Staff War Diary". First World War Diaries AWM4, 1-58-4 Part 1. Canberra: Australian War Memorial. October 1917. Archived from the original on 19 April 2012. Retrieved 22 February 2013.
- "Egyptian Expeditionary Force General Staff Headquarters War Diary". First World War Diaries AWM4, 1-6-18 Part 1. Canberra: Australian War Memorial. October 1917. Archived from the original on 25 October 2012. Retrieved 22 February 2013.
- British Army; Egyptian Expeditionary Force (1918). Handbook on Northern Palestine and Southern Syria (1st provisional 9 April ed.). Cairo: Government Press. OCLC 23101324.
- Allenby, E. H. H.; H. Pirie-Gordon (1919). A Brief Record of the Advance of the Egyptian Expeditionary Force under the command of General Sir Edmund H.H. Allenby, GCB, GCMG July 1917 to October 1918 compiled from Official Sources (2 ed.). London: H.M. Stationery Office. OCLC 17017063.
- Bou, Jean (2006). "Cavalry, Firepower, and Swords: The Australian Light Horse and the Tactical Lessons of Cavalry Operations in Palestine, 1916–1918" (PDF). The Journal of Military History. 71 (1): 99–125. doi:10.1353/jmh.2007.0009. hdl:1885/30058. S2CID 159813243. Retrieved 16 March 2007.
- Bou, Jean (2009). Light Horse: A History of Australia's Mounted Arm. Australian Army History. Port Melbourne: Cambridge University Press. ISBN 978-0-521-19708-3.
- Bruce, Anthony (2002). The Last Crusade: The Palestine Campaign in the First World War. London: John Murray. ISBN 978-0-7195-5432-2.
- Cutlack, Frederic Morley (1941). The Australian Flying Corps in the Western and Eastern Theatres of War, 1914–1918. Official History of Australia in the War of 1914–1918. Vol. VIII (11th ed.). Canberra: Australian War Memorial. OCLC 220900299.
- Daley, Paul (2009). Beersheba: A Journey Through Australia's Forgotten War. Melbourne University Publishing. ISBN 9780522855999.
- Dennis, Peter; Jeffrey Grey; Ewan Morris; Robin Prior; Jean Bou (2008). The Oxford Companion to Australian Military History (2nd ed.). Melbourne: Oxford University Press, Australia & New Zealand. OCLC 489040963.
- Erickson, Edward J. (2007). John Gooch; Brian Holden Reid (eds.). Ottoman Army Effectiveness in World War I: A Comparative Study. Cass Military History and Policy series, No. 26. Milton Park, Abingdon, Oxon: Routledge. ISBN 978-0-203-96456-9.
- Falls, Cyril; A. F. Becke (maps) (1930). Military Operations Egypt & Palestine from June 1917 to the End of the War. Official History of the Great War Based on Official Documents by Direction of the Historical Section of the Committee of Imperial Defence: Volume 2 Part I. London: HM Stationery Office. OCLC 644354483.
- Falls, Cyril; A. F. Becke (maps) (1930). Military Operations Egypt & Palestine from June 1917 to the End of the War. Official History of the Great War Based on Official Documents by Direction of the Historical Section of the Committee of Imperial Defence: Volume 2 Part II. London: HM Stationery Office. OCLC 256950972.
- Grainger, John D. (2006). The Battle for Palestine, 1917. Woodbridge: Boydell Press. ISBN 978-1-843-83263-8. OCLC 255698307.
- Gullett, Henry S. (1941). The Australian Imperial Force in Sinai and Palestine, 1914–1918. Official History of Australia in the War of 1914–1918. Vol. VII (11th ed.). Canberra: Australian War Memorial. OCLC 220900153.
- Hill, Alec Jeffrey (1978). Chauvel of the Light Horse: A Biography of General Sir Harry Chauvel, GCMG, KCB. Melbourne: Melbourne University Press. ISBN 978-0-522-84146-6.
- Hughes, Matthew, ed. (2004). Allenby in Palestine: The Middle East Correspondence of Field Marshal Viscount Allenby June 1917 – October 1919. Army Records Society. Vol. 22. Phoenix Mill, Thrupp, Stroud, Gloucestershire: Sutton Publishing. ISBN 978-0-7509-3841-9.
- Jones, Ian (2007). A Thousand Miles of Battle: The Saga of the Australian Light Horse in WWI. Aspley, Queensland: Anzac Day Commemoration Committee. OCLC 27150826.
- Keogh, E. G.; Joan Graham (1955). Suez to Aleppo. Melbourne: Directorate of Military Training by Wilkie & Co. OCLC 220029983.
- Kinloch, Terry (2007). Devils on Horses: In the Words of the Anzacs in the Middle East,1916–19. Auckland: Exisle Publishing. ISBN 978-0-908988-94-5.
- Lucas, Sir Charles Prestwood (1926). The Empire at War. Vol. 5. London: Oxford University Press. OCLC 1183612.
- Massey, Graeme (2007). Beersheba: The Men of the 4th Light Horse Regiment Who Charged on the 31st October 1917. Warracknabeal, Victoria: Warracknabeal Secondary College History Department. OCLC 225647074.
- Massey, William Thomas (1919). How Jerusalem Was Won: Being the Record of Allenby's Campaign in Palestine. London: Constable and Company. OCLC 2056476.
- Powles, C. Guy; A. Wilkie (1922). The New Zealanders in Sinai and Palestine. Official History New Zealand's Effort in the Great War. Vol. III. Auckland: Whitcombe & Tombs. OCLC 2959465.
- Preston, R. M. P. (1921). The Desert Mounted Corps: An Account of the Cavalry Operations in Palestine and Syria 1917–1918. London: Constable & Co. OCLC 3900439.
- Pugsley, Christoper (2004). The Anzac Experience: New Zealand, Australia and Empire in the First World War. Auckland: Reed Books. ISBN 978-0-7900-0941-4.
- Wavell, Field Marshal Earl (1968) [1933]. "The Palestine Campaigns". In Sheppard, Eric William (ed.). A Short History of the British Army (4th ed.). London: Constable & Co. OCLC 35621223.
- Woodward, David R. (2006). Hell in the Holy Land: World War I in the Middle East. Lexington: The University Press of Kentucky. ISBN 978-0-8131-2383-7.
- Young, Peter, ed. (1986). The Marshall Cavendish Illustrated Encyclopaedia of World War I: Volume 10 1918–19. New York: Marshall Cavendish. OCLC 313824353.
External links
- The Beersheba ANZAC Memorial Center
- Australian Light Horse Studies Centre- Palestine – Beersheba
- The Light Horse Charge at Beersheba
- Map of the Turkish troop dispositions on the morning of 31 October 1917 and the subsequent course of the battle at Beersheba
- A copy of the telegram to the Turkish Commander of the 4th Army
- Cicek, M. Talha: Beersheba-Gaza Line, in: 1914-1918-online. International Encyclopedia of the First World War.
- A comprehensive list with links to the transcriptions of over 70 eyewitness accounts to the attack on Beersheba from the Australian Light Horse Studies Centre