Excel 2013
Cell Basics
To use the fill handle:
There may be times when you need to copy the content of one cell to several other cells in your worksheet. You could copy and paste the content into each cell, but this method would be very time consuming. Instead, you can use the fill handle to quickly copy and paste content to adjacent cells in the same row or column.
- Select the cell(s) containing the content you wish to use. The fill handle will appear as a small square in the bottom-right corner of the selected cell(s).
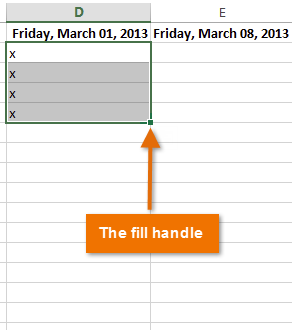 Locating the fill handle
 - Click, hold, and drag the fill handle until all of the cells you wish to fill are selected.
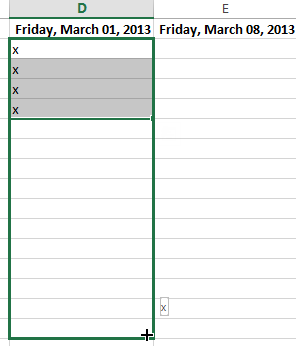 Dragging the fill handle
 - Release the mouse to fill the selected cells.
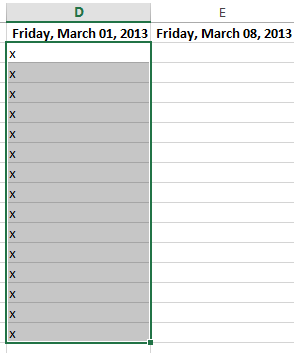 The filled cells
To continue a series with the fill handle:
The fill handle can also be used to continue a series. Whenever the content of a row or column follows a sequential order, like numbers (1, 2, 3) or days (Monday, Tuesday, Wednesday), the fill handle can guess what should come next in the series. In many cases, you may need to select multiple cells before using the fill handle to help Excel determine the series order. In our example below, the fill handle is used to extend a series of dates in a column.
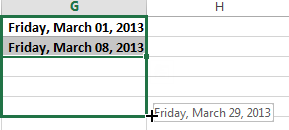 Using the fill handle to extend a series
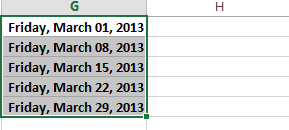 The extended series
To use Flash Fill:
A new feature in Excel 2013, Flash Fill can enter data automatically into your worksheet, saving you a lot of time and effort. Just like the fill handle, Flash Fill can guess what kind of information you're entering into your worksheet. In the example below, we'll use Flash Fill to create a list of first names using a list of existing email addresses.
- Enter the desired information into your worksheet. A Flash Fill preview will appear below the selected cell whenever Flash Fill is available.
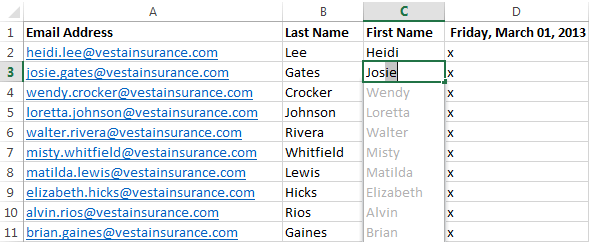 Previewing Flash Fill data
 - Press Enter. The Flash Fill data will be added to the worksheet.
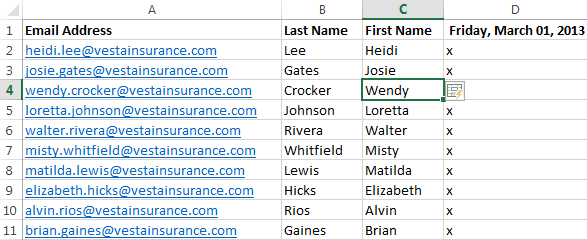 The entered Flash Fill data
To modify or undo Flash Fill, click the Flash Fill button next to recently added Flash Fill data.
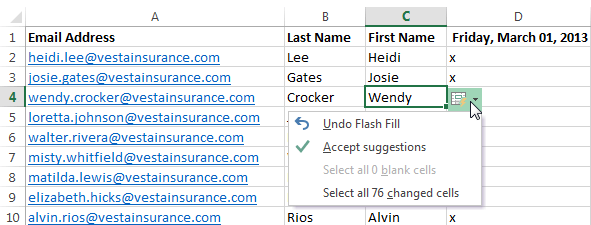 Clicking the Flash Fill button


