Lesson 21: Using the Set Timing Feature
/en/powerpoint2003/ordering-objects-on-a-slide/content/
Introduction
By the end of this module, you should be able to:
- Set the timing for each slide
Using the set timing feature
By default, PowerPoint is set to advance from one slide to the next when you click your mouse, use the down arrow key, or press the Page Down key. However, you can change this default setting and program your PowerPoint presentation slides to advance at specified time intervals. In PowerPoint, this feature is called set timing.
To set timing:
- Select Slide Show
 Slide Transition from the main menu.
 - Select View
 Slide Sorter.
 - Select all slides using your mouse.
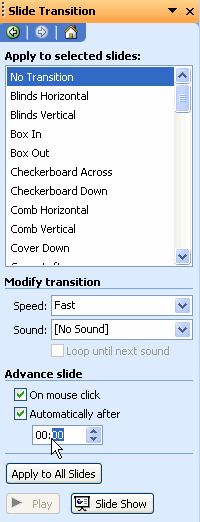
- Deselect On mouse click in the Slide Transition task pane.
- Select Automatically After.

- Enter the amount of time you would like to display each slide.
- Click Apply to All Slides.
Challenge!
Download and save the Sample PowerPoint presentation to complete this challenge.
- Open the Sample PowerPoint presentation.
- Set the timing for the presentation so each slide automatically advances after five seconds.
- Close the presentation without saving the file.
/en/powerpoint2003/using-the-set-rehearse-timing-feature/content/


