Lesson 33: Sharing Your Presentation Online
/en/powerpoint2016/rehearsing-and-recording-your-presentation/content/
Introduction
PowerPoint offers several options to enhance or even totally change the way you deliver presentations. Instead of presenting your slide show normally, you can choose to present it as a video, or you can even present it live online so others can view it remotely. No matter how you choose to give your presentation, you can enhance it by customizing your slide show to remove or reorder slides. All of these options can help you give a polished and professional presentation.
Watch the video below to learn more about the different ways you can share your presentation.
Exporting a presentation as a video
The Create a Video feature allows you to save your presentation as a video. This can be useful because it lets your viewers watch the presentation whenever they want. To make sure your viewers have enough time to view each slide, you might want to rehearse the timings or record your slide show before using this feature.
To create a video:
- Click the File tab to access Backstage view.
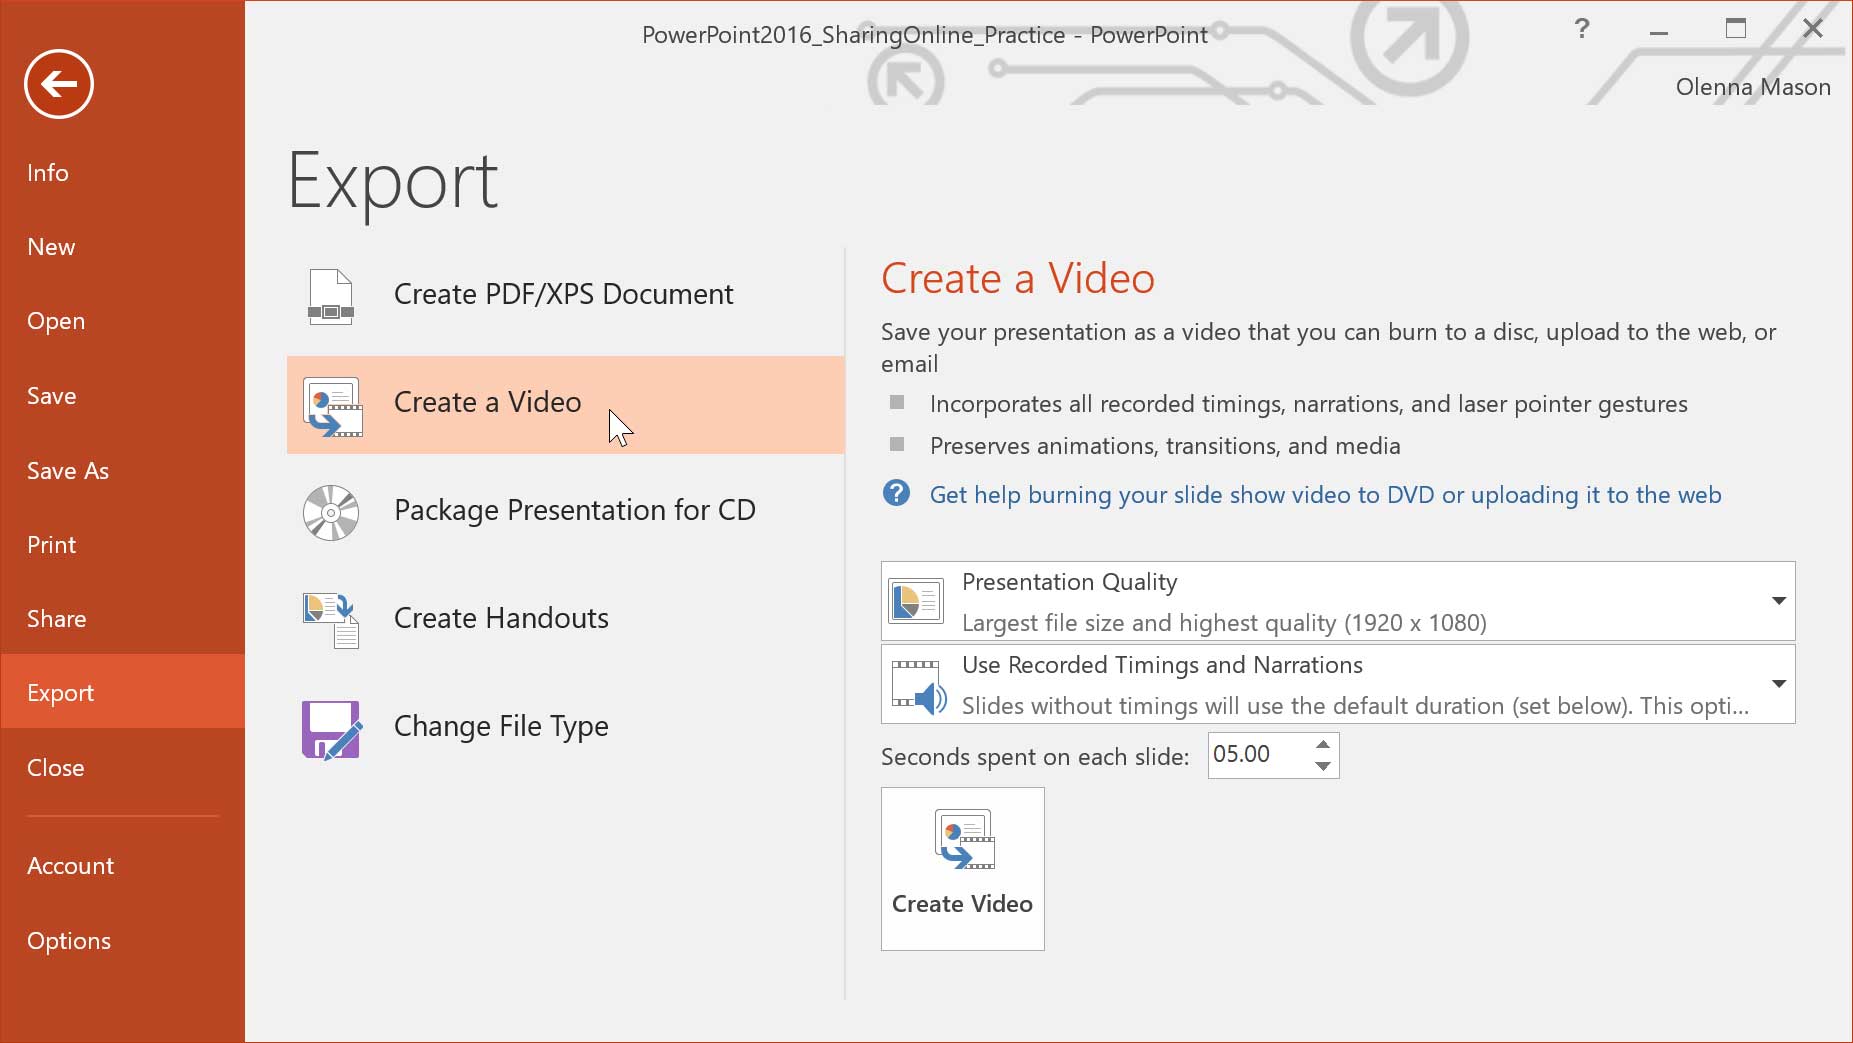
- Select Export, then click Create a Video. Video export options will appear on the right.
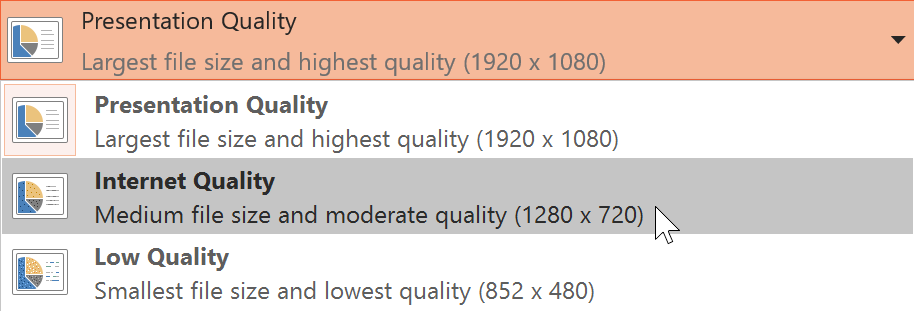
- Click the drop-down arrow next to Presentation Quality to select the size and quality of your video.
- Select the drop-down arrow next to Use Recorded Timings and Narrations. Choose Don't Use Recorded Timings and Narrations if you don't have or don't want to use recorded timings. You can also choose Use Recorded Timings and Narrations if you have already recorded timings and narrations and want to use them in your video.
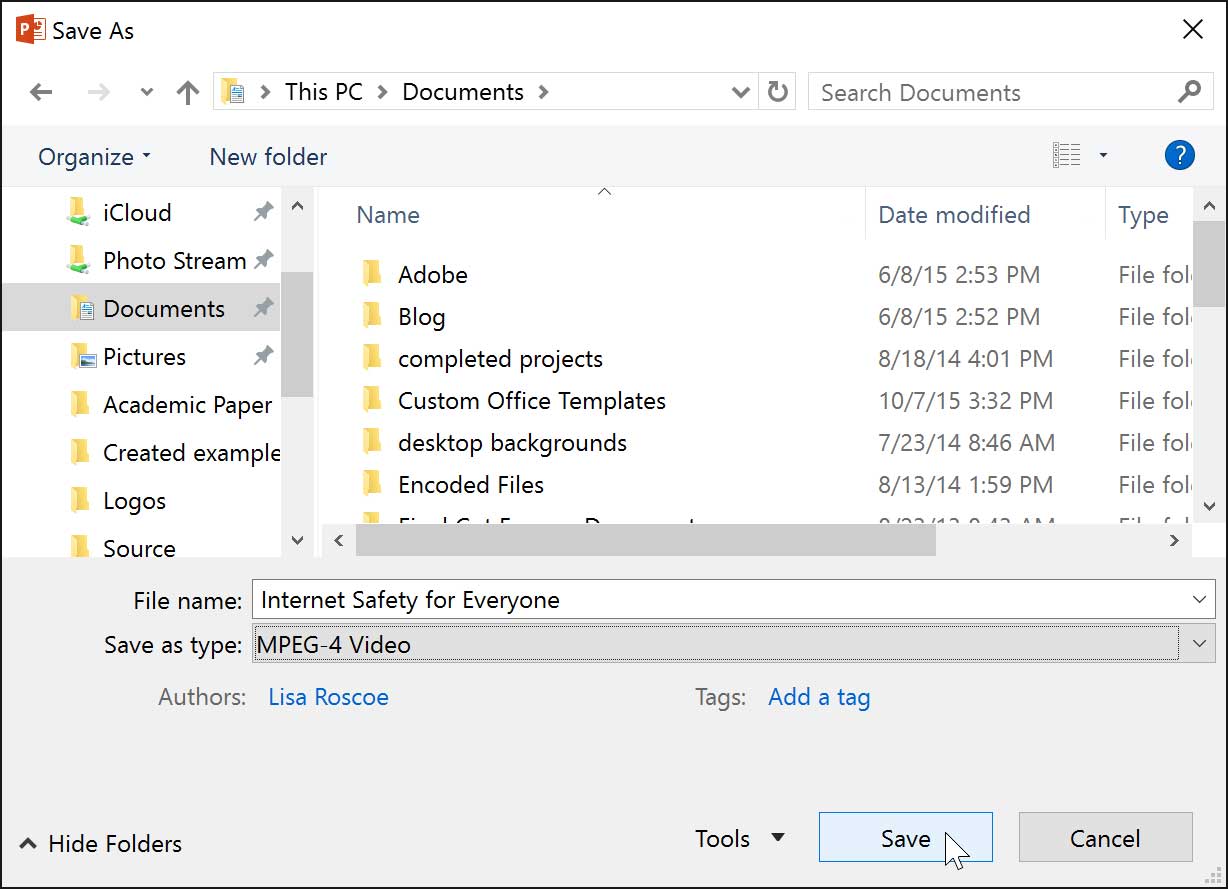
- Click Create Video. The Save As dialog box will appear.
- Select the location where you want to save the presentation, then enter a name for the presentation.
- Click Save. As PowerPoint creates your video, a status bar will appear at the bottom of the PowerPoint window. When the bar is complete, your video is ready to view, send, or upload.
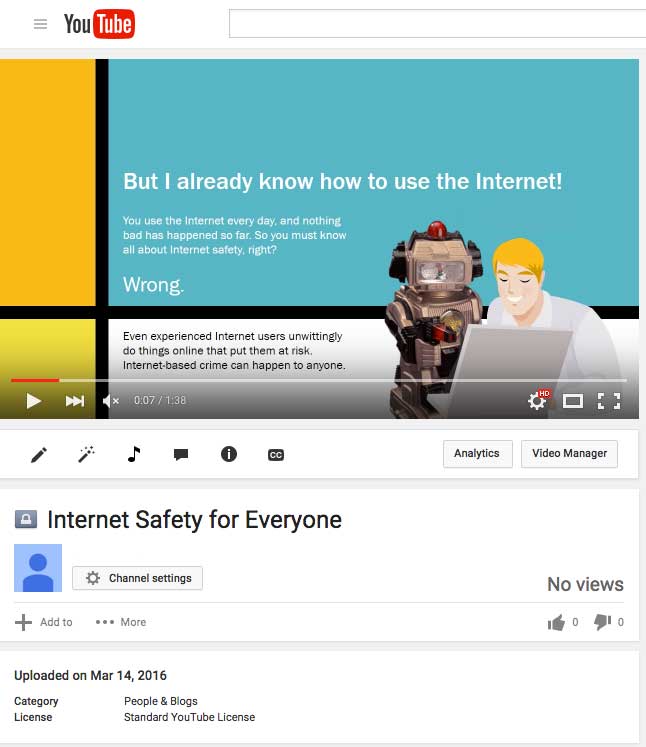
In addition to emailing your video, you can upload your video to free video-sharing sites like YouTube. Once your video is uploaded, you can give the link to anyone you want to see it. To learn more about using YouTube to share videos online, visit our YouTube tutorial.
Presenting your slide show online
Presenting a slide show online is surprisingly easy. All you and your viewers need is an Internet connection—they don't even need PowerPoint. Once your viewers are connected, you can start the presentation as you normally would.
Please note that you cannot edit your presentation or mark it with a highlighter or pen while you are presenting a slide show online. You also cannot use PowerPoint to speak to your audience. Plan to communicate with your viewers through teleconferencing, or pre-record your narration.
To present online:
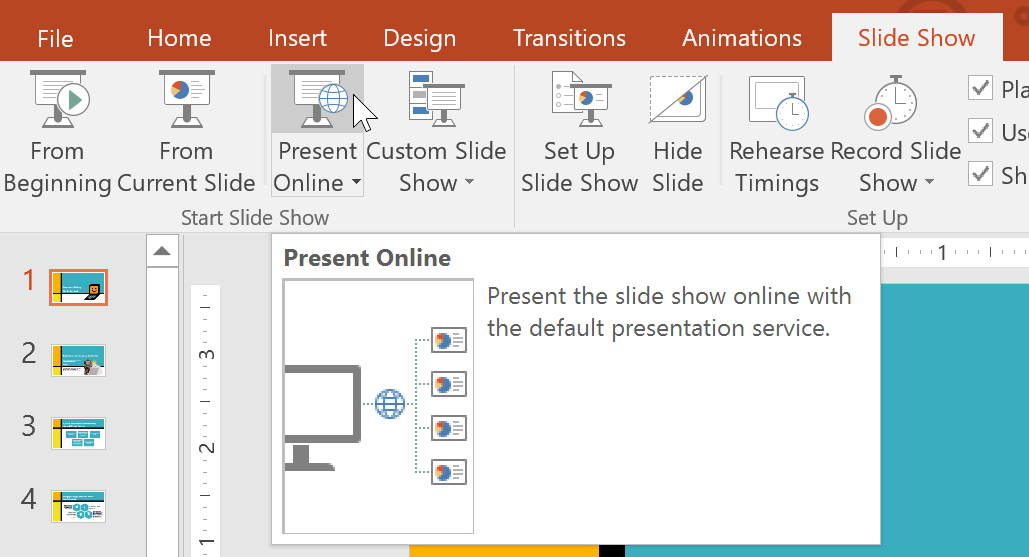
- Select the Slide Show tab, then locate the Start Slide Show group.
- Click the Present Online command.
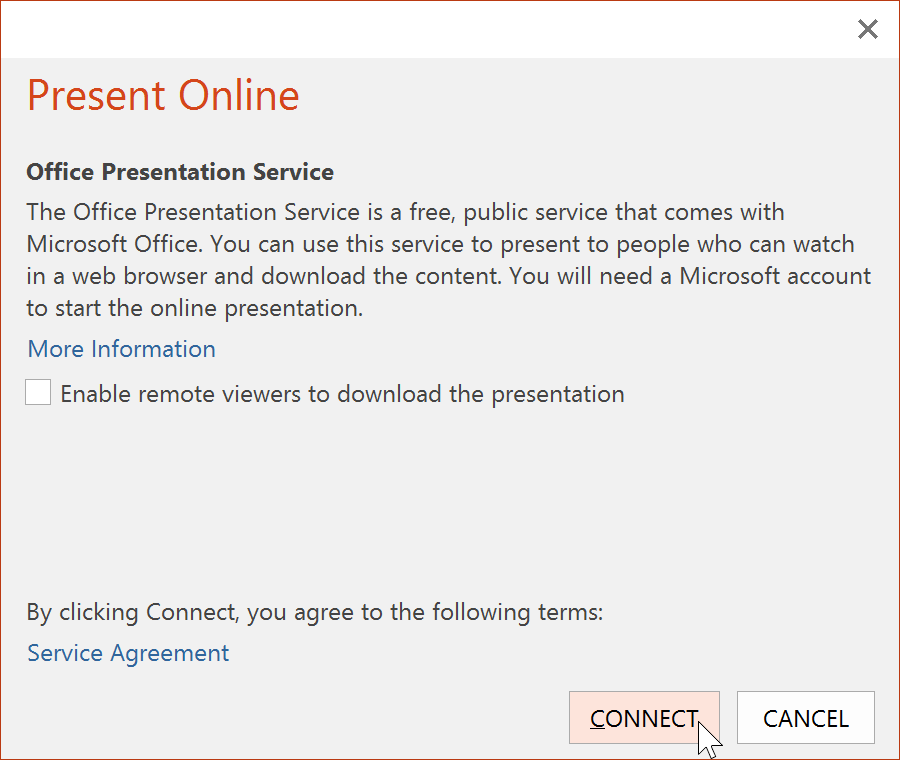
- A dialog box will appear. Click Connect. A status message will appear as PowerPoint prepares your online presentation.
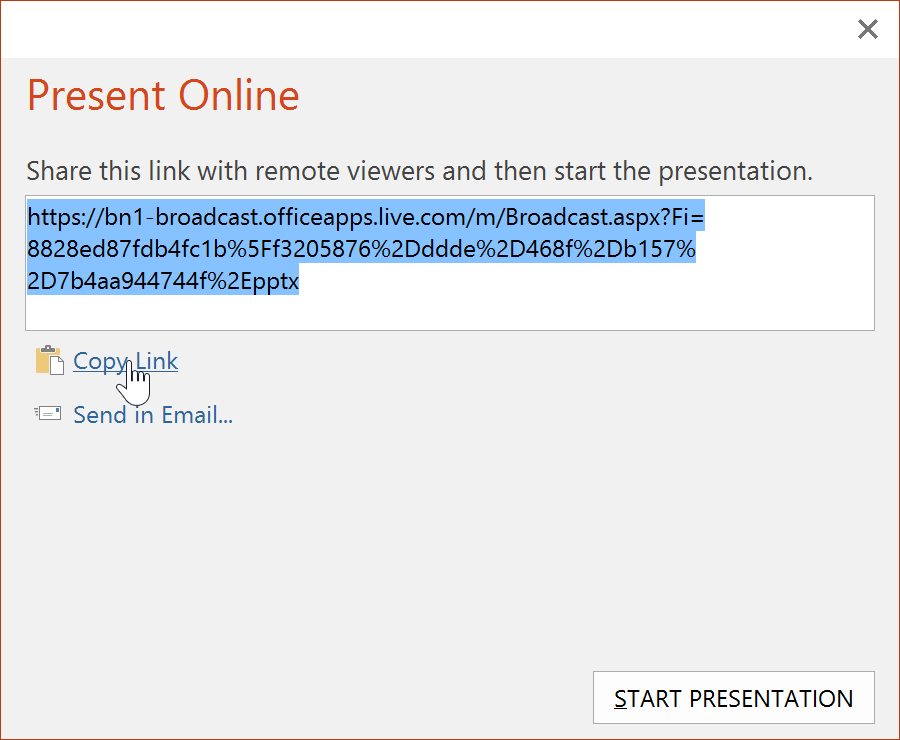
- A link will appear. If it's not already selected, select the link.
- Click Copy Link to make a copy of the link, which you can paste just about anywhere—including Facebook, a blog, or an email. You'll just want to make sure each of your viewers receives a copy of the link before you begin your presentation.
- Click Start Presentation.
- Present the slide show as you normally would, using the mouse or keyboard to advance the slides.
- When you are finished, click End Online Presentation.
- A dialog box will appear to confirm that you want to end the presentation. Click End Online Presentation.
Challenge!
- Open our practice presentation.
- Export the practice presentation as a video, and save it to your computer.
- If you have a friend or family member with an Internet connection, try to present the slide show online.
/en/powerpoint2016/buying-office-2016/content/


