This article was co-authored by Ashleigh Grounds. Ashleigh Grounds is a Makeup Artist and Hair Stylist based in Austin, Texas. Ashleigh has over 11 years of cosmetology experience. She studied cosmetology in Dallas, Texas and completed a two-year hair salon apprenticeship in Kuala Lumpur, Malaysia with Toni & Guy Hair Salon. She is accredited by the International Board of Cosmetology, is a certified Babe Hair Extension Professional, and is a certified Brazilian Blow Out Professional. Ashleigh was voted the best Hair Stylist in Austin for 2012 by RAW Artists and was voted in the top 20 salons for 2020 in Austin by Expertise. Ashleigh's work has been featured in Talentmagazines, BlogTalkRadio, KXAN, and Studio 512.
There are 10 references cited in this article, which can be found at the bottom of the page.
This article has been viewed 47,233 times.
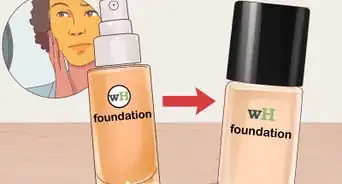
Applying foundation can help even out the skin tone on your face. You can hide blemishes, dark spots, or redness by using foundation to create naturally even-looking skin. Makeup sponges are a popular makeup tool since they are easy to use with different types of foundation. Using makeup sponges is an easy technique, and with a little practice, you’ll start using them in your regular makeup routine!
Steps
Preparing Your Skin and Makeup
-
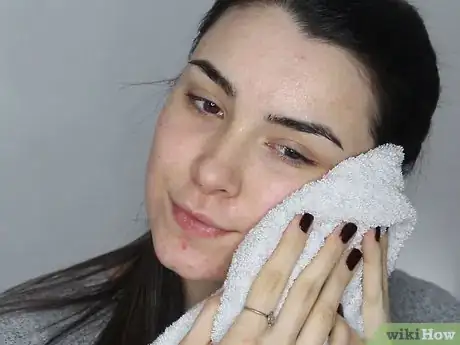
1Cleanse your face first. If you want your foundation to look smooth and even, it's important to maintain a good skincare routine.[1] Use cleanser and warm water to wash your face. Water that’s too hot or cold might irritate your skin. Massage the cleanser gently into your skin with your fingertips. After you've washed your face thoroughly, rinse away the cleanser with warm water, making sure you don't leave any residue.
- When you're finished, gently pat your face dry with a towel.
- You may also want to mist your face with toner to help rebalance your skin.
-
2Moisturize your face. Using moisturizer immediately after you wash your face will help your skin hold in moisture. Plus, your foundation will blend more evenly and create a flawless look when your skin is well-moisturized. Let the moisturizer dry for at least 1 minute.
- If you can’t wait for the moisturizer to dry, blot your face with a tissue after moisturizing.
Advertisement -
3Apply foundation primer. Squirt a pea-sized amount of primer onto the back of your hand. Blend the primer into your face using gentle circular motions with your fingertips. Let it dry for 2 to 3 minutes before adding foundation.[2]
- Different kinds of primers have different uses, so choose one that matches your skincare needs. For instance, if you have an uneven skin tone, you might pick a primer that balances out redness or covers dark spots. If you have fine lines or large pores, you might choose a primer that helps fill those areas in.[3]
-
4Use a slightly damp makeup sponge for natural-looking coverage. Wet your makeup sponge and squeeze out excess water until it's just damp. A slightly damp sponge won’t soak up excess foundation. You'll be able to build foundation gradually onto your face for a natural look.[4]
- An egg-shaped Beautyblender is one of the most popular types of makeup sponges, but you can also try a wedge or flocked sponge.
- Don't wring out the sponge or squeeze it tightly. By doing so, you may be damaging the sponge. [5]
-
5Pour a dime-sized amount of foundation onto the back of your hand. Doing this rather than pouring directly from bottle to sponge will ensure you don’t waste excess foundation. Only pour a small amount at first. You can always pour more onto your hand if needed.[6]
- If you are using pressed powder foundation, you can dip the sponge directly into the foundation.[7]
Using Your Makeup Sponge
-
1Dip your sponge gently into the foundation on your hand. Dip the thickest, widest part of the sponge into the foundation on your hand. Since your sponge is still damp, the foundation won’t soak into the sponge. Start with only a little foundation at first, so you can get used to blending with the sponge.[8]
-
2Dab foundation onto the center of your face and blend outward. Start from the center of your face and move towards your hairline. Use a gentle bouncing or tapping motion to distribute the foundation onto your skin. Dabbing rather than rubbing will apply makeup more evenly and naturally.[9]
- Makeup artists call this “stippling.”[10]
-
3Continue dabbing foundation into your face and neck until blended. If your sponge is egg-shaped, use the small pointed edge around your eyes and nose. Use the larger, round part of your sponge for your cheeks, forehead and jawline. Blend until the foundation looks like your natural skin.[11]
- If you can see where the blended foundation meets your neck, the color may be too dark or too light. Make sure you’ve chosen the best foundation for your skin type and tone.
- Only apply the foundation to your jawline and neck when there is a small amount of foundation left on the sponge.
-
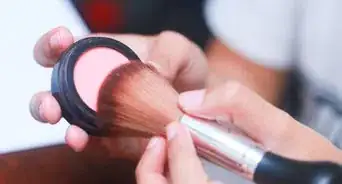
4Wait 2 to 3 minutes or finish applying your makeup, then apply setting powder. Let the foundation set for a few minutes and finish applying any other makeup you want to wear before applying setting powder, which will keep the foundation in place. You can use your makeup sponge or a small fluffy makeup brush to apply the powder in a gentle dabbing motion.[12]
- Setting powder can also help set your eyeliner, mascara, or lipstick.
-
5Wash your sponge with facial cleanser or mild soap after every use. You can also use makeup cleanser for sponges. Rinse your sponge in warm water and massage it with a few drops of facial cleanser or mild soap. If the sponge is stained with makeup, then you can also soak it in soapy water overnight. Rinse and wring it out until the water from the sponge runs clear.
- Bacteria and mold can grow quickly in sponges, and using a dirty sponge can make blending foundation harder.[13]
-
6Let your sponge air dry before using it again. After washing your sponge, roll it back and forth onto a clean towel to remove remaining moisture. Let it dry flat on the towel completely. You should replace old sponges every 3 months.[14]
Expert Q&A
Did you know you can get expert answers for this article?
Unlock expert answers by supporting wikiHow
-
QuestionHow do you get flawless makeup?
 Ashleigh GroundsAshleigh Grounds is a Makeup Artist and Hair Stylist based in Austin, Texas. Ashleigh has over 11 years of cosmetology experience. She studied cosmetology in Dallas, Texas and completed a two-year hair salon apprenticeship in Kuala Lumpur, Malaysia with Toni & Guy Hair Salon. She is accredited by the International Board of Cosmetology, is a certified Babe Hair Extension Professional, and is a certified Brazilian Blow Out Professional. Ashleigh was voted the best Hair Stylist in Austin for 2012 by RAW Artists and was voted in the top 20 salons for 2020 in Austin by Expertise. Ashleigh's work has been featured in Talentmagazines, BlogTalkRadio, KXAN, and Studio 512.
Makeup Artist & Hair Stylist
-
QuestionWhat should I do before I apply foundation?
 Ashleigh GroundsAshleigh Grounds is a Makeup Artist and Hair Stylist based in Austin, Texas. Ashleigh has over 11 years of cosmetology experience. She studied cosmetology in Dallas, Texas and completed a two-year hair salon apprenticeship in Kuala Lumpur, Malaysia with Toni & Guy Hair Salon. She is accredited by the International Board of Cosmetology, is a certified Babe Hair Extension Professional, and is a certified Brazilian Blow Out Professional. Ashleigh was voted the best Hair Stylist in Austin for 2012 by RAW Artists and was voted in the top 20 salons for 2020 in Austin by Expertise. Ashleigh's work has been featured in Talentmagazines, BlogTalkRadio, KXAN, and Studio 512.
Makeup Artist & Hair Stylist
References
- ↑ Ashleigh Grounds. Makeup Artist & Hair Stylist. Expert Interview. 22 April 2020.
- ↑ https://www.allure.com/gallery/primer-tricks-youve-never-heard-before
- ↑ Ashleigh Grounds. Makeup Artist & Hair Stylist. Expert Interview. 22 April 2020.
- ↑ https://www.instyle.com/beauty/how-to-use-a-makeup-sponge
- ↑ https://www.glamour.com/story/best-makeup-sponges-for-applying-foundation-bronzer-blush
- ↑ https://youtu.be/iNCegDN2iXg?t=112
- ↑ https://www.bustle.com/articles/166825-do-beauty-blenders-work-with-powder-i-tried-it-out-heres-what-happened-photos
- ↑ https://www.instyle.com/beauty/how-to-use-a-makeup-sponge
- ↑ https://www.glamour.com/story/best-ways-to-use-makeup-sponge
- ↑ https://www.glamour.com/story/best-ways-to-use-makeup-sponge
- ↑ https://www.bustle.com/articles/125693-how-to-use-a-beauty-blender-in-5-simple-steps-to-get-flawless-looking-foundation
- ↑ https://www.seventeen.com/beauty/makeup-skincare/a39449/ways-youre-applying-face-powder-wrong/
- ↑ https://www.glamour.com/story/best-ways-to-use-makeup-sponge
- ↑ https://www.allure.com/story/how-often-should-you-replace-your-beautyblender
