This article was co-authored by Nini Efia Yang. Nini Efia Yang is the Owner of Nini's Epiphany, a San Francisco Bay Area makeup and hair studio. Specializing in bridal makeup with almost 10 years of experience, her work has been featured in Ceremony Magazine, They So Loved, and Wedding Window.
There are 10 references cited in this article, which can be found at the bottom of the page.
wikiHow marks an article as reader-approved once it receives enough positive feedback. In this case, 93% of readers who voted found the article helpful, earning it our reader-approved status.
This article has been viewed 166,393 times.
Whether you want to create wrinkles, scrapes, scars, or try out zombie and fantasy looks, latex makeup is the way to go! Before you start on your masterpiece, take a second to plan your look. Then, start experimenting with different techniques and you'll make something out of this world!
Steps
Applying Liquid Latex
-
1Shave the area before applying liquid latex. As it dries, liquid latex will get caught in any hair underneath the application area, which will cause pain when you attempt to remove the latex. If possible, shave the area so you have a pain-free removal process once the latex has dried.
-
2Coat any hair you don't shave with vegetable oil or petroleum jelly. If you're applying latex onto an area you can't shave, like your eyebrows, try coating them with a moderate, even layer of vegetable oil or petroleum jelly. This will help lubricate the hairs and prevent any pain caused from removing the latex.
- You can use any kind of vegetable oil, like canola or olive oil.
- You can also apply lotion to any remaining skin to make the application process smoother.
Advertisement -
3Shake your latex bottle well before you apply your makeup. Keep the cap on the bottle, and shake the bottle up and down for a few seconds. This ensures the latex is mixed thoroughly.
- If your latex is not shaken up well, it may not apply correctly.
-
4Apply a thin coat of liquid latex using a brush or sponge. After shaking the bottle, pour it into a bowl. Dip a brush or a sponge into the bowl, then apply the liquid latex to the area you want to cover.[1] Be careful to only apply a small amount, as liquid latex dries quickly.[2]
- Use a plastic cup or bowl, so you can reuse it later.
-
5Use a hair dryer or wait for the liquid latex to dry. Your liquid latex will dry in about 5 to 10 minutes at body temperature.However, you can also dry your liquid latex with a hair dryer between applications. Set your hairdryer on low and hold it about 5 inches (13 cm) away from your skin. Once the latex is dried, you can apply more layers, or move on to decorating![3]
-
6Wash your brushes and sponges between uses in warm, soapy water. If the latex dries on your brush, it will stiffen up the bristles and ruin the brush. Always stop in between your applications to rinse your brushes in soapy water.[4]
- You can run them under the faucet and wash them with soap, or you can fill a bowl with soap and water and let your brushes soak.


Creating Your Look
-
1Create wrinkles by stretching your muscles as the latex dries. Immediately after applying the latex, pull in your cheek muscles tightly. Release your cheek muscles after your latex dries. This should create wrinkles and lines in the dried latex.[5]
- You can do this for many other parts of the body as well, just tighten and release those specific muscles.
- You can also use some wrinkle stipple to create more defined wrinkles.
-
2Apply spirit gum and tissues or cotton to create fake scars. Spirit gum will help bind the tissue to your skin, and the tissues will build up texture that mimics scars. Brush liquid latex over top and let it dry.[6]
-
3Apply tissue or toilet paper before the latex to create fake wounds or cuts. Place a flat piece of tissue paper on your skin and hold it in place with a hand. Once you've arranged it, create small cuts down the paper with a toothpick or tweezers, then squirt the liquid latex onto your skin and on the tissue paper.
- The liquid latex should hold the tissue paper to your skin.
- Apply more coats and tissue paper to achieve your desired look and ensure everything will stay in place.
- To make scars or cuts, apply a long strip of latex and let it dry. Then, roll in the edges and apply another layer of latex over the top.
-
4Experiment with multiple wounds to make a zombie look. Try a combination of bite marks, scratches, and open wounds. The combination of several different effects will make your zombie costume look realistic and detailed.


Decorating Your Latex
-
1Apply foundation to blend the latex into your other makeup. After your latex has dried, blend the latex with your skin using liquid or powder foundation.[7] Dab your foundation over the latex and the skin immediately touching it. This will make your skin and the latex look seamless!
-
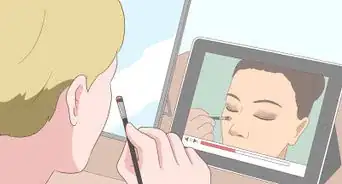
2Use eyeliner and eyeshadow to create highlights or shadows in the latex. Eyeliner is a great way to make bold lines or add fine detail. Eyeshadow comes in a variety of colors, and some are sparkly or shimmery. These hues can be applied to your latex makeup to add different effects and colors.[8]
- For example, use greens, grays, or blacks for a zombie look.
- Use dark reds, purples, and crimsons to help detail wounds and scars.
-
3Decorate your makeup with grease paints. Grease paints are paints you can use to expand upon your latex makeup. Purchase some grease paints and paint over top of your liquid latex. Adding extra color or dimension makes your special effects makeup look even more realistic and detailed.[9]
- Paint on details like wrinkles or bruises.
- You can apply grease paint all over for full-bodied looks.
-
4Dust your latex makeup with a loose powder or use finishing spray to complete your look. This is particularly helpful if you have already applied liquid foundation. Use a brush to apply powder, or spray the finishing spray across your face lightly. Setting your makeup will help to finish your look.[10]
-
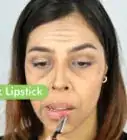
5Add lip color to match your look. Whether or not you have latex incorporated into your mouth or jaw area, you can pick a lip color to go with your look. Try lipstick, tinted lip balm, or paint, depending on your look. Throw on some lip color after your latex has dried.
Removing Liquid Latex
-
1Peel the plastic off in pieces from your skin. As long as the latex does not hurt to pull on, peel off the liquid latex from your face or body. It should come off in larger chunks.[11]
-
2Loosen the remaining latex with warm water. The heat will loosen up the liquid latex and make it easier to remove. Peel off the remaining pieces as they get looser.[12]
-
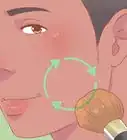
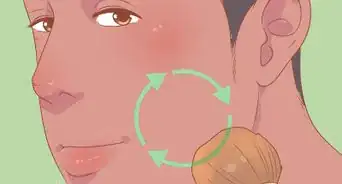
3Wipe away the latex with soap, water, and a washcloth. Wash off any remaining makeup or latex with soap and water. Then, rub a washcloth over your makeup in small, circular motions. This should lift up any remaining latex. Pat your skin dry with a dry towel.[13]
-
4Use soap and warm water to remove liquid latex from hair. Take a shower, and lubricate the hairs with lots of warm, soapy water. You can use a washcloth or loofah to help remove the latex. Move the washcloth in circular motions to loosen the latex.[14]
- If you still are having trouble removing the latex, try dabbing some rubbing alcohol over the latex. Use a cotton ball or swab, and lightly rub some rubbing alcohol over the latex. This should help loosen it from your skin.

Expert Q&A
Did you know you can get expert answers for this article?
Unlock expert answers by supporting wikiHow
-
QuestionHow long does it take for liquid latex to set?
 Laura MartinLaura Martin is a Licensed Cosmetologist in Georgia. She has been a hair stylist since 2007 and a cosmetology teacher since 2013.
Licensed CosmetologistEach layer will take 5-10 minutes to dry, but you can use a hair dryer to speed up the setting time.
Support wikiHow by unlocking this expert answer.
-
QuestionWhat is liquid latex made out of?Laura MartinLaura Martin is a Licensed Cosmetologist in Georgia. She has been a hair stylist since 2007 and a cosmetology teacher since 2013.
Licensed CosmetologistLiquid latex is made out of latex, water, and ammonia. The ingredients create a pliable, fast-drying material that is often used to create special effect makeup.Support wikiHow by unlocking this expert answer.
-
QuestionCan you use liquid latex as an adhesive?Laura MartinLaura Martin is a Licensed Cosmetologist in Georgia. She has been a hair stylist since 2007 and a cosmetology teacher since 2013.
Licensed CosmetologistYes, liquid latex can be used as an adhesive. You can use it to attach prosthetic scars, ridges, etc. You can also use it to build special effects from scratch.Support wikiHow by unlocking this expert answer.
Warnings
- Perform an allergy test before you apply any latex. Liquid latex is completely safe, though latex allergies and sensitivities are rather common. Before you start on your makeup, apply a small amount of liquid latex to the inside of your elbow. Allow the latex to dry, and wait 30 minutes. If there is no rash or allergic reaction, you should be safe to use the Liquid Latex.[15]⧼thumbs_response⧽
- Avoid getting liquid latex in your eyes or mouth. It is for external use only.⧼thumbs_response⧽
- If you get liquid latex in your eyes, rinse thoroughly with a saline solution. Contact your doctor or emergency services if you experience any adverse reactions or symptoms.⧼thumbs_response⧽
- Keep in mind that liquid latex will separate from sweat and natural oils. These are natural reactions, though be mindful of your latex lifting off the surface.⧼thumbs_response⧽


References
- ↑ Nini Efia Yang. Makeup Artist. Expert Interview. 27 August 2019.
- ↑ https://youtu.be/eWcfmrUlmzI?t=1m45s
- ↑ https://www.theguardian.com/lifeandstyle/2015/oct/29/halloween-costume-ideas-zombie-walking-dead-makeup-tips
- ↑ https://youtu.be/eWcfmrUlmzI?t=1m31s
- ↑ Nini Efia Yang. Makeup Artist. Expert Interview. 27 August 2019.
- ↑ https://snapguide.com/guides/make-a-fake-wound-1/
- ↑ Nini Efia Yang. Makeup Artist. Expert Interview. 27 August 2019.
- ↑ https://www.allure.com/story/other-uses-for-eye-shadow
- ↑ https://www.allure.com/story/how-to-remove-halloween-face-paint
- ↑ http://theeverygirl.com/make-makeup-last-day/
- ↑ https://www.maskworld.com/english/disguise-news/ears-noses-scars-wounds-tips-for-latex-prosthetic-pieces#4
- ↑ https://www.maskworld.com/english/disguise-news/ears-noses-scars-wounds-tips-for-latex-prosthetic-pieces#4
- ↑ https://www.maskworld.com/english/disguise-news/ears-noses-scars-wounds-tips-for-latex-prosthetic-pieces#4
- ↑ https://www.maskworld.com/english/disguise-news/ears-noses-scars-wounds-tips-for-latex-prosthetic-pieces#4
- ↑ http://www.bandolier.org.uk/bandopubs/NHSSlatex.html
About This Article