This article was co-authored by Daniel Vann. Daniel Vann is the Creative Director for Daredevil Cosmetics, a makeup studio in the Seattle Area. He has been working in the cosmetics industry for over 15 years and is currently a licensed aesthetician and makeup educator.
There are 15 references cited in this article, which can be found at the bottom of the page.
This article has been viewed 1,118,458 times.
Makeup isn’t only for women. A little makeup can go a long way towards accentuating your features and hiding flaws. Apply foundation to smooth out bumps and narrow features. Treat dark circles and other blemishes with concealer. Use eyebrow pencils and eyeliner to give yourself your own unique look. The key to applying makeup is to use a small amount of it on moisturized skin and blend it so it looks natural.
Steps
Highlighting and Contouring Your Face
-
1Highlight areas of your face you wish to feature. A liquid highlighter will make the important areas of your face look more radiant. Highlight your nose by brushing a thin line down its bridge. Fill in the area between the eyebrows with diagonal strokes. Use gentle strokes as you move and watch as your skin begins to look younger and smoother.[1]
- Try highlighting other areas. Color in the space between your lower eyelids and upper cheekbones. Place a little bit around your nostrils and above the arches of your eyebrows.
- Your highlighter should be two shades lighter than your skin tone. Those with light skin, for instance, wouldn’t want to use brown or orange highlighters.[2]
-
2Blend in the highlighter with your fingers. Tap or massage the highlighter into your skin. You don’t need to use a lot of force. Small areas, such as around your nose, can be handled by patting in the makeup with a single finger. For larger areas, such as the bridge of your nose, rub your finger lightly up and down the highlighted area.
- When you’re finished, the highlighter won’t leave any obvious lines.
Advertisement -
3Contour your face with foundation. Apply foundation over the areas you wish to sculpt. For your nose, brush on a line all the way down both its sides. The darker foundation should be next to the highlight on the bridge of your nose. Later on, your nose will appear thinner and more shapely.[3]
- Try contouring other areas. Start at eyebrow level on the side of your head and follow your head’s curve upwards to your hairline. Also, suck in your cheeks and paint from near your lower eyelid, along the hollow of your cheek, and down into your jawline.
- Your foundation should also complement your skin tone, but be about two shades darker.
-
4Blend the foundation with your fingers. Gently go over the foundation lines. Pat them down and rub them into your skin. The goal is to soften the lines so the foundation blends in and becomes undetectable.
-
5Cover dark areas with light-colored foundation. A stippling brush is useful for applying and blending in this second coating of foundation. Dip the brush, a cotton ball, or makeup sponge in the foundation. Tap the brush against the areas you wish to cover. When you get to your nose, work from bottom to top and finish blending it with your fingers.[4]
- This lighter foundation should be two shades lighter than your skin tone.
-
6Powder over highlighted areas. The powder is used to reduce the unnatural skin glow some makeup, warm temperature, and bright lights can cause. Get a pressed powder a shade lighter than your skin tone. Use a brush to spread a light coating over the areas you highlighted earlier.
-
7Color your face with bronzer. Bronzer is useful if you think you look a little pale. Get a bronzer two shades darker than your skin tone. With your brush, follow the contour lines you made earlier. Use circular motions to blend the bronzer and highlighter.[5]
- After this, you may continue to make adjustments. Try blending in some blush on your cheekbones, nose, eyelids, and chin.
- You can also use a lip liner to draw on freckles and other beauty spots you covered. This will ensure your skin maintains a natural, no makeup look.
Concealing Dark Circles and Blemishes
-
1Test the concealer on your arm. Find the veins on the underside of your wrist. Rub a little bit of the concealer into your skin. If it matches your skin, it’ll hide the veins. A concealer that matches your skin will look natural when used to hide marks on your face.
- Men with oily skin should avoid cream and stick concealers. Those with dry skin should avoid liquid concealers.[6]
- Colored concealer, used in place of your regular concealer, can help cover up certain marks. Use the opposite color from what’s on your face. Orange pigment can help cover bluish dark circles and green pigment can help cover red blemishes.[7]
-
2Apply the concealer around the blemish. Dab the concealer near the blemished area. You can do this directly with stick concealer or by using a finger or brush. Look into a mirror. Spread small amounts of the concealer all around the border of the darkened area. Don’t forget add some concealer on the top of raised blemishes.
- Foundation works the same way as a concealer but doesn’t blend in well with facial hair. Avoid using foundation and concealer at the same time under facial hair..
-
3Blend in the concealer with your fingers. Take your fingertips and tap them against the concealer. Gently rub the cream into the area. Keep a delicate touch when working around painful blemishes. It won’t take long for the concealer to blend in with your skin.

Filling in Your Eyebrows
-
1Brush your eyebrows into shape. Start near the center of your face. Use gentle strokes to draw the hairs upwards. Continue doing this down to the thin part of the eyebrows. As you reach the end, brush to the side so your brows end in points.[8]
- A spoolie is a tiny brush used on eyebrows. It looks similar to a mascara brush, but make sure you don’t grab a makeup-filled brush by mistake.
-
2Pluck your eyebrows with tweezers. Any loose hairs can be removed. Grip the hairs and pull them out one by one. Work slowly so you don’t thin your eyebrows more than you want. Take some time to step back from the mirror and see how your eyebrows look. Groomed eyebrows should complement your facial structure.[9]
- Start at the thicker part and end at the thinner part. Keep the hairs at an even length on the top and bottom of the eyebrow.
- Facial structure is important. For an oval face, for example, make your eyebrows square with space between them. For more square faces, a slight arch in your eyebrows will look better.
-
3Fill in your eyebrows with a brow pencil. Press the pencil gently against your brow. Find the place where the hairs begin to slant towards the side of your head. Make short strokes to the side to add color. For areas of vertical hair, start at the bottom of your brow and work upwards until your eyebrows look full.[10]
-
4Hold the hairs in place with brow gel. Dip the brush in the gel. Again, lightly stroke the brush along your brow. Drag the brush along the area of hair that slants towards the side of your face. Return to the vertical hair and stroke upwards from the bottom of your brow.[11]


Using Eyeliner
-
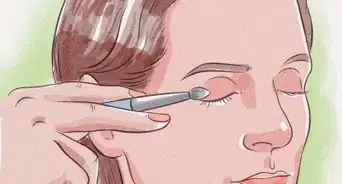
1Draw a line under your lower eyelash. Use a black eye pencil to trace along the bottom of your eye. Move slowly so you draw on an even, thin line. For a more pronounced look, you can also close your eye and color your eyelid.
- You can use gel or liquid eyeliner if you wish. These tend to be a little harder for beginners to use and are more expensive, but last longer.
-
2Smudge the eyeliner with your finger. To channel David Bowie or Johnny Depp, make your eyeliner a little messy. Take one fingertip and rub it back and forth under your eye. If you colored your eyelid, smudge that too. Don’t worry about it looking neat.[12]
-
3Line the inside of your eye. Open your eye wide. Take the pencil to your lower eyelid. Touch the pencil to the inside portion. Draw a line around it from one corner to the other.[13]
- Feel free to customize your look. You may make them more colorful by adding silver eyeshadow to the inner corners or covering the black areas with a shiny lip gloss.
- You can also add mascara to make your eyes look darker. This is done by gently dragging a mascara brush over your eyelashes.

Establishing a Skincare Routine
-
1Wash your face with an exfoliant. Exfoliants remove dead skin cells, which helps makeup settle better on your face. Apply some exfoliant. Don’t rub it in. Instead, gently massage or pat it in. Follow up by patting your face dry with a towel. Use the exfoliant at least twice a week. You should always wash your face before applying makeup.[14]
- If you have sensitive skin, use exfoliant sparingly.
- A non-exfoliant cleanser can always be used. It’s a good idea to use once (twice for oily skin) a day even when you aren’t wearing makeup.
-
2Apply toner to hydrate your skin. Toner replenishes your skin, so it’s useful anytime you apply a cleanser. Get a cotton ball or cosmetic pad. Dip it in a little bit of the toner, then use it to dab the toner across your face. It’ll keep your skin smooth and soft.[15]
- Avoid using toners with alcohol. These can dry out your face.
-
3Protect your skin with a 15 SPF moisturizer. Moisturizer, when applied in the morning, shields your skin from the sun. It can be applied at night as well to reduce the formation of wrinkles and other marks that break up makeup. Look for a product that has an SPF rating of 15 or higher. Rub it over your face and neck.[16]
- Try using moisturizer before applying makeup and after you wash it off at night.
-
4Clean off your makeup at night. Always remove makeup before you sleep. Wash your face at night to ensure you don’t leave stains on your pillow. A cleanser will help guarantee that your face is free of all makeup.
- An oil-based cleanser is effective for removing makeup, but shouldn’t be used on oily skin. Instead, stick to gels and water-based cleansers.
-
5Wear lip balm. Lip balms also protect your skin and should be applied every morning. Look for ones with at least SPF 15, since these will protect your lips from sun damage. Avoid balms that have a shiny or glossy finish. These tend to look feminine.


Expert Q&A
-
QuestionIs it ok for guys to wear makeup?
 Daniel VannDaniel Vann is the Creative Director for Daredevil Cosmetics, a makeup studio in the Seattle Area. He has been working in the cosmetics industry for over 15 years and is currently a licensed aesthetician and makeup educator.
Licensed AestheticianYes! In my time doing makeup, I've pinpointed five types of guy makeup: makeup-less, daredevil, drag, half-drag, and androgenous. Daredevil is the kind that I like to wear, where you retain some essence of your maleness, but you just look a little more sinister, a little more like a rocker. It is noticeable and flashy, but quick, and there's not a ton of makeup involved. -
QuestionHow do you create a rocker look with contouring?Daniel VannDaniel Vann is the Creative Director for Daredevil Cosmetics, a makeup studio in the Seattle Area. He has been working in the cosmetics industry for over 15 years and is currently a licensed aesthetician and makeup educator.
Licensed AestheticianIf you're going for a rocker look, focus on how your face looks when you're positioning it downward, how the shadows look when you press your chin to your clavicle. You look more like a predatory animal. Follow those shadows when you're contouring. -
QuestionHow can you create different makeup looks as a man?Daniel VannDaniel Vann is the Creative Director for Daredevil Cosmetics, a makeup studio in the Seattle Area. He has been working in the cosmetics industry for over 15 years and is currently a licensed aesthetician and makeup educator.
Licensed AestheticianIf you're going for a makeup-less look where you don't want it to show, try focusing on skin care and adding a little concealer and maybe some clear lip gloss or mascara. Make little touches here and there and use as little makeup as possible to do the trick. If you want an androgynous look, add more symmetry, more peachiness, and maybe pastel colors.
Warnings
- Applying makeup to open or bleeding spots can make those spots appear worse. Wait until they close.⧼thumbs_response⧽
- Do not exfoliate immediately after shaving. Doing so will irritate your skin.⧼thumbs_response⧽
Things You'll Need
Contouring and Highlighting
- Highlighter
- Lighter foundation
- Darker foundation
- Brushes
- Pressed powder
- Bronzer
Concealing Blemishes
- Concealer
Shaping Eyebrows
- Spoolie brush
- Tweezers
- Eyebrow pencil
- Eyebrow gel
Applying Eyeliner
- Black eye pencil
Caring for Skin
- Exfoliator
- Toner
- Moisturizer
- Makeup cleanser
- Lip balm
-Step-11.webp)


-Step-16-Version-5.webp)


References
- ↑ https://www.youtube.com/watch?v=F3lQnPFTwic&feature=youtu.be&t=139
- ↑ https://www.makeup.com/highlighter-for-your-skin-tone
- ↑ http://www.elle.com/beauty/news/a28308/how-to-contour-pro/
- ↑ https://www.youtube.com/watch?v=F3lQnPFTwic&feature=youtu.be&t=269
- ↑ https://www.youtube.com/watch?v=F3lQnPFTwic&feature=youtu.be&t=363
- ↑ http://www.paulaschoice.com/expert-advice/makeup-tips/eyes/how-to-choose-and-use-concealer.html
- ↑ http://www.askmen.com/fashion/trends_700/704_concealer-for-men.html
- ↑ http://www.elle.com/beauty/makeup-skin-care/tips/g8496/how-to-define-eyebrows/?slide=5
- ↑ http://www.huffingtonpost.com/2015/07/20/men-eyebrows-grooming_n_3749690.html
- ↑ https://www.youtube.com/watch?v=VzJvAwMyifA&feature=youtu.be&t=151
- ↑ http://www.huffingtonpost.com/2015/07/20/men-eyebrows-grooming_n_3749690.html
- ↑ https://www.beautylish.com/a/vxycv/how-to-eyeliner-for-men
- ↑ https://www.youtube.com/watch?v=eoev5w0jE-U&feature=youtu.be&t=40
- ↑ https://sokoglam.com/pages/the-korean-skin-care-routine
- ↑ http://www.paulaschoice.com/expert-advice/skincare-advice/basic-skin-care-tips/how-to-put-together-a-skin-care-routine.html
- ↑ http://www.byrdie.com/daily-skincare-routine/
About This Article

If you’re a man and you want to apply makeup to contour your face, use a light-colored liquid highlighter to bring attention to the areas of your face you wish to feature, like along the bridge of your nose or in a V-shape between your eyebrows. Tap or massage the highlighter with your fingers to blend it in, then apply a darker foundation over the areas you wish to sculpt, like down the sides of your nose, or in the hollows of your cheeks, and blend that in as well. Swipe a powder brush into setting powder and swirl it onto your face in a circular motion to set your makeup. If you want to learn how to shape your eyebrows or wear eyeliner, keep reading the article!


-Step-11.webp)
-Step-12-Version-3.webp)