This article was co-authored by Essie Karimi. Essie Karimi is a Professional Tailor and the Owner of Sew Fit Tailoring & Alterations, a sewing shop that has been operating for over 40 years. Essie specializes in tailoring, alterations, sewing, repairs, and redesign. Essie works on a variety of clothing types, including wedding dresses, formal wear, casual wear, sportswear, swimwear, and uniforms.
This article has been viewed 53,869 times.
A blind hem stitch is a classic way to tailor trousers or skirts to the right length. This barely-visible hem creates a crisp, clean appearance and is easy to do with just a bit of practice. Many sewing machines have a special foot for blind hems, but you can make the stitch on a machine even without this attachment. Once you master the process, you'll find yourself spending a lot less on alterations!
Steps
Preparing the Garment
-
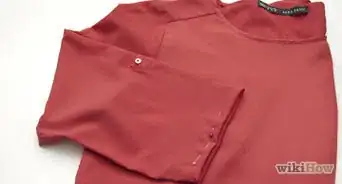
1Remove the seam from the existing hem. You can do this with a seam ripper or small nail scissors. Or, if the garment is much longer than desired, you can cut off the bottom with fabric scissors.
- Don't make the garment too short, though! Leave several inches to prepare your blind hem.
-
2Try on the garment (right side out) in front of a full-length mirror and decide on a desired length for the hem.
- Stand on a stool or table and ask a friend to put a few pins at the correct level.
Advertisement -
3Remove the garment and mark the desired hemline around the leg or skirt. Remove the pins.
- Use water-soluble pencil, pen, or chalk.
- Alternatively, you can mark the hemline with pins.
-
4Decide how deep you want your hem, and mark a line that distance above and below the hemline. For example, if you want a 2-inch deep hem, you mark a line 2 inches (5.1 cm) above and 2 inches below the hemline.
- Again, you can use a water-soluble pen or pencil, or do this with pins.
-
5Trim the raw edge, leaving about 1 inch (3 cm) below your lowest line. Be certain to leave an inch of fabric!
-
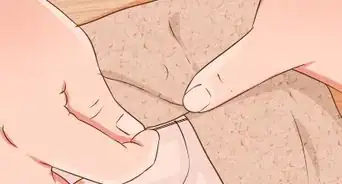
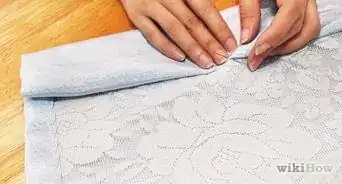
6Fold the raw edge in and press with an iron. If you have 1 inch (2.5 cm) of raw edge, tuck 1/2 inch (5.1 cm) of fabric under, leaving the remaining 1⁄2 inch (1.3 cm) under your bottom line.
- Some experts suggest sewing this fold with a basic straight stitch or finishing the raw edge with an over edge or zigzag stitch, but this may not be an essential step.[1]
-
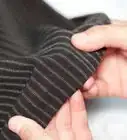
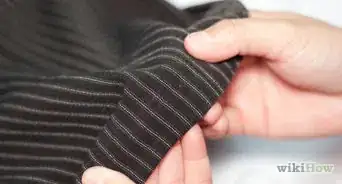
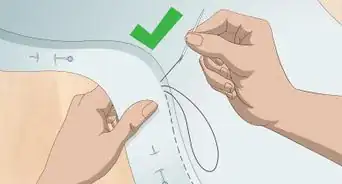
7Tuck the fabric under along the middle line so that it now forms the hemline. Do this by pinching the fabric at the middle line (what's to be your final hemline). Your other two lines (above and below the hemline) should line up, since they are equidistant from the hem. Pin around the hem to hold this fold in place.
-
8Cuff the hem by folding along the line above the hem and pin. At this point, your bottom line will once again be exposed, and below it the pressed raw edge.
- You can remove the previous pins and use them to secure the folds.
-
9Press the folds lightly with an iron. After you've done this, you can remove the pins if you wish, but it isn't necessary.[2]


Preparing Your Sewing Machine
-
1Check that your sewing machine has a blind hem presser foot in its collection. The sewing machine requires a specific foot for this stitch, with the vertical bar passing between the two feet.
- Alternatively, buy a universal blind hem presser foot for your machine in a sewing shop or online. These feet are fairly inexpensive and a good choice if your machine does not have the blind hem presser foot.[3] Make sure, however, that it fits your machine. Check the product specifications before buying: they'll usually say which machines it works with.
- If you can't find a presser foot for your machine, you can still make this hem! Skip to sewing instructions in Part 3, Step 2.
-
2Attach the blind hem presser foot to the sewing machine. Follow the instructions for your particular machine.
-
3Set the machine to the blind hem stitch setting. This setting is often indicated by two stitches spaced far apart, but check your user's manual to be sure. Now you're ready to sew![4]


Sewing the Blind Hem Stitch
-
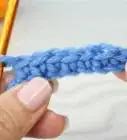
1Turn the fabric wrong side up (inside out, in other words) and position it on the sewing machine. Make sure the foot's vertical plate is sitting right on top of the fold. The machine is going to stitch along the raw edge section mostly, but cross the plate into the fold every few stitches.
-
2Stitch slowly. Hold the fabric carefully so that the fold stays just under the vertical plate. This way the needle is sure to catch it.[5] If you do not have a blind hem presser foot, make the stitch pattern manually:
- Put the machine feed dogs on the inside.
- Place your fabric on the machine as in Step 1.
- Make five straight stitches, and then one stitch to barely catch the fold.
- Continue around the hem.
-
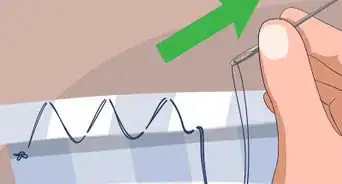
3Inspect your work. Remove the garment, snip the thread, and turn right side out. Check for any missed stitches.
- If needed, go back and redo the sections where there is a missing stitch.
-
4Remove the pins and press the hem. If a line remains from the previous hemline, try spritzing it with a bit of distilled water and ironing. If this doesn't work, it will probably come out when laundered.[6]


Expert Q&A
-
QuestionHow do you blind stitch fabric that is really thick?
 Essie KarimiEssie Karimi is a Professional Tailor and the Owner of Sew Fit Tailoring & Alterations, a sewing shop that has been operating for over 40 years. Essie specializes in tailoring, alterations, sewing, repairs, and redesign. Essie works on a variety of clothing types, including wedding dresses, formal wear, casual wear, sportswear, swimwear, and uniforms.
Professional TailorUse a needle and thread! Thick fabric can cause the needle to break when you're using a machine.


References
- ↑ https://www.youtube.com/watch?v=zP6zhTCmR5M
- ↑ http://www.coletterie.com/tutorials-tips-tricks/tutorial-how-to-sew-a-blind-hem
- ↑ http://www.makeit-loveit.com/2011/07/blind-hem-stitch-with-a-sewing-machine.html
- ↑ http://www.coletterie.com/tutorials-tips-tricks/tutorial-how-to-sew-a-blind-hem
- ↑ http://www.coletterie.com/tutorials-tips-tricks/tutorial-how-to-sew-a-blind-hem
- ↑ http://www.coletterie.com/tutorials-tips-tricks/tutorial-how-to-sew-a-blind-hem
About This Article

To blind hem stitch, first remove the seam from the existing hem. Next, mark or pin the newly desired length for the hem. Trim the raw edge, leaving 1 inch below your lowest line, then fold the edge in and press it with an iron. After ironing, pin around the fold to hold the new hem in place. Attach the blind hem presser foot to your sewing machine, turn your garment inside out, and slowly stitch your hem. For tips on how to finish your hem without the blind hem presser foot attachment, keep reading!