This article was co-authored by Ben Barkan. Ben Barkan is a Garden and Landscape Designer and the Owner and Founder of HomeHarvest LLC, an edible landscapes and construction business based in Boston, Massachusetts. Ben has over 12 years of experience working with organic gardening and specializes in designing and building beautiful landscapes with custom construction and creative plant integration. He is a Certified Permaculture Designer, is licensed Construction Supervisor in Massachusetts, and is a Licensed Home Improvement Contractor. He holds an associates degree in Sustainable Agriculture from the University of Massachusetts Amherst.
There are 10 references cited in this article, which can be found at the bottom of the page.
wikiHow marks an article as reader-approved once it receives enough positive feedback. This article received 19 testimonials and 90% of readers who voted found it helpful, earning it our reader-approved status.
This article has been viewed 749,363 times.
Tulips are a beautiful addition to any flower garden or lawn. You can grow gorgeous tulips year after year with the right maintenance and attention. It's quite easy – no watering schedule and no complicated fertilization techniques. Whether you're a beginner or a pro, this flower is good choice for any garden.
Steps
Planting Your Tulip Bulbs
-
1Plant your tulips in the fall, about 6 to 8 weeks before winter.[1] Tulip bulbs are best planted in September or October in the northern climates and October or November in the southern climates. The warmer your climate, the later they should be planted. The soil should be below 60°F (15°C).[2]
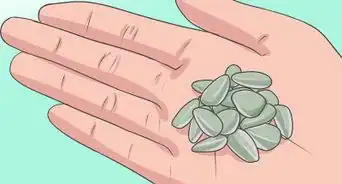
- You can keep tulip bulbs in your refrigerator (or some other cool, dry location) for about 2 months before planting season if you buy them in summer. However, do not store them next to apples, as they give off ethylene, destroying the bulb.
- Most bulbs need 12-14 weeks of a "cold period" to bring about beautiful bulbs come spring. Do not buy bulbs after December 1st unless they've been "pre-cooled."
-
2Choose an area that receives some shade. It should be sunny at least part of the day where you plant your tulips. In places like the American southeast, plant them in a place that gets morning sun only.[3] Tulips want sun, but they also want cool soil – don't give them sun that'll scorch them.
- If you're farther north, sun all day may be fine (the soil will be naturally cool enough). But if you live further south where it's hotter, shade in the afternoon will be better to keep the soil cooler.[4]
Advertisement -
3Choose sandy, well-drained soil with a pH of 6 to 6.5. There is no sub-species of tulip that prefers excessive moisture. The soil should be well-drained, neutral to slightly acidic, fertile, and even sandy.[5]
- Wet soil is death to a tulip. Never purposefully go out of your way to water your tulips – all you can do is ensure drainage by adding shredded pine bark or even sand to the area.
-
4Loosen the soil. Before planting the tulip bulbs, use a planting fork or tiller to loosen the soil. Dig down in the soil 12 inches (30.5 cm) to 15 inches (38.1 cm). Then, mix 2 inches (5.1 cm) to 4 inches (10.2 cm) of compost into the soil.
-
5Plant the bulbs at a depth that is about three times as deep as the bulb. The bigger the bulb, the deeper your hole should be. It should be 12 inches (30.5 cm) to 15 inches (38.1 cm) deep. Loosen the soil to ensure drainage or create a raised bed.
- The bigger the bulb, the bigger the bloom will be, too.[6]
- If you live in a very warm climate, you may wish to keep the bulbs in your fridge for the first 4-6 weeks to simulate cold weather. Give it a light watering every couple of weeks to retain a bit of moisture.
-
6Plant bulbs 6 inches (15.2 cm) or more from each other. They need about 4–6 inches (10.2–15.2 cm) of their own soil to grow sufficiently, otherwise they encroach on each other's nutrients. Choose a plot size that allows each of your tulips its own "home turf."
- Plant each bulb pointy end up. Fill the hole back with soil and press the dirt into place firmly.
- Tulips rapidly multiply. Even if you only plant a few, in a couple of years, you'll have a whole family.[7]
-
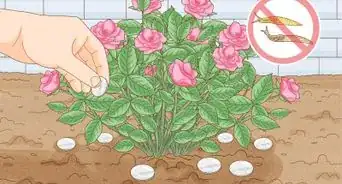
7Apply mulch. After planting your tulip bulbs, cover them with chopped leaves, wood chips or mulch. If you have rodents or animals in your garden that you're worried about, you may need to erect a cage or fence around the bulbs. You may also consider putting thorny leaves or gravel in with the soil to deter pests.
- Use a 1 inch (2.5 cm) to 2 inches (5.1 cm) layer of mulch, leaves, or wood chips to protect the bulbs, control weeds and retain moisture.
- If you're planting perennials, you'll need to feed them every year to start them going again. You can use organic material, compost, or a balanced time-release bulb food every fall to start the process going.


Caring for Your Tulips
-
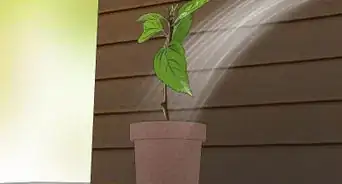
1Water your tulips once planted. Right after planting, the tulips do actually need watering to trigger growth. This will likely be one of the few times you actually have to water them.
- Do not water them again until you see leaves. Then, you can give them a light sprinkling and that's it.[8]
-
2Water developing tulips only during a dry spell. If it hasn't rained in a few weeks in your area, give your tulips a dusting of water. This will be one of the rare occasions when you should step in and get some moisture into the soil.
- Tulips often need less water during the spring due to lots of rain and moisture. Most of the time, the weather will take care of this plant for you. Normal rainfall is all they need.[9]
-
3Do not allow your tulips to remain in standing water. If there has been an excess of rain in your area, drain out any extra water from the area if you can. Tulips can't stand having wet feet and drenched soil may mean a swift goodbye to your lovely flowers. You may even consider adding some shredded bark or sand to the area around your tulips to help keep them dry.
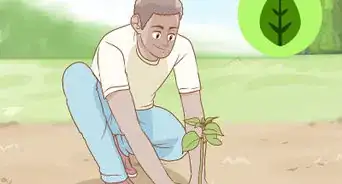
- If you notice that the area you planted your tulips in collects water, you'll likely be better off moving the plant to a drier area. Dig them up taking the surrounding soil with you and find an area that rain falls on, but can drain out of.
-
4Fertilize your tulips. Fertilize your tulips once in the beginning of spring for continuous growth.[10] A balanced liquid fertilizer works well. This is especially important for perennials.
- Sprinkle or pour about one tablespoon of flower or plant fertilizer around each tulip bulb. This will last them for their entire "hibernation" period in the winter. Tulips are great at storing nutrients for long periods of time.
- Did you forget to fertilize in the fall? You can use a fast-release nitrogen fertilizer on developing leaves.[11]
- Tulips are pretty easy in the scheme of things. If you're dealing with annuals, they may not need fertilizer at all. In the right climate, you can plant your tulip and essentially forget about it, no watering or fertilization necessary.


Giving Tulips After-Blooming Care
-
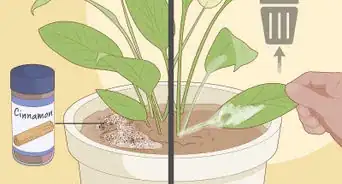
1Check for blights and diseases. Blight (or Tulip Fire) creates brown specks on the leaves and turns the flower grey in color. If any of your bulbs are diseased, dig them up and throw them away to prevent it spreading to other tulips. If only part of the plant is damaged, cut it off to see if you can salvage the plant.[12]
- The only thing you can do to prevent disease is to adequately care for your tulips. You can only make sure they get a modicum of moisture, a little bit of shade, and are planted in decent, slightly acidic soil.
- Aphids can be a problem, but they're easily handled with water spray.
-
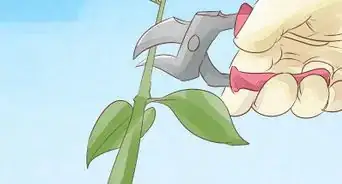
2Deadhead your tulips after they flower. Tulips produce seeds once they begin to wilt, and these seeds weaken the bulb, making it unattractive. This practice of deadheading is best for perennials and annuals.[13] Here's how it's done:
- Take shears and cut off the flower head from the stem once it's fully spent.
- Leave most of the stem in place for about six weeks or until the foliage starts to yellow.
- Shear off the leaves at ground level and dispose of the spent plant matter once the six weeks is up. Mark the location, if desired, so you can find the bulbs later.
- However, don't do this with species tulips. You want them to reproduce with their seeds and turn into an entire colony.
-
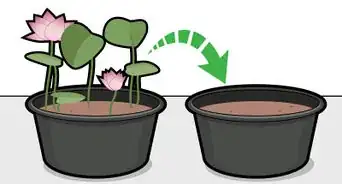
3Dig up the bulbs of annuals. Some tulips are annuals, meaning their entire life takes place over the course of one year ‐ they and their offspring won't be coming back. Once all the tulips have bloomed and died, dispose of the entire plant from bulb to tip.[14]
- Many farmers and gardening enthusiasts prefer annuals when it comes to tulips. They're easy to grow, cheap, and when the year is done, that's it. They can grow more for the next year and experiment with different varieties if they so choose.
-
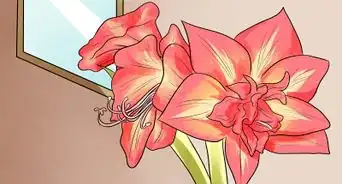
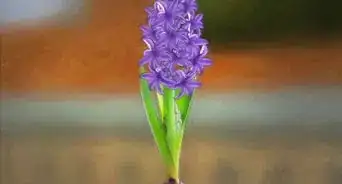
4Know if your tulip is likely to come back. If you're dealing with a perennial, you've left the bulb in the ground, and you cared for your tulips adequately, you may find that next year you have another crop of beautiful tulips (you may also find that you have too many – tulips reproduce quickly). Here are the varieties that are the most likely to come back with practically no effort from you:[15]
- "Olympic Flame" Tulip
- "Peppermint Stick" Tulip
- Crocus Tulip
- "Negrita" Triumph Tulip
- "Spring Green" Veridiflora Tulip


Expert Q&A
Did you know you can get expert answers for this article?
Unlock expert answers by supporting wikiHow
-
QuestionDo you need to deadhead tulips?
 Maggie MoranMaggie Moran is a Professional Gardener in Pennsylvania.
Home & Garden SpecialistDeadheading tulips isn't a must, but it does help make the flower bed look tidier.
Support wikiHow by unlocking this expert answer.
-
QuestionHow do you keep cut tulips from drooping?Maggie MoranMaggie Moran is a Professional Gardener in Pennsylvania.
Home & Garden SpecialistCut the stem about an inch above the current cut and remove all the leaves under the rim of the vase.Support wikiHow by unlocking this expert answer.
-
QuestionWhat do you do with tulips after they are done blooming?Maggie MoranMaggie Moran is a Professional Gardener in Pennsylvania.
Home & Garden SpecialistAfter the tulips are done blooming, deadhead them with a pair of shears just below the spent bloom.Support wikiHow by unlocking this expert answer.
Warnings
- Be cautious about fertilizing tulips immediately after flowering. Doing so can increase the chance of disease.⧼thumbs_response⧽
- Using more than 2 inches (5.1 cm) of mulch can harm the tulips by causing them to travel too far for sunlight!⧼thumbs_response⧽


References
- ↑ Ben Barkan. Garden & Landscape Designer. Expert Interview. 2 June 2020.
- ↑ http://www.almanac.com/plant/tulips
- ↑ http://www.almanac.com/plant/tulips
- ↑ https://www.whiteflowerfarm.com/how-to-grow-tulips
- ↑ http://www.almanac.com/plant/tulips
- ↑ http://www.gardenersnet.com/bulbs/tulips.htm
- ↑ http://www.gardenersnet.com/bulbs/tulips.htm
- ↑ http://www.garden.org/howtos/index.php?q=show&id=1301
- ↑ https://www.whiteflowerfarm.com/how-to-grow-tulips
- ↑ Ben Barkan. Garden & Landscape Designer. Expert Interview. 2 June 2020.
- ↑ http://www.americanmeadows.com/tulips-come-back
- ↑ http://homeguides.sfgate.com/fire-blight-tulips-41083.html
- ↑ http://homeguides.sfgate.com/deadhead-tulip-29593.html
- ↑ http://aggie-horticulture.tamu.edu/wildseed/growing/annual.html
- ↑ http://www.bhg.com/gardening/flowers/bulbs/top-perennial-tulips/#page=2
- ↑ Ben Barkan. Garden & Landscape Designer. Expert Interview. 2 June 2020.
About This Article

Store tulip bulbs in the refrigerator for up to 2 months and plant in the fall in holes about 3 times their height. Water the bulbs right after you plant, then wait until their leaves sprout to give them another light sprinkling—that’s it! Place 1 spoonful of flower fertilizer around each bulb at the beginning of fall and spring. After your tulips bloom, throw away any flowers with signs of blight, like brown speckled leaves or gray flowers. Then, when the flowers are spent, cut off the flower head to prevent wilting, removing the leaves and stems once they turn yellow. To learn more from our Horticulturist co-author, such as where in your yard is the best to plant tulips, keep reading!