This article was co-authored by Jon Depoian and by wikiHow staff writer, Janice Tieperman. Jon Depoian is a Skateboarding Instructor and the Owner of Intro2Skateboarding, an organization based in Orange County, California that provides professional private, home-school, after-school, birthday party, and summer camp skateboard lessons for beginners and experienced skateboarders alike. Jon has over 21 years of skateboarding experience and over 10 years of skateboard instruction experience. He also has extensive experience producing street skateboarding videos and skating competitions.
There are 19 references cited in this article, which can be found at the bottom of the page.
This article has been viewed 6,511 times.
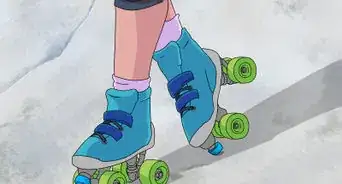
Are your rollerblade wheels not quite spinning the way they used to? Chances are, your bearings need a round of cleaning and lubrication. While extremely dirty and grimy bearings might not be worth the elbow grease, most bearings can benefit from regular cleaning and TLC. Don’t worry—we’re here to walk you through every step of the process. Once you get the basics down, feel free to tune up your bearings once every 1-3 months, depending on how often you skate.[1]
Steps
Disassembling the Skates
-
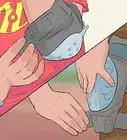
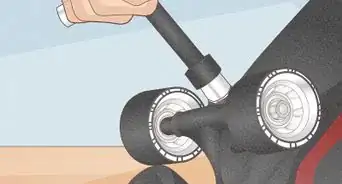
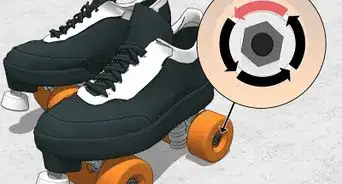
1Unfasten the wheel from the skate with an inline skate tool. Look for 1-2 bolts fastened through the center of your skate wheel and the base of the skate. Stick the end of the skate tool into the center of the bolt and turn it counterclockwise. With a little effort, you should be able to loosen and remove the bolts.[2]
- An inline skate tool is a long, T-shaped tool with a thick handle and a thin, 4 mm-wide Allen wrench. You can buy one at a specialty skate shop, or order one online.
- Use 2 skate tools at the same time if the wheel is attached with 2 separate bolts.
- Stash the bolts in a separate container so you don’t lose track of them.
-
2Pry out the first bearing out of the wheel with the long end of your skate tool. Hold the wheel in 1 hand and the skate tool in another. Tilt the skate tool at a 45-degree angle and slide it into the middle of the wheel. Using the long end of the tool, search for the bearing’s opposite edge. Then, shimmy the skate tool to gradually lift and pop the bearing out of its wheel.[3]
- You can also remove your bearings with an in-line skate tool. This is a three-pronged tool designed specifically for skates.[4]
Advertisement -
3Remove the spacer from the center of your wheel. Look for a small, cylindrical piece of metal sitting between your bearings. This is a spacer, and it helps prevent your wheels from jamming up when you adjust your skate axles.[5] Flip your wheel over and lightly shake it out to remove the spacer.[6]
- Set the spacer aside with your bolts.
-
4Push the second bearing out of your wheel with the base of your skate tool. Slide the skate tool through the empty space of the wheel, where you just removed the first bearing. Then, firmly press on the handle of the skate tool with your palm—this should pop the second bearing right out.[7]
-
5Pry out rubber bearing shields with a thumbtack. Rubber shields are a different color and fit really snugly on the outside of the bearing. Use the pointy end of a thumbtack as a lever by prying it into the edge of the shield. In a matter of seconds, the rubber shield should pop free from the rest of the bearing.[8]
- Set the bearing shields aside with your other supplies, like your spacers and bolts.
-
6Extract the C-ring with a thin, pointy object to remove metallic bearing shields. The C-ring is a thin, C-shaped metal hoop that sits right beneath the edge of the bearing, holding the metallic shield in place. Pry up this ring with the pointy end of the pointy tool, and tap the bearing on a hard surface to shake out the metal shield.[9]
- A thumbtack works really well for this.
- Some metal bearing shields may be sealed, making them impossible to remove. If that’s the case for you, feel free to skip this step.[10]


Soaking and Lubricating the Bearings
-
1
-
2Cover the bearings with a specialized bearing cleaner. Pour the cleaner directly over the bearings until they’re completely drenched and submerged. You don’t need to fill up the container all the way.[13]
- Use a cleaning product designed specifically for skate bearings. You can buy this online or at a specialized skate shop.
-
3Jiggle the jar to give your bearings a deep clean. Fasten the lid on your jar really tightly. Then, shake the jar back and forth. Continue shaking the jar until the cleaner looks pretty muddy and grimy—this is a good sign that you’ve dislodged a lot of the dirt, oil, and grease. Then, pour out the dirty cleaning liquid, refill the jar, and repeat the shaking process until the liquid stays clear.[14]
-
4Remove the bearings from the cleaner and set them on a paper towel. Slip on a pair of gloves, so you don’t have to touch the cleaning chemicals directly. Then, transfer all of the clean bearings to the paper towel.[15]
- You can also use a thin, pointy object to lift and move the clean bearings out of the jar.
-
5Spin and tap your bearings to make sure that they’re clean. Grip each bearing between your thumb and pointer finger. Using your opposite pointer finger, start spinning the wheel—ideally, the bearing should be spinning smoothly and fluidly. While you’re at it, hit the bearing on the paper towel to check for any dirt, oil, or grease residue.[16]
-
6Dry off your clean bearings with a towel and an air compressor. Lay all of the bearings flat on the paper towel. Pat each of the bearings dry with a clean rag, and then spritz a can of compressed air directly in and around each bearing.[17]
-
7


Reassembling the Skates
-
1Press the rubber shield back on top of the bearing. Center the seal directly on top of the bearing, making sure that it lines up with the grooves and edges. Then, firmly press the shield into place with your fingers.[20]
-
2Replace the metallic shield with the C-ring on top. Place the metallic ring on top of the skate bearing. Then, slide the C-ring back beneath the top edge.[21]
-
3Insert the first bearing into the wheel with your thumbs. Center the bearing along the center of the wheel, with the bearing shield facing up. Place your thumbs on either side of the bearing and push firmly to pop it back into place.[22]
- If the bearing doesn’t go in completely, force it into place with your skate tool.
-
4Turn the wheel over and place the spacer in the center. Make sure that the spacer is vertical and perched along the center of the first bearing.[23]
-
5Press the second bearing into place with your thumbs. Place the bearing on top of the spacer, centering it in the middle of the wheel. As you did before, pop the bearing back into position with your thumbs.[24]
-
6Reattach the wheel to your skate with bolts and a skate tool. Slide the wheel back into its proper place on your skate. Twist the bolts back into place with your skate tool (or skate tools) until the wheel feels tight and secure. As a final test, spin the wheel with your finger to make sure everything’s working smoothly.[25]
- Some skate enthusiasts recommend lining up your wheels by spin speed; in other words, group the slowest spinning wheels together, along with the fastest spinning wheels.


Things You’ll Need
- Inline skate tool
- Thumbtack
- Empty jar (with lid)
- Bearing cleaner
- Gloves
- Paper towel
- Clean cloth
- Air compressor
- Bearing oil

References
- ↑ https://www.devaskation.com/how-to-clean-roller-skate-bearings/
- ↑ https://www.youtube.com/watch?v=fKxTbsoMEdE&t=0m26s
- ↑ https://www.youtube.com/watch?v=m6Aajqt9AR4&t=2m38s
- ↑ https://www.youtube.com/watch?v=iTb448Kq3fs&t=0m17s
- ↑ https://www.rollerbob.com/faq/do-i-need-to-buy-new-bearin.html
- ↑ https://www.youtube.com/watch?v=m6Aajqt9AR4&t=2m51s
- ↑ https://www.youtube.com/watch?v=m6Aajqt9AR4&t=2m58s
- ↑ https://www.youtube.com/watch?v=iTb448Kq3fs&t=1m2s
- ↑ https://www.youtube.com/watch?v=iTb448Kq3fs&t=1m17s
- ↑ https://rollerskatenation.com/bearings-101/
- ↑ https://www.devaskation.com/how-to-clean-roller-skate-bearings/
- ↑ https://www.devaskation.com/how-to-clean-roller-skate-bearings/
- ↑ https://www.devaskation.com/how-to-clean-roller-skate-bearings/
- ↑ https://www.devaskation.com/how-to-clean-roller-skate-bearings/
- ↑ https://www.youtube.com/watch?v=fKxTbsoMEdE&t=2m58s
- ↑ https://www.youtube.com/watch?v=fKxTbsoMEdE&t=3m23s
- ↑ https://www.devaskation.com/how-to-clean-roller-skate-bearings/
- ↑ https://www.devaskation.com/how-to-clean-roller-skate-bearings/
- ↑ https://www.youtube.com/watch?v=0IQWZ7QX0oY&t=1m4s
- ↑ https://www.youtube.com/watch?v=2MdcYKnEsEE&t=3m17s
- ↑ https://www.youtube.com/watch?v=MDJtwppQJhs&t=1m45s
- ↑ https://www.youtube.com/watch?v=m6Aajqt9AR4&t=0m41s
- ↑ https://www.youtube.com/watch?v=m6Aajqt9AR4&t=1m3s
- ↑ https://www.youtube.com/watch?v=m6Aajqt9AR4&t=1m14s
- ↑ https://www.youtube.com/watch?v=fKxTbsoMEdE&t=4m54s
About This Article