This article was co-authored by Noël Reid-Killings. Noël Reid-Killings is a Professional Hair Stylist and the Owner of Noël New York Salon & Boutique. With over a decade of experience, Noël specializes in curating and customizing hair solutions for all hair types and textures. She has worked with countless A-list celebrities including Alicia Keys, Ciara, Yara Shahidi, and Simone Missick. Her work has been featured on makeover shows and in magazines including Essence, Sophisticates Black Hair, Teen Vogue, Elle, 21Ninety, WWD, POPSUGAR, Allure, The Cut, The Huffington Post, and Swaay.
There are 8 references cited in this article, which can be found at the bottom of the page.
This article has been viewed 397,426 times.
Have you wanted to get the crimped hair look, but didn't want to go out and buy a special crimper? Luckily, it is possible to crimp your hair using a hair straightener and a few extra tools. This article will show you a few ways of crimping your hair. Some have a tighter crimp, while others have a looser crimp.
Steps
Using Braids for a Tight Crimp
-
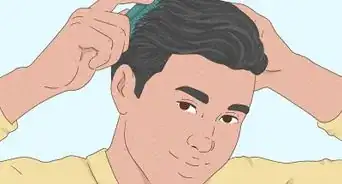
1Start with straight, dry, tangle-free hair. Even if you have curly hair, it might be a good idea to straighten it. This will help reduce frizz later on.
- While straightening curly hair might reduce frizz and define the crimps, it's not necessary. It's up to your style preference.
-
2Apply product if you want a stronger hold. Use a styling mousse if you have very straight hair, or if your hair can't hold a curl. Try to get something lightweight or that enhances curls.[1]Advertisement
-
3Pull half of your hair up into a bun. Gather all of your hair above ear level into a loose bun. Leave the lower layer of your hair hanging down by your shoulders. You will be working with this layer first.
-
4Divide your hair into at least six, equal sections. The more, smaller sections you make, the tighter crimp you will get. For a very tight crimp, try ½ to 1 inch (1.27 to 2.54 centimeters) wide sections.
-
5Braid the sections tightly. The smaller, tighter braids, the better. If you want more volume, start braiding right at the roots. If you want less volume, start braiding only halfway down the hair shaft. Tie each braid off with a small hair elastic.
- Your hair can be braided into individual, loose hanging braids, or you can braid it in cornrows. Either style will produce a crimp.
-
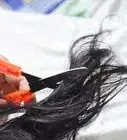
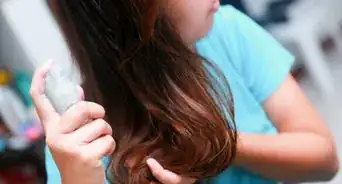
6Spray each braid generously with a heat protection spray. Be sure to get the front and back of each braid. You will also want to spray the ends of your hair as well. This will protect your hair from the heat of the hair straightener. It will keep your hair from getting too dry or scorched.
- This step is optional, but a heat protection spray will help prevent damage to your hair.
-
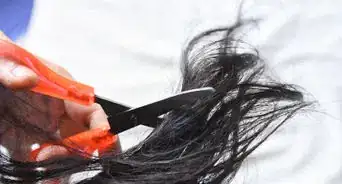
7Run a flat iron over each braid. Start close to your roots, and press down on the braid for a few seconds with your straightener. Release the braid, and press the next segment flat. You may need to run the straightener through your braids twice.
- If you have time, you could allow the braids to set for a few hours or could wear them overnight as an alternative. If you choose this method, braid all of your hair at once.
-
8Wait until the braids cool to undo them. Do not undo the braids just yet. You will work with the upper layer first. This will give the braids enough time to cool down. If you take the braids out too soon, they will lose their crimp.
-
9Undo your bun and let your hair down. You will repeat the process for the remaining part of your hair. Leave the first section braided during this part. Divide your remaining hair into at least six equal sections. Try to use the same amount of sections as your used in your lower layer.
-
10Repeat the sectioning, braiding, and straightening. Be sure to spray your hair liberally with a heat protection spray before you straighten it, if you chose to use it.
-
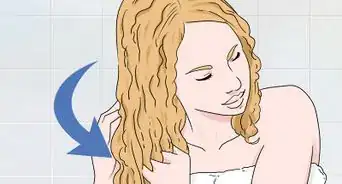
11Let your hair cool before you take the braids out. Do not take the braids out if your hair is still warm. If you do, the crimp will fall out. Once your hair is cool, start undoing the braids from the bottom layer first.
-
12Do not brush your hair. If you do, your hair will turn frizzy. If the crimp is too tight, you can loosen it by gently running your fingers through your hair.
- If you must adjust your hair, stick to creating a part. Do this once and then leave it alone.
-
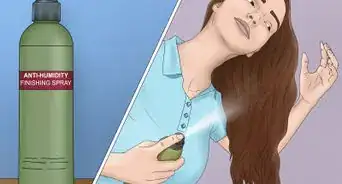
13Spray your hair with hairspray. While it's optional, hairspray will preserve your style and help the crimp last longer.[2]
- Avoid touching your hair throughout the day because it can easily frizz.


Using Pins for a Tight Crimp
-
1Get some U-pins. U-pins are also called hair pins. They are like bobby pins but open and shaped like a letter U. You will need lots of them. You can find U-pins at a beauty supply shop or online.[3]
- If you absolutely cannot find any U-pins, get some stiff wire and cut it to twice the length of your finger. Fold it in half until a narrow U-shape. It should be no wider than your finger.
- Do not use bobby pins; they will not work for this method.
-
2Apply a styling mousse. Use a lightweight styling mousse on clean, straightened, tangle-free hair. Your hair must be brushed, or it will turn out frizzy. It might also be a good idea to straighten it first; this will also help reduce frizz.
- The styling mousse is especially important for those with naturally-straight hair, or for those whose hair can't hold a curl easily.
-
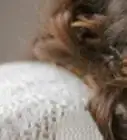
3Twist most of your hair into a bun. Pull three-quarters of your hair up into a loose bun at the top of your head. The bottom fourth of your hair should be hanging loose around your shoulders. You will be working on this section first.
-
4Take a small section of hair, closest to your face. The section should be about 1 inch (2.54 centimeters) wide, and 1 inch (2.54 centimeters) tall.
-
5Place the section inside the pin. Bring the curved part of the pin as close to your scalp as possible. The closer the pin is to your scalp, the more volume you will get.
-
6Wrap your hair around the prongs. Start wrapping the hair around the two prongs until you reach the end of your hair. Weave the hair in and out of the prongs in figure-rights. When you reach the end, consider wrapping a small hair elastic around the ends of the U-pin. This will help pinch the pin closed, and prevent your hair from unraveling.
-
7Repeat the process for the rest of the bottom layer. Work in 1 inch (2.54 centimeters) sections.
-
8Lightly mist the hair-covered U-pins with a heat protecting spray. For more holding power, you can also add a little bit of hairspray as well.
-
9Set your hair straighten to medium and go over the hair-wrapped U-pins. Do not use a high heat setting. Start ironing from the ends of the U-pin first, and work your way towards your roots. Only clamp the straightener down five seconds at a time.
-
10Continue working your way through your hair. Repeat the sectioning, weaving, and straightening process for the next three layers. When you are done, you should have no hair left to weave. You should have four rows of hair-wrapped U-pins. Make sure that you spray and "straighten" each row before starting on the next.
-
11Let your hair cool down. If you remove the U-pins too soon, your hair will not hold its crimp. This will take about ten minutes or so.
-
12Remove the U-pins. Start from the bottom layer first. Pull off the hair tie, but don't unravel the hair. Instead, pinch the curved part of the U-pin, and simply pull it out of your hair.[4]
-
13Avoid brushing your hair. If you do, your hair will turn frizzy. If the crimps are too tight for your liking, you can loosen them by running your fingers through your hair.


Using Twists for a Looser Crimp
-
1Make sure your hair is dry and tangle free. Wash, dry and brush your hair. Using dry, brushed hair will help reduce frizz. Do not work on damp hair.
-
2Apply a lightweight styling mousse to your hair. Squeeze a dollop into your hand and smooth it onto your hair. This will help your hair hold its crimp better later on.
-
3Divide your hair into sections. Consider dividing your hair into horizontal sections for a tighter crimp. If you want, you can gather half of your hair up into a loose bun at the top of your head. Work with the bottom layer first. When you are done, you can undo the bun and work with that layer.
- Using twists can result in waves instead of crimps if you use sections that are too wide or are not able to be twisted tightly enough.
-
4Take a section of hair closest to your face. The smaller section you grab, the tighter the crimp will be.
-
5Twist your hair. Twist the section into a tight rope, away from your face.[5] Twist it tight enough so that it forms a rope, but not so tight that it curls in on itself.
-
6Spray the section generously with a heat protection spray. This will keep your hair from drying out or getting scorched by the hair straightener.
-
7Run a hair straightener over the rope. Do not let go of the rope just yet.
-
8Wait until the hair cools. Hold onto the rope until the hair cools, then gently release it. If you let go of your hair too soon, it may not hold the crimp.
-
9Continue working through your hair. Keep twisting and straightening your hair until all of your hair is crimped. When you get to the other side of your face, remember to twist the hair rope away from your face as well. If you are working in layers, undo the top layer, and repeat the twisting and straightening process on it as well.
-
10Avoid brushing your hair. If the crimp is too tight for you, you can loosen it by gently running your fingers through your hair. If you try brushing your hair, your hair may turn frizzy.
-
11Spray your hair with hairspray. This will set the crimp and make it last longer.


Using a Hair Straightener for a Wavy Crimp
-
1Apply styling mouse or hairspray. Use lightweight styling mousse on dry, clean, straightened hair. It would be a good idea to straighten your hair, even if it is naturally curly.[6] This will help prevent frizz.
- Make sure your hair has been recently washed. A straightener can fry dirty hair.
-
2Pull part of your hair into a loose bun. Consider pulling your hair up into a loose bun with the bottom half loose. This will give you a more manageable amount of hair to work with, while keeping the extra hair out of the way.
-
3Take a small section of hair. The smaller sections you work with, the more crimped your hair will be. Sections that are 1-inch in diameter will be best.[7]
-
4Spray the section generously with a heat protection spray. This will keep your hair from getting damaged.
-
5Clamp the straightener down on the hair section. Try to get as close to the roots as possible. Use a medium heat setting. Any hair straightener will do, but the wider the straightener is, the looser your crimp will be. If you want sharper crimps, look for something that is ½ or 1 inch (1.27 or 2.54 centimeters) wide.
-
6Rotate the straightener upwards while holding the hair section down.[8] Flip the straightener upwards by 180°. Gently tug downward on the loose ends of the hair section. This will create a curve.
-
7Place the straightener just below the first curve. Clamp it down.
-
8Rotate the straightener downwards while holding the hair section up.[9] Flip the straightener downwards by 180°. Meanwhile, gently tug on the loose ends of the hair section upwards. This will complete the crimp.
-
9Place the hair straightener just below the crimp and continue crimping it.[10] Rotate the straightener upwards while gently tugging down on the loose ends of your hair—just as before. Keep going down the length of the hair section, rotating the straightener up and down, until you reach the ends.
- Be careful not to tug downwards with the hand that is holding onto the straightener.
-
10Finish the rest of your hair. Remember to spray each section down with a heat protection spray before you touch it with the hair straightener. Also, if you divided your hair into two parts, let your already-crimped hair cool down a little before undoing the bun and crimping the rest of your hair.
-
11Let your hair cool before you touch it. If you touch it too soon, you may mess up the crimps before they set. [11]
-
12Consider spraying your hair with some hairspray. This will help set the crimps and make them last longer.


Expert Q&A
-
QuestionWhy is it I sometimes still cannot use the straightener to crimp my hair?
 Ashley AdamsAshley Adams is a Licensed Cosmetologist and Hair Stylist in Illinois. She completed her Cosmetology education at John Amico School of Hair Design in 2016.
Professional Hair StylistYou may need more practice with using the straightener. Practice makes perfect! -
QuestionIf I sleep with it, how can I keep it crimped?
 Community AnswerJust braid your hair in several small braids, and in the morning, unbraid your hair.
 -
QuestionWhat happens if I braided my hair but it doesn't look crimped in the end?
 Community AnswerIt's possible you tried to crimp too much hair at one time or you ran over the braid too quickly. Next time, use smaller braids with slightly damp hair and use the straightener slowly.
Warnings
- Not every method is going to work for every hair type; some people's hair holds styles better than others.⧼thumbs_response⧽
- Avoid using a high heat setting on your hair straightener, even with a heat protection spray.⧼thumbs_response⧽
- Do not use a hair straightener every day. You will damage your hair in the long run, even with a heat protection spray.⧼thumbs_response⧽
Things You'll Need
Using Braids for a Tight Crimp
- Hair straightener
- Styling mousse
- Heat protection spray
- Small hair elastics (Optional for curly hair)
- Hairspray
Using Pins for a Tight Crimp
- Hair straightener
- Styling mousse
- Heat protection spray
- U-pins
- Small hair elastics
- Hairspray
Using Twists
- Hair straightener
- Styling mousse
- Heat protection spray
- Hairspray
Using a Hair Straightener
- Hair straightener, ½ to 1 inch (1.27 to 2.54 centimeters) is recommended
- Styling mousse
- Heat protection spray
- Hairspray

References
- ↑ https://www.youtube.com/watch?v=HPljaNBFm7o
- ↑ https://www.youtube.com/watch?v=PhcYh6MUXPE
- ↑ http://thebeautydepartment.com/2011/10/halloween-hair-tutorial-2/
- ↑ http://thebeautydepartment.com/2011/10/halloween-hair-tutorial-2/
- ↑ http://alldaychic.com/beautiful-waves-using-an-iron-and-elastic-bands/
- ↑ Noël Reid-Killings. Celebrity Hair Stylist. Expert Interview. 25 November 2020.
- ↑ Noël Reid-Killings. Celebrity Hair Stylist. Expert Interview. 25 November 2020.
- ↑ Noël Reid-Killings. Celebrity Hair Stylist. Expert Interview. 25 November 2020.
- ↑ Noël Reid-Killings. Celebrity Hair Stylist. Expert Interview. 25 November 2020.
- ↑ Noël Reid-Killings. Celebrity Hair Stylist. Expert Interview. 25 November 2020.
- ↑ http://thebeautydepartment.com/2012/12/make-waves/
- ↑ https://www.jeanlouisdavid.us/article/how-to-crimp-your-hair-without-crimping-irons_a4693/1
- ↑ https://www.jeanlouisdavid.us/article/how-to-crimp-your-hair-without-crimping-irons_a4693/1
- ↑ https://www.jeanlouisdavid.us/article/how-to-crimp-your-hair-without-crimping-irons_a4693/1
- Videos provided by MysteseBeauty
About This Article

If you want to crimp your hair with a straightener, begin with clean, dry, and brushed hair. For now, put the top half of your hair in a bun to keep it out of the way. Then, divide the bottom half of your hair into 6 or more sections that are no more than 1-inch wide. Braid each of these sections into a tight braid and spray them with a heat protection spray. After all of your hair is braided, run your flat iron over each braid. After the braids have cooled, undo them and repeat the process on the top half of your hair. To learn how to use U-pins to crimp your hair from our Cosmetologist reviewer, scroll down!