This article was co-authored by wikiHow staff writer, Eric McClure. Eric McClure is an editing fellow at wikiHow where he has been editing, researching, and creating content since 2019. A former educator and poet, his work has appeared in Carcinogenic Poetry, Shot Glass Journal, Prairie Margins, and The Rusty Nail. His digital chapbook, The Internet, was also published in TL;DR Magazine. He was the winner of the Paul Carroll award for outstanding achievement in creative writing in 2014, and he was a featured reader at the Poetry Foundation’s Open Door Reading Series in 2015. Eric holds a BA in English from the University of Illinois at Chicago, and an MEd in secondary education from DePaul University.
This article has been viewed 59,378 times.
Learn more...
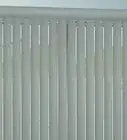
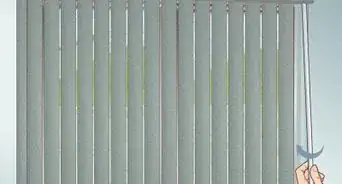
Roller blinds refer to any window blinds that use a single sheet of fabric to cover the entirety of a window. Cutting roller blinds is an easy and straightforward process. Since the materials used to manufacture roller blinds are often quite thin, it’s not difficult to remove a section of the blinds with a utility knife, hacksaw, and a straight edge. Anyone can cut roller blinds by taking accurate measurements, and working carefully and slowly when handling their cutting tools.
Steps
Measuring Your Blinds
-
1Use a retractable measuring tape to measure your window frame. Since your blinds are going to rest inside your window frame, you need to measure the distance between the interior edges of your window. To do this, place the metal lip of your measuring tape flush against the inside edge of your window frame and hold it in place with your nondominant hand. Extend the measuring tape to the opposite inside edge.[1]
- Write your dimensions down on a piece of scrap paper so that you can easily refer to it later.
- Measure twice to make sure that you didn’t make a mistake when measuring the first time.
Tip: Subtract the length of the brackets that attach your blinds to the window from the length of the window frame so the blinds fit perfectly inside the frame.
-
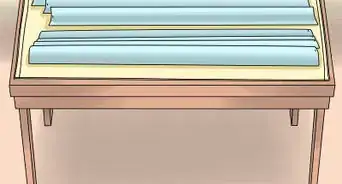
2Spread your roller blinds out on a flat and clean surface. You need a large, flat surface to mark your cuts. A large table or clean section of the floor will work just fine. Open your blinds all the way and place two heavy objects at either end so that they don't retract and lie flat on your work surface.[2]Advertisement
-
3Use a framing square or leveler to measure the length of your cut. Subtract the length of your window frame from the length of your roller blinds to determine how far into the blinds you need to cut. Starting near bottom of your blinds, measure your distance out from the edge that you want to cut with a framing square, leveler, or ruler. Mark the amount that you need to remove by making a small indicator with your marker.[3]
-
4Make additional marks on your blinds to create a guiding line. After making your first mark near the bottom of your blinds, work your way up the blind making indicators of equal size. Be sure to keep your measuring tape, framing square, ruler, or leveler perpendicular to the edge of your roller blinds when you mark your cut. Make a second, identical mark near the top of your roller blind’s fabric.[4]
- You’re going to connect your marks that you make with a straight edge, so don’t make them too big or it may be hard to match them from center to center.
-
5Align a large straight edge with your marks to make a straight line. A large leveler is preferable, but any straight edge will work. Connect your straight edge to the bottom of your roller blinds and draw a line through your markings with a grease pencil or permanent marker. Repeat this process, making a line of equal length that connects all of your marks. Extend your line through the top of your blind.[5]
- This will result in a single continuous line running from the bottom of your blinds to the top. The line will be perfectly parallel to the current edge of your blinds.


Removing Fabric with a Utility Knife
-
1Place your straight edge along the line that you’ve drawn. Line your straight edge up at the bottom of the screen. Adjust your straight edge so that the line that you’ve drawn is fully visible at the junction where your straight edge meets the screen.[6]
- You can use scissors instead of a utility knife if you’d like, but you’ll risk fraying the edge of your roller blinds each time that you have to close the blades together.
-
2Begin cutting the screen with a utility knife. Hold the knife at a 45-degree angle with the point angled towards the straight edge. Place pressure on your straight edge with your nondominant hand to keep it in place. Puncture the screen near the top of your straight edge.[7]
Tip: Put a cutting board or sheet of cardboard underneath your blinds before you cut it. That way you won’t permanently damage your table or floor!
-
3Continue to cut along your straight edge until you reach the top of your blinds. Drag your utility knife along the straightedge to cut through the blinds. When you reach the top of your roller blinds, you can use scissors or a utility knife to cut the large lengthwise piece of fabric off.
- Don’t worry about removing the fabric at a perfect 90-degree angle or anything. You’ll cut the blind’s roller off momentarily. You’re only cutting it off to give yourself more freedom and space to work.


Cutting the Pole inside the Roller Blinds
-
1Place your roller blinds on a stable table or work surface. You’ll need a firm and flat surface to brace your blinds against as you use your hacksaw, so move the blinds to a table or sawhorse where you can hold it flat. It is preferable to do this outside, since you’re going to saw through the metal bar that you wrap your blinds around, which will cause metal shavings to fly everywhere.
-
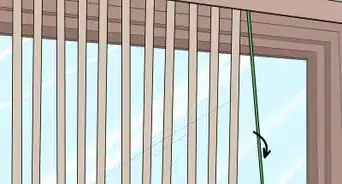
2Hold the pole firmly in place and begin to cut with a hacksaw. Use your nondominant hand to apply pressure to the pole at the top of the blinds that they wrap around. Carefully align your hacksaw’s blade with the length that you’ve cut off by matching the blade to the edge of the blinds. Begin sawing in a simple, easy, back-and-forth motion.[8]
- The teeth of the blade will do a lot of the work for you and if you push on your saw, you’ll lose control of your cut. Continue to cut through the pole until you’ve cut through it entirely.
- Let the excess section of the pole fall to the floor as you finish your cut to create a clean edge.[9]
Tip: If the pole is made out of a thinner plastic, you may be able to snap it off near the end of this process just by tugging on it.
-
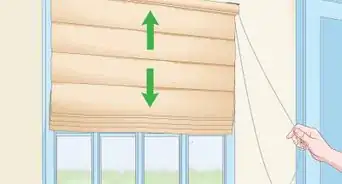
3Test your roller blinds by holding them in place where you wish to install them. With the pole and fabric fully removed, hold your roller blinds in the window space where you plan on installing them. Check to make sure that you have enough room for your brackets by looking for a small gap between your blinds and the window frame. Use scissors to remove any frayed material or loose strings that you see on the edge that you cut.[10]
- If you need to make additional cuts or trims, use the same straight edge and knife that you used the first time.


Things You’ll Need
Measuring Your Blinds
- Retractable measuring tape
- Framing square, ruler, or leveler
- Permanent marker
- Grease pencil or permanent marker
Removing Fabric with a Utility Knife
- Utility knife or scissors
- Straight edge
Cutting the Pole inside the Roller Blinds
- Hacksaw
- Scissors


References
- ↑ https://www.youtube.com/watch?v=dwQRRRBxCbA&t=430s
- ↑ https://youtu.be/dwQRRRBxCbA?t=513
- ↑ https://youtu.be/dwQRRRBxCbA?t=547
- ↑ https://youtu.be/dwQRRRBxCbA?t=547
- ↑ https://youtu.be/dwQRRRBxCbA?t=597
- ↑ https://www.skil.co.uk/step-by-step/how-to-fit-a-roller-blind.html
- ↑ https://www.skil.co.uk/step-by-step/how-to-fit-a-roller-blind.html
- ↑ https://www.skil.co.uk/step-by-step/how-to-fit-a-roller-blind.html
- ↑ https://www.skil.co.uk/step-by-step/how-to-fit-a-roller-blind.html
About This Article