This article was co-authored by wikiHow Staff. Our trained team of editors and researchers validate articles for accuracy and comprehensiveness. wikiHow's Content Management Team carefully monitors the work from our editorial staff to ensure that each article is backed by trusted research and meets our high quality standards.
There are 15 references cited in this article, which can be found at the bottom of the page.
wikiHow marks an article as reader-approved once it receives enough positive feedback. This article has 15 testimonials from our readers, earning it our reader-approved status.
This article has been viewed 693,453 times.
Learn more...
India's general shape is very similar to that of a kite, with its border made of lots of different curved lines. To draw the general outline, you'll need a ruler and pencil to make the first marks. Give your map some necessary details by adding the curved edges of the border, marking the main cities, and drawing the important landmarks. With some practice, you'll be able to draw the map of India in no time!
Steps

Forming the Outline
-
1Use a ruler to draw a vertical line going down your paper. Start with a blank piece of paper, a ruler, and a pencil. Draw a vertical line slightly to the left of the center of the page about 14.5 cm (5.7 in) long.[1]
- For your line to be off-center slightly, begin drawing it roughly two-fifths of the way across the top of the page.
- Draw the line lightly so that you can erase it later on.
-
2Make a dot on your line at the 4.5 cm (1.8 in) mark. Draw a light dot or tick mark 4.5 cm (1.8 in) from the top of the line. This dot is a reference point for where to place your ruler for the next horizontal mark, so mark it lightly but visibly.[2]
-
3Draw a horizontal line across the dot. Use your pencil and ruler to draw a straight horizontal line that extends 4 cm (1.6 in) to the left of the mark and 8 cm (3.1 in) to the right of the mark.[3]
- Your lines will form a rough cross shape.
-
4Orient the ruler diagonally going from the top left to the bottom right. Locate the center point on your drawing where both lines converge and place your ruler along this dot. Twist your ruler so that it’s running diagonally across the page.[4]
-
5Draw a line that’s 8 cm (3.1 in) long. Align the ruler diagonally so that there's 3 cm (1.2 in) to the left of the center dot and 5 cm (2.0 in) to the right of the center dot. Use your pencil to make the line.[5]
- Once you’re finished, your new line will slope straight downwards.
-
6Make a diagonal line going in the opposite direction. Reposition your ruler and create a new diagonal line that extends 2 cm (0.79 in) to the right of the center mark and 3–4 cm (1.2–1.6 in) to the left.[6]
- This line should form the other half of an "X" shape from the first diagonal line.
-
7Use the sketched lines as a guide for where to draw the edges. You should now have 4 lines total: a long line vertically, a long line horizontally, and 2 diagonal lines that form a stubby X. The tips of these lines show you the boundary of India, or where the outline of your drawing will extend.[7]
- While India will have lots of complex curves when you draw it in detail, this is its simplified shape.
-
8Use curved lines to create the border of India. The outline of India is almost entirely made up of detailed curves, both big and small. To draw your map accurately, refer to a map of India to see where exactly the curves swoop inwards and outwards, as well as how close together or far apart they should be.[8]
- For example, the bottom portion of India looks like a V shape while the portion of India farthest to the left looks like a backwards 3. While these are the simplified shapes of each section, they all have small curves.


Adding the Details
-
1Draw the states and union territories of India to show boundary lines. India has 28 states and 8 union territories. All of the states and union territories are made up of detailed curved lines of different shapes and sizes, making it difficult to draw without referring to a picture of India’s states already drawn. Find a picture of India with all of the states clearly pictured and practice drawing them on your own map.[9]
- When figuring out how large or small to draw each state, use the eraser on your pencil or the tip of your finger as a measuring tool. For example, you might measure and find out that the length of India is 27 pencil erasers, and the first state that goes along this length is 3 pencil erasers long.
- If desired, label each state after you’ve drawn them all in, writing each state’s name. For example, you might label Andhra Pradesh, which is on the coast of India to the southeast, or Punjab, which is towards the northernmost tip of India.
-
2Create dots or stars to mark the main cities in India. Some of the major cities in India include Mumbai, which is on the western coast of India a little more than halfway down the length of it, and New Delhi, which is towards the top middle of India. Decide which cities you’d like to include on your map, drawing a star, dot, or other symbol to show where they’re located.[10]
- Kolkata is located near the eastern tip of India, and Bangalore is in the middle of the bottom tip of India.
- Hyderabad is roughly three-quarters of the way down the middle of India going vertically.
-
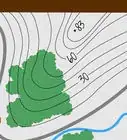
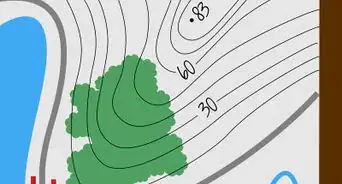
3Illustrate the topography of India to show land contours. Use different colors to show the different elevations of India. Areas of very high altitude might be purple, while areas of average altitude are yellow, and areas of low altitude are green.[11]
- For example, color in the Himalayan mountains area, which is the northernmost point of India, a dark purple to show a very high elevation.
- The entire coast of India with the exception of the Himalayan mountains is a very low elevation.
- The middle of India and the southernmost area of India both have mountain ranges of average elevation.
-
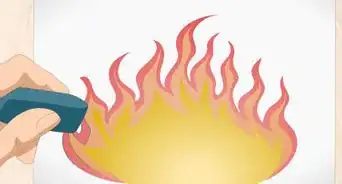
4Draw small pictures to show important landmarks. If you want to add some creativity to your map, choose major landmarks of India, such as the Taj Mahal, Golden Temple, or Amber Fort, and draw a small picture of them where they’re located. After drawing the simple picture, you can label the landmark too, if desired.[12]
- Consider putting the pictures of the landmarks in a key to the side of your map so you don’t need to write the names of each landmark directly on the map.
- For example, you might draw a simple outline of the Taj Mahal and place it 1–2 cm (0.39–0.79 in) above the center of India.
-
5Label any rivers or oceans to show the bodies of water. Draw lines in the shape of rivers to show where they’re located in India, or write the names of the oceans surrounding India. You can even use a blue pencil or pen to make it clearer that you’re depicting water.[13]
- You might label the Arabian Sea to the left of India, the Bay of Bengal to the right of India, and the Indian Ocean at the bottom of India.
- The Ganges river flows diagonally along the upper right section of India.
- The Narmada, Tapti, Krishna, and Kaveri rivers all flow horizontally across India.
-
6Make a key for your map so people can read it easily. Your key will tell your map viewers what any symbols mean, such as a squiggly blue line portraying a river or a star signifying a city. Draw a box to the right of your map and put any symbols in the box that you show in your map, writing what the symbol means to the right of each one.[14]
- In your key you might draw a picture of the Taj Mahal and write “Taj Mahal” next to it, or draw dotted lines and write “state boundary” next to it.
-
7Color your map to make states, landmarks, or bodies of water stand out. Use crayons, colored pencils, or markers to enhance your map. Color each state a different color, or color in rivers and oceans a blue color to represent water. If you added landmarks to your map, add details using different colors.[15]
- For example, color the states using colors like red, yellow, purple, and green.


Community Q&A
-
QuestionHow can I make my map very neat?
 Community AnswerStart with a light pencil or make the lines really light -- you'll be doing a lot of erasing and redrawing. It helps to start with one direction (north, south, east or west). As you reach a point where it feels difficult, stop and mark the beginning and end of each border. This will make some of the proportions easier to attain.
 -
QuestionHow do I make sure everything is the right size?Community AnswerIf you would like to maintain good measurements, you can use two sheets. One will have the map on it, which you can buy or download online. On this map, draw grid lines or measured squares. Then take another sheet and draw a grid on it, just like you did on the map. Number the squares, and draw your map square by square.
-
QuestionHow many states are in India?
 Community AnswerThere are 29 states in India.


References
- ↑ https://www.youtube.com/watch?v=J3a29-rdge0#t=50s
- ↑ https://www.youtube.com/watch?v=J3a29-rdge0#t=55s
- ↑ https://www.youtube.com/watch?v=J3a29-rdge0#t=1m1s
- ↑ https://www.youtube.com/watch?v=J3a29-rdge0#t=1m19s
- ↑ https://www.youtube.com/watch?v=J3a29-rdge0#t=1m21s
- ↑ https://www.youtube.com/watch?v=J3a29-rdge0#t=1m37s
- ↑ https://www.youtube.com/watch?v=J3a29-rdge0#t=1m55s
- ↑ https://www.youtube.com/watch?v=d5bkxhbE8SU#t=15s
- ↑ https://www.youtube.com/watch?v=d5bkxhbE8SU#t=1m11s
- ↑ https://www.worldatlas.com/articles/the-10-largest-cities-in-india.html
- ↑ http://www.floodmap.net/Elevation/CountryElevationMap/?ct=IN
- ↑ http://www.walkthroughindia.com/attraction/top-25-famous-monuments-and-distinctive-landmarks-of-india/
- ↑ https://www.youtube.com/watch?v=999ngrj_BHM#t=35s
- ↑ https://www.gislounge.com/whats-in-a-map/
- ↑ https://www.youtube.com/watch?v=PPnmKczuO6c#t=47s
About This Article

To draw the map of India, draw a large square on a piece of paper, then lightly draw 3 vertical lines to divide the square into quarters, and number them 1-4 from left to right. Draw a horizontal line to divide those quarters into top and bottom sections. Use these guidelines to help you as you sketch the map. The largest portion of India will be drawn in the top and bottom halves of the second section, with the majority of eastern India residing in the third section. If you are drawing to scale, small sections should extend into the first and fourth sections as well. To learn how to mark the 29 states and 7 union territories, read on!