This article was co-authored by wikiHow staff writer, Amy Bobinger. Amy Bobinger has been a writer and editor at wikiHow since 2017. She especially enjoys writing articles that help people overcome interpersonal hurdles but frequently covers a variety of subjects, including health and wellness, spirituality, gardening, and more. Amy graduated with a B.A. in English Lit from Mississippi College in 2011 and now lives in her hometown with her husband and two young sons.
wikiHow marks an article as reader-approved once it receives enough positive feedback. In this case, 94% of readers who voted found the article helpful, earning it our reader-approved status.
This article has been viewed 80,550 times.
Learn more...
Dried gourds are perfect for all kinds of crafts, from making birdhouses to creating the perfect fall-themed display. Even better, it’s very easy to dry your own gourds for decorating. It can take anywhere from a few weeks up to several months for your gourds to dry completely, depending on their size. Also, if you’re growing your own gourds, how and when you harvest them can make a big difference in the finished result!
Steps
Drying the Surface of the Gourds
-
1Wash the gourds in soapy water, then rinse and dry them. Dirt and bacteria can cause your gourds to decompose, preventing them from curing properly. To make sure this doesn’t happen, add a squirt of mild dish detergent to warm water, then gently wash the entire surface of each gourd. Rinse the gourds when you’re finished and pat them dry with a soft cloth.[1]
- Make sure to completely dry the surface of the gourd.
Tip: Remember to be gentle when you're handling the gourds. Cutting or bruising the skin makes them more susceptible to rotting.
-
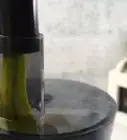
2Spray each gourd with rubbing alcohol or a household disinfectant. Lightly spritz the outside of the gourds with your chosen disinfectant, but don’t saturate them. You can use a commercial disinfecting product, rubbing alcohol poured into a spray bottle, or you can make your own disinfectant from 1 part bleach and 10 parts water.[2]
- For example, if you have a large batch of gourds, you might mix 1 cup (240 mL) of bleach with 10 cups (2,400 mL) of water.
- Wipe the gourds dry if the disinfectant doesn’t evaporate within about 1 minute.
- If you’d like, you can use a disinfecting wipe instead of a spray.
Advertisement -
3Spread the gourds on several layers of newspaper in a warm, dry place. Stack at least 3-4 layers of newspaper together, then spread out the gourds so they're laying on their sides, and they aren’t touching each other. This will allow the air to circulate, helping the gourds dry more evenly.[3]
- For even better air circulation, you may want to place the gourds on a slotted roasting tray, although this isn’t necessary.[4]
- You can also hang the gourds by tying twine around the stems, if you prefer.
- Keep the gourds on a shelf, a counter, or even outside. However, try to keep them out of direct sunlight, as this can cause the color to fade.
-
4Turn the gourds once a day for about a week, replacing any damp paper. Check on your gourds every day for the first week, turning them each time you do so. That way, you don't leave any one part of the gourd touching the newspaper for more than a day or so, as that can prevent it from drying.[5]
- If the newspaper under the gourds is damp or wet, replace it with fresh paper to prevent mold from growing.
- No matter how carefully you select, wash, and store your gourds, some of them may rot anyway. Immediately throw out any gourds that shrivel or get soft spots.
- You'll be ready to move to the next stage when the shells of the gourds are bright and hard.


Finishing the Curing Process
-
1Wipe gourds with disinfectant after a week. After a week, the outside of your gourds will be hard to the touch. Once that happens, it’s time to move them to a dark place to finish curing. Wipe down the surface of each gourd with rubbing alcohol, household disinfectant, or diluted bleach, then pat the surface of the gourds completely dry with a soft cloth.[6]
- Moisture could promote mold growth, so be sure to thoroughly dry the gourds.
-
2Move the gourds to a warm, dark, dry place. When you were drying the surface of the gourds, it didn’t matter if they were exposed to some light. However, as you continue the curing process, the gourds need to be kept in a dark spot, as light can cause the color of the gourds to fade over time. Move them to a place where they won’t be disturbed, and place them on layers of newspaper again.[7]
- Try keeping the gourds in an attic, the bottom of a closet, or a warm basement.
- If you’re concerned about having enough space for the gourds, hang them by tying twine around the stems.
-
3Leave the gourds to cure for 3-4 weeks, turning them every few days. Since the outside of the gourds are dry at this point, you don’t need to turn them every day. However, you should still turn them every 2-3 days, discarding any gourds which have turned soft or shriveled.[8]
- It’s common for some gourds to develop mold on their surface. This will not affect the gourds’ ability to dry, and in some cases it can even enhance the colors on a gourd. However, you can wipe the mold away with a dry or slightly damp cloth, if you’d like.
Tip: Gourds can sometimes smell unpleasant as they cure, so it’s best to keep them out of your main living area, if it’s possible.
-
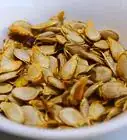
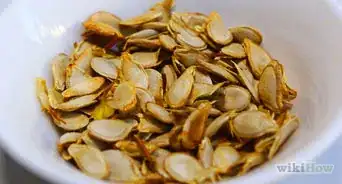
4Continue turning the gourds until they are completely dry. The length of time it will take the gourds to dry depends on their size. However, you’ll know the gourds are dry when you can hear the seeds rattling inside the gourds when you shake them.[9]
- Small gourds may only take 2-3 weeks to dry, whereas large gourds, like the kind used for birdhouses, may take up to 6 months to fully cure.
-
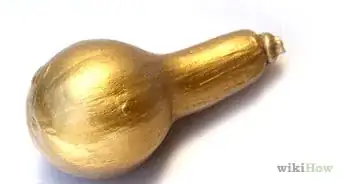
5Decorate your dried gourds and enjoy. Once they’re dried, you can paint your gourd, draw on it, carve it, or do whatever else your imagination can dream up! When you’re finished, you may want to seal the gourd with paste wax or clear shellac to help preserve it, especially if you carved or cut the shell. However, the gourds will last for several months without any preservation.[10]
- If you add a coat of clear shellac, your dried gourd may last for several years.


Harvesting Gourds for Drying
-
1Harvest the gourds when the stem starts to shrivel and turn brown. If you harvest a gourd before it’s completely mature, it won’t dry as well, and it will be more likely to rot. One way to tell if a gourd is mature is to check the stem. Once it’s withered and brown, the gourd is probably ready.[11]
- Other signs include a dull exterior and a hardened shell.[12]
-
2Be gentle when you handle the gourds. Try not to damage the skin, and don’t test the hardness with your fingernail. This can leave dents, cuts, or bruises that give bacteria and insects a place to enter the fruit, speeding up the decomposition process.[13]
-
3Cut the vine with a sharp knife, leaving 2–4 in (5.1–10.2 cm) of the stem. Leaving some of the stem on the gourd helps you avoid bruising it as you cut through the vine, and it gives you a convenient way to hold the gourd without handling the skin. In addition, the dried stems are a nice addition on a decorative gourd.[14]
Tip: Using a sharp knife, rather than twisting and pulling the stem, will also help you avoid bruising the fruit.


Community Q&A
-
QuestionI don't have access to gourds in my country. Can I use polymer clay?
 Community AnswerYou can use normal clay, or even clay kitty litter.
 -
QuestionWhat do I use clay or kitty litter for? I must have missed something.
 Community AnswerTo dry them out. Cat litter with silica would be best, as it is very absorbent.
 -
QuestionMy gourds don't rattle, theyshould be dried completely, I got them in october last year, they are the kind with the big bottom and a skinny neck that curves somewhat, I dried them to use as maracas :(
 Amy GremillionCommunity AnswerLarger-sized gourds can take up to 6 months to dry fully, so if it hasn't been that long, give them a little more time. If it has, the variety you chose may not have many seeds.
Things You'll Need
Drying the Surface of the Gourds
- Mild dish soap
- Water
- Soft cloth
- Rubbing alcohol, bleach, or household disinfectant
- Newspaper
- Twine (optional)
Finishing the Curing Process
- Disinfectant
- Newspaper
- Twine (optional)
Harvesting Gourds for Drying
- Sharp shears or knife


References
- ↑ https://newengland.com/today/living/crafts/how-to-preserve-gourds/
- ↑ https://www.mygardenlife.com/how-to/decorating-with-gourds-how-to-dry-a-gourd
- ↑ https://web.extension.illinois.edu/state/newsdetail.cfm?NewsID=7924
- ↑ https://extension.illinois.edu/hortihints/0108b.html
- ↑ https://web.extension.illinois.edu/state/newsdetail.cfm?NewsID=7924
- ↑ https://web.extension.illinois.edu/state/newsdetail.cfm?NewsID=7924
- ↑ https://web.extension.illinois.edu/state/newsdetail.cfm?NewsID=7924
- ↑ https://web.extension.illinois.edu/state/newsdetail.cfm?NewsID=7924
- ↑ https://web.extension.illinois.edu/state/newsdetail.cfm?NewsID=7924
- ↑ https://newengland.com/today/living/crafts/how-to-preserve-gourds/
- ↑ https://web.extension.illinois.edu/state/newsdetail.cfm?NewsID=7924
- ↑ https://extension.illinois.edu/hortihints/0108b.html
- ↑ https://www.mygardenlife.com/how-to/decorating-with-gourds-how-to-dry-a-gourd
- ↑ https://web.extension.illinois.edu/state/newsdetail.cfm?NewsID=7924
About This Article