This article was co-authored by Clinton M. Sandvick, JD, PhD. Clinton M. Sandvick worked as a civil litigator in California for over 7 years. He received his JD from the University of Wisconsin-Madison in 1998 and his PhD in American History from the University of Oregon in 2013.
This article has been viewed 27,267 times.
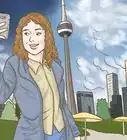
Many students come from foreign countries to the U.S. to further their studies. As citizens of other countries, these students must file for a student visa before coming to the U.S. A visa is a travel document, like a passport, from a home country. It allows a student to travel to a U.S. entry point to request permission to study in this country. Permission must be granted by the Department of Homeland Security and Customs.
Steps
Starting Your Application
-
1Find out if you're eligible for a student visa. To be eligible for a student visa in the US, you need to meet certain requirements. Make sure you qualify for a student visa before beginning the application process.
- There are three basic requirements to be eligible for a student visa in the USA: academic eligibility, financial stability, and health insurance.[1]
- Academic eligibility means you have been accepted to a school in the United States. Eligibility requirements for US schools vary by school and the best way to get a sense of whether you meet standards is to browse that school's website.[2]
- Financial stability means showing you have the means to sustain yourself while in the US. You will need to be able to make a living without having to work unless you have a work visa, and you can do this via student loans, scholarships, or grants.[3]
- Health insurance means showing proof of medical insurance to cover any health problems you have while in the United States.[4]
-
2Get the proper forms from your school. Once you've been admitted into a US school, you'll need to get the proper forms from your school to apply for a visa.
- When you're enrolled in your new school, you will be entered into their Student and Exchange Visitor Information System. You will have to pay a fee known as the SEVIS 1-901 Fee, the amount of which depends on your school.[5]
- The school will give you a form called the Form I-20 that you will take to your visa interview. It basically confirms your enrollment in the program. If you're taking a child or spouse with you overseas, they will need individual Form I-20s. There may be fees associated with multiple requests.[6]
Advertisement -
3Figure out what type of visa you need. Student visas come in a variety of forms in the United States. Make sure you know which type of visa is applicable to your situation.
- F1 visas are the most common form of academic visas. They are for students who are coming to the US for academic studies or for an English Language Program. F1 visas allow students to work part time while in school and may allow students to stay in the country one year after the visa expires to gain experience. F1 visas state that students have until the end of the expiration date listed on their visa to complete their studies.[7]
- JI visas are for students coming to the US to obtain practical training in a field not offered in their country. Part time employment is permissible with a JI visa as long as the exchange visitor program permits it.[8]
- An M1 visa is for students attending a non-academic vocational program. M1 vista holders are not permitted to work in the US, so it's particularly important that they provide evidence they're able to support themselves throughout their studies.[9]
-
4Submit the online application. The process of applying for a visa begins with an online application.
- The online visa application, found on the US Department of State website, must be completed and submitted online. You must also print out a copy and bring it to your interview.
- The online application will ask basic questions about you, such as contact information and your full name. It will also ask brief questions about your field of study and reasons for attending school abroad.
- While submitting the online application, you'll be ask to upload a photo of yourself. The photo needs to be a color full face photo, taken within 6 months against a white background. Any devices you normally wear, like glasses or hearing aids, need to be worn in the photo but you should not wear anything like a hat or a scarf that might cover your face. However, religious headgear is exempt from these regulations. You should have neutral expression and your head should be between 50% and 69% of the image's total height.[10]
-
5Schedule your interview. When you complete the application, you will have the chance to sign up for an interview at a nearby US embassy.
- Applicants under the age of 13 and over the age of 80 are not required to interview.
- Apply early, as wait times for interviews vary. You want to make sure you have your visa secured before you have to begin school.


Preparing for Your Interview
-
1Pay all the required fees. You will probably be required to pay the application fee prior to your interview. The fee can be paid online and will be $160. You may have to pay an additional visa insurance fee after receiving your visa.
-
2Gather the necessary documents. Before the interview, make sure you have all the documents you'll need to bring in ready.
- You will need a passport that is valid until six months after your period of stay in the US ends.
- You will need your printed immigration visa.
- You will need the payment receipt from your application fee.
- You will need all the forms issued to you by your school.
- You will need a copy of the photo you uploaded while completing the online form.
-
3Attend your interview. Your interview is to determine whether you meet the qualifications to receive a visa and which category is appropriate for you.
- A consular will conduct the interview. She will start by asking you basic questions to make sure you meet all legal requirements to receive a visa.
- You will also be asked questions about how you intend to support yourself in the US, your field of study, and your knowledge of the English language.
- During your interview, you will be required to submit an ink-free digital fingerprint scan as part of a routine background check.
-
4Know your options if your visa is declined. If your visa is denied, you can appeal this decision. You will probably need additional documentation and a visa counselor can help you figure out what other papers you should submit. Try asking your school to submit further paperwork speaking to your qualifications as a student at their school. This can help you successfully appeal your denial.[11]


Filing for a Visa Outside the US
-
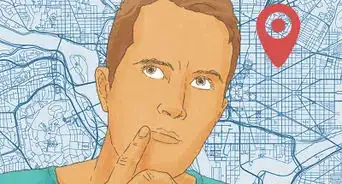
1Find country-specific information. If you're a US student applying for a visa outside the United States, you need to know the requirements for the country where you're studying.
- The study abroad website, travel.state.gov, can help you locate country-specific information about applying for your visa.
- You can also talk to an adviser in your school's study abroad department to find out specifics on the forms you'll need to apply.
-
2Complete any forms or procedures for your university before applying for a visa. It's likely the school you're attending abroad will send you a number of forms regarding your visa. Before you begin the process of applying for your visa, fill out and return all these forms in full and make sure you have the proper paperwork from the school where you're studying to include in your application.
-
3Apply early. As with applying for a visa in the United States, wait times for interviews and issuing visas vary. Apply as soon as you're accepted into a program overseas. You want to make sure you have your visa secured well before the start date of your program. Oftentimes, wait times for interviews can stretch up to 4 weeks during summer months. Plan accordingly.
-
4Get basic paperwork ready. Regardless of where you're applying for a visa, copies of the following documents will likely be requested during the process:
- A valid passport
- Your birth certificate
- Your social security card
- Transcripts from any previous higher learning institutions you attended


References
- ↑ http://www.internationalstudent.com/study_usa/preparation/student-visa/
- ↑ http://www.internationalstudent.com/study_usa/preparation/student-visa/
- ↑ http://www.internationalstudent.com/study_usa/preparation/student-visa/
- ↑ http://www.internationalstudent.com/study_usa/preparation/student-visa/
- ↑ http://www.internationalstudent.com/study_usa/preparation/student-visa/
- ↑ http://www.internationalstudent.com/study_usa/preparation/student-visa/
- ↑ http://www.internationalstudent.com/study_usa/preparation/student-visa/
- ↑ http://www.internationalstudent.com/study_usa/preparation/student-visa/
- ↑ http://www.internationalstudent.com/study_usa/preparation/student-visa/
About This Article