This article was co-authored by Tanglewood Sue. Tanglewood Sue is a DIY and Upcycling Specialist and the Owner of Tanglewood Works out of Hyattsville, Maryland. With over nine years of experience, Sue specializes in upcycled painted furniture and other handmade, personalized, and sustainable goods. With her passion for art and reinvention, marketing experience, and Bachelor’s Degree in Broadcast Media, Sue has been able to create a business that not only provides quality pieces but empowers customers to create their works through her library of DIY tutorials and live demos as well as DIY supplies.
This article has been viewed 100,479 times.
It's very easy to damage wood and create a large hole. Whether your item is a wooden wall or a piece of furniture, you can easily repair it using some craft sticks and wood filler. Once you've covered the hole with wood filler, prime and paint it to give it a smooth, new finish.
Steps
Preparing the Materials and Craft Sticks
-
1Gather your materials. Select water-based wood filler, primer, and paint if the item you are repairing is kept indoors, or solvent-based wood filler and oil-based primer and paint if the item will be placed outdoors. You'll also need craft sticks, disposable plates, PVA glue, wood glue, 120-grit sandpaper, and paintbrushes or rollers.[1]
- Gather old clothes, rags, a sheet or drop cloth, painter's tape, and a paint stirrer as well.
-
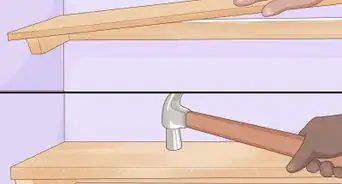
2Glue craft sticks together to cover the hole. The craft sticks will provide a support for you to apply the wood filler to. Inspect the size of the hole and decide how many craft sticks it would take to cover it.[2]
- For example, if a hole can be filled by 3 craft sticks, lay them flat on a work surface side by side. Pour glue over the back of the 3 craft sticks. Place 3 more craft sticks on top of the first 3 to create a strong layer that's stuck together properly.
- The amount of craft sticks you'll have to use depends on the size of the hole.
- Give the glue 10 to 15 minutes to dry.
Advertisement -
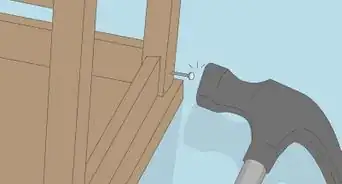
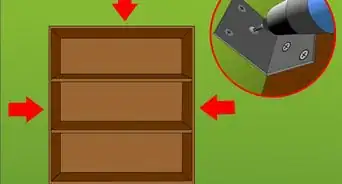
3Place the craft sticks on the back of the hole and secure them with wood glue. Place the glue around the border of the hole in your wood. You should lay the craft sticks on the side they won't be seen from. If you're filling a hole in a cabinet, wall, or a wardrobe, place the craft sticks on the inside of the hole.[3]
- If you're covering a hole in a wall or wood that you can't place on a flat surface, you might need to hold the craft sticks for 5 minutes so they stick to the glue.


Applying the Wood Filler
-
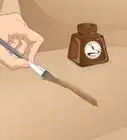
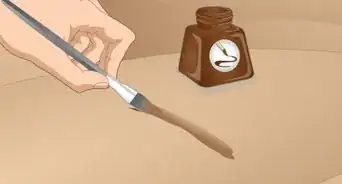
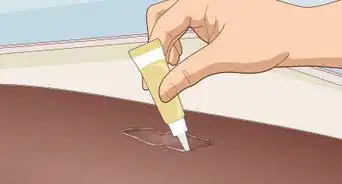
1Mix your wood filler using a craft stick and a disposable paper plate. Follow the directions on the tin of the wood filler you're using. Directions vary depending on the manufacturer. There's no need to mix a large amount of wood filler. A small amount of wood filler on the plate will do the job.[4]
- Ensure that the room is well ventilated as wood filler has a very strong smell.
- The filler is fully mixed when it turns orange-brown in color.
-
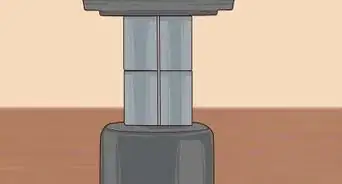
2Apply the wood filler to the craft sticks to fill the hole. Once your wood filler is mixed, use it quickly. Apply the filler to the craft sticks using another craft stick or a putty knife. The craft sticks will act as a support for the wood filler. The filler should be level and even with the surface of the wood.[5]
-
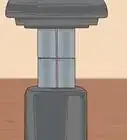
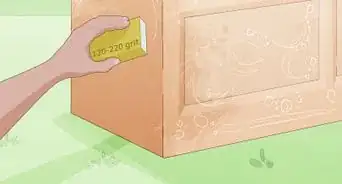
3Let the filler dry for 1 hour before using 120-grit sandpaper on it. Once the filler is dry, rub it with 120-grit sandpaper. You will need to use a decent amount of pressure when rubbing the filler with the sandpaper. Keep using the sandpaper until it's level with the rest of the wood.[6]
- If you're using a pad sander on the filler, use 220-grit sandpaper instead. Pad sanders are handheld devices that can powerfully sand wood.
-
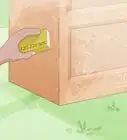
4Use a cloth to clean the wood and remove the dust. Hold your cloth under the tap for a couple of seconds and wipe the area of the wood you just filled in. You might need to wipe the area a couple of times if the hole was very large or if you used a lot of filler.[7]
- Wiping the area with a cloth is also necessary before you prime the wood.


Priming and Painting the Wood
-
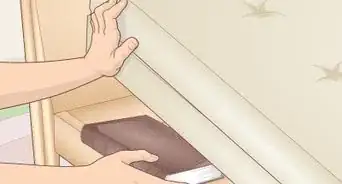
1Place a sheet on the floor or on your work surface before you prime. If you're painting a wooden wall, place a sheet on the floor to catch any drips of paint. If you're painting a wooden cabinet or another item that you can move, place it on top of a sheet to ensure maximum protection for the surrounding area.[8]
- Move any furniture away before you paint. If the furniture is too big to move, cover it with another sheet.
- Cover baseboards, hinges, and other items with painter's tape if you need to.
-
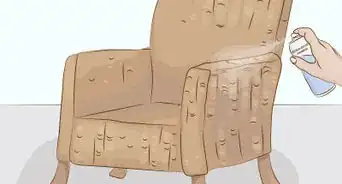
2Apply a primer to the wood. Primer makes it easier for the paint to stick to the surface of the item you're painting. If you're painting a wooden wall and you have the paint you used for the rest of the wall when you originally painted it, you'll only need to prime the area you filled in with wood filler. If you want to paint the entire area of the wooden object, you'll need to prime it all.[9]
- Use a roller to prime a wall and a paintbrush to prime smaller objects.
-
3Give the primer 3 hours to fully dry. Primer can dry within 2 hours of being applied to an item. However, if you paint the primer before it's dry, you'll ruin the item you're painting. By giving it 3 hours to fully dry, you allow for the primer to dry completely.
- Don't paint over the primer before it's completely dry. Primer can feel dry to the touch without being fully dry.
-
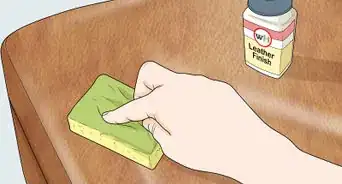
4Apply the first coat of paint to the wood. Once the primer has completely dried, use a paintbrush or a roller to apply the first coat to the wood. Rollers will work best on walls and other flat surfaces. Paint other surfaces using a flat or tapered paintbrush.[10]
- If you're only painting over the filler, use the same paint you painted the rest of the item with. If you can't find that paint, go to the local paint store and take paint strips. Hold these strips to the wood to find the right color of paint.
- Don't be afraid to use plenty of paint. It's better to apply too much paint to the item than too little. Make sure you brush the paint so it evenly covers the surface of the item.
- Use even and measured strokes like you used to apply the primer.
-
5Give the first coat 2 to 3 hours to completely dry. You should give the paint time to properly dry into the wood. This will take 2 hours at the very least. Test if the paint is dry by dabbing it with a tissue. Inspect the tissue after for signs of paint. If there's no paint on the tissue, the paint is dry and you can apply the second coat.[11]
- Consider leaving the paint dry overnight to ensure it's completely dry.
-
6Apply the second coat of paint to the wood. After the first coat has fully dried, use even and measured strokes once more to apply the second coat. Once you finish applying the second coat, look at the wood and decide if it needs another coat. If the paint doesn't look right on the wood, it will probably need another coat.[12]
-
7If you decide to apply another coat, follow the process again. Give the second coat 2 to 3 hours to dry before painting the third coat.


Expert Q&A
-
QuestionCan I just sand the wood around a gouge to make it even?
 Tanglewood SueTanglewood Sue is a DIY and Upcycling Specialist and the Owner of Tanglewood Works out of Hyattsville, Maryland. With over nine years of experience, Sue specializes in upcycled painted furniture and other handmade, personalized, and sustainable goods. With her passion for art and reinvention, marketing experience, and Bachelor’s Degree in Broadcast Media, Sue has been able to create a business that not only provides quality pieces but empowers customers to create their works through her library of DIY tutorials and live demos as well as DIY supplies.
DIY & Upcycling SpecialistYou can, but that's going to be a lot of sanding. Unless you're dealing with a very thin scratch or gouge, this is probably an inefficient way to go about it. -
QuestionWhy do I have to sand the wood filler down after it dries?Tanglewood SueTanglewood Sue is a DIY and Upcycling Specialist and the Owner of Tanglewood Works out of Hyattsville, Maryland. With over nine years of experience, Sue specializes in upcycled painted furniture and other handmade, personalized, and sustainable goods. With her passion for art and reinvention, marketing experience, and Bachelor’s Degree in Broadcast Media, Sue has been able to create a business that not only provides quality pieces but empowers customers to create their works through her library of DIY tutorials and live demos as well as DIY supplies.
DIY & Upcycling SpecialistWell, you don't have to sand it down, but it's going to stand out pretty badly if you don't. Sanding helps to create a uniform texture before you paint or stain it.
Things You'll Need
- Craft sticks
- Glue
- Wood glue
- Wood filler
- Disposable plate
- 120-grit sandpaper
- 220-grit sandpaper and pad sander (optional)
- Cloth
- Water-based paint for indoors
- Oil-based paint for outdoors
- Paintbrush
- Roller
- Tissue
- Primer
- Sheets
- Painter's tape


References
- ↑ https://www.bobvila.com/articles/how-to-use-wood-filler/
- ↑ https://www.familyhandyman.com/carpentry/how-to-use-epoxy-on-wood-for-repairs/view-all/
- ↑ https://www.familyhandyman.com/carpentry/how-to-use-epoxy-on-wood-for-repairs/view-all/
- ↑ https://www.bobvila.com/articles/how-to-use-wood-filler/
- ↑ Tanglewood Sue. DIY & Upcycling Specialist. Expert Interview. 24 March 2021.
- ↑ Tanglewood Sue. DIY & Upcycling Specialist. Expert Interview. 24 March 2021.
- ↑ https://www.familyhandyman.com/carpentry/how-to-use-epoxy-on-wood-for-repairs/view-all/
- ↑ https://www.bobvila.com/articles/how-to-use-wood-filler/
- ↑ https://www.bobvila.com/articles/30124-dream-it-do-it-how-to-paint-wood-furniture/
About This Article

If you’ve noticed a large hole in a piece of wood or furniture, you can fix it with a few supplies from your local home improvement store. If the wood’s kept indoors, use a water-based wood filler, primer, and paint, but if it’s kept outdoors, use a solvent-based wood filler, oil-based primer, and paint. You’ll also need sandpaper and a paintbrush or roller. To fill the hole, you’ll need to apply the wood filler. Once it’s dried after an hour or so, sand the surface to make it smooth. Then, prime and paint the surface so it blends in with the rest of the wood. You’ll need to wait 2 to 3 hours between coats of primer and paint. For more tips, including how to cover use craft sticks to help cover a hole from the inside, read on!