This article was co-authored by wikiHow Staff. Our trained team of editors and researchers validate articles for accuracy and comprehensiveness. wikiHow's Content Management Team carefully monitors the work from our editorial staff to ensure that each article is backed by trusted research and meets our high quality standards.
There are 15 references cited in this article, which can be found at the bottom of the page.
This article has been viewed 28,713 times.
Learn more...
You’re cruising along when all of a sudden you notice your engine making a terrible racket, accompanied by the distinctive odor of exhaust. When you get home, you pop the hood and, after doing a little digging, discover the source of the problem—there’s a crack in your exhaust manifold. Now what? For both you and your vehicle’s wellbeing, your best bet is to just bite the bullet and get the part replaced. With the right tools, however, it is possible to perform a relatively simple patch job that will keep your ride road-worthy for a few more miles.
Steps
Locating and Exposing the Crack
-
1Pop your hood and locate your exhaust manifold beside your vehicle’s engine. You’ll find the part connected to either the front or back side of the lower portion of the engine. It’s a complex assembly consisting of a rectangular metal harness and several small tubes lined up side-by-side, all of which come together at the bottom end where they run into the vehicle’s main exhaust pipe.[1]
- The function of the exhaust manifold is to collect the exhaust gases from each of the engine’s separate cylinders, funnel them into one large tube, and then eject them via the exhaust pipe.
- Cracks most often occur as a result of regular, extreme fluctuations in engine temperature. This repeated heating and cooling places a lot of strain on the metal (typically either cast iron or stainless steel) used to fabricate the part.
-
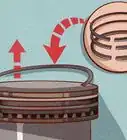
2Remove the heat shield covering the manifold. On some vehicles, the exhaust manifold is hidden from sight by a large, contoured piece of metal known as a heat shield. Getting this part out of the way is a cinch. Just undo the bolts on the top panel by turning them counterclockwise (left) with a ratchet and appropriately-sized socket, then pull up on the shield to lift it away from its seat.[2]
- In some cases, there may be a third or even fourth bolt on the side or bottom section of the shield.
- Your exhaust manifold’s heat shield is there to prevent heat damage to your exhaust system and other important parts inside the engine compartment, so don’t forget to reinstall it once you’ve completed your repairs.[3]
Advertisement -
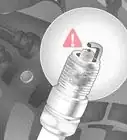
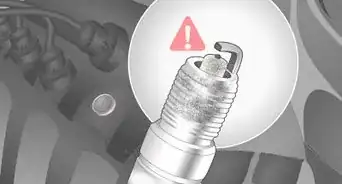
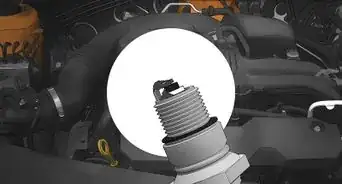
3Identify where the part is damaged. The majority of cracks serious enough to cause excess engine noise and exhaust leakage will be plainly visible to the naked eye. Most of the time, these can be found somewhere along one of the small tubes. Every now and then, however, a crack may form in the harness that holds the pipes together, or in a gasket or other accessory piece.[4]
- Don’t panic if you find a crack that spans several inches—long cracks aren’t necessarily any worse than short ones. It’s wide cracks, splits, and holes that you have to worry about, as these are much tougher to successfully patch.
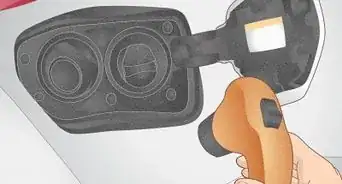
- If you’re having trouble tracking down the source of the leak, one surefire solution is to rig up a shop vacuum to blow air backwards through your exhaust pipe, then spray the manifold with water and watch for bubbles to appear.[5]
-
4Widen the crack to around 1⁄8 in (0.32 cm) if necessary. Wedge a file, dremel tool, grinder blade, or slender drill bit into the crack and carefully grind down the edges until it’s approximately the same width from end to end. You can also accomplish this manually with a sheet of extra coarse sandpaper, though it may take quite a bit longer.[6]
- Don’t pry on the crack in an effort to open it up. Not only will you risk enlarging it too much, you’re also likely to leave metal protruding from the opposite side, which could inhibit the part’s performance.
- Fissures narrower than 1⁄8 in (0.32 cm) tend to be harder to repair for the simple reason that you can’t get as much filler material in them.
-
5Sand the damaged area with a low-grit sandpaper to remove rust and dirt. If the crack is in a spot that’s easily accessible by hand, reach in and go over it with a sheet of sandpaper somewhere in the 80- to 100-grit range. Apply firm pressure and switch up the direction of your strokes frequently to get off as much solidified residue as possible.[7]
- Another quick, easy, time-conserving option is to do some speed-polishing using a dremel tool equipped with a wire brush attachment.[8]
- The abrasive sandpaper will help to wear down gunk and surface corrosion while also scuffing up the metal a bit to prepare it for the epoxy-based product you’ll be using to seal up the crack.
Warning: If you can’t get to the crack, it’s recommended that you take your vehicle in to have it serviced by an experienced technician. Removing a leaky exhaust manifold is a difficult and delicate task, as it often requires the removal of other critical engine components.[9]
-
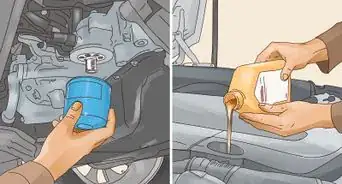
6Clean the part thoroughly with a foaming engine cleaner. Spray a liberal amount of cleaner onto the manifold, then allow it to sit for 20-30 minutes. When time is up, fill a small container up with a sudsy solution of warm water and liquid dish detergent and pour it over the part slowly to rinse it. Afterwards, give it a second rinse with clean water to flush away any lingering traces of soap.[10]
- You can pick up a can of engine cleaner at any auto supply store for around $3-5, as well as the automotive departments of most grocery stores and supercenters.
- If you’re not fond of working with noxious chemical cleaners, go with a natural all-purpose cleaner or degreaser instead, or try making your own.[11]


Filling in the Damage with a Metal Repair Paste
-
1Buy a container of thermal metal repair paste. These products are readily available at any auto supply store. Be sure to pick out a paste that’s rated for at least 1,200 °F (649 °C). Anything lower than that may not be able to hold up to the intense temperatures that the exhaust manifold pipes climb to on a regular basis.[12]
- Metal repairs pastes are typically made from a combination of ultra-strong epoxies, silicone, minerals, and tiny pieces of metal suspended in a tacky liquid. They’re formulated to be effective on any type of solid metal surface, including stainless steel and cast iron.[13]
- One neat thing about thermal pastes is that since they’re designed for high-heat scenarios, they actually get stronger as they get hotter.
-
2Mix the paste vigorously until it’s a uniform thickness. Some products come premixed in a single container and just need a good stir before they’re ready to go. Others may require you to squeeze multiple components onto a single surface and mix them yourself. For best results, be sure to follow the directions listed on the packaging.[14]
- A small wooden stir stick, craft stick, or flexible plastic knife will make an ideal stirrer and applicator. You can also do your mixing with the blade of a screwdriver if you don’t have anything more suitable on hand.
- When properly mixed, the paste should have a texture similar to wet sand.
-
3Spread a liberal amount of paste over the crack evenly. Use your applicator to scoop up a glob of paste and transfer it to the damaged area on the manifold. Then, smooth it until it covers the entire crack, along with about 1⁄4 inch (0.64 cm) of the intact metal on each side. Be careful not to leave any gaps or thin spots.[15]
- It’s a good idea to pull on a pair of rubber gloves anytime you’re working with a metal-based thermal paste, as they contain ingredients that can cause skin and eye irritation.[16]
- Don’t worry about over applying the paste. You can always sand down the excess material later if need be.
-
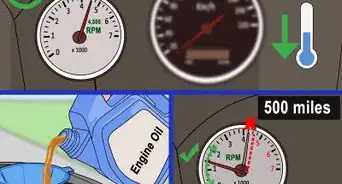
4Let the paste cure for at least 24 hours before starting your vehicle. Most metal repair pastes dry to the touch within 1-2 hours, but don’t fully harden for 18-24. Play it safe and wait a minimum of one full day. If the paste gets too hot before it’s had sufficient time to cure, it could fail, leaving you right back where you started.[17]
- If you’re not sure whether your application is completely cured, press on it firmly with your fingernail. If it leaves a dent, the product still needs more time.
Tip: Adding some heat to the equation can speed things along a bit. Try waving a hair dryer or heat gun over the fresh paste from a distance of about 3–6 inches (7.6–15.2 cm) for 10-15 minutes, or simply parking your vehicle in the sun with the hood up.[18]
-
5Sand the dried paste to eliminate lumps and other inconsistencies if desired. Use a power sander or sheet of coarse 50- to 100-grit sandpaper to grind the product down to a uniform thickness. It will be rock-solid after a full day of curing, so don’t be afraid to really bear down and dig in. Aim for a smooth finish that’s free of noticeable height differences.
- If you’re using ordinary sandpaper, it may be more comfortable for you to wrap the sheet around a contoured sanding block. This will improve your grip and make it easier for you to get down into hard-to-reach areas.
- This step is mostly cosmetic and therefore basically optional. The only time applying a metal repair paste too heavily may cause an issue is if it somehow seeps through to the inside of the part.[19]
-
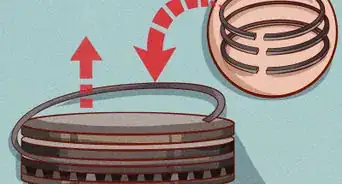
6Replace your exhaust manifold’s heat shield when you’re done. Lower the shield into place over the part with the convex side facing out, then slip in the fixing bolts and tighten them down by turning them clockwise (right) with your ratchet. Crank the nuts until they’re nice and snug to ensure that the shield will stay put while the engine is running at peak temperature.[20]
- Failure to properly secure the fixing bolts that hold the heat shield on could result in audible rattling inside the engine compartment, which can be quite alarming when you’re not expecting it.


Warnings
- Unlike other sorts of epoxies, metal repair pastes are only designed to seal small gaps in metal surfaces, and aren’t strong enough to bond separate pieces. If any part of your exhaust manifold has split or broken off completely, it’s best to just have it replaced.⧼thumbs_response⧽
Things You’ll Need
- 80- to 100-grit sandpaper
- File, dremel tool, grinder, or power drill with slender bit
- Foaming engine cleaner
- Water
- Liquid dish soap
- Small container
- Thermal metal repair paste (rated for high heat)
- Small wooden stir stick, craft stick, or flexible plastic knife
- 50- to 100-grit sandpaper
- Shop vacuum (optional)
- Wire brush dremel attachment (optional)
- Screwdriver or similar tool (optional)
- Hair dryer or heat gun (optional)
- Power sander (optional)


-Step-13.webp)


References
- ↑ https://www.cars.com/auto-repair/glossary/exhaust-manifold/
- ↑ https://www.youtube.com/watch?v=cbRitBF2c4Q&feature=youtu.be&t=11
- ↑ https://www.cartalk.com/content/one-exhaust-heat-shields-fell-my-honda
- ↑ https://www.enginebuildermag.com/2017/03/cracks-and-how-to-fix-them/
- ↑ https://www.youtube.com/watch?v=GtkXZDaevKQ&feature=youtu.be&t=42
- ↑ http://knowhow.napaonline.com/how-to-use-jb-weld-extremeheat/
- ↑ http://knowhow.napaonline.com/how-to-use-jb-weld-extremeheat/
- ↑ https://www.youtube.com/watch?v=9DAcQnbmMzE&feature=youtu.be&t=3
- ↑ https://www.autoblog.com/2016/11/18/how-to-replace-an-exhaust-manifold/
- ↑ https://www.popularmechanics.com/cars/how-to/a6008/how-to-clean-an-engine/
- ↑ https://nymag.com/strategist/article/best-natural-organic-cleaning-products.html
- ↑ https://toolsfirst.com/best-metal-glue/
- ↑ https://www.quiksteel.com/content/products/sds/16562TRI.pdf
- ↑ http://knowhow.napaonline.com/how-to-use-jb-weld-extremeheat/
- ↑ https://www.youtube.com/watch?v=9DAcQnbmMzE&feature=youtu.be&t=100
- ↑ https://www.quiksteel.com/content/products/sds/16562TRI.pdf
- ↑ http://knowhow.napaonline.com/how-to-use-jb-weld-extremeheat/
- ↑ https://multimedia.3m.com/mws/media/1081388O/heat-curing-article.pdf?fn=Heat%20Curing%20Article.pdf
- ↑ http://knowhow.napaonline.com/how-to-use-jb-weld-extremeheat/
- ↑ https://www.youtube.com/watch?v=_LVBAkNpWWI&feature=youtu.be&t=145
About This Article