This article was co-authored by wikiHow Staff. Our trained team of editors and researchers validate articles for accuracy and comprehensiveness. wikiHow's Content Management Team carefully monitors the work from our editorial staff to ensure that each article is backed by trusted research and meets our high quality standards.
There are 7 references cited in this article, which can be found at the bottom of the page.
The wikiHow Culinary Team also followed the article's instructions and verified that they work.
This article has been viewed 38,190 times.
Learn more...
Freezing your cooked rice is a thrifty alternative to throwing it out, and can save you precious time and energy when it comes to preparing future meals. In order for rice to freeze properly, it’s best to store it while it’s still fresh and moist. Place the rice in an airtight container and keep it in your freezer for up to a month. The next time you need to throw a meal together in a hurry, simply reheat the frozen rice in the microwave or on the stovetop.
Steps
Getting Fresh Rice Ready for the Freezer
-
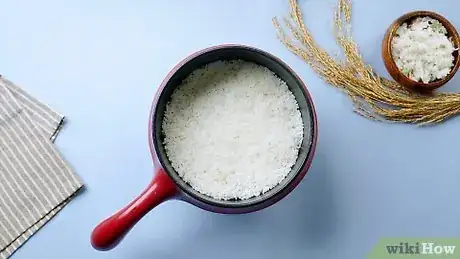
1Cook up some fresh rice. Rice freezes best when it’s still full of moisture. Heat up a batch of your favorite style of rice in your rice cooker or on the stovetop. Whatever’s left over can go in the freezer. Preparing and freezing rice in bulk at the beginning of the week can free up a lot of time that you would otherwise spend fixing individual batches.[1]
- If you’re attempting to prepare a certain amount of rice, keep in mind that most varieties double or even triple in size as they cook—1 cup of dry rice can produce 2–3 cups of cooked rice.[2]
- Any type of rice can be frozen and reheated, including white, brown, basmati, wild, jasmine, and other varieties.[3]
- Avoid freezing rice that's been sitting in the refrigerator for more than a day. Most of the moisture have dissipated by then, and bacteria will have begun slowly creeping in.
-
2Allow the rice to cool. Placing freshly-cooked rice in the freezer while it's still hot can cause it to clump. To prevent this, simply leave the rice sitting out at room temperature until it stops steaming. When it's barely warm to the touch, it will be ready to put away.
- Spread the rice out in a thin layer on a baking sheet to speed things along.
- There’s no need to cool the rice separately in the refrigerator prior to freezing.
Advertisement -
3Drizzle on a small amount of oil to keep the rice from sticking. As an optional step, add about 1⁄2–1 tablespoon (7.4–14.8 ml) of any oil with a mild flavor profile (such as vegetable, canola, or olive) to the cooled rice before transferring it to its storage container. Toss the rice thoroughly to coat it. The slick oil will keep the individual grains separated, improving the texture and making it easier to heat through.[4]
- Start with the smallest amount of oil necessary and add an extra 1⁄4–1⁄2 tablespoon (3.7–7.4 ml) per cup to better coat larger batches.
- This is especially handy for white rice, which has a high starch content that makes it prone to sticking.
- Be careful not to overdo it with the oil, or you could end up making the rice wet and greasy.
-
4Portion the rice into servings. Divvy up the rice into cup-sized quantities (about 190g apiece) and store them separately, rather than heaping it all into a solitary container. This will spare you the task of measuring come dinnertime. It also offers greater portion control, which can be a big help if you’re on a diet or just don’t want to be wasteful.[5]
- Set aside 1–2 cups (190–380 g) for individual portions, and 4–6 (760–1.14 kg) cups for families and dishes that feature rice as a key component.
Freezing the Rice
-
1Pack the rice into a freezer-safe container. Scoop the rice into a sheet of plastic wrap and bundle it into a neat little package to safeguard against freezer burn. Then, stick the bundle in a quart or gallon-sized (1.8 l) freezer bag. A plastic storage container with a locking lid will also work just fine.[6]
- Press as much air out of the storage container as possible before zipping or locking it to ensure that the rice stays fresh.
-
2Place the storage container in the freezer. If you’re freezing multiple bags, smooth them out and stack them on top of one another so that they lie flat. A thinner layer will make ice less likely to form and help the rice reheat more evenly.[7]
- Find some room away from heavier items that might damage the container or mash the delicate rice inside.
-
3Keep the rice in the freezer for up to a month. Unlike refrigerated rice, which typically needs to be used within 2–3 days, frozen rice often stays good for 30 days or longer. That means you can enjoy a hot meal at your leisure instead of being rushed to use up your leftover ingredients before they go bad.[8]
- Label each container with that day’s date so you’ll know how long it’s been in the freezer.
- Avoid removing the rice unless you’re about to heat it up. Continual thawing and refreezing isn’t good for it.
Thawing and Using Frozen Rice
-
1Microwave the frozen rice for around 2 minutes. When you’re ready to throw a quick stir fry or hassle-free gumbo together, grab a pre-portioned container of rice and dump it into a large microwave-safe bowl. Warm the rice on medium power for about a minute at a time until it’s hot. After the first 2 minutes, decrease the time to 30-second intervals to avoid overcooking.[9]
- Rice may lose a little moisture following a long stint in the freezer. If it looks somewhat dry, add about a teaspoon of cold water and stir between heating.
- If you reheat rice often, invest in a set of containers with ventilated steam lids. You can microwave the rice directly in these containers, eliminating one more step from the process.[10]
-
2Warm the frozen rice on the stovetop instead. Scrape the rice into a saucepan and set it on the cooktop over medium heat. Add ¼ –½ c (59–118 ml) of water to make up for the moisture that escapes through steam. Stir the rice frequently as it heats up to prevent sticking. In just about 5 minutes it will be hot, moist, and delicious.[11]
- This will be the preferred thawing method for those who prefer the slow-cooker approach or are planning on adding other ingredients to the rice.
-
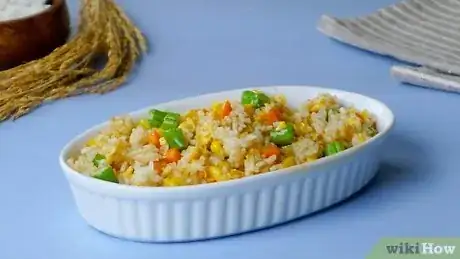
3Add frozen rice directly to your favorite dishes. If you’re putting together a pan of enchiladas, casserole, or hearty stew, you can skip the thawing process altogether and use the rice as-is. It will warm naturally as it cooks, and you can take advantage of those few extra minutes to get the rest of your ingredients in order.[12]
- Break up any large clumps you come across before mixing the rice with other ingredients.
- Cooking with frozen rice can lower the temperature of the food, so you may have to adjust your cook times accordingly. Be ready to tack on an additional 5-10 minutes as needed.
-
4Only reheat as much rice as you can eat. Thawed rice doesn’t refreeze well, so be sure to take the number of people you’re serving into account while planning your meal. Otherwise, you may just end up throwing the uneaten portion away.
- An average serving of rice is about ½-1 cup (190–380 g) per person.[13]
- Make sure you’re actually using the rice you freeze. The more that accumulates, the faster you’ll begin to run out of storage space and the tougher it will be to keep up with the contents and dates of each container.
Warnings
- Throw out frozen rice if it shows signs of freezer burn.⧼thumbs_response⧽
Things You'll Need
- Cooked rice
- Airtight storage container
- Microwave-safe container
- Microwave
- Saucepan
- Cooking oil (vegetable, canola, or olive)
- Water
References
- ↑ https://www.justonecookbook.com/how_to/how-to-freeze-rice/
- ↑ http://www.cooksinfo.com/rice
- ↑ https://www.foodiewithfamily.com/how-to-freeze-rice-for-fried-rice-and-other-dishes/
- ↑ https://www.bonappetit.com/test-kitchen/how-to/article/how-to-freeze-avocado-rice-granola
- ↑ https://www.budgetbytes.com/2013/08/how-to-freeze-rice/
- ↑ https://www.thekitchn.com/how-to-make-ahead-and-freeze-cooked-rice-or-any-grain-226716
- ↑ https://lifehacker.com/the-best-way-to-freeze-cooked-rice-and-other-grains-for-1753292850
- ↑ https://www.justonecookbook.com/how_to/how-to-freeze-rice/
- ↑ https://www.foodiewithfamily.com/how-to-freeze-rice-for-fried-rice-and-other-dishes/


