This article was co-authored by Art Fricke. Art Fricke is a home renovation and repair specialist and the owner of Art Tile & Renovation based in Austin, Texas. With over 10 years of experience, he specializes in bathroom and kitchen renovations. Art focuses on a single contractor approach to customized renovation work, and performs projects such as installing custom tile showers, fixing tiled shower leaks, replacing cracked tiles, and installing floor and wall tile.
This article has been viewed 26,011 times.
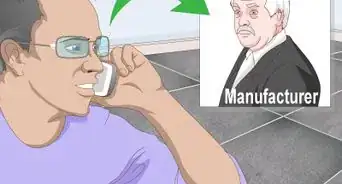
Whether you’re remodeling a bathroom or repairing existing tile, grouting wall tile is a necessary and often time-consuming task. However, by preparing yourself and being systematic, you can dramatically cut down on the time and effort it takes. Ultimately, by preparing your work area and gathering supplies, mastering grouting, and cleaning up excess grout, you’ll finish a seemingly overwhelming task quickly. In the end, whatever room your tile wall is in will look refreshed.
Steps
Preparing Your Work Area
-
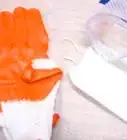
1Put on safety protection. Use rubber gloves, eye protection, older clothes that cover your arms, and a smock. If you don’t put on safety protection, you could potentially hurt yourself. This is especially true for eye protection, as you may get grout in your eyes without it.
- Make sure the room you’re working in is properly ventilated. To do this, open nearby windows and doors. If you have a bathroom vent, turn it on.
-
2Tape plastic covers to surrounding walls and floors. Use painters tape to secure plastic to the area directly underneath where you’ll be working with grout. In addition, place plastic next to the portion of the wall you’ll be working on. This will protect these areas from grout spills or stains.[1]Advertisement
-
3Remove tile spacers from in-between the tiles. If you just laid new tile, you’ll want to remove the spacers you used to keep them in a grid pattern. Use needle-nose pliers to remove them. In the end, if you forget to remove them, you’ll wind up putting grout right over them. This could cause your grout to decay rapidly in the future.[2]
-
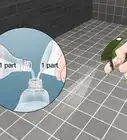
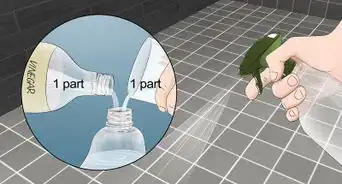
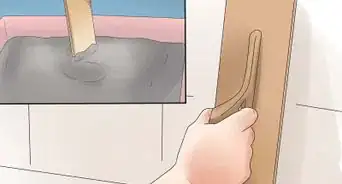
4Mix your grout until it is smooth and consistent. Read the directions on your grout product. Then, pour the appropriate amount of water into a bucket. Add the amount of grout powder the package specifies. Use a trowel or a paddle mixer attached to a drill to mix the grout until it has a consistency like toothpaste. After mixing your grout, let it sit for about 10 minutes before using it.
- If your grout seems liquidy, add a little more powder. If your grout seems very thick, add a little bit of water.[3]
- Alternatively, purchase pre-mixed grout to ensure it has the right consistency.
-
5Mix your grout every 15 minutes. Take your float/trowel and lightly mix the grout every 15 minutes. Do this by moving your float in a circular fashion through the grout. If you don’t mix the grout regularly, it will wind up setting and you won’t be able to work with it.[4]


Spreading the Grout
-
1Pick a 3 ft × 3 ft (0.91 m × 0.91 m) section. After you’ve set up, don’t just start grouting the entire wall. First, divide the wall up into manageable sections that are about 3 ft × 3 ft (0.91 m × 0.91 m). This way, you’ll be able to finish one section before the grout completely dries. When you’re done, you can move on to another section.[5]
- Use painter's tape to mark out your sections.
-
2Spread grout over the tiles. Tip the bucket forward a little. Flip your float upside down. Then, slide it under the top of the grout and scoop some up. Spread the grout in an up-and-down fashion over the tiles. Do this until your entire 9 square foot (.84 square meter) section has a thin layer of grout on it.[6]
- Use a plastic drywall knife if you’re working in a small area, such as when adding a backsplash in a kitchen.
-
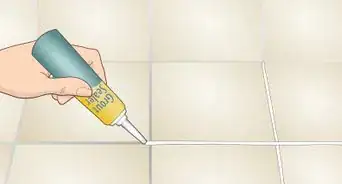
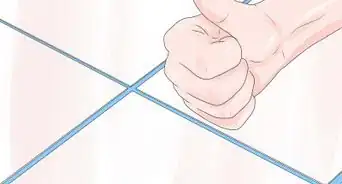
3Float more grout in a diagonal fashion. Position your float at a 45-degree angle to the tiles and spread your grout liberally into the joints. The joints are the spaces between your tiles. Push as much grout into the joints as possible. Add more grout until you are confident the joints are filled.
- As you spread the grout into the joints, use the side or corner of the float to compress it.
- Avoid filling joints that are between tile and another surface, like a bathtub. You'll caulk these areas later.[7]
-
4Hold the float at 90 degrees and remove excess grout. After you’ve filled and compressed the grout in the joints, use your float to remove excess grout. You can do this by making quick passes over the tiles and scraping up as much grout as possible.
- Don’t spend too much time removing the grout. Just get as much as you can.
- Use a serpentine motion (across, up, back, up, and across) to quickly cover as much of the tile as possible.[8]
-
5Use the rounded corner of your float to shape your grout joints. After you’ve filled the joints, take the rounded corner of your float and run it over them. Try to create a slightly concave shape (a slight curve inward) in the grout. In addition, this will have the effect of compacting your grout and helping you remove the excess.
- If your float doesn’t have a rounded edge, you can use another tool or object. For example, you can use a toothbrush handle.
- Don’t use a metal tool. This could damage the tile.[9]


Cleaning the Tiled Surface
-
1Fill a bucket with clean water. Get a 2-gallon (7.6 l) bucket and fill it up with water. While you can use warm water, cool water will work well in most circumstances. This water will be used to help clean excess grout off the tile.
- If you’ll be grouting a large wall area, you may want to fill two buckets up.[10]
-
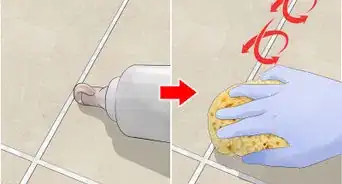
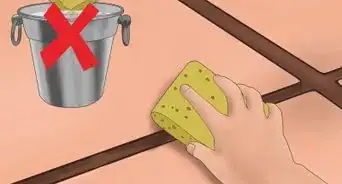
2Use a sponge to wipe off excess grout. Wait about 20 to 30 minutes after you first applied the grout. Then, use your sponge to wipe the tile back and forth. Focus on the surface of the tile, not the joints. After you’ve cleaned a small section, dunk your sponge in the clean water.
- Use a clean part of the sponge for each wipe. When the sponge gets covered in grout, clean it in your bucket of water. Repeat sponging every section until only a thin layer (or “haze”) of excess grout remains.
- Use a hydrophilic sponge, if you have one. You can purchase one at a home improvement store.[11]
- Don't wait longer than about 20 minutes before you clean the tiles. Otherwise, the grout could start to dry, making it difficult or even impossible to clean.[12]
-
3Lightly sponge the joints. Clean your sponge, then slightly depress the sponge with a finger and run that part of the sponge over the joints. Avoid pressing too hard, as you don’t want to remove too much grout. When doing this, focus on making sure the grout lines are uniformly shaped and have the same depth.[13]
-
4Buff the tile with a microfiber cloth or cotton towel. Wait until the grout is completely dry. This could take about 30 minutes. Then, take a microfiber towel and buff the surface of the tile. To buff, use a moderate amount of force to rub the cloth in a circular fashion on the tile.
- Rotate the cloth so can use a clean part on each tile. When your cloth is covered with grout, use a new one.
- Avoid using a cotton towel or anything abrasive. You could scratch soft tiles.[14]
-
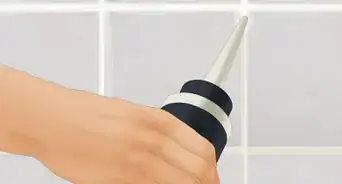
5Caulk joints between tile and other surfaces. After you’ve grouted interior joints, you’ll need to apply caulk to joints between tile and other surfaces like bathtubs and sinks. This is important, as grouting exterior joints could cause cracking. Choose a caulk that matches the color of your grout. Then, apply a minimal amount to fill the space.[15]
-
6Shape the caulk. Take a slightly rounded surface, like the back of a toothbrush, and lightly run it over the caulking. When doing this, you should compress it into the joint and create a uniform appearance. When you’re done, take a wet microfiber cloth and wipe off extra caulk.[16]


Expert Q&A
-
QuestionHow long leave should I grout before wiping?
 Art FrickeArt Fricke is a home renovation and repair specialist and the owner of Art Tile & Renovation based in Austin, Texas. With over 10 years of experience, he specializes in bathroom and kitchen renovations. Art focuses on a single contractor approach to customized renovation work, and performs projects such as installing custom tile showers, fixing tiled shower leaks, replacing cracked tiles, and installing floor and wall tile.
Home Renovation & Repair SpecialistAllow the grout to dry for 48-72 hours, then come back and wipe on a penetrating sealer to help keep out water. Let the sealer sit for 15-20 minutes, then wipe it away. -
QuestionWhat is the easiest way to grout tile?Art FrickeArt Fricke is a home renovation and repair specialist and the owner of Art Tile & Renovation based in Austin, Texas. With over 10 years of experience, he specializes in bathroom and kitchen renovations. Art focuses on a single contractor approach to customized renovation work, and performs projects such as installing custom tile showers, fixing tiled shower leaks, replacing cracked tiles, and installing floor and wall tile.
Home Renovation & Repair SpecialistIf your grout lines are smaller than 1⁄8 in (0.32 cm), use unsanded grout to ensure it gets down into the lines. If your grout lines are 1⁄8 in (0.32 cm) or larger, use sanded grout, as the added sand will reinforce the grout, making it more durable. -
QuestionHow long should I wait to apply the grout?Art FrickeArt Fricke is a home renovation and repair specialist and the owner of Art Tile & Renovation based in Austin, Texas. With over 10 years of experience, he specializes in bathroom and kitchen renovations. Art focuses on a single contractor approach to customized renovation work, and performs projects such as installing custom tile showers, fixing tiled shower leaks, replacing cracked tiles, and installing floor and wall tile.
Home Renovation & Repair SpecialistAfter you install the tiles, wait about 24 hours. Then, remove the spacers and apply the grout.
Things You’ll Need
- A bucket
- A trowel
- A float
- A toothbrush
- Water
- Grout powder
- A sponge
- A microfiber cloth

References
- ↑ https://www.familyhandyman.com/painting/tips/using-masking-tape-when-painting/view-all/
- ↑ https://www.hunker.com/12271219/homemade-chinking
- ↑ https://www.bobvila.com/articles/how-to-grout-tile/#.WZbGirpFxPY
- ↑ https://www.familyhandyman.com/tiling/grouting/our-best-grouting-tips/view-all/
- ↑ https://www.familyhandyman.com/tiling/grouting/our-best-grouting-tips/view-all/
- ↑ https://www.familyhandyman.com/tiling/grouting/our-best-grouting-tips/view-all/
- ↑ https://www.familyhandyman.com/tiling/grouting/our-best-grouting-tips/view-all/
- ↑ https://www.familyhandyman.com/tiling/grouting/our-best-grouting-tips/view-all/
- ↑ https://www.familyhandyman.com/tiling/grouting/our-best-grouting-tips/view-all/
- ↑ https://www.familyhandyman.com/tiling/grouting/our-best-grouting-tips/view-all/
- ↑ https://www.familyhandyman.com/tiling/grouting/our-best-grouting-tips/view-all/
- ↑ Art Fricke. Home Renovation & Repair Specialist. Expert Interview. 1 July 2020.
- ↑ https://www.bobvila.com/articles/how-to-grout-tile/#.WZbGirpFxPY
- ↑ https://www.familyhandyman.com/tiling/grouting/grouting-tips-and-techniques/view-all/
- ↑ https://www.familyhandyman.com/tiling/grouting/grouting-tips-and-techniques/view-all/
- ↑ https://www.familyhandyman.com/tiling/grouting/grouting-tips-and-techniques/view-all/
About This Article

To grout wall tiles, start by dividing your wall into 3 foot by 3 foot sections so you can work on it before the grout dries. Then, mix your grout until it's smooth, and spread it across one section with a trowel. Additionally, spread the grout into the joints and use the side of your float to compress it. Next, scrape your float across the tiles to get rid of excess grout, and use the rounded edge to shape your grout joints. Repeat the process for the other sections, making sure to mix the grout every 15 minutes to keep it from drying out. For tips on how to wash the tiled surface when you're done grouting, keep reading!