This article was co-authored by Maggie Moran. Maggie Moran is a Professional Gardener in Pennsylvania.
This article has been viewed 18,286 times.
Collard greens are a famous staple of Southern cuisine that are beginning to be recognized as a treat in other areas. The plants are fairly easy to grow and do well in cool weather. You can grow them in containers or plant them directly in the ground. In either case, they’ll need loose soil and lots of sun and water. They will be ready to harvest in 40-85 days.
Steps
Readying the Soil
-
1Choose a sunny area. Pick one that gets at least 6 hours of full sunlight per day. Collards need lots of light to grow well. If you want to plant in containers, you can move them during the day to make sure that they get plenty of sun.[1]
-
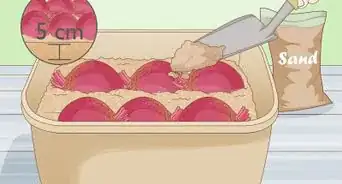
2Pick a well-drained area, if you're planting collards in the ground. Go with an area where the soil drains, without any muddy spots or pooled water. On the other hand, the soil should not drain so much that it becomes bone dry and dusty. For a simple test of your soil’s drainage:[2]
- Remove the bottom and top of a coffee can.
- Dig a hole that is 4 inches (10 cm) deep in your soil.
- Place the can in the hole. Pack soil around it so that it is secure in the ground.
- Fill the can with water.
- After an hour has passed, come back and measure how much the water has dropped down in the can.
- If at least 2 inches (5.1 cm) of water has escaped within the hour, then your soil drains well and is perfect for collards.
Advertisement -
3Test the soil’s pH. Collard greens tolerate a range of soil pH’s, with estimates ranging from 6.0 to 7.5. You can purchase a soil pH testing kit from a garden supply store. There are two main types: digital probes and paper strips.[3]
- Follow the instructions included with your kit for exact details about testing the soil pH.
- You can also contact your local county or cooperative extension agency for tips on measuring your soil’s pH.
-
4Loosen your soil. Take a spade and go over the soil. Go down to a depth of about 10 inches (25 cm). Remove any sticks or rocks that you find.[4]
- If you are using potting soil, then just dump it out in a container and break up any clumps.
-
5Add a layer of compost, if your soil has a high proportion of clay or sand. Collards can tolerate a variety of soil types, but they should all contain plenty of organic matter. If your soil has lots of clay or sand, once it is nice and loose, dump compost on top until there is a layer about 4 inches (10 cm) thick. Use your spade to mix some into the first layer of soil.[5]
- If you don't have compost, you can use manure instead.


Planting Your Greens
-
1Wait until late summer or early fall to plant. Collard greens are a cool weather crop. Planting in late summer or early fall so they can beat the heat and grow well.[6]
- When the soil temperature reaches 45 °F (7 °C), it is warm enough for collards to sprout.
-
2Dig out rows in the soil if you are planting the collards in the ground. Use your spade to take out some dirt in long lines and mound it up on the sides. Create rows that are 24 inches (61 cm) to 36 inches (91 cm) apart.[7]
-
3Plant seeds just below the surface of the soil. Whether you're planting them in the ground or in containers, place seeds 0.25 inches (0.64 cm) below the surface of the soil. Alternatively, you can sprinkle seeds on the soil, then lightly cover them.[8]
- You can simply scatter the seeds, since you will then them out to save the healthiest plants later.
- Your seeds should germinate in about 5 to 10 days.
-
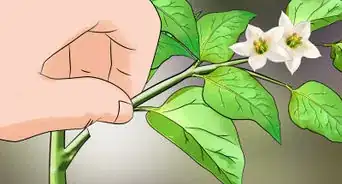
4Thin your seedlings when they are 8 inches (20 cm) to 10 inches (25 cm) high. If you planted lots of seeds there's a good chance a lot of them will sprout. Pull up the smallest or weakest, and leave just the strongest, healthiest ones.[9]
- If you planted in the ground, thin the seedlings until those remaining in the soil are 18 inches (46 cm) to 24 inches (61 cm) inches apart.
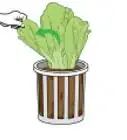
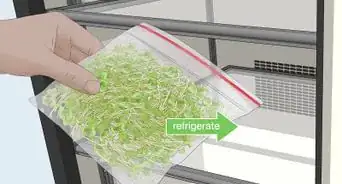
- Save the seedlings you pull up and add them to your salads for a tasty treat.
-
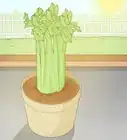
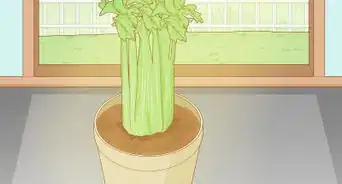
5Transplant seedlings from containers to the ground, if you want. After the seedlings are several inches high, you can take the whole root ball out of the container and plant it in a hole in the ground that's slightly larger. Fill in the rest of the space with soil. Water the seedlings well when you're done
- Collard greens can grow just fine in containers, so there's no need to transplant if you don't want to.
-
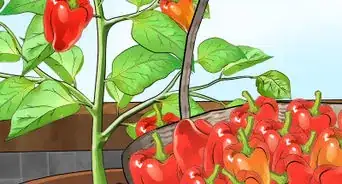
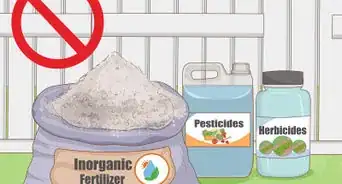
6Fertilize your plants. Spread 1 cup of fertilizer to the side of your plants soil for every 30 feet (9.1 m) you have planted in row, once they are several inches high. Lightly rake the soil to mix the fertilizer in, then water your plants.[10]
- Choose a fertilizer that is high in nitrogen. Collard greens need this nutrient to produce healthy leaves.
- If you have planted collards in containers, use about 1 tablespoon (15 mL) of fertilizer per plant.
- Keep an eye on your plants. If their leaves begin to look pale instead of dark green, fertilize again in 4-6 weeks.


Maintaining and Harvesting Your Plants
-
1Water your plants well. Keep your collard greens in moist soil. It should remain slightly damp, but not soaking wet. Depending on where you live, you may not need to water the plants every day.[11]
- If water pools up in the soil, you are watering too much.
- Give your collard greens 1 inch (2.5 cm) to 1.5 inches (3.8 cm) of water a week, unless it has rained at least that much in your area.
- You can keep track of rainfall by setting up a rain gauge in your garden.
- If you live in a dry area, add mulch to the soil so it retains moisture.
-
2Keep pests off of your plants. Sprinkle diatomaceous earth on the ground near your plants to stop slugs. Use an insecticide with Bt (Bacillus thuringiensis) in it to get rid of caterpillars.[12]
- You can find these materials at a garden supply store.
- Slugs are slimy, soft-bodied creatures that look like snails without shells. They will eat the leaves of collard greens.
- Caterpillars come in many colors and sizes. The ones that will attack collard greens are likely to be an inch or two long and striped (black, white, and yellow, for instance).
- You may not see these pests at first, but if you see holes chewed through the leaves of your plants, they are the likely culprit.
-
3Stop diseases from ravaging your collards. Collards are fairly hardy plants, but they can still be impacted by a few diseases. Keeping the plants in well-drained soil will prevent clubroot, which can cause plants to wither or not produce leaves. Spots on the leaves indicate a fungus, which can be treated with neem oil, sulfur, or another fungicide. Avoiding planting collards in the same soil in successive years prevents other diseases, including:[13]
- Black leg
- Black rot
- Yellows
-
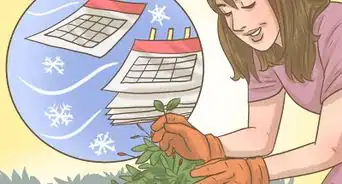
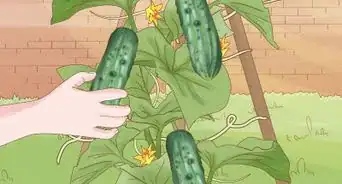
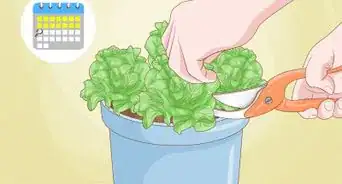
4Let a light frost cover your plants before harvesting. Collards actually taste sweeter if they are allowed to frost over before harvesting. Generally, however, collards are ready to harvest anywhere between 40 to 85 days after germination.[14]
- For best results, harvest anytime after the first frost has come and gone.
- You can pick collards when they are frozen in the ground. However, be gentle with the plants because their leaves become brittle when frozen.
-
5Clip whole plants or pick individual leaves. Cut the whole plant about 4 inches (10 cm) from the ground. Alternatively, pick single leaves, working from the bottom up so that new ones will grow. Either way is a fine method for harvesting collard greens, but picking off individual leaves means your plants will keep producing throughout the growing season.[15]EXPERT TIPMaggie Moran is a Professional Gardener in Pennsylvania.Home & Garden Specialist
 Maggie Moran
Home & Garden SpecialistBoil your collard greens for a quick and delicious veggie side. Horticulturalist Maggie Moran advises, “Cut and remove the stems and the center rib of the collard greens. Then, boil water and cook the greens for 15 minutes. After draining them well, you can add garlic or lemon juice to the collards to enhance their flavor.”
-
6Replant collard greens the next year, if necessary. If you only pick individual leaves from your plants (and not the entire plant at once), your collard greens may continue to grow the next year. However, this will depend on the climate in your area. Collards can tolerate frosts, but if winter temperatures/conditions are severe, you may need to replant the greens next year.


Expert Q&A
-
QuestionHow long does it take to grow collard greens?
 Maggie MoranMaggie Moran is a Professional Gardener in Pennsylvania.
Home & Garden SpecialistA collard green takes between 60 and 85 days to go from germination until you can harvest it. -
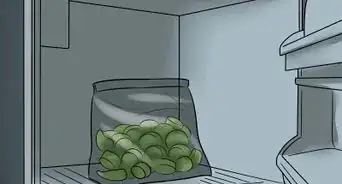
QuestionHow do you clean collard greens?Maggie MoranMaggie Moran is a Professional Gardener in Pennsylvania.
Home & Garden SpecialistOne of the easiest ways is to use the kitchen sink. Fill the sink with slightly warm water and add 1/2 cup of white vinegar. Place the collard greens into the sink and rinse them with cold water as you pull them out. -
QuestionHow do you prepare collard greens?Maggie MoranMaggie Moran is a Professional Gardener in Pennsylvania.
Home & Garden SpecialistCut and remove stems and the center rib of the collard greens. Then, boil water and cook the collard greens for 15 minutes. After draining well, you can add garlic or lemon juice to the collards to add a variety of flavor.
Things You'll Need
- Collard greens seeds
- Spade
- Compost
- Plant containers (optional)
- Diatomaceous earth (optional)
- An insecticide with Bt (Bacillus thuringiensis) in it (optional)
- High-nitrogen fertilizer
- Frost blanket (optional)


References
- ↑ http://www.gardeningblog.net/how-to-grow/collard-greens/
- ↑ https://www.the-compost-gardener.com/soil-drainage.html
- ↑ https://extension.umn.edu/vegetables/growing-collards-and-kale
- ↑ https://agrilifeextension.tamu.edu/browse/featured-solutions/gardening-landscaping/collard-greens/
- ↑ https://agrilifeextension.tamu.edu/browse/featured-solutions/gardening-landscaping/collard-greens/
- ↑ http://www.southernliving.com/home-garden/gardens/grow-collard-greens
- ↑ http://www.southernliving.com/home-garden/gardens/grow-collard-greens
- ↑ http://www.gardeningblog.net/how-to-grow/collard-greens/
- ↑ http://www.southernliving.com/home-garden/gardens/grow-collard-greens
- ↑ https://agrilifeextension.tamu.edu/browse/featured-solutions/gardening-landscaping/collard-greens/
- ↑ http://www.southernliving.com/home-garden/gardens/grow-collard-greens
- ↑ http://www.southernliving.com/home-garden/gardens/grow-collard-greens
- ↑ https://bonnieplants.com/growing/growing-collards/
- ↑ http://www.gardeningblog.net/how-to-grow/collard-greens/
- ↑ https://bonnieplants.com/growing/growing-collards/
About This Article