This article was co-authored by Guy Peters and by wikiHow staff writer, Christopher M. Osborne, PhD. Guy Peters is the Owner of MOP STARS Cleaning Service, a complete house cleaning service for residential and commercial clients, based in Denver, Colorado. Founded in 2014, MOP STARS provides regular, move in/out, deep, and commercial cleaning services. Guy has a BA in Finance from the California State University - Sacramento and an MBA from Cornell University.
There are 9 references cited in this article, which can be found at the bottom of the page.
This article has been viewed 12,422 times.
A workshop is a great place for making things, but making a big mess shouldn’t be one of them! A clean workshop is safer, more efficient, and better suited to high-quality work. By doing a little bit of tidying, mess prevention, and organizing regularly, you can keep your workshop humming along as a creative space.
Steps
Cleaning Routine
-
1Do quick cleanups as messes arise, or at least every 30-60 minutes. At first, it may feel like a waste of time to do any cleanup in the middle of your work session. However, quickly cleaning up potential hazards like sawdust piles or greasy floors is essential for shop safety. Also, every little bit of cleanup you do now makes it that much easier to get everything clean at the end of the day.[1]
- Stop and clean up potential hazards like oily spots on the floor immediately. Clear away tools, scraps, and other obstructions as soon as they pose any risk to you operating your shop tools and machinery safely.
- Get in the habit of quickly cleaning up whenever you move from one work area to another—for instance, when you switch from working under your car to repairing body damage near the trunk. If you’re in a single work area for a long stretch, take a break every 30 or 60 minutes to do a quick cleanup.
-
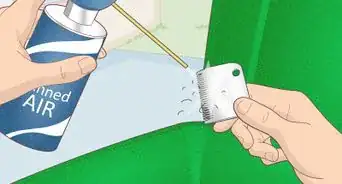
2Use a shop vacuum, brushes, and rags to clear away work surface debris. Use your shop vacuum to suck up as much fine dust—such as sanding dust—as you can. Follow this by brushing any remaining dust and debris out of cracks, crevices, and other hard-to-reach areas with a clean, dry paintbrush. Finally, if needed, wipe down flat surfaces with a hand brush or dry shop rags.[2]
- Start with the shop vacuum so you can suck up and filter out as much of the fine particulates as possible. Brushing fine dust will simply make it airborne until it resettles in the shop.
- Invest in a good shop vacuum with a long, flexible hose, attachments, a generously-sized canister on wheels, and a high-quality filter.
Advertisement -
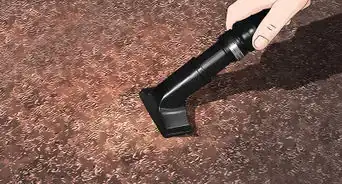
3Remove dry debris from the floor with a broom or shop vacuum. If there’s a lot of fine shop dust on the floor, start with the shop vacuum, then sweep out any tight corners with your broom, and finish up with another dose of the shop vacuum as needed. If it’s mostly just dirt and shop scraps on the floor, it’s okay to start with your broom and a dustpan, if desired.[3]
- Keep both a push broom and a traditional long-handled broom in the shop. Push brooms are better for cleaning larger areas more quickly, while traditional brooms are better at reaching tight spaces.
-
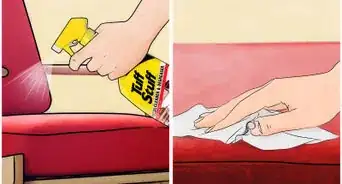
4Wipe up sticky or greasy spots with wet shop rags. Remember to address spills, grease spots, and sticky areas immediately to keep your shop safe. Use dry rags or paper towels for liquid spills and pre-moistened, heavy-duty shop rags for greasy or sticky spills. In terms of technique, just scrub and wipe until the area is safe and clean.[4]
- As an alternative to commercial shop rags, use scrap rags (such as from old T-shirts) and a heavy-duty, all-purpose spray cleaner.
-
5Do a more complete cleanup at the end of each day to keep your shop tidy. When your day in the workshop is done, resist the urge to grab a drink and put your feet up right away. Instead, spend a few minutes—probably no more than 15—giving the shop a good cleanup. Vacuum, sweep, wipe, and tidy up the entire shop, and make sure everything is right where it should be. Then grab that drink and put your feet up![5]
- Cleaning up at the end of the day means that you can get right to work on your next workshop day with a clean, organized space. Starting off with a clean shop can also motivate you to keep it that way throughout the day.
- Collect all the trash and throw it out.
- Then dust and wipe everything. Start from the top to the bottom of a room. This technique is more efficient as it ensures you don't have to clean anything twice as debris falls on the lower surfaces.[6]
- Finish up by vacuuming, then mopping the floors. Incorporate cleaning into your daily routine.[7]


Dust Control
-
1Use plastic sheeting and drop cloths to protect items from dust and debris. Common workshop activities like cutting, sanding, grinding, and scraping create a lot of dust and particulates that end up spreading all over the shop. By taking a few minutes to cover the shelves, cabinets, work stations, and shop tools that you aren’t currently using, you’ll cut way back on the amount of cleanup awaiting you at the end of the day.[8]
- If you’re not using your table saw, for instance, lay a drop cloth over it. Similarly, tape or clip up plastic sheeting to cover open shelving or pegboards that contain tools you don’t currently need.
- When you’re done working in the shop, ball up the sheeting and cloths, take them outside, and shake them out so they’re ready to go for next time.
-
2Invest in power tools that operate with dust collection systems. Modern shop tools like saws, sanders, grinders and routers often utilize integrated dust collection systems. In many cases, you can attach the tube of your shop vacuum to the tool to prevent dust and particulates from escaping in the first place. It’s like cleaning up before you even get the chance to make a mess![9]
- Alternatively, it may make sense for you to invest in a central dust collection system for your shop, which can be attached to several different tools for convenience. Basic models start at around $30 USD, while higher-grade models can cost well over $100.[10]
-
3Make a DIY dust reducer out of a box fan and a furnace filter. Even if you have a dust collector for your tools, consider adding this added DIY element. Attach a furnace filter to the back (intake) side of a box fan with stretch cords, rope, or duct tape. Set up the fan so the intake side is as close as it can be to your work area. Turn the fan on high speed whenever you’re creating dust, and check and replace the filter as needed.[11]
- An air purifier will also work, but these tend to be quite a bit more pricey.
-
4Maintain the filter and collection canister of your shop vacuum. Extend the life of your shop vacuum filter by adding a cheap filter over the top of it. Cut the legs off of a pair of pantyhose, leaving about 4 in (10 cm) of leg length behind. Slip the hose over your shop vacuum filter, then tightly tie off the leg “stumps.” Replace the pantyhose once they accumulate a layer of dust.[12]
- Here’s another shop vacuum tip: Open a trash bag and press it down into the empty collection canister. Fold the top of the bag over the lip of the canister, then secure the top of the shop vacuum in place. When it’s time to empty the canister, remove the lid carefully and slowly fold in and cinch up the trash bag to prevent dust from escaping.
- Your shop vacuum’s filter traps many of the fine dust particles that would either resettle in your workshop or end up in your lungs if you aren’t wearing proper breathing protection. It’s always better to clean up fine shop dust with a shop vacuum rather than a broom and dustpan.


Organization
-
1Declutter your shop by sorting everything into “keep,” “trash,” “sell,” and “donate” piles. Set up and label boxes and bins, or tape off labeled squares in the middle of the shop floor or the driveway. Sort every item in your shop into one of the piles, giving each an honest evaluation—if you don’t use it, don’t keep it![13]
- If you have enough room in your workshop, consider adding a “keep but store” pile as well. This is for items that you rarely use but don’t want to get rid of. Stash them in labeled boxes.
- To keep workshop clutter in check, sort through your stuff once per year. And give the shop a good cleaning at the same time!
-
2Set up work stations and storage areas so they're efficient and safe. Once you’ve gotten rid of the stuff you don’t need, take the opportunity to reimagine your workshop’s layout. Make a few sketches and plan out how you can locate different workstations and storage areas so that you can grab tools and move from station to station more efficiently. Keep tips like the following in mind while reorganizing your shop:
- Put workstations that require extra space, like a table saw where you often cut long pieces of lumber, either in the center of the shop or along an open wall.
- Put workstations that you often use in tandem nearby. For example, if you frequently go straight from using your table saw to working at your sanding table, locate them near each other.
- Prioritize safety when storing flammable or explosive materials. Create a space for gasoline cans on the floor along a wall that’s far away from any heat or ignition sources. Store propane tanks in a caged-in area outside, not in your shop—they’re too much of a fire hazard.
-
3Install open shelving, pegboards, and cabinets for organized storage. If you have stuff in boxes on the floor and taking up space on your workbenches and tables, look for ways to maximize your workshop’s storage potential. Use every bit of wall space to your advantage. Install a mix of shelving, pegboards, and cabinets so that you have different options suited to different types of tools and gear.[14]
- Pegboards are great for hanging up hand tools that you use frequently.
- Open shelving is great for mid-size tools you use frequently.
- Cabinets are best for tools and gear that you want to protect from shop dust and other elements.
-
4Organize items based on use frequency, function, and safety. After you’ve enhanced your storage capacity, don’t just store your stuff haphazardly! Place the tools that you use most often in the most easily-accessible spots. Put items that you use together in the same area, and as close as possible to the workstation where you use them. Avoid putting heavy or hazardous items in spots that present a safety risk. For example:[15]
- Store paint on open shelving, but only on the lower shelves to reduce safety hazards.
- Sort hardware like nails, screws, bolts, and fuses into individual (and labeled) baskets that are made to hang on pegboard. Alternatively, store them in small, stackable storage drawers on your workbench.
- Hang belts, hoses, lengths of chain, and similar items from nails in the wall or hooks attached to your pegboard.
- Put tools you use infrequently in labeled tool boxes or tool chests.
-
5Put each tool away as soon as you’re finished using it. Little messes quickly turn into big messes once tools and other items you’re not using start to pile up. Instead of letting things accumulate, put the tool you’re done with back in place before grabbing the next tool you want to use.[16]
- For instance, when you’re finished using your hammer, don’t just set it on the nearest open spot on your workbench. Take the extra few seconds to hang it in its designated spot on the pegboard.
- Keeping a workshop (or any other workspace) organized is all about instilling new habits. It needs to become second nature for you to do things like put your tools away as soon as you’re done with them. It takes time, but you can do it!


Things You’ll Need
- Shop vacuum
- Push broom and long-handled broom
- Dustpan with a brush
- Clean paintbrushes of various sizes
- Dry rags (like old T-shirts)
- Pre-moistened shop rags
- Dust mask and eye protection
- Storage options (pegboards, shelves, cabinets)


References
- ↑ https://www.bobvila.com/articles/2101-workshop-safety/
- ↑ https://www.tampabay.com/archive/1996/07/20/tips-to-keep-your-workshop-clean/
- ↑ https://www.tampabay.com/archive/1996/07/20/tips-to-keep-your-workshop-clean/
- ↑ https://www.tampabay.com/archive/1996/07/20/tips-to-keep-your-workshop-clean/
- ↑ https://www.makefromwood.com/the-guide-that-will-keep-your-workshop-organized-forever/
- ↑ https://www.popularmechanics.com/home/interior-projects/how-to/g1238/15-secrets-to-cleaning-your-home-in-half-the-time/
- ↑ https://www.popularmechanics.com/home/interior-projects/how-to/g1238/15-secrets-to-cleaning-your-home-in-half-the-time/
- ↑ https://www.tampabay.com/archive/1996/07/20/tips-to-keep-your-workshop-clean/
- ↑ https://www.woodworkingsquad.com/how-to-keep-your-workshop-dust-free/
- ↑ https://www.woodmagazine.com/woodworking-plans/dust-collection/installing-a-dust-collection-system
- ↑ https://www.tampabay.com/archive/1996/07/20/tips-to-keep-your-workshop-clean/
- ↑ https://www.tampabay.com/archive/1996/07/20/tips-to-keep-your-workshop-clean/
- ↑ https://www.thisoldhouse.com/ideas/read-you-organize-your-garage
- ↑ https://www.woodmagazine.com/workshop/outfit-organize/organize-your-shop-in-a-weekend
- ↑ https://www.woodmagazine.com/workshop/outfit-organize/organize-your-shop-in-a-weekend
- ↑ https://www.bobvila.com/articles/2101-workshop-safety/
- ↑ https://www.woodworkingsquad.com/how-to-keep-your-workshop-dust-free/
- ↑ https://www.bobvila.com/articles/how-to-clean-your-toolbox-and-workshop/
About This Article