This article was written by Maha Mohamed and by wikiHow staff writer, Aly Rusciano. Maha Mohamed is a Custom Dessert Artist and the Owner of Sweet Treats SJ. Maha has over ten years of experience creating custom treats for special occasions. She specializes in custom cakes, cupcakes, cookies, and chocolate-covered treats.
There are 16 references cited in this article, which can be found at the bottom of the page.
wikiHow marks an article as reader-approved once it receives enough positive feedback. This article received 41 testimonials and 100% of readers who voted found it helpful, earning it our reader-approved status.
This article has been viewed 1,380,238 times.
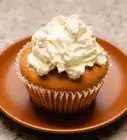
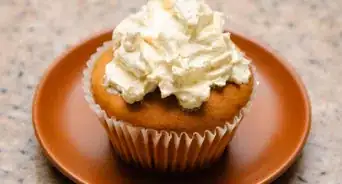
There’s just something about a beautifully frosted cake that turns any occasion into a celebration. Baking a cake is a breeze these days, thanks to box mixes, but what about cake frosting? Homemade cake frosting or cake icing is surprisingly easy to make and only takes a few minutes to whip up. With a handful of ingredients and an electric mixer, you can have your very own buttercream, sugar glaze, or cream cheese frosting. Keep reading, and we’ll teach you how.
This article is based on an interview with our custom dessert artist, Maha Mohamed, owner owner of Sweet Treats SJ. Check out the full interview here.
Ingredients
- 1 cup (200 g) of butter
- 3 cups (600 g) of powdered sugar
- 2 tablespoons (30 mL) of whipping cream
- 1 teaspoon (4.9 mL) of vanilla or almond extract
- 1 cup (200 g) of powdered sugar
- 2 tablespoons (30 mL) of milk or juice
- Vanilla or almond extract
- ½ cup (100 g) of butter
- 1 cup (200 g) of cream cheese
- 2 cups (400 g) of powdered sugar
- 1 teaspoon (4.9 mL) of vanilla extract
Steps
Vanilla Buttercream
-
1Soften 1 cup (200 g) of butter. The quickest way to soften butter is to place it in a microwave-safe dish and microwave it for 10 to 30 seconds. If you don’t have a microwave, cut the butter into small pieces and leave it on the counter for 4 hours before using it.[1]
- If you don’t have butter, use margarine; however, the icing may have an oilier flavor and thinner consistency.
- Softened butter is the perfect temperature when you can push your finger in it with little pressure.[2]
-
2Beat the softened butter and powdered sugar together. Put the softened butter in a large bowl and start beating with an electric mixer. Gradually add 3 cups (600 g) of powdered sugar while mixing. Start at a low speed, then increase to a medium speed once the sugar is incorporated with the butter.[3]
- If you don’t have an electric mixer, no worries! Beat the ingredients by hand using a spoon, fork, or whisk.
- The longer you beat your frosting, the fluffier and lighter it’ll be.
Advertisement -
3Add 2 US tbsp (30 mL) of whipping cream and 1 tsp (4.9 mL) of vanilla extract. Beat the mixture until the frosting is fluffy and one uniform color. If it spreads thickly and evenly off a knife, it’s good to go.[4] Otherwise, troubleshoot as follows:
- If the icing is too soft, beat in more powdered sugar in 2 tablespoons (30 mL) intervals until it’s thick enough to spread or place in the fridge for a few minutes.[5]
- If the icing is too thick or cracks when spread, add water or cream in 1 tablespoon (15 mL) intervals until it’s soft and spreadable.
- Try using heavy cream and almond extract instead of whipping cream and vanilla extract for a richer taste.
-
4Toss in additional flavors or colors if you’d like. This step is optional but can add a special flair to traditional cake frosting. Use a flavor that compliments your cake, or add food coloring that matches the occasion’s decor.
- Try adding 1 tsp (4.9 mL) of lemon juice or zest if you baked an angel food cake.
- Make a rich chocolate buttercream for a vanilla cake by adding 4 oz (118 g) of melted baking chocolate while mixing.
- Toss in 2 tsp (9.9 mL) of instant coffee to give a chocolate cake some mocha flavor.
- Use a few drops of red food coloring to make a pink icing fit for a princess party.
-
5Store buttercream frosting in an airtight container. Believe it or not, buttercream doesn’t have to go into the fridge immediately. Once made, this cake frosting can last at room temperature in an airtight container for 2 days. Place any remaining frosting or cake in the fridge after 2 days to be enjoyed for at least another week.[6]
- Consider storing your frosting in the freezer if you made too much. Fill a sealable bag or freezer-safe container with frosting, and keep it in the freezer for up to 3 months.


Sugar Glaze
-
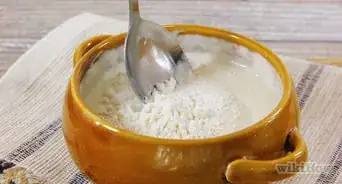
1
-
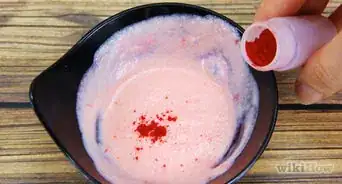
2Pour 2 US tbsp (30 mL) of milk or lemon juice over the sugar. The great thing about this recipe is it’s extremely universal, and depending on the flavor you want to add, you can use milk, lemon juice, or other fruit juices.[9] Adding milk makes a sweet and rich icing, while using lemon juice creates a light and citrusy glaze.
- Remember, it’s always better to add too little liquid than too much, so add your milk or juice in small increments.
- Keep in mind that the color of your liquid will change the color of your icing. For instance, grape juice would make a purple or pink glaze.
-
3Stir the mixture with a spoon or whisk. Use gentle stirring motions to bring the sugar and liquid together, making sure not to knock any out of the bowl. Continue stirring until a paste forms.[10]
-
4Add more liquid until all the dry sugar is incorporated. Keep pouring milk or juice into the mixture in 1 tablespoon (15 mL) increments until the icing reaches your desired consistency. For a pourable glaze, aim for a thin and watery mixture. For thicker icing, try for a blended puree consistency.[11]
- If your mixture gets too runny, add more powdered sugar.
-
5Mix in a few drops of vanilla or almond extract. Finish off your icing with a flavor extract of your choice. Stir in the flavor until everything is well combined, and you’re ready to spoon or pour your sugar icing over your cake.[12]


Cream Cheese Frosting
-
1Soften ½ c (100 g) of butter and 1 c (200 g) of cream cheese. Place each item in the microwave for 10 to 30 seconds, or cut them into chunks and leave them on the counter for a few hours. The butter and cheese are ready when they’re soft to the touch, not melted.[15]
- If you prefer the taste of normal buttercream frosting, use double the amount of butter and half the amount of cream cheese, as this will give you a creamy frosting without all the cheese flavor.
- Opt for full-fat cream cheese, as low-fat cream cheese could make the frosting runny.
-
2Beat the softened butter and cream cheese together in a bowl. Use an electric mixer (if you have one) and cream the ingredients until they’re light and fluffy. Scrape down the sides of the bowl with a fork or knife to ensure there are no clumps.[16]
-
3Stir in 2 c (400 g) of powdered sugar in ½ c (100 g) increments. After thoroughly mixing the butter and cream cheese, gradually add the powdered sugar to the bowl. Pour in ½ cup (100 g) of powdered sugar, mix until combined, and then pour in another ½ cup (100 g). Continue adding and mixing until 2 cups (400 g) of powdered sugar is incorporated.[17]
-
4Beat the frosting until it’s light and fluffy. Continue to mix the icing until it reaches your desired consistency. If you’re not sure whether it's fluffy enough, stop. Overmixing could cause the dairy to melt and make a runny frosting.
- If your frosting is too runny, add more cream cheese and powdered sugar to thicken the frosting.
-
5Flavor your frosting with 1 tsp (4.9 mL) of vanilla extract. Stir in 1 tsp (4.9 mL) of vanilla extract and/or food coloring. Mix the frosting until everything is well incorporated and no streaks of flavoring or coloring are visible. Now all that’s left to do is spread your cream cheese frosting onto your cake and enjoy![18]
- Top a red velvet cake with this frosting for a traditional pairing, or spread it onto a chocolate chip cookie for a decadent treat.
- Store leftover icing and a cream cheese frosted cake in the fridge within 2 hours of making to avoid spoilage.[19]


Expert Q&A
-
QuestionIs icing better with butter or shortening?
 JoAnna MinneciJoAnna Minneci is a Professional Chef based in the Nashville, Tennessee area. With more than 18 years of experience, Chef JoAnna specializes in teaching others how to cook through private cooking lessons, team-building events, and wellness and nutrition classes. She has also appeared in numerous television shows on networks such as Bravo and Food Network. Chef JoAnna received Culinary Arts training from the Art Institute of California at Los Angeles. She is also certified in sanitation, nutrition, kitchen management, and cost control.
Professional ChefButter is better for flavor, while shortening is better for resiliency. You can also use a combination of those two to get some kind of balance. -
QuestionShould you bake a cake before or after making icing?
 wikiHow Staff EditorThis answer was written by one of our trained team of researchers who validated it for accuracy and comprehensiveness.
Staff AnswerwikiHow Staff EditorStaff AnswerYou can bake your cake before or after you make your icing. Typically, bakers will make frosting while their cake is in the oven or cooling. Just do whichever works best for you! -
QuestionDo l have to use powdered sugar? Is there any other option?wikiHow Staff EditorThis answer was written by one of our trained team of researchers who validated it for accuracy and comprehensiveness.
Staff AnswerwikiHow Staff EditorStaff AnswerYes, it's ideal that you use powdered sugar to make cake frosting. Using any other type of sugar won't give you the same results. The sweetness and dusty nature of powdered sugar is what gives buttercream its fluffy, smooth texture and delicious taste.
Warnings
- Avoid leaving extra icing out at room temperature. Store any leftovers in a sealed container in the fridge to keep them from spoiling or melting.⧼thumbs_response⧽


References
- ↑ https://youtu.be/i40icwQ7l5s?t=29
- ↑ Maha Mohamed. Custom Dessert Artist. Expert Interview. 26 May 2022.
- ↑ Maha Mohamed. Custom Dessert Artist. Expert Interview. 26 May 2022.
- ↑ https://youtu.be/i40icwQ7l5s?t=175
- ↑ Maha Mohamed. Custom Dessert Artist. Expert Interview. 26 May 2022.
- ↑ https://www.thekitchn.com/how-to-store-frosting-23294028
- ↑ JoAnna Minneci. Professional Chef. Expert Interview. 23 December 2021.
- ↑ https://www.thekitchn.com/simple-solutions-how-to-make-a-94001
- ↑ JoAnna Minneci. Professional Chef. Expert Interview. 23 December 2021.
- ↑ https://youtu.be/ucmf1eO6dSM?t=9
- ↑ https://youtu.be/ucmf1eO6dSM?t=18
- ↑ https://youtu.be/AP0TNy8irGA?t=90
- ↑ JoAnna Minneci. Professional Chef. Expert Interview. 23 December 2021.
- ↑ https://stripedspatula.com/powdered-sugar-glaze/#faq
- ↑ https://youtu.be/OHHupZWrPdc?t=95
- ↑ https://youtu.be/nld3-CybnPM?t=105
- ↑ https://youtu.be/nld3-CybnPM?t=192
- ↑ https://youtu.be/2-R-nOMnSTM?t=45
- ↑ https://www.americastestkitchen.com/cooksillustrated/how_tos/8353-storing-cream-cheese-frosting
- ↑ https://youtu.be/nld3-CybnPM?t=35
About This Article

One way to make cake icing is by preparing a buttercream frosting, which starts by placing 1 cup of butter into the microwave for 10-30 seconds to soften it. Then, gradually mix the softened butter with 3 cups of powdered sugar, by hand or in an electric mixer on low speed. Once the butter and sugar are combined, add 2 tablespoons of whipping cream or heavy cream, and 1 teaspoon of vanilla or almond extract. Beat the mixture until it’s thick enough to apply with a knife, and spread it over the cake! For more tips, including how to make a simple sugar or cream cheese icing, read on!