This article was co-authored by Kristin Pulaski and by wikiHow staff writer, Hunter Rising. Kristin Pulaski is a Professional Nail Artist and the Founder of Paintbucket, a self-owned and operated nail salon based in Williamsburg, Brooklyn. She has over five years of experience running Paintbucket and is licensed as a nail technician. Paintbucket offers nail art manicures, pedicures, and soft gel extensions along with customized packages for wedding and bridal parties. She holds a BA in Managerial Science from Manhattan College.
There are 11 references cited in this article, which can be found at the bottom of the page.
This article has been viewed 28,506 times.
Clear nail polish is great for protecting your nails while maintaining a natural look, and in a pinch, you can use it as a base or top coat for other colors. If you want to save a little money on your cosmetics, you can easily make a few alternatives to clear polish at home. We’ve pulled together a few different recipes you can try out to make your nails really stand out!
Steps
Glue and Water
-
1Fill an empty nail polish bottle ¾ full with clear school glue. You can buy empty nail polish bottles from cosmetics stores, or you can clean out a bottle that you have at home. Take any clear school glue you have and squeeze it into the nail polish bottle. Leave a quarter of the bottle empty so there’s room to add some water.[1]
- If you don’t have clear glue, white school glue may also work but it could look slightly hazy once it dries.
-
2Top off the bottle with water. Use a pipette or funnel so it’s easier to pour your water into the bottle. Slowly add water until it reaches the neck of the bottle. Otherwise, if you fill the bottle up to the brim, the polish could spill out as soon as you put the brush in.[2]Advertisement
-
3Shake the bottle to mix the polish. Screw the cap onto your bottle of polish so none of it spills out. Vigorously shake the bottle until the water and glue are thoroughly combined. When you see little bubbles throughout the entire mixture, then it’s ready to apply![3]
- Shake the polish every time before you use it just in case the glue and water separate.

Glue and Sanitizer
-
1Put 1 tsp (4.9 ml) of school glue in a bowl. You can use either clear or white school glue since they’ll both dry transparent, though white school glue might look a little hazier. Pour your glue into an empty nail polish bottle or a small bowl.[4]
-
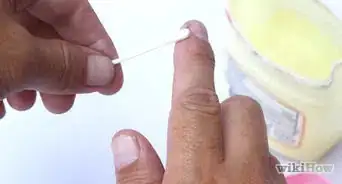
2Add about 1 tsp (4.9 ml) of hand sanitizer. You can use any store-bought hand sanitizer to help thin out your glue. Just squirt a little bit into the same bowl as your glue.[5]
-
3Combine the mixture. Give the bottle a good shake or stir the ingredients together with a spoon until they’re both thoroughly combined. Once the polish has an even consistency, you’re ready to apply it to your nails.[6]


Wearing the Polish
-
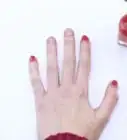
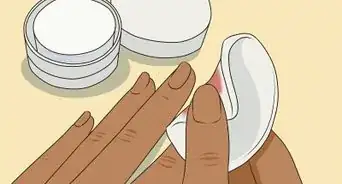
1Apply your polish to your nails in a thin layer.[7] Dip a nail polish brush into your homemade polish, and wipe off the excess on the edge of the bowl or bottle. Just drag the tip of the brush across your nail in a long, smooth stroke. Cover your entire nail with the polish so it’s completely protected.[8]
- Avoid applying your polish in thick layers since it will take longer to dry and give your nails a bumpy, uneven surface.[9]
-
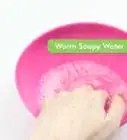
2Let your nails dry completely. It usually takes around 10 minutes for your nails to dry, so just sit and relax. Be careful not to touch your nails or do anything with your hands that could scratch or stick to the wet polish. Once your nails feel dry and not tacky, then they’re ready.[10]
- You can also point a hair dryer at your nails to help them dry faster.
- Homemade polishes usually last for 4–5 days.[11]
-
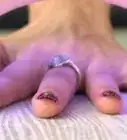
3Paint over the polish if you want to use it as a base coat. If you want to temporarily apply another color to your nails, paint a layer directly over the homemade polish once it’s dry. Whenever you want to get rid of the top color, just pick along the edges of your nail with some tweezers to peel the polish off easily.[12]
- This works extremely well since it allows you to remove polish without any remover.

Expert Q&A
-
QuestionHow do I make my nail polish dry faster?
 Kristin PulaskiKristin Pulaski is a Professional Nail Artist and the Founder of Paintbucket, a self-owned and operated nail salon based in Williamsburg, Brooklyn. She has over five years of experience running Paintbucket and is licensed as a nail technician. Paintbucket offers nail art manicures, pedicures, and soft gel extensions along with customized packages for wedding and bridal parties. She holds a BA in Managerial Science from Manhattan College.
Salon Owner & Nail SpecialistAlways apply it in a thin, even layer, especially if it's a base coat. When applying colored polish, apply multiple thin coats instead of one thick coat.

References
- ↑ https://youtu.be/du5cFrFzx9s?t=48
- ↑ https://youtu.be/du5cFrFzx9s?t=56
- ↑ https://youtu.be/du5cFrFzx9s?t=91
- ↑ https://youtu.be/pJg7xMZm0KU?t=16
- ↑ https://youtu.be/pJg7xMZm0KU?t=8
- ↑ https://youtu.be/pJg7xMZm0KU?t=29
- ↑ Kristin Pulaski. Salon Owner & Nail Specialist. Expert Interview. 19 May 2020.
- ↑ https://youtu.be/pJg7xMZm0KU?t=45
- ↑ Kristin Pulaski. Salon Owner & Nail Specialist. Expert Interview. 19 May 2020.
About This Article