This article was co-authored by Julie Naylon. Julie Naylon is the Founder of No Wire Hangers, a professional organizing service based out of Los Angeles, California. No Wire Hangers provides residential and office organizing and consulting services. Julie's work has been featured in Daily Candy, Marie Claire, and Architectural Digest, and she has appeared on The Conan O’Brien Show. In 2009 at The Los Angeles Organizing Awards she was honored with “The Most Eco-Friendly Organizer”.
There are 13 references cited in this article, which can be found at the bottom of the page.
This article has been viewed 19,041 times.
Desk organizers can help you keep track of your various work or school supplies, but premade products tend to be costly and don’t always suit your specific needs or style. Fortunately, it’s a cinch to make your own easy DIY desk organizers on a budget using basic, everyday items.[1] Just choose your materials and put them together in a way that provides maximum efficiency and storage potential. Don’t forget to customize your DIY organizers to lend them a bit of your own unique personality! Check out the tips below to learn how to make your very own DIY desk organizers at home.
Steps
Storing Small Items
-
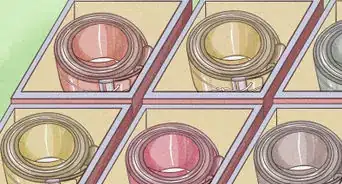
1Convert drinking cups into receptacles for loose supplies. Hunt around for a set of suitably-sized disposable drinking cups and lay them out in a single row on your desktop. These will be perfect for stashing small items that are prone to getting dropped or misplaced, such as paper clips, thumbtacks, and staples.[2]
- Shot glasses, mason jars, or coffee mugs could also double as easy desktop storage if cheap paper cups aren’t your thing.[3]
- If you’re worried about losing or mixing up your most-used supplies, group your containers inside a separate tray to ensure that they all stay together.
-
2Fashion a rustic pen and pencil holder out of a piece of wood. Slice a thick tree branch or small stump into a disc that’s roughly 6 inches (15 cm) across and 3–4 inches (7.6–10.2 cm) high. Drill a series of holes into the upper surface of the wood using a 1⁄2 in (13 mm) drill bit, then slip your writing utensils inside to reduce the clutter inside your desk drawers.[4]
- Unlike store-bought pen and pencil holders, a quaint wooden organizer can introduce a charming natural element to your workspace.
- Cutting the wood will require you to use a hand saw, circular saw, or similar tool. Always take the necessary safety precautions when operating cutting tools to prevent an accident or injury.
Advertisement -
3Stack wooden crates into makeshift shelves. Place the crates directly on top of one another in neat rows or columns, or offset them for a more bohemian look. Once you’ve decided on the best way to configure your shelves, use a few lines of wood glue to fasten them into a single unit. The possibilities are virtually endless![5]
- Another option is to ask around at supermarkets for the kind of disposable crates that produce and other fragile goods are often shipped in.
Tip: You can often find inexpensive wooden crates at craft stores and shops that specialize in home decór.
-
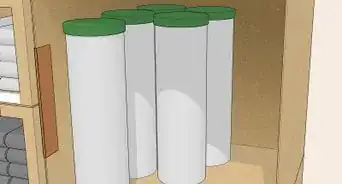
4Line up a row of cubbies from empty soup cans. Remove the label from each can and wash out the inside thoroughly. Turn the cans onto their sides and glue them to a custom-cut scrap wood base, making sure the openings all face the same directions. You can even glue one or more additional layers of cans on top to make multi-tiered cubbies.[6]
- You might also try this with paint cans if you need to maximize your storage space.
- If you like, you can spray paint the cans to add a touch of color. Metallic shades will look particularly good on the sleek, round cubbies.[7]
-
5Beautify wire holders with some homespun embroidery. If you’re handy with a ball of yarn, upgrade an uninspired basket or caddy by weaving colorful threads in and out of the individual openings. You can stick to a single color, go two-tone, or even incorporate simple designs like hearts, diamonds, or your favorite superhero’s trademark logo.[8]
- Cover drab metal caddies with 1-2 coats of enamel spray paint before you begin embroidering.
- The addition of a little yarn can give cold, impersonal accessories a more homely feel.


Organizing Documents and Paper Goods
-
1Put together a modern-looking inbox using cheap shadowbox frames. Cut a plastic coat hanger in half just beside the hook. Set it inside one frame with the cut ends down and drive flat-tipped screws through the wall of the frame into the coat hanger to join them. Position the second frame 2–3 inches (5.1–7.6 cm) above the first, then screw it down the same way. Together, the two frames will serve as trays for ingoing and outgoing mail or other documents.
- A pair of clear shadowbox frames should only run you a couple of dollars at your local arts and crafts store.
- If you want a little more flash, some vibrant spray paint or a few sheets of funky contact paper can enhance the look of the clear trays instantly.
-
2Assemble a sturdy paper tray out of plywood. Cut a sheet of 1 in (2.5 cm) plywood into five or six 10 in (25 cm) squares. Paint each square in your preferred color using acrylic paint. Once the paint has had time to dry, stand 2 of the squares up vertically and space the remaining 3-4 squares evenly between them horizontally. Drive drywall screws through the edges of the horizontal squares to hold them in place.[9]
- A standard 2-slot tray will call for a total of five 10 in (25 cm) squares. Plan on cutting an additional square for each extra slot you want to add.
- You’ll also need to make one more square if you want to enclose the backside.
-
3Turn an old bed spring into a functional letter organizer. Salvage a spring from an old mattress or box-spring (or simply a purchase a new spring of a suitable size). Glue the spring to a painted or stained board that’s been cut to the same size. There will be enough space between each spiral to neatly hold even an overstuffed business envelope.[10]
- You can pick up a single compression spring from any hardware store or home improvement center for as little as $5.
Tip: For a more aesthetic approach, use a board with a live edge or a piece of raw wood that’s been planed flat.
-
4Liven up a boring file holder with scrapbooking paper. If you already have a useful organizer or tray that isn’t much to look at, don’t throw it out—give it a makeover. Measure the holder and trace its dimensions onto a sheet of decorative scrapbooking paper. Cut out the paper and attach it to the outside of the holder using high-strength PVA glue.
- Try mixing-and-matching different designs and patterns of paper to make a holder that’s totally one-of-a-kind.


Crafting All-in-One Organizers
-
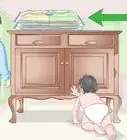
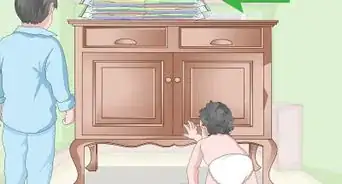
1Use a partitioned drawer as a simple desktop solution. Dig up an old compartment-style desk drawer, the kind with walls dividing it into separate compartments. Station the drawer in one corner of your desk and fill it with anything that will fit in the compartments.[11]
- Remove the knobs from the drawer and decorate it with paint, paper, or other accents to make it look like it belongs on top of your desk rather than inside it.
- If you can’t find a partitioned drawer, consider making your own removable divider frame using a few pieces of scrap wood.[12]
Tip: Most partitioned desk drawers feature compartments large enough to store sheets of paper, pens and pencils, as well as loose supplies like stamps and paper clips.
-
2Make a spacious one-piece open organizer from fencing wire. Snip a sheet of welded fencing wire into a section that’s about 2–2.5 ft (0.61–0.76 m) long by 1.5–2 ft (0.46–0.61 m) wide. Bend the sheet into a “U” shape with the aid of a scrap board or other slender, squared object. Spray-paint the organizer with enamel paint and arrange books, folders, notepads, or small storage containers inside.[13]
- Trim the cut edges of the wire as close to the crossbars as possible. Otherwise, they could pose a risk for accidental cuts or scrapes.
- One major benefit of wire organizers is that you can plainly see what’s in them at a glance.
-
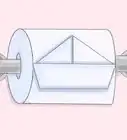
3Whip up a quick-and-easy organizer set using only cardboard. Hold onto your empty cereal boxes and spent paper towel rolls. Once they’re all used up, cut the cardboard down to whatever size best fits your workspace. File away paper items in the box pieces and use the tubes to hold pens, paint brushes, scissors, and other supplies.[14]
- Glue some patterned fabric or decorative scrapbooking paper onto the outside of the cardboard to hide brand markings and give the completed set a uniform appearance.
- You can also use tissue boxes or other types of cardboard packaging to vary the size and shape of your containers.
-
4Stitch up a leather catchall for your keys and other go-to accessories. Cut a piece of leather into a 6–8 in (15–20 cm) square. Pinch the material together in the corners and sew a stitch about 1 in (2.5 cm) from the end to help it hold its shape. When you’re done, drop in your car keys, wallet, ID badge, phone charger, and anything else you want to keep within grabbing distance.[15]
- Use acrylic paint to emblazon your catchall with colors, symbols, or other unique decorative elements.[16]
- Depositing all of your important pocket items in one central place will make you less likely to lose them in the future.


Expert Q&A
Did you know you can get expert answers for this article?
Unlock expert answers by supporting wikiHow
-
QuestionWhat are some common mistakes I should avoid when organizing my desk?
 Julie NaylonJulie Naylon is the Founder of No Wire Hangers, a professional organizing service based out of Los Angeles, California. No Wire Hangers provides residential and office organizing and consulting services. Julie's work has been featured in Daily Candy, Marie Claire, and Architectural Digest, and she has appeared on The Conan O’Brien Show. In 2009 at The Los Angeles Organizing Awards she was honored with “The Most Eco-Friendly Organizer”.
Professional OrganizerA common mistake that I see is going out and buying a bunch of organizing products. I always say that shopping is the last thing you should do, as you really don't know what you're going to need to organize or where things are going to go yet. Buying things in advance can sometimes just add more to the clutter.
Support wikiHow by unlocking this expert answer.
Warnings
- If you plan on using your homemade organizers at work, be sure to get them approved by your employer before adding them to your desk.⧼thumbs_response⧽


References
- ↑ Julie Naylon. Professional Organizer. Expert Interview. 18 December 2019.
- ↑ https://www.bhg.com/decorating/storage/organization-basics/simple-storage-for-less/?slideId=slide_0e7f1242-4ee7-4ae1-8f07-f149d351c3a4#slide_0e7f1242-4ee7-4ae1-8f07-f149d351c3a4
- ↑ https://www.homedit.com/12-creative-and-unusual-diy-pencil-holder-ideas-for-your-home-office/
- ↑ https://www.diyncrafts.com/41248/organization/21-awesome-diy-desk-organizers-that-make-the-most-of-your-office-space
- ↑ https://www.homedit.com/diy-desk-organizers/
- ↑ http://www.bystephanielynn.com/2011/09/50-crafts-and-projects-using-recycled-repurposed-upcycled-cans-saturday-inspiration-ideas.html
- ↑ https://www.oregonlive.com/hg/index.ssf/2010/06/stack_up_empty_cans_to_create.html
- ↑ https://thecraftedlife.com/embroidered-desk-organizer/
- ↑ http://www.iheartorganizing.com/2016/02/do-it-yourself-paper-sorting-organizer.html
- ↑ https://www.diyncrafts.com/41248/organization/21-awesome-diy-desk-organizers-that-make-the-most-of-your-office-space
- ↑ https://www.diyncrafts.com/41248/organization/21-awesome-diy-desk-organizers-that-make-the-most-of-your-office-space
- ↑ https://www.kevinandamanda.com/kitchen-drawer-organizer/
- ↑ https://www.homedit.com/diy-desk-organizers/
- ↑ https://modpodgerocksblog.com/recycled-craft-diy-desk-organizer/
- ↑ https://www.homedit.com/cross-stitch-leather-catchall/
- ↑ http://www.justpaint.org/painting-on-leather-with-acrylics/
- ↑ Julie Naylon. Professional Organizer. Expert Interview. 18 December 2019.
About This Article

To make a desk organizer, line up a few cups or jars for storing small items, like paperclips or thumb tacks. If you want a pencil or pen holder, use a mason jar or a coffee cup. You could also wash out an old soup tin, tear off the paper, and use the tin to store small things. If you're looking for something to put letters or documents in, glue a bed spring to a piece of plywood. Then, store files or paperwork in between the springs. Alternatively, cut your old cereal boxes down to size and place your papers inside them. For tips on how to make an organizer using fencing wire or a door, read on!