X
This article was co-authored by wikiHow Staff. Our trained team of editors and researchers validate articles for accuracy and comprehensiveness. wikiHow's Content Management Team carefully monitors the work from our editorial staff to ensure that each article is backed by trusted research and meets our high quality standards.
This article has been viewed 86,700 times.
Learn more...
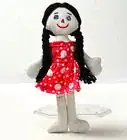
If you like to make dolls or you have dolls that have lost their hair, you can easily make hair for them. It doesn't matter whether it's a Barbie doll or a Raggedy Andy doll. All you need is some yarn or doll hair wefts (sections of hair pre-bound together), plus a few basic supplies that you probably already have around the house.
Steps
Method 1
Method 1 of 2:
Making Yarn Hair with a Sewing Machine (For Cloth Dolls)
-
1Gather your materials. For this project, you will need cardboard, yarn, felt, scissors, thread, a needle, and a sewing machine.
-
2Cut out a rectangular piece of cardboard. You want it to be 4-6 inches (15-20cm) long. To determine the height, figure out how long you want the hair to be. The height of the piece of cardboard should be equal to the desired length of hair.Advertisement
-
3Pick out the color of your yarn and felt. What color do you want the doll’s hair to be? The felt should match the yarn, so make sure that you will be able to find felt in the color you choose.
- You can choose any weight of yarn that you want. A fine yarn is closest to the thickness of hair and will lay more naturally, but you will need more of it to complete the project. On the other hand, you could use a bulky yarn and simply unwind the strands once the hair piece is sewn into place. It's completely up to you.
-
4Cut a piece of felt about 4 inches (10cm) wide and 2 inches (5cm) long. Measure it against the doll’s head to make sure that it will be long enough. It should be long enough to form the part down the middle of the doll’s head. Eventually, you’ll use this to hold the hair together. Set the piece aside for later.
-
5Start to wrap the yarn around the cardboard. You should be wrapping the yarn around the side that matches the desired hair length. After about 5 rotations, slip the felt under the yarn. Try to wrap it evenly over one edge of the piece of cardboard.
-
6Continue wrapping until you get the thickness you want. Just be careful that you don't make it so thin that you would be able to see through to the doll’s scalp. Ideally, you probably should wrap the yarn along the length of the cardboard until it is at least three strands deep. The end product will probably look about the way it does on the cardboard, so if it looks thin there, then add more yarn.
-
7Sew the yarn to the felt by hand first. Use a needle and thread to loosely stitch the yarn in place down the center of the felt. If you have lined it up correctly, the edge of the cardboard should provide you with a guide to follow down the center of the felt. This seam will be the part down the middle of the hair. When you're done, each piece of yarn should be lightly secured to the felt. Don’t worry about small, tight stitches, since the sewing machine will take care of that.
-
8Cut the yarn along the opposite edge of the cardboard. Try to cut in a straight line so that the hair on each side will be of equal length. Set the cardboard to the side.
-
9Sew the yarn to the felt using a sewing machine. Set the sewing machine to produce a tight and narrow zigzag stitch. This time, you want to make sure that the yarn is securely fastened to the felt and will not fall out easily. Sew down the center of the felt, following the line of stitches that you sewed by hand. Don't backstitch when you get to the end--just sew off the edge of the felt and knot the ends of the threads.[1]
-
10Center the seam or "part" of yarn hair down the middle of the doll's head and pin it securely. Use a needle and thread to stitch the hair into place. You can follow the line of the seam that you made with the sewing machine. But if the doll will be a child’s toy, make sure that you sew the felt securely. To that end, you can also do two seams, one down each side of the felt beneath the yarn hair.
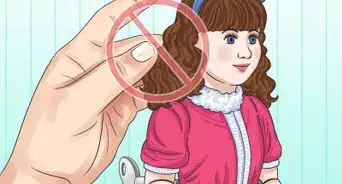
- To adapt this process for a boy doll, simply make several wefts using shorter yarn. Attach them to the doll’s head in horizontal rows, beginning in the front and adding more close together until you reach the nape of the neck.
- If desired, you can lay the hair flat and glue it to the head of the doll. Or you might consider doing this with a few strands in the front, so that the doll has a fixed hairline. Just use a white craft glue that will be flexible when dry.
-
11Unravel the hair if desired. If you like the chunky yarn hair look, you can leave it as it is. Otherwise, most yarn is easy to unwind. Just pick apart each strand and brush it out with a fine-toothed comb.


Advertisement
Method 2
Method 2 of 2:
Making a Wig Cap with Glue (For Any Doll)
-
1Gather your materials. For this project, you will need plastic wrap, a piece of sturdy fabric, white craft glue (Tacky glue or even Mod Podge might work), two rubber bands, hair wefts, and a hot glue gun. You'll be making a removable wig for your doll, rather than attaching the hair to the doll's head.
-
2Cut out two equal-sized squares of plastic wrap and fabric. The squares should be large enough to completely cover the doll’s head with a little extra to spare. Any fabric works, although you might want something on the thicker side.[2]
-
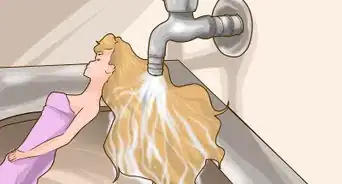
3Center the doll's head in the middle of the plastic wrap. Wrap the plastic down around the doll's head, keeping it as smooth and flat as possible at the top. Fix it securely in place using a rubber band. The plastic wrap will protect the doll's head while you mold the wig cap to fit its size and shape.
-
4Place the fabric over top of the plastic wrap. Wrap it over the doll's head just as you did with the plastic wrap. Use a second rubber band to secure it in place. As much as you can, try to smooth out the fabric at the crown of the head and along where the front hairline will be. It’s okay if some of it gathers in the back, since this area shouldn't be visible in the finished product.
-
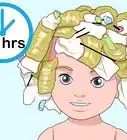
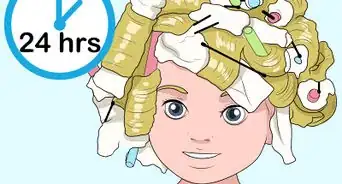
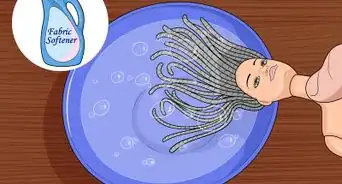
5Douse the fabric with white craft glue. Smear it thickly over the area above the rubber band. Make sure that it’s thoroughly coated and try to rub it into the fabric until it is saturated. Leave the fabric to dry for several hours.
- The glue will ultimately give a specific shape to the fabric, since it dries in the shape of the doll's head. It also provides some stiffness, to secure the cap in place when you're done.
-
6Add another layer of craft glue. Again, smear it on thickly and make sure that you completely cover the doll's head.
-
7Repeat the process until the cap is smooth to the touch. It should be thick enough that it will hold its shape even when it is removed. However, it should also be flexible enough that you can remove it from the doll's head or securely slip it back on as needed.
-
8Cut the rubber band and slide the fabric off the doll’s head. The fabric should come off easily, and the glue should not crack or break. If it does, you may not have used a sufficiently flexible glue and you might need to repeat the previous step. You can remove the plastic wrap at this point and discard it.
-
9Turn the cap inside out. The side that is covered in the smooth layer of glue will be the interior of the wig cap, while the fabric will be the exterior side to which you will attach the wig hair.
- At this point, you should have something that looks almost like a shuttlecock from a game of badminton. One end will be rounded and stiff, approximating the shape of the doll's head, while the excess fabric will trail out around it.
-
10Trim off the excess fabric. You don’t have to get the cap perfect at this point. Just use scissors to cut off the part that doesn’t have any glue on it. You can discard the excess fabric.
- The cap should look roughly like a snug-fitting sock that is molded to the shape of the doll's head.
-
11Fit the cap onto the doll’s head. It should fit securely. If it is too loose, you may need to start over again, this time ensuring that the fabric is stretched as tightly as possible over the doll's head.
-
12Trim the edges of the cap. If the wig cap is too large or the edges are uneven, use a pencil or marker to draw a line along where the edge should be. The cap should end a little above where you want the hairline to fall. Remove the cap and use your scissors (or an Exacto knife) to trim along the line.
-
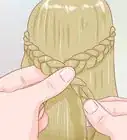
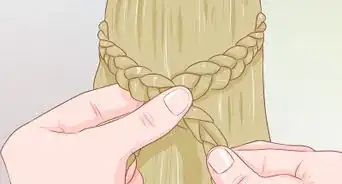
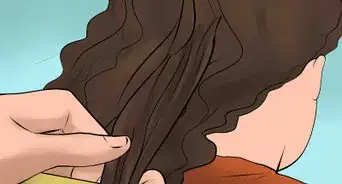
13Cut your wefts of hair into sections for the cap. A weft is made from hair that has been woven or sewn to hold it together. Wefts usually look like hair extensions: wide, thin sections of hair, rather than large chunks. You can purchase them from some craft or hobby stores, and also from online specialty stores. The weft sections that you cut should be long enough to loop over or behind the doll's head from one ear to the other.
-
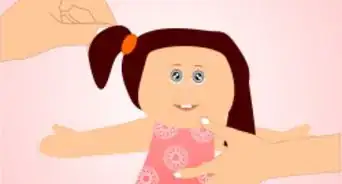
14Use hot glue to attach premade wefts of hair to the cap. Line the first section up along the front of the cap, so that it runs parallel to the hairline and ends on each side just above where the doll's ears are. Glue the seam line of the weft onto the cap. Line the next section of hair up next to or within less than 0.2 inches of the first section, and glue it into place. Repeat the process down the back of the head until the wig is completely covered.
- Don't worry too much if the ends of the wefts look a bit unfinished. You can arrange the hair so that it falls over the ends to conceal them.
-
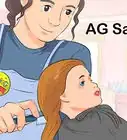
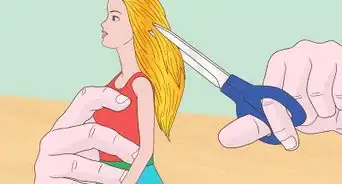
15Let the glue dry. You may need to trim the hair so that it comes to an equal length, unless you like the layered look. You should be able to part the hair down the middle or brush it back as desired. You can also trim the front row of hair so that your doll has bangs.
-
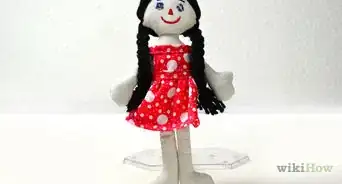
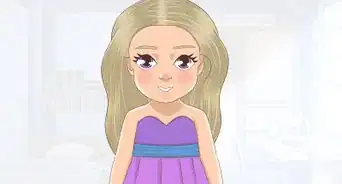
16Enjoy! You should now have a wig for your doll that looks like a miniature of a wig that a human would wear. The best part is that these wigs aren't secured to the doll, so they're interchangeable. Make a couple of these if you want to change up the doll's style or give it a new hairdo.


Advertisement
Things You Need
- Yarn
- Scissors
- Cardboard
- Needle
- Thread
- Felt
- White craft glue
- Fabric
- Plastic wrap
- Doll hair weft
- Hot glue gun
References
About This Article

wikiHow Staff
wikiHow Staff Writer
This article was co-authored by wikiHow Staff. Our trained team of editors and researchers validate articles for accuracy and comprehensiveness. wikiHow's Content Management Team carefully monitors the work from our editorial staff to ensure that each article is backed by trusted research and meets our high quality standards. This article has been viewed 86,700 times.
Co-authors: 15
Updated: January 24, 2023
Views: 86,700
Categories: Caring for Doll Hair
Advertisement