This article was co-authored by wikiHow Staff. Our trained team of editors and researchers validate articles for accuracy and comprehensiveness. wikiHow's Content Management Team carefully monitors the work from our editorial staff to ensure that each article is backed by trusted research and meets our high quality standards.
wikiHow marks an article as reader-approved once it receives enough positive feedback. This article received 18 testimonials and 90% of readers who voted found it helpful, earning it our reader-approved status.
This article has been viewed 770,754 times.
Learn more...
Rice flour is a great gluten-free alternative for baking, but it can be kind of expensive at the store. Making your own rice flour at home will save you money, and it’s actually so simple to do! All you need is a blender or coffee grinder. If you happen to have a grain mill, that works too. Check out the steps below to get started!
Steps
Grinding Rice Flour in a Blender
-
1Place 1 to 2 cups (240 to 470 ml) of rice in your blender at a time. You don’t want to clog up the blender by filling it completely with rice. Smaller amounts will let the blade work more efficiently and grind the rice better.[1]
- A good rule of thumb to follow is that 1 cup (240 ml) of rice yields about 1 1⁄2 cups (350 ml) of rice flour.[2]
- You can use either white or brown rice, as long as it’s raw and uncooked.
White vs. Brown Rice
Better for baking: Brown.
It has a slightly nutty and sweet taste.Cheaper: White.
Brown rice is considered a premium product so it costs more.More nutritious: Brown.
It contains bran, which is stripped from white rice. That gives brown rice more protein and fiber.Lasts longer: White.
The oil in brown rice causes it to go bad faster.Lighter food: White.
Brown rice flour tends to be denser, making heavier baked goods. -
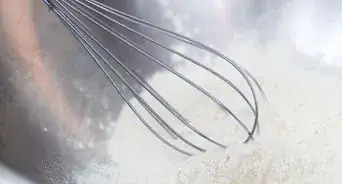
2Cover the blender and grind the rice until it’s a fine powder consistency. Turn the blender on the highest setting to get the best results. The flour should be smooth and there shouldn’t be any large chunks.[3]
- Grinding rice is hard on your blender's blades. If you plan on making a lot of flour, invest in a higher quality blender that's more durable.
- The finer the flour, the better it will work in baking and other recipes.
Advertisement -
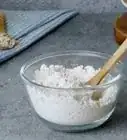
3Transfer the flour to an airtight container and place the lid tightly on it. Any air that leaks into a container that's not properly sealed can cause the flour to spoil faster. Either a plastic or glass container or jar will work.[4]
- If you use a resealable bag, squeeze out any excess air before you seal the bag.
-
4Store the flour in the pantry for up to 1 year until you’re ready to use it. While flour can keep for a very long time, it tends to get musty or stale after 1 year. Throw it away if you see mold or notice a foul scent.[5]
- To keep track of when the flour needs to be thrown out, use a permanent marker or a sticker label to note the date you should throw it out by. This will be 1 year from the day you made it. If you have different types of flour in your pantry, you may also want to write “rice flour” on the label.
- Keeping the flour in the refrigerator or the freezer will help the flour last longer.


Making Rice Flour with a Coffee Grinder
-
1Clean out any leftover coffee grounds from the grinder if necessary. You don’t want coffee-flavored rice flour! Use a scrub brush or small spatula to wipe out grounds from around the blades.[6]
- Never put your fingers near the blades and always unplug the grinder before cleaning it.
- An old paintbrush or toothbrush can also get into hard-to-reach nooks.
-
2Run 2 to 3 tablespoons (30 to 44 ml) of rice through the grinder at a time. The coffee grinder will turn the grains of rice into a smooth powder. It’s best to grind the rice in small quantities so it doesn’t clog or overwork the coffee grinder.[7]
- If you notice the grinder getting hot, simply unplug it and let it cool down for a few minutes before continuing grinding.
- You may need to run the rice powder through the grinder a second time if it’s still coarse after the first run. Grinders that are older or that have worn blades won’t process the rice as efficiently.
-
3Pour the powder into an airtight container, sealing it tightly. As you grind the rice, transfer each batch into a plastic or glass container. Once you’re finished grinding, place the lid on the container securely to keep the flour fresh.[8]
- Glass jars with lids or resealable bags will work instead of a container.
-
4Store the flour in a cool, dry place for up to 1 year. Stick the container in the pantry or a cupboard, for example, until you’re ready to use it. If you notice a rancid odor, throw it away.[9]
- If you don’t want to forget the flour’s “expiration date,” use a permanent marker or a sticker label on the container to write down the date you made the flour.
- You can also store the flour in the refrigerator or freezer to keep it fresh for longer.


Using a Grain Mill to Make Rice Flour
-
1Turn the dial to the highest setting, then turn the mill on. On some machines, the highest setting might be labeled as “pastry.” Flip the switch to power on the grain mill once you’ve adjusted the dial.[10]
- The settings on the dial control how coarse or fine the flour will be. A lower setting churns out a grittier powder, for instance.
- Always turn the grinder on prior to adding the rice.
-
2Pour the rice into the hopper of the mill to grind it. The hopper will automatically grind the rice as it passes through and will deposit the flour in the attached canister. If necessary, use a spoon or other utensil to push the rice towards the center of the hopper to speed up the grinding.[11]
- If the flour isn’t as fine as you’d like it to be, run it through the hopper again.
-
3Turn off the mill after you grind all of the rice. You’ll know the grinding process is finished when you hear the mill give off subtle high-pitched sound. Flip the power switch to the off position to stop the mill.[12]
- You can let the mill run for an extra 5 seconds after it’s finished just to make sure no stray pieces of rice are lodged inside.
-
4Remove the canister from the mill and pour the flour into a container. The canister should easily detach from the mill. Once you transfer the rice flour into an airtight container, seal the container tightly by pressing firmly on the lid until it snaps or suctions into place.
- Scrape any excess flour on the sides of canister into the container with a spoon so you don’t waste any.
- Resealable bags are a suitable alternative to a container.
-
5Store the flour in the pantry, fridge, or freezer for up to 1 year. After 1 year, you might notice that the flour loses some of its flavor and smells musty. Throw it away sooner if you see mold.[13]
- Cool, dark spots are best for storing flour. Look for an area that is dry, too.
- Keeping flour in the fridge or freezer is your safest option to prevent it from spoiling faster.
- Label the container or bag with a permanent marker or sticker label if you want to remember when it will expire. Write down the contents of the container (“rice flour”) along with the expiration date.


Community Q&A
Did you know you can get answers researched by wikiHow Staff?
Unlock staff-researched answers by supporting wikiHow
-
QuestionHow long does it take to make rice flour?
 wikiHow Staff EditorThis answer was written by one of our trained team of researchers who validated it for accuracy and comprehensiveness.
Staff AnswerwikiHow Staff EditorStaff AnswerIt should only take only a few minutes to make a small amount of rice flour, although the time will depend on the strength of your processing machine or mill, and its size. If you have to add lots of small batches to grind in succession, it’ll probably take around 10 minutes to complete a few cupfuls.
Support wikiHow by unlocking this staff-researched answer.
-
QuestionHow to make rice flour quietly?wikiHow Staff EditorThis answer was written by one of our trained team of researchers who validated it for accuracy and comprehensiveness.
Staff AnswerwikiHow Staff EditorStaff AnswerThe noise that accompanies making rice flour is to be expected, because the hard grains are hitting against the blades of the machine used to refine the rice. A mill may be quieter than using a food processor or blender but whatever way you choose to make rice flour, there will be some noise involved. Try doing it during the daytime when less people will be bothered by its noise, and shut the kitchen door, if possible.Support wikiHow by unlocking this staff-researched answer.
-
QuestionIs there a difference between rice powder and rice flour?wikiHow Staff EditorThis answer was written by one of our trained team of researchers who validated it for accuracy and comprehensiveness.
Staff AnswerwikiHow Staff EditorStaff AnswerThere is a very slight difference. Rice powder tends to be coarser than rice flour, which is more refined and powdery. To help you understand the difference, it is similar to the difference between superfine sugar and powdered sugar, both sugar products but one refined more than the other.Support wikiHow by unlocking this staff-researched answer.
Things You'll Need
Blender Rice Flour
- Blender
- Airtight container
- Permanent marker or label (optional)
Coffee Grinder Rice Flour
- Coffee grinder
- Scrub brush or small spatula
- Airtight container
- Permanent marker or label (optional)
Grain Mill Rice Flour
- Grain mill
- Airtight container
- Spoon (optional)
- Permanent marker or label (optional)
Warnings
- Do not use minute rice. You should use raw, uncooked rice.⧼thumbs_response⧽


References
- ↑ https://www.littlehouseliving.com/making-and-using-rice-flour.html
- ↑ https://amyshealthybaking.com/blog/2016/11/03/easy-homemade-oat-flour/
- ↑ https://naturalthrifty.com/how-to-mill-flour.html
- ↑ https://food52.com/blog/15993-the-best-way-to-store-all-sorts-of-flours
- ↑ https://food52.com/blog/15993-the-best-way-to-store-all-sorts-of-flours
- ↑ https://inhabitat.com/flour-power-diy-make-gluten-free-flours-at-home-with-a-coffee-grinder/
- ↑ https://inhabitat.com/flour-power-diy-make-gluten-free-flours-at-home-with-a-coffee-grinder/
- ↑ https://inhabitat.com/flour-power-diy-make-gluten-free-flours-at-home-with-a-coffee-grinder/
- ↑ https://food52.com/blog/15993-the-best-way-to-store-all-sorts-of-flours
About This Article
To make rice flour, start by putting 1-2 cups of any kind of rice in a blender. You can use more rice than that, but only blend 1-2 cups at a time so your blender doesn't clog. Next, cover the blender and grind the rice until it has a fine, powdery consistency. When you're finished, transfer your rice flour to an airtight container and store it in a pantry for up to 1 year. To learn how to make rice flour using a coffee grinder, scroll down!