This article was co-authored by wikiHow Staff. Our trained team of editors and researchers validate articles for accuracy and comprehensiveness. wikiHow's Content Management Team carefully monitors the work from our editorial staff to ensure that each article is backed by trusted research and meets our high quality standards.
There are 17 references cited in this article, which can be found at the bottom of the page.
wikiHow marks an article as reader-approved once it receives enough positive feedback. In this case, 83% of readers who voted found the article helpful, earning it our reader-approved status.
This article has been viewed 403,082 times.
Learn more...
Tie-dyeing is a fun and creative way to add personality to clothing and fabrics. Using rubber bands or string, the material of the item to be dyed is bunched together to make different patterns, shapes and colors. There are a variety of simple patterns you can try, from spirals to mirror patterns.
Steps
Choosing Fabrics, Dye and Supplies
-
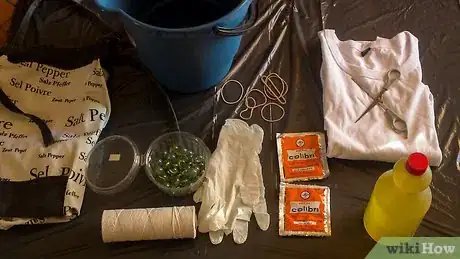
1Collect the supplies you’ll need for your project. Tie-dyeing is a messy activity, so you’ll want to set up a work area that allows you leeway for working with colored dye and, generally speaking, making a mess!
- You’ll need a plastic covering for your work surface. A paint tarp will work. Or you can lay down garbage bags according to your needs.[1]
- An apron or smock will be needed to protect your clothes. It’s best to wear old clothes. Consider them your “dye” clothes and use them whenever you tie dye.[2]
- Wear rubber gloves. They’ll protect your hands from the dye and also the hot water.[3]
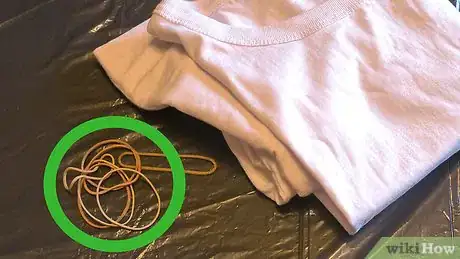
- Have a good pile of rubber bands on hand for wrapping your fabrics to create different designs.[4]
- You also might need about half a dozen marbles if you choose the marble-made circular design.[5]
- You’ll need scissors, a large metal spoon for stirring, and tongs for removing clothing from dye bathes.[6]
- Set aside cleanser or bleach. They’ll be needed for cleaning up.
-
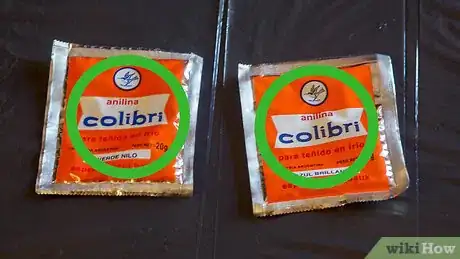
2Select one or more dyes. You can buy individual packets of dye, or you can use bottled dye. You can also buy kits from a craft store.[7]
- Purchase a squirt bottle if you don’t have one. Sixteen ounces will dye about a dozen shirts.[8]
Advertisement -
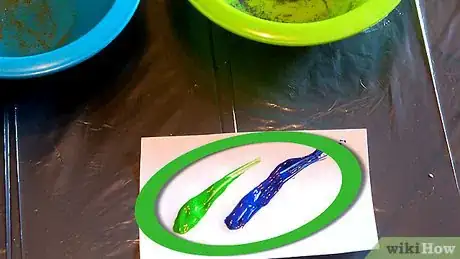
3Decide on your colors. There are many colored dyes to select from. Some colors that wouldn't otherwise be compatible work when they're gradually blended together, as happens during the tie dye process. Be creative.
- One of the most popular choices is rainbow. Yellow, orange, aqua, blue, purple and fuschia make up the rainbow color.
- Turquoise with a lighter amount of fuchsia will make blue.[9]
- Try mixing raspberry, brown, turquoise and bronze for a darker result.
- Jade brown, turquoise and olive green result in greenish hues.
- Green apple, yellow and olive also create a green finish.
- Deep purple and turquoise are a bright combination.
-
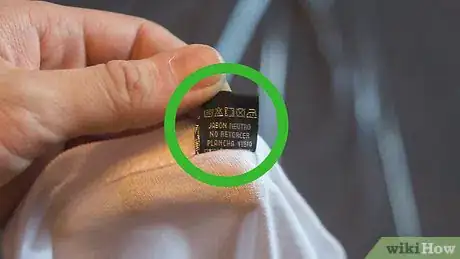
4Choose the materials you wish to dye. White cotton works well. You can also dye nylon, wool or silk.[10]
- White cotton t-shirts are often used for tie-dyeing, but there are lots of possibilities, from gloves to tennis shoes.
- Put aside 1 cup of salt if you're working with cotton. Adding salt to the dye bath enhances color.[11]
- If you're dyeing other materials like nylon, silk or wool, you'll need a cup of white vinegar. It gentles the process for sensitive materials.[12]
-
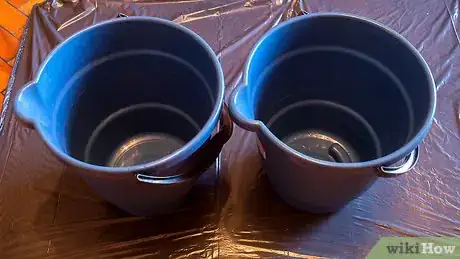
5Set aside buckets for your dye baths. Use enamel or stainless steel rather than plastic containers if you can. Plastic will stain. The buckets will be filled with hot water and dye. They should hold about 3 gallons each.[13]
- You'll need a separate bucket for every color you plan to use.
Designing Your Patterns
-
1Tie-dye your t-shirts or other fabrics using rubber bands. Rubber bands bunch or shape the material in various ways to make patterns, once the bands are removed. Patterns are created because the dye of the immersed item does not reach the parts of the fabric that are bunched together.[14]
- Wrapping the fabric tightly will produce more white areas that the dye can't reach.
- You can use string instead of rubber bands if you wish.
-
2Make a circular pattern. Find the center of your fabric where you'd like the core of the circle to be. Pinch that section and slip a marble inside the material just behind where you're pinching it. Than fasten a rubber band behind the marble.[15]
- Continue to add marbles and rubber bands. The rubber bands prevent the material from being dyed. This, in turn, will leave white circles on the dyed background. [16]
-
3Make a striped pattern. Roll your fabric tightly from side to side or top to bottom. Side to side will make horizontal stripes, while top to bottom will make vertical stripes. Make spaces along the fabric with your rubber bands. Make the spaces even so that the striped pattern will look neat. The bands will produce white stripes when finished.[17]
-
4Make a mirror design. Fold the shirt/fabric in half. A mirror image results on each layer folded.[18] Using a t-shirt for example: fold the material from right to left so that the arms overlap. This will make the pattern run side to side. To make the mirror top to bottom, the bottom part of the shirt should be folded up to the neck.
-
5Make a spiral pattern. Pinch the center of the t-shirt or other fabric and twist until the material is in a circle. Use rubber bands to hold it in place.[19]
- Another method for making a spiral design (using a t-shirt as an example) would be to twist the shirt around your finger while pinning the shirt to the table. Your finger serves as the axes around which the shirt is rotated. When you’ve wound the shirt tightly, remove your finger and wrap the shirt in rubber bands. Use three or four bands fixed to the fabric so that they crisscross in the center of the material.[20]
-
6Design a marbleized tie-dye pattern. Crunch the fabric into a ball. Use rubber bands to wrap the fabric in different directions. Remember: the tighter you wrap the fabric, the more white areas will be left on the fabric.[21]
Dyeing Your Fabrics
-
1Prepare the dye baths before beginning to tie-dye. Fill your three-gallon containers with hot water. You can heat up water in the microwave or use a tea kettle if necessary. Arrange the buckets from darkest dye to lightest dye so that you begin with the darkest dye.
- You'll only need one three-gallon container if your fabric is going to be all the same color.
- Alternately, you can try low-water immersion, leaving just enough water to cover the garment. Bunching the garment in a smaller container will give it a crystalline appearance.[22]
-
2Mix fabric dye with the water. Follow the instructions on the package. For powdered dye, dissolve the powder in a little hot water before adding it to the bath. About ¼ cup dye to 1 cup hot water should do the trick.[23]
- For darker or brighter colors, use twice the amount of dye.
- For cotton items, add a cup of salt to the dye bath to bring out the color.[24]
- For silk, wool or nylon, add 1 cup white vinegar to protect the material.[25]
- Stir well using your metal spoon to be sure the dye is mixed with the water. If you're using salt, make sure it has dissolved before moving on.[26]
-
3Immerse the fabric into the dye bath. If you're using more than one color, hold the section of the fabric to be dyed in its color. Remove it when you're finished. Move on to the next dye bath and repeat the process with a new section of the fabric.[27]
- If you're working with only one color you can let the fabric soak up the color in the dye bath according to how dark you'd like it to be. The longer you leave the fabric in the dye bath, the darker the color will be.
- Remove the item when it looks a little darker than your preferred shade. When it dries it will lighten up.[28]
- Use tongs or rubber gloves to immerse a multicolored item in each of its dye baths. [29]
- When you're finished, cut away the rubber bands using your scissors.
-
4Clean the tie-dyed fabric. The dye will most likely bleed onto the white areas of the fabric. This adds to the "tie-dye flair."
- Rinse the newly dyed item under warm water. Choose a mild detergent for your dyed item.[30]
- Gradually cool the water and continue to rinse as it cools.
- Rinse in cool water, until the water runs clear. Keep those rubber gloves on so that your hands don't get dyed![31]
- Squeeze out excess water gently. You can roll the item an old towel.
- Machine dry or hang to dry.[32]
Community Q&A
-
QuestionHow long should my shirt be in the bucket when tie dying?
 Community AnswerIt depends. If you keep it in for a long time, it will come out dark. If you keep it for a short time, it will be light. For light, leave it 30 seconds to a minute. For dark, leave it two to fuoor minutes.
 -
QuestionDoes it really matter if my hands get dyed?
 Community AnswerNot really. The chemicals will not damage your skin, just wash your hands with soap and water a few times to get the dye out.
 -
QuestionWhat are the materials?
 Community AnswerT-shirts or what you want to tie dye, fabric dye, water, squeeze bottles or buckets, rubber bands, and gloves.
References
- ↑ http://www.parents.com/fun/arts-crafts/kid/tie-dye-with-kids/#page=1
- ↑ http://www.parents.com/fun/arts-crafts/kid/tie-dye-with-kids/#page=1
- ↑ http://www.sciencebuddies.org/science-fair-projects/project_ideas/Chem_p019.shtml#materials
- ↑ http://www.squiglysplayhouse.com/ArtsAndCrafts/Crafts/Tie-Dye.html
- ↑ http://www.bobvila.com/articles/how-to-tie-dye-2/#.VwPkqfkrLX5
- ↑ http://www.sciencebuddies.org/science-fair-projects/project_ideas/Chem_p019.shtml#materials
- ↑ http://www.parents.com/fun/arts-crafts/kid/tie-dye-with-kids/#page=1
- ↑ http://www.dharmatrading.com/techniques/tiedye/group-tie-dye-instructions-for-schools-camps-parties-fundraisers-etc.html
- ↑ http://www.pburch.net/dyeing/howtotiedye.shtml
- ↑ http://www.dharmatrading.com/techniques/tiedye/group-tie-dye-instructions-for-schools-camps-parties-fundraisers-etc.html
- ↑ http://www.parents.com/fun/arts-crafts/kid/tie-dye-with-kids/#page=1
- ↑ http://www.dharmatrading.com/techniques/tiedye/tie-dye-instructions.html
- ↑ http://www.parents.com/fun/arts-crafts/kid/tie-dye-with-kids/#page=1
- ↑ http://edhelper.com/ReadingComprehension_54_1136.html
- ↑ http://www.bobvila.com/articles/how-to-tie-dye-2/#.VwPkqfkrLX5
- ↑ http://www.bobvila.com/articles/how-to-tie-dye-2/#.VwPkqfkrLX5
- ↑ http://www.bobvila.com/articles/how-to-tie-dye-2/#.VwPkqfkrLX5
- ↑ https://upanddyed.wordpress.com/2013/06/06/tie-dye-patterns-part-3-folds/
- ↑ http://www.stevespanglerscience.com/lab/experiments/
- ↑ http://www.bobvila.com/articles/how-to-tie-dye-2/#.VwPZOvkrLX4
- ↑ http://www.woodstockstory.com/tiedyepatternsdesigns.html
- ↑ http://www.dharmatrading.com/techniques/crystal-wash-technique-a-form-of-inchlow-immersion-inch-dyeing.html
- ↑ http://www.parents.com/fun/arts-crafts/kid/tie-dye-with-kids/#page=2
- ↑ http://www.parents.com/fun/arts-crafts/kid/tie-dye-with-kids/#page=1
- ↑ http://www.parents.com/fun/arts-crafts/kid/tie-dye-with-kids/#page=2
- ↑ http://www.parents.com/fun/arts-crafts/kid/tie-dye-with-kids/#page=1
- ↑ http://www.woodstockstory.com/tiedyepatternsdesigns.html
- ↑ http://www.parents.com/fun/arts-crafts/kid/tie-dye-with-kids/#page=3
- ↑ http://www.parents.com/fun/arts-crafts/kid/tie-dye-with-kids/#page=1
- ↑ http://www.parents.com/fun/arts-crafts/kid/tie-dye-with-kids/#page=4
- ↑ http://www.parents.com/fun/arts-crafts/kid/tie-dye-with-kids/#page=4
- ↑ http://www.parents.com/fun/arts-crafts/kid/tie-dye-with-kids/#page=4
- ↑ http://www.sciencebuddies.org/science-fair-projects/project_ideas/Chem_p019.shtml#procedure
About This Article
To make simple tie dye, wrap rubber bands around your fabric in different ways to create basic designs like circles, stripes, or spirals. Heat up the water for your dye bath, then mix the dye into the water according to the package instructions. Fully immerse the fabric in the dye bath if you want it to be a single color, or dip it into different dye baths if you want multiple colors. Soak the fabric until the color is as dark you'd like—the longer you leave it in the dye bath, the darker it will get! If you want to learn how to make different patterns on your fabric, keep reading the article!
