This article was co-authored by wikiHow Staff. Our trained team of editors and researchers validate articles for accuracy and comprehensiveness. wikiHow's Content Management Team carefully monitors the work from our editorial staff to ensure that each article is backed by trusted research and meets our high quality standards.
This article has been viewed 94,500 times.
Learn more...
Do you love ballet? Do you want to have your own space to practice at home or in a studio? Make your own ballet barre with some simple materials and construction, for mounting on the wall or freestanding anywhere in the room.
Steps
Make a Barre for the Wall
-
1Measure and mark height. Use a tape measure and a pencil to mark the height you want your barre to be at on the wall. Make the mark for your first bracket, whether that will be in the middle of your barre or one end. Buy brackets meant either for stairway handrails or closet rods.
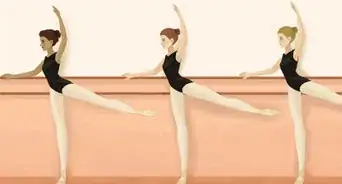
- The ideal height of the barre is at the dancer’s waist level, or approximately 32-46” from the floor.[1]
- Remember that the barre itself will sit on top of your brackets, so the actual height of the barre could be a few inches above your mark for where the bracket will go.
- You may want to check first to find the placement of studs in your wall by using an electronic stud finder or finding studs based on wall outlets, nails in existing trim, or measuring in 16” increments from the wall.[2]
-
2Measure and mark distance for brackets. Measure and mark where you want your brackets to attach to the wall. Use a level to make sure each one is at the same height. Adjust the number of brackets and their spacing according to the length of your barre:
- 4’ barre: 2 brackets spaced 32" apart (8" overhang)
- 6’ barre: 2 brackets spaced 48" apart (12" overhang)
- 8’ barre: 2 brackets spaced 64" apart (16" overhang)
- 10’ barre: 2 brackets spaced 80" apart (20" overhang)
- 14’ barre: 3 brackets, 1 centered with 64" space on each side (20" overhang)
- 16’ barre: 3 brackets, 1 centered with 80" space on each side (16" overhang)[3]
Advertisement -
3Drill in brackets. Use your power drill to attach brackets to the wall where you made pencil marks.
- The number of screws will depend on the type and size of your brackets, but you will need enough to attach each one to the wall as well as another for each bracket to attach the dowel.
-
4Pre-drill holes into the dowel. Use the same distance between brackets that you marked on the wall to measure and mark where the brackets will attach to your wooden dowel. Then pre-drill holes into the dowel at these spots to make it easier to attach to the brackets.[4]
- You can also mark where to pre-drill holes by laying the dowel on the brackets and marking where you will need to screw through them and into the dowel. Do this by looking up at the underside of the barre.
-
5Attach dowel. Get underneath your barre and have a helper hold the dowel in place against the brackets so you can attach it with a screw through each bracket into the dowel.
- You can also choose to attach the dowel to the brackets first, then mount the whole apparatus onto the wall. Just make sure you have helpers to hold the whole thing level and in place.[5]


Make a Portable (Freestanding) Barre
-
1Get PVC pipe for the posts of the barre. Get four pieces of pipe cut at 12” long for the base or “feet” of the posts. Decide on the desired height for your barre and get two pieces of pipe at that measurement. You may want it cut to a slightly shorter length, as overall height will be added by the joint pieces and feet.
- Note that these pieces will make a single barre. If you want to make a double barre with two different heights, you will need to have four different sections of pipe and two extra cross joints to make the posts, which will total to your desired height.
- The ideal height of the barre is at the dancer’s waist level, or approximately 32-46” from the floor.[6]
-
2Use PVC pipe or wood for the barre. Get PVC pipe, wooden dowel, or closet rods cut to your desired length for the barre.
- Some of the length will be absorbed by the joints used to assemble the barre, so you might want to add a few inches to your length before cutting.
- Remember that you’ll need two lengths if you’re making a double barre at two different heights.
-
3Get joints for the pipe. Buy PVC joint pieces at the same diameter as your pipe. You will need six 90-degree angle elbow joints and two T-shaped (3-holed) cross joints.
- Remember that if you’re making a double barre, you’ll need two extra cross joint pieces.
-
4Fit the pieces together. Assemble the pieces of your barre. Connect two 12” pieces of pipe with a cross joint in the middle and two elbow pieces on the opposite ends. Place the piece for the height of your barre into the same cross piece to finish your first post. Assemble the second post in the same way.[7]
- For a single bar, attach your PVC or wooden dowel piece to the top of your posts with elbow joints at each end.
- For a double barre, attach the PVC or wooden dowel for your lower bar to your posts with cross pieces. Then place the second piece of post into the cross pieces on both sides. Add the top bar using two elbow joints.
-
5Attach foam to the feet (optional). If you don’t want your barre to move around or scratch floors, buy craft foam or rubber to stick to the bottom of the feet, where each elbow joint touches the floor.
- Cut pieces of foam in squares or circles that will fit the bottom of the elbow joints. It doesn’t matter if the foam overlaps the edges slightly, as it will offer more protection.
- You can use PVC glue to affix the foam to the PVC, or buy self-adhesive foam sheets.[8]


Community Q&A
-
QuestionWhat is a ballet dictionary.
 Minmin4Community AnswerA "ballet dictionary" isn't actually a dictionary. It means all the french words we use for each step.
 -
QuestionAre PVC pipes good for ballet barres?
 Buggylu25Top AnswererAny sturdy material will work for your barre, as long as it is comfortable and stable. You can definitely use PVC pipes.
 -
QuestionCan I use cardboard instead?
 Community AnswerNo, absolutely not. Cardboard is not sturdy enough. Just hold on to the back of a chair.
Warnings
- Be certain to choose a rod and supports that are strong enough to support the dancer.⧼thumbs_response⧽
Things You'll Need
For wall method:
- Power drill
- Level
- Tape measure
- Pencil
- Stud-finder (optional)
- 2” wooden dowel
- Stairway handrail brackets or closet brackets
- Screws to match brackets
For freestanding method:
- 1.25” PVC pipe
- 2-4 cross joints for pipe
- 6 elbow joints for pipe
- 1-2 closet rods or wooden dowels (optional)
- Craft foam or rubber (optional)
References
- ↑ http://www.matsmatsmats.com/ballet-dance/specs-ballet-bar-fixed.html
- ↑ http://workshop.lifehacker.com/three-ways-to-find-a-stud-without-a-stud-finder-1636206760
- ↑ http://www.matsmatsmats.com/ballet-dance/specs-ballet-bar-fixed.html
- ↑ http://www.blesserhouse.com/2015/04/diy-ballet-barre-and-how-to-hang-a-heavy-mirror.html
- ↑ http://www.11magnolialane.com/2013/09/19/another-diy-ballet-barre-for-my-little-ballerina/
- ↑ http://www.matsmatsmats.com/ballet-dance/specs-ballet-bar-fixed.html
- ↑ http://toroidalsnark.net/barre.html
- ↑ http://adultballerinaproject.com/diy-barre-ballerinas-can-build-too/
About This Article

To make a portable barre, connect 2 pieces of PVC pipe together with a cross joint in the middle. Then, add elbow joints on each end. Next, place a pipe cut to the height of your barre into the cross joint to complete your first post. Once you’ve finished the first post, assemble the second one in the same way. Finally, attach your bar to the top of your posts using elbow joints. For tips on how to make a wall barre, read on!