This article was co-authored by wikiHow Staff. Our trained team of editors and researchers validate articles for accuracy and comprehensiveness. wikiHow's Content Management Team carefully monitors the work from our editorial staff to ensure that each article is backed by trusted research and meets our high quality standards.
This article has been viewed 20,105 times.
Learn more...
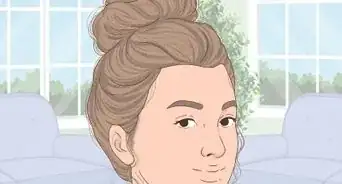
The hair knot, also known as a bun, a topknot, or a chignon, is a versatile hairstyle that can be worn in virtually any type of setting. It is a simple and elegant hairstyle for a formal event, but it’s just as appropriate to keep your hair out of your face on a casual day. The best part about the hair knot is that it isn’t too tricky to create. With a little practice, you can style your hair into the perfect hair knot for any occasion.
Steps
Making the Ponytail
-
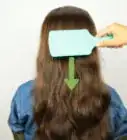
1Brush out your hair to remove any tangles. This style works best on medium to long hair, and it’s easiest to create your hair knot in hair that is smooth and brushed out. If you like to style your hair with a shine serum or oil, you put some in your hair now.
-
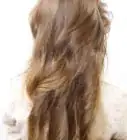
2Tease your hair for volume. This step is optional for anyone who likes a little extra volume in their up-dos. Using a rattail comb or a brush, tease the hair around the crown of your head. You can learn about the basics of teasing hair here.
- Make sure that you smooth your hair over the teased section so your finished ponytail still looks smooth.[1]
Advertisement -
3Gather your hair and tie it with a hair tie. Brush back your hair and gather it in your one hand. Then, set the brush down and use your free hand to ensure your hair is smooth and fix any bumps. Then, tie your hair into the ponytail with your hair tie.[2]
- Because you’ll be securing your knot with bobby pins later, it’s best to use a thin, less bulky hair tie.
- Your ponytail can be low, in the middle of your head, or high. Your hair knot will look very different depending on where you place it on your head, so experiment to figure out which placement you prefer.
-
4Pull your ponytail to secure the elastic. Split your ponytail into two sections, and pull them in opposite directions. This should tighten your hair tie to your head, making sure that your ponytail is secure. It’s best to create your hair knot with a tight ponytail, because you’ll need to secure it to your head. Double check that you’ve gotten all of your hair up into the ponytail.[3]

Creating the Knot
-
1Apply a holding product to your ponytail. This step is optional, but great for anyone who has layers in their hair or struggles with frizz or flyaways.[4] Apply a bit of product, such as a shine serum or hair gel, to the palm of your hand and run it along your entire ponytail. Make sure that you’ve coated the entire thing with a light layer of product so that it remains smooth and sleek for hours.
-
2Twist your ponytail. Starting at the base of your ponytail, begin twisting the entire ponytail in one direction. Use both hands to make sure it’s twisted tightly. Continue twisting until you’ve reached the end of your ponytail.[5]
-
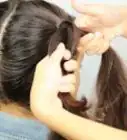
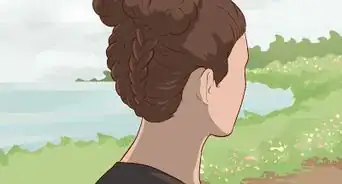
3Wrap your ponytail around your hair tie. After you’ve twisted the entire length of your ponytail, you need to begin coiling it around the hair tie at the base of your ponytail. This part may take a bit of practice. Use one hand to hold the end of your twisted ponytail, and use the other one to help form the knot securely against your head. Wrap the twisted ponytail around the base as many times as you’re able to, forming the circular bun.[6]
- Make sure to hold your knot firmly after you’ve created it but before it’s secured in place, otherwise you will have to start all over.

Securing the Knot
-
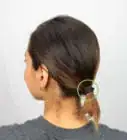
1Use bobby pins to secure your hair knot. Use your fingers to open the bobby pin, and then slide it into your bun so that it holds the wrapped ponytail against your head. The amount of bobby pins you will need depends on how thick your hair is, but the key is to play it safe. Use as many pins as you need to make your bun feel completely secure and immovable.
-
2Spray your knot with hairspray. To finish your look, grab your favorite hairspray and mist the knot. This will give it a little bit of extra hold, and also help to manage frizz. You can also spray the rest of your hair in order to keep everything sleek and in place.[7]
- Hairspray is a must if you are planning on being extremely active while wearing your hair knot. If you’re going dancing, spray away!
-
3Bring extra bobby pins with you to manage flyaways. If you’re heading out for the entire day or night, make sure to bring some extra insurance. Throw a few bobby pins in your purse, backpack, or pocket so that if any pesky hairs start poking out of your hair knot, you can use a spare bobby pin to tame them. Nothing ruins the look of a sleek hair knot more than one rogue piece of hair sticking out!
- If you’re wearing your hair knot to a casual event, it’s less important to worry about frizz and flyaways. Messy hair knots may even be preferable when you’re trying to keep it casual.


References
- ↑ https://www.youtube.com/watch?v=0C7XjBqXZRU
- ↑ https://www.youtube.com/watch?v=0C7XjBqXZRU
- ↑ https://www.youtube.com/watch?v=0C7XjBqXZRU
- ↑ https://www.youtube.com/watch?v=0C7XjBqXZRU
- ↑ https://www.youtube.com/watch?v=0C7XjBqXZRU
- ↑ https://www.youtube.com/watch?v=0C7XjBqXZRU
- ↑ https://www.youtube.com/watch?v=0C7XjBqXZRU
- Videos provided by Knot Me Pretty
About This Article