This article was co-authored by wikiHow Staff. Our trained team of editors and researchers validate articles for accuracy and comprehensiveness. wikiHow's Content Management Team carefully monitors the work from our editorial staff to ensure that each article is backed by trusted research and meets our high quality standards.
There are 15 references cited in this article, which can be found at the bottom of the page.
The wikiHow Video Team also followed the article's instructions and verified that they work.
This article has been viewed 24,950 times.
Learn more...
Making your own lead rope for your horse is a fun way to get creative. This lets you decide on the color scheme and the length! All you need are 4 different colors of paracord, a swivel bolt snap, scissors, and a lighter. Attach the strands of paracord to the swivel bolt snap first and then start braiding your lead rope. Once you have finished braiding, tie a knot at the end, and then burn the loose ends of paracord to prevent them from fraying. Your lead rope is now ready to use with your horse!
Steps
Attaching the Paracord to the Snap
-
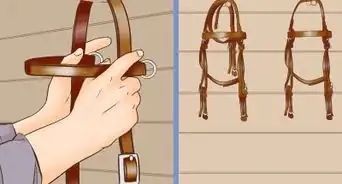
1Get paracord, a swivel bolt snap, a pair of scissors, and a lighter. It’s best to have all of your supplies ready to go before you begin! Choose 4 different colors of paracord, as this makes the braiding process easier. Then get a swivel bolt snap so that you can clip the lead rope to your horse’s halter. The scissors are for trimming the paracord and the lighter is to burn the ends of the strands to prevent fraying.[1]
- Paracord is an inexpensive, lightweight nylon rope that traditionally was used for parachute suspension lines. However, today it is used for a variety of different purposes like crafts, military supplies, and boating equipment.
- You can purchase paracord and swivel bolt snaps from home improvement stores, outdoor gear stores, or online.[2]
-
2Cut a 10 ft (3.0 m) length of each color of paracord. Lay out each different colored strand of paracord. Get a measuring tape and measure out the correct length of each one. Use a pair of sharp scissors and cut each strand of paracord to size. You’ll end up with 4, 10 ft (3.0 m) lengths of paracord.[3]
- You can also make a shorter lead rope if you prefer by cutting each paracord strand to only 7 ft (2.1 m) long instead.[4]
Advertisement -
3Fold the paracord strands in half and align the center loops together. Take both ends of a strand of paracord. Bring the ends together and fold the strand in half, creating a gentle loop in the center. Repeat this for the remaining 3 strands of paracord and hold all of the center loops together so that they align.[5]
- Check that all of the ends of the paracord strands line up to make sure that they are folded evenly.
- There will be 8 different paracord strands attached to the swivel bolt snap.
-
4Put the aligned loops through the swivel bolt snap. Take the loops of paracord strands that you folded and make sure that they all still align. Then push these through the swivel bolt snap. Make sure that all of the loops have gone through the snap and that they are still aligned correctly.[6]
-
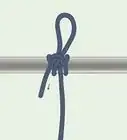
5Pull the loose ends of the paracord strands through the loops. Grasp all of the loose ends of the paracord strands. Bring these through all of the loops that you pushed through the swivel bolt snap to create a knot. Pull on the loose ends of the paracord strands to tighten the knot against the swivel bolt snap.[7]
- This creates a knot at the swivel bolt snap with 8 different strands of paracord.

Braiding the Paracord
-
1Separate the strands into 4 pairs using 2 different color combinations. Look at the strands of paracord that are attached to the swivel bolt snap and decide which colors you want to pair together. Create 1 pair with 2 different colors and then a second pair with the remaining 2 colors. Then copy the color combinations for the final 2 pairs.[8]
- For example, if your paracord strands were orange, red, yellow, and white, you could have 2 pairs that are made of orange and red strands, and 2 pairs that are made of yellow and white strands.
- Avoid using the same colored strands to create a pair, as this can make the braiding process confusing.
-
2Keep 2 matching pairs in the center and the remaining pairs on the outside. Place the paracord pairs that stem from the swivel bolt snap in a line. Arrange the pairs so that the 2 pairs in the center have a matching color combination and each pair on the outside has a matching color combination.[9]
- For example, the orange and red pairs could be in the middle and the yellow and white pairs could be on the outside.
-
3Cross the 2 middle pairs over the top of each other. Take each middle pair of paracord strands and cross one over the other. It doesn’t matter which one crosses over first. Then hold 1 middle pair to each side so that there is a small gap in the center. Pull the strands of the middle pairs so that they feel tight.[10]
- For example, the orange and red pairs would cross over each other.
-
4Cross the left outside pair over the right outside pair. Bring both outside pairs into the center. Then cross the left-hand side pair over the right-hand side pair, before bringing both pairs back to the outside position again.[11]
- For example, bring the yellow and white pairs into the middle position and cross the left pair over the right pair. Then pull each pair back to the outside position again so that the orange and red pairs return to the center.
-
5Repeat the braiding process until there is only 7 in (18 cm) left. Continue crossing the 2 middle pairs over and then the 2 outside pairs over. For the middle pairs, it doesn’t matter which side you cross over first. However, for the outside pairs, stick to crossing the left-hand side pair over right-hand side pair to keep the process straightforward. Braid the paracord until there is approximately 7 in (18 cm) left at the loose ends.[12]
- Remember to pull each pair tight as you braid it.


Securing the Lead Rope
-
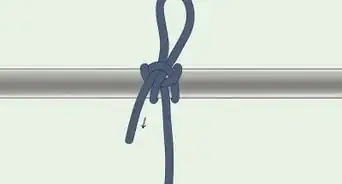
1Tie a knot at the end of the lead rope to secure the braiding. Create a loop with all of the loose ends of the braided paracord and then pull all of the loose ends through the loop. Then pull tightly on both the braided and loose ends of the lead rope to tighten it fully.[13]
- Although the knot keeps the lead rope tight and secure, it isn’t permanent. This means that you can always undo the knot and the braiding if you want to change the lead rope or use the paracord for something else.
-
2Trim the ends of the strands to make them even. Sometimes the strands can become slightly uneven during the braiding process. Get a pair of sharp scissors and trim the strands to make sure that they line up neatly.[14]
-
3Burn the ends of the paracord strands with a lighter to secure them. Hold the end of 1 paracord strand and flick the lighter on. Hold the flame to the end of the strand for 2-3 seconds and then remove the lighter. Repeat this for each individual strand.[15]
- Burning the ends of the strands melts the paracord slightly and prevents it from fraying. This keeps the lead rope looking neat and tidy, and also helps it to stay secure.
-
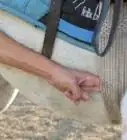
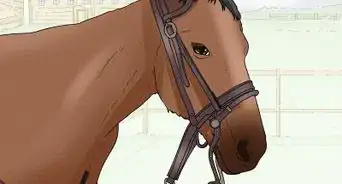
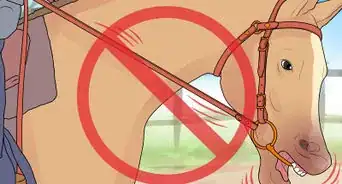
4Attach the lead rope to your horse's halter to use it. Open the buckle of the swivel bolt snap and clip it onto the tie ring on your horse's halter, which is just up from the chin. Make sure that the swivel bolt snap is closed securely and then begin leading your horse with the lead rope.[16]
- You can also use the lead rope to keep your horse secure while you're grooming.

Things You’ll Need
- 4 different colors of paracord
- Swivel bolt snap
- Scissors
- Lighter
- Halter


References
- ↑ https://youtu.be/jaTV9YptKR4?t=30
- ↑ https://youtu.be/-2Hf-Jssc54?t=168
- ↑ https://youtu.be/jaTV9YptKR4?t=23
- ↑ https://youtu.be/jaTV9YptKR4?t=33
- ↑ https://youtu.be/jaTV9YptKR4?t=40
- ↑ https://youtu.be/jaTV9YptKR4?t=62
- ↑ https://youtu.be/jaTV9YptKR4?t=62
- ↑ https://youtu.be/jaTV9YptKR4?t=121
- ↑ https://youtu.be/jaTV9YptKR4?t=137
About This Article