This article was co-authored by wikiHow Staff. Our trained team of editors and researchers validate articles for accuracy and comprehensiveness. wikiHow's Content Management Team carefully monitors the work from our editorial staff to ensure that each article is backed by trusted research and meets our high quality standards.
This article has been viewed 82,670 times.
Learn more...
Even if this is your first time going to Build-a-Bear, making a new furry friend is easy. Follow the stations in the store to pick out an animal, stuff it, and customize it with whatever clothing and accessories you like. If you need help, workshop employees are always around to guide you in the right direction. You can also use Build-a-Bear’s official website to customize a stuffed animal before you step into a workshop. When you’re done, bring your furry friend with you to give it a new home.
Steps
Making a Build-a-Bear
-
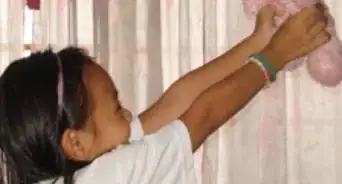
1Choose a stuffed animal from the bin. A few colorful bins near the Build-a-Bear Workshop entrance hold all the stuffed animals ready to be made. Pictures above the bins show you what the finished animals look like. Pick out the one you want before walking over towards the sound machine.[1]
- Dig around in the bins. Many of the animals feel different to touch, and this may help you decide which one you want.
-
2Select a sound chip if you want your animal to speak. Next to the bins, you will see a red and blue machine with a lot of buttons. Press the buttons to hear each sound your animal could make. Look up at the top part of the machine to find the corresponding sound drawer. Open the drawer to take a sound chip.
- Your animal can growl, giggle, or even say “I love you.” You can pick more than 1 sound.
- Sound chips cost between $4 and $8 USD.
Advertisement -
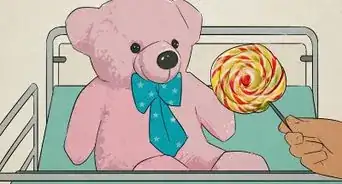
3Pick a scent disk if you want your animal to have a smell. Your Build-a-Bear can smell like chocolate, bubblegum, or another scent. Walk past the sound machine and you will come to the stuffing machine. The scent disks hang in bags around the machine. Choose any you like before having your animal stuffed.[2]
- Scents are small disks placed in your animal’s paw. They currently cost $3.50 USD.
-
4Give the animal, sound chip, and scent disk to the stuffer. One of the store employees, or “Bears,” will be waiting for you at the stuffing machine. Make sure you give them any sounds or scents you want for your Build-a-Bear.[3]
-
5Pick a heart out of the basket if you want one. The employee will ask you if you want to put a heart inside your furry friend. Choose a special heart out of the basket on the stuffing machine. The basket has hearts with a few different patterns, so get one that feels special or seems unique.[4]
- These hearts do not cost anything. The heart from the sound machine, which gives your Build-a-Bear a heartbeat, costs extra.
-
6Stuff your animal at the stuffing station. After putting in the heart, sounds, and scents you chose, the employee will hold your animal up to the stuffing machine. Press the machine’s pedal or turn its handle to let out some of the stuffing. The workshop employee will help you get the right amount of stuffing. They will also sew your animal shut when you’re finished.[5]
- Tell the employee if you want your bear to be soft with less stuffing or firmer with more stuffing.


Customizing a Build-a-Bear
-
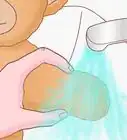
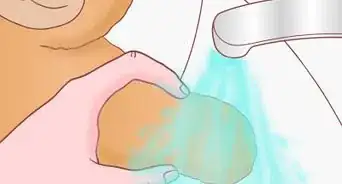
1Stop at the air bath if you want to groom your Build-a-Bear. If you would like, groom your animal before dressing it up. Walk past the stuffing station and you will soon come across a plastic bathtub with a few faucets that blow air. Set your animal on top of the bathtub, then step on the pedal to release some air.[6]
- Brushes are placed nearby so you can give your animal a quick brushing before you dress it.
-
2Dress your Build-a-Bear with clothing and accessories. Look in the middle of the store to find some racks with a selection of dress-up items. Also check the shelves along the walls for more. There are lots of different outfits to choose from, such as sleepwear and sports jerseys. You can even mix and match items to create your own outfit!
- You can use the clothing to dress your furry friend in the store. If you don’t want to do that now, the workshop employees will pack the clothes with your animal at the register.
- If you want to change your animal’s clothing, get multiple outfits. You can always come back and get more.
-
3Print out a birth certificate at the computer. The computer will be somewhere near the clothing. Follow the instructions on screen to complete the certificate. All you have to do is type in your furry friend’s information, such as its name and date of birth. Click on the “Finish” button to send the certificate to the cash register.[7]
- If you have questions, ask a store associate. They will be more than happy to help you fill out the certificate.
-
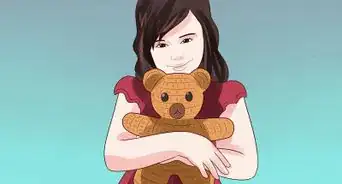
4Visit the register to get a carrier box for your Build-a-Bear. Step up to the register when you are done making your new animal. After you pay, the employee will put your furry friend in a box, along with the birth certificate. You are ready to take your Build-a-Bear home!
- If you like, you can carry your animal home without a box. However, the box keeps it safe and clean until you get there.


Creating a Build-a-Bear Online
-
1Click on the Bear Builder tab to begin making your animal. Find “The Bear Builder” button in the upper left corner of the screen. Click on it to be taken to the creation screen. The builder works the same way as a Build-a-Bear Workshop. You can completely customize your bear.[8]
- The online store is great for finding animals and accessories not available at your local workshop.
-
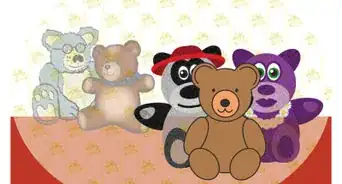
2Choose the kind of animal you want. You will see a list of furry friends available to make. Scroll down the page to see pictures of the animals Build-a-Bear offers. This includes a lot of unique animals for holidays, sports teams, or other collections such as Sesame Street.[9]
- Click the filter button in the upper left corner to make browsing easier. You can narrow the list down by fur color, price, and other options.
-
3Click the next button to begin picking out clothing. Find the “Next” button on the right side of the screen. The page will show you pictures of the various pieces of clothing you can use to dress up your animal. Some items are listed as “online exclusive,” so you cannot get them by visiting your local workshop.[10]
- The filter option is available on this page as well as the sounds, scents, and accessories pages. Use it to help narrow down your options.
-
4Pick out sounds and scents for your Build-a-Bear. Click the “Next” button to be taken to the sounds and scents page. First, the builder will show you the list of sounds. You can click on them to hear what they sound like. After you decide, click “Scents” at the top of the screen to shop for scents.[11]
- These are components that get packed inside your furry friend. Sound chips let it talk or make noises. Scent disks give it a smell, such as berries or lavender.
- You can get as many sounds and scents as you want. If you don’t want any, simply move on to the next page.
-
5Select any accessories you want for your animal. Click the “Next” button one last time to go to the accessories page. Look at the pictures for any cool or cute accessories that go with your Build-a-Bear’s outfit. Click the “Finish Building” button on the right when your animal is ready to go.[12]
-
6Create your Build-a-Bear’s birth certificate. On the next page, hit the “Create Birth Certificate” option to give your bear a name. You can also add a birth date and say who the bear is for if it is a gift. When you are finished, press the “Save And Continue” button.[13]
- You do not have to complete the birth certificate. If you want it, it doesn’t cost extra.
-
7Select how you want your Build-a-Bear to be sent to you. Build-a-Bear gives you a few shipping options. You can order your animal stuffed or unstuffed. If you let Build-a-Bear do the stuffing, you can tell them to leave the clothing off so you can dress your furry friend at home.[14]
- The “unstuffed” option means you will have to take your animal to a workshop to get it stuffed. You can stuff it and customize it like you would with an animal purchased in-store.
-
8Put in your payment and shipping information. Press the “Add To Bag” button, then “Checkout.” Type in the address you want your furry friend shipped to. Add the payment information to place your order. Then, expect your Build-a-Bear in the mail soon![15]
- Currently, you can use a credit card or PayPal to complete the transaction.
-
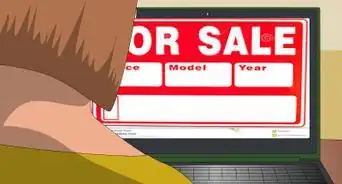
9Shop for additional items using the store. You can buy animals, clothing, and other accessories separately by using the menus at the top of the screen. This way, you can buy anything you need without going through the builder. It’s also useful for exploring the store before beginning to build a new animal.[16]


Community Q&A
-
QuestionCan you customize the Build-A-Bear to speak using your voice?
 Brett GilbertTop AnswererYes. They sell personalized voice chips. You can find these at the sound machine. Squeeze the chip to activate it, then say what you want to record. Remember to do this in a quiet part of the store.
 -
QuestionHow long does building a bear take?Brett GilbertTop AnswererBuilding your animal doesn't take long at all. All you have to do is pick your animal and take it to the stuffing machine. If you know what you want, this takes only a few minutes.
-
QuestionCan you put a scent on a stuffed build a bear?Brett GilbertTop AnswererThe scent is placed inside the Build-a-Bear, so it's best if you pick it before you get your furry friend stuffed. If you want one later, the workshop employees may be able to undo the stitching to put in the scent for you.
References
- ↑ http://www.wonderbaby.org/articles/build-a-bear-workshop
- ↑ http://www.wonderbaby.org/articles/build-a-bear-workshop
- ↑ http://www.mommyish.com/build-a-bear-workshop-experience-sweatshop/
- ↑ http://www.mommyish.com/build-a-bear-workshop-experience-sweatshop/
- ↑ http://www.mommyish.com/build-a-bear-workshop-experience-sweatshop/
- ↑ http://www.wonderbaby.org/articles/build-a-bear-workshop
- ↑ http://www.mommyish.com/build-a-bear-workshop-experience-sweatshop/
- ↑ https://www.buildabear.com/bear-builder-how-to-video.html
- ↑ https://www.buildabear.com/bear-builder-how-to-video.html
- ↑ https://www.buildabear.com/bear-builder-how-to-video.html
- ↑ https://www.buildabear.com/bear-builder-how-to-video.html
- ↑ https://www.buildabear.com/bear-builder-how-to-video.html
- ↑ https://www.buildabear.com/bear-builder-how-to-video.html
- ↑ https://www.buildabear.com/bear-builder-how-to-video.html
- ↑ https://www.buildabear.com/bear-builder-how-to-video.html
- ↑ https://www.buildabear.com/bear-builder-how-to-video.html
About This Article

To make a stuffed animal at a “Build A Bear” Workshop, start by picking out an animal from one of the bins near the entrance. Then, select a sound chip if you want your animal to speak. Additionally, choose a scent disk in scents like chocolate or bubblegum to give your furry friend a special smell. Next, go to the stuffing machine and give your animal, sound chip, and scent disk to the stuffer. Once the stuffer holds your animal up to the stuffing machine, press the machine’s pedal or turn its handle to stuff your new furry friend! To learn more, including how to customize your animal with clothes and accessories, read on.