This article was co-authored by Mitchell Newman. Mitchell Newman is the Principal at Habitar Design and its sister company Stratagem Construction in Chicago, Illinois. He has 20 years of experience in construction, interior design and real estate development.
This article has been viewed 36,463 times.
Getting a rusty metal object ready for painting takes a bit of work, but it’s totally doable. Paint can’t bond to rust, so you’ll need to start by restoring the surface. Elbow grease will do the trick for lightly rusted metal, but tougher jobs may require a power sander or chemicals. After prepping the surface, prime and paint it with rust-inhibiting products. That's all it takes to breathe new life into any old, rusty eyesore!
Steps
Removing Rust
-
1Scrape off light, loose rust with a wire brush. If you’re dealing with a lightly rusted surface, you may just need to give it a quick scrub with a brush. A paint scraper or metal putty knife may also do the trick. Scrape off peeling paint and powdery, flaking rust until the surface is mostly smooth.[1]
- You don’t need to get down to bare metal. You just need to get rid of peeling or flaking rust and old paint, which prevent new coats of paint from bonding.
-
2Scrub heavily rusted areas with coarse and fine sandpaper. If a wire brush and paint scraper didn’t do the trick, attack heavy rust with coarse sandpaper (100-grit or below). You could also use a sanding block or power sander. After starting with a coarse grit, sand the surface with fine, 400-grit sandpaper.[2]
- If you use a power sander, keep the tool moving to avoid wearing down the metal.
Advertisement -
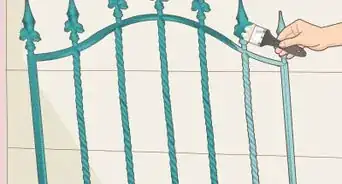
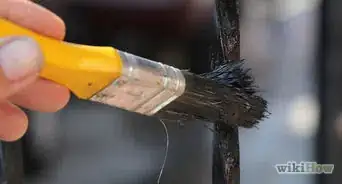
3Use chemicals if elbow grease doesn’t do the trick. Rust removers that contain phosphoric or hydrochloric acid are the most efficient options, but these are heavy-duty chemicals. If you opt for this method, read your product's instructions carefully and use it as directed. Apply the chemical with an old paintbrush, let it sit for the recommended amount of time, then scrub away liquefied rust with a wire brush.[3]
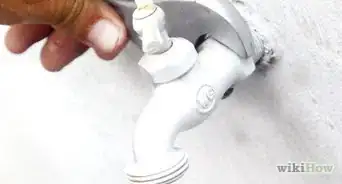
- For most products, you’ll need to hose down the object after applying the chemical. Find a spot to rinse the object where runoff won’t damage grass or plants.
- Gentler rust removers are available, but soaking overnight is usually necessary. For large objects, such as patio furniture, this may not be practical.
Safety Precaution: Wear heavy rubber gloves, protective goggles, and a respirator when working with an acid-based rust remover.
-
4Wipe off the surface with old towels promptly. If you only used a wire brush or sander, wipe away dust and residue after removing the rust. If you used a chemical, dry the object immediately after you’ve finished rinsing it. Dry it quickly and thoroughly, as any moisture can lead to flash rust, which is a new layer of rust that can form within a matter of hours.[4]
- To avoid flash rust, restore the surface, then promptly add a coat of rust-inhibiting primer. Don’t remove rust one day, then prime the surface the next. Once you’ve added the primer, you can finish the project at your own pace.
-
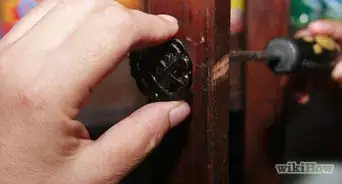
5Apply a rust converter if the rusty metal object has tight spots. Even a chemical remover might have trouble getting rust off of objects with intricate details or tight spots. If necessary, place the object on a drop cloth, then spray or brush on a coat of rust converter.[5]
- A rust converter contains substances that chemically convert rust into a paintable surface. You can find one at the hardware or home improvement store; products may also be labeled “rust reformer” or “rust neutralizer.”
- If you haven't already, use a wire brush or sandpaper to remove loose rust before using a rust converter.
- If you apply it with a brush, use an old or disposable paint brush. Don’t use that brush for future painting jobs. Allow the converter to dry for the recommended length of time before applying a primer.


Priming the Surface
-
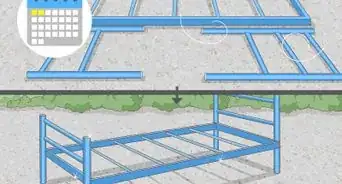
1Place the object you’re painting on a drop cloth. If you haven’t already, spread out a drop cloth or a large plastic sheet. Preferably, set up your painting area outside. If you need to paint inside, choose a well-ventilated area and consider using a respirator.[6]
Tip: If you paint outside, avoid setting up your work area in direct sunlight, which could cause the paint to dry too quickly. Additionally, don’t apply paint and primer when it’s windy.[7]
-
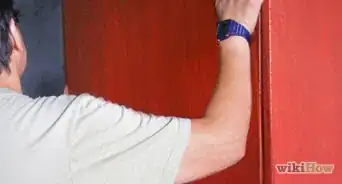
2Raise or hang the object you’re painting, if possible. Hunching over is inconvenient and bad for your back. If you can, prop up the thing you’re painting with objects such as cinder blocks or sawhorses. Not only is this more convenient, it’ll help you access undersides and tight spots.[8]
- If the object you’re painting is light enough, you could also suspend it using a wire or an old coat hanger.
- Don't worry if you're not able to prop up the object. Just look carefully for spots on the underside you may have missed. If necessary, apply coats in multiple steps with the object placed right-side-up and upside-down.
-
3Invest in a rust-inhibiting metal spray paint and spray primer. Purchase products that are labeled for metal and contain a zinc additive. Zinc helps prevent rust from developing in the future. Use a light gray primer for a light final paint color, and a black primer for a darker final color.[9]
- You might need to spend a bit more on a rust-inhibiting paint and primer, but it’s worth it in the long run. You’re putting in a lot of work, and investing in quality products lowers the chance that you’ll have to repeat the process in the future.
-
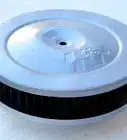
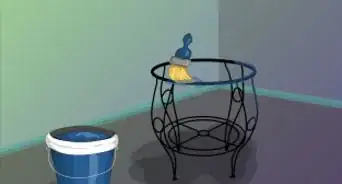
4Apply a thin coat of primer. Read the instructions, shake the can for as long as directed, then lightly prime the surface using smooth, even strokes. Hold the can about 12 in (30 cm) away from the surface, and keep the can in continuous motion.[10]
- Spray painting a metal surface is better than using a brush. Using a brush on metal leaves behind unsightly stroke marks. Additionally, it’s easier to coat nooks, crannies, and fine details with spray paint.
-
5Spray on another coat after the first has dried. Wait at least 2 hours before adding another coat of primer, or as long as the instructions specify. Remember to keep the can moving and apply thin coats to prevent paint runs.[11]
- Add a total of 2 to 3 thin coats of primer. The surface will be ready for top coats when it’s evenly coated with primer and no streaks of metal are visible.


Adding the Top Coats
-
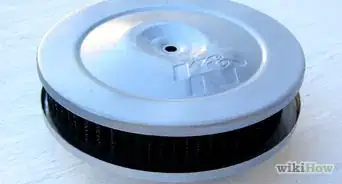
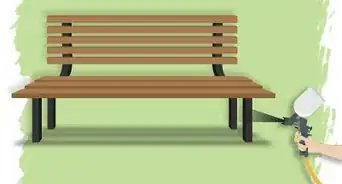
1Apply 2 to 3 thin coats of rust-inhibiting metal spray paint. Once again, read your product’s instructions, shake the can for as long as directed, and use even, continuous strokes. Keep your coats thin for a smooth, even finish. Be sure to wait at least 2 hours before applying an additional coat.[12]
Spray Painting Quick Tips
Shake the can for 3 to 4 minutes. Shaking is crucial and helps ensure the paint is mixed well.
Hold the can about 12 in (30 cm) from the surface you’re painting. Double check the instructions, and go with the recommended distance.
Keep the can moving. Hovering over 1 spot can lead to paint runs and drip marks.[13]
-
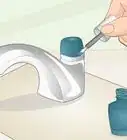
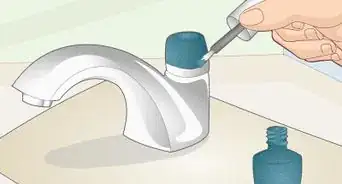
2Cover painted areas if you're adding a second color. If you’re adding stripes or painting parts of furniture different colors, cover the newly painted areas with masking or painter’s tape and plastic. Be sure to let the freshly-painted surfaces to dry before taping them, then add 2 to 3 coats of the additional color.[14]
- Suppose you’re restoring a metal patio table, and you want to paint the tabletop turquoise and the frame and legs gray. Paint the tabletop, cut plastic sheets and tape them to the tabletop, then paint the rest of the table.
-
3Seal your paint job with a clear top coat for best results. While optional, a coat of clear sealer will reduce oxidation and extend the lifespan of your paint. Read the instructions, shake the can, and apply 1 thin coat using the same technique as ordinary paint or primer.[15]
- Find clear top coat spray at the home improvement store. Both matte and glossy finishes are available.


Expert Q&A
-
QuestionWhat is the best rust remover for metal?
 Mitchell NewmanMitchell Newman is the Principal at Habitar Design and its sister company Stratagem Construction in Chicago, Illinois. He has 20 years of experience in construction, interior design and real estate development.
Construction ProfessionalThe best approach to removing rust depends on how severe it is. You can sand light rust with steel wool, or use an emery cloth or file if it's a little more stubborn. You might even need to use a grinder if the rust is really deep. Then, coat the piece in a primer that will inhibit rust, and paint over that.
Warnings
- Remember to wear heavy gloves, protective eye wear, and a respirator if you use an acid-based rust remover.[17]⧼thumbs_response⧽
Things You’ll Need
- Wire brush
- Sandpaper or sander (100 and 400 grit)
- Acid-based rust remover (optional)
- Rust converter (optional)
- Heavy rubber gloves
- Goggles
- Rags
- Drop cloth or plastic sheet
- Rust-inhibiting metal spray primer
- Rust-inhibiting metal spray paint
- Masking or painter’s tape (optional)
- Clear spray sealer (optional)


References
- ↑ https://www.familyhandyman.com/painting/restore-metal-before-painting/view-all/
- ↑ https://www.familyhandyman.com/tools/how-to-remove-rust/view-all/
- ↑ https://www.familyhandyman.com/tools/how-to-remove-rust/view-all/
- ↑ https://www.bobvila.com/articles/how-to-refinish-rusty-old-patio-furniture/
- ↑ https://www.bobvila.com/articles/how-to-refinish-rusty-old-patio-furniture/
- ↑ https://www.bhg.com/home-improvement/porch/outdoor-rooms/how-to-paint-rusty-metal/
- ↑ https://www.bobvila.com/articles/how-to-refinish-rusty-old-patio-furniture/
- ↑ https://www.familyhandyman.com/painting/12-tips-for-perfect-spray-paint/view-all/
- ↑ https://www.familyhandyman.com/tools/how-to-remove-rust/view-all/
- ↑ https://www.familyhandyman.com/tools/how-to-remove-rust/view-all/
- ↑ https://www.bobvila.com/articles/how-to-refinish-rusty-old-patio-furniture/
- ↑ https://www.bobvila.com/articles/how-to-refinish-rusty-old-patio-furniture/
- ↑ https://www.familyhandyman.com/painting/12-tips-for-perfect-spray-paint/view-all/
- ↑ https://www.bhg.com/home-improvement/porch/outdoor-rooms/how-to-paint-rusty-metal/
- ↑ https://www.familyhandyman.com/tools/how-to-remove-rust/view-all/
- ↑ https://www.familyhandyman.com/painting/12-tips-for-perfect-spray-paint/view-all/
- ↑ https://www.familyhandyman.com/tools/how-to-remove-rust/view-all/
About This Article