wikiHow is a “wiki,” similar to Wikipedia, which means that many of our articles are co-written by multiple authors. To create this article, volunteer authors worked to edit and improve it over time.
There are 8 references cited in this article, which can be found at the bottom of the page.
This article has been viewed 193,275 times.
Learn more...
Painting a motorcycle tank is way to customize your motorcycle, but not everyone knows how to paint a motorcycle tank. The gas tank on a motorcycle is a highly sensitive part, and there is a specific technique to painting it safely so that you get a smooth finish. Learn the best way to paint your motorcycle tank, and you can save yourself money that you would spend hiring someone else to do it.
Steps
-
1Remove all of the existing paint. Use a sandblaster to sand the tank down to bare metal. Sandblasting might leave some cracks and holes, so use a metal filler to fill in cracks and a body filler to fill in holes.[1] Use a piece of 180-grit sandpaper over the surface repeatedly until it is smooth to the touch.[2]
-
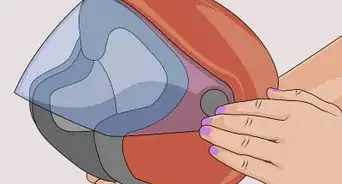
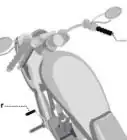
2Cover all openings with duct tape, and use a utility knife to trim the tape before you paint a motorcycle tank. Cover any areas where the rubber gaskets contact the gas tank as this will prevent the paint from getting inside the gas tank. This would include areas in the filler neck area, the petcock assembly, and where the fuel gauge mounts to the tank.Advertisement
-
3
-
4Apply several coats of base paint, and sand with 380-grit sandpaper in between coats. Allow each coat to dry before proceeding to the next coat.
-
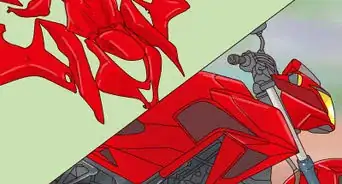
5Air brush and add designs, if desired.
-
6Apply 3 to 4 coats of clear coat polymer. Allow to dry. This will protect your tank in case you drip gasoline on it while using a gasoline pump.[5]
Community Q&A
-
QuestionShould I wet-sand the clear coat?
 Community AnswerYes, you should.
 -
QuestionWhich type of paint is best to avoid gasoline damage?
 Community AnswerUse an automotive, catalyzed 2K urethane paint, primer, color layers and clear coat. It is much more resistant to physical damage, UV exposure and chemicals than the acrylic automotive paints.
 -
QuestionDo I need to remove all the old paint when painting a motorcycle tank?
 Community AnswerFor best results, yes.
Warnings
- Before you paint your motorcycle tank, drain any gasoline from the tank into a suitable container. Make sure the tank is completely aired out before you begin painting it, since gasoline is highly flammable. Allow the inside of the tank to dry out until you can no longer smell the gasoline fumes, which may take a few days.⧼thumbs_response⧽
- Remove all of the old paint before applying new paint to avoid incompatibility issues between the 2 types of paint.[6] If you fail to remove all of the old paint, this will become obvious after the tank is repainted.⧼thumbs_response⧽
Things You'll Need
- Sandblaster
- Metal filler
- Body filler
- Sandpaper, 180- and 380-grit
- Duct tape
- Utility knife
- Primer
- Paintbrushes
- Paint colors of your choice
- Clear coat polymer paint
- Camera (optional)
- Spray Gun

-Step-13.webp)

-Step-17.webp)
References
- ↑ https://www.youtube.com/watch?v=kJHo_hn1Mak
- ↑ https://www.youtube.com/watch?v=LQFH0iuW2iI
- ↑ https://www.youtube.com/watch?v=Osqtbrl_Qxs
- ↑ https://www.youtube.com/watch?v=riFEFJrMxPM
- ↑ https://www.youtube.com/watch?v=lcX1HL9iL4E
- ↑ https://www.youtube.com/watch?v=KawH640l7YM
- http://www.finishing.com/337/95.shtml
- http://www.gas-tank.com/bike.htm


-Step-13.webp)


