This article was co-authored by Lauren Kurtz. Lauren Kurtz is a Naturalist and Horticultural Specialist. Lauren has worked for Aurora, Colorado managing the Water-Wise Garden at Aurora Municipal Center for the Water Conservation Department. She earned a BA in Environmental and Sustainability Studies from Western Michigan University in 2014.
wikiHow marks an article as reader-approved once it receives enough positive feedback. In this case, 80% of readers who voted found the article helpful, earning it our reader-approved status.
This article has been viewed 291,818 times.
You needn't have a huge herb garden to yield a variety of interesting flavours from your plants. A simple herb pot can provide you with lots of exciting plants to spice up your cooking and create a very manageable green space for a kitchen, patio, or small garden area.
Steps
Buying Your Herbs
-
1Find herbs that have similar watering and sunlight needs. Since you will be planting your herbs in the same pot, you have to make sure that they are compatible. Some herbs, such as parsley, love water and need soil that is constantly moist. Other herbs, such as rosemary, prefer when soil is left to dry between watering.[1]
- If your herbs don't have the same watering and sunlight needs, you should plant them in separate pots.
- Thyme is another herb that doesn't like too much water, and would make a great pot-mate for rosemary.
- You should also take lighting needs into consideration as well. Most herbs require about 6 hours of sunlight, but some need more.
-
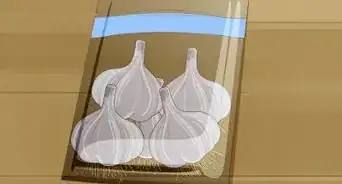
2Pick 3 to 4 herbs that you like to cook with. Once you have narrowed your list down to compatible herbs, pick 3 to 4 herbs from that list that you like to cook with. For example, if you find yourself using a lot of basil in your cooking, but hate the taste of chives--pick the basil and skip the chives. If you can't decide what type of herbs to grow, consider any of these popular choices:[2]
- Basil
- Mint
- Oregano
- Parsley
- Rosemary
- Thyme
Advertisement -
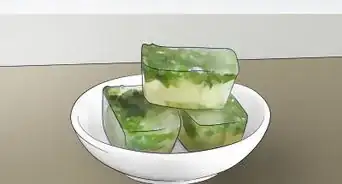
3Try some aromatic or flowering herbs. Most herbs will flower, including basil and rosemary, but some herbs are actual flowers, such as chamomile and lavender. You can add these into the same pot as the rest of your culinary herbs, or you can put them into their own pot.
- Most flowering herbs are safe to use in cooking, such as lavender. They are more popular in tea, however, such as chamomile.
- Some herbs aren't actual flowers, like chamomile, but still have a nice fragrance. Sage is a great example.
-
4Consider different varieties of the same herb. Did you know that there are different species of both mint and basil? If you really like to cook with a certain herb, research the different varieties that this herb comes in, and plant them all in the same pot.
- Mint: chocolate mint, peppermint, spearmint, and sweet mint
- Oregano: Greek oregano, Italian oregano, and hot & spicy oregano
- Parsley: Flat Italian parsley and curled parsley
- Thyme: English thyme, French thyme, German thyme, and lemon thyme
-
5Get young plants from the nursery rather than seed packets. While you can certainly start herbs from seeds, it is much easier to start them from young plants bought at a nursery. Not only are they easier to take care of, but you'll be able to harvest them sooner.[3]
- Nurseries are not the only place to buy herbs. Many grocery and natural food stores also set potted herbs.
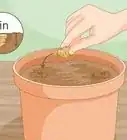
- Starting herbs from seeds is more time consuming, but costs less money. If desired, you can start seeds in a small pot on a sunny windowsill indoors.
-
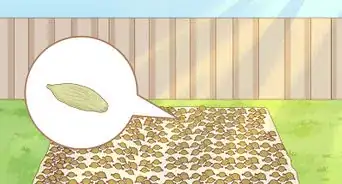
6Choose herbs that vary in height for a more pleasing display. Much like other plants and flowers, herbs don't all grow to be the same height. Some herbs, such as thyme, are much shorter than other herbs, such as rosemary. Using herbs that grow to different heights will make your herb pot look more interesting than using herbs that all grow to be the same height.
- If you really want herbs that all grow to the same height, take texture into consideration. Rosemary is shrubby and spiky while chives are slender and thin.
- Different varieties of the same herb count. Many of them look different from each other.


Choosing Your Pot and Soil
-
1Get a pot that is at least 18 inches (46 cm) wide. While a small pot may look cute, bigger is better when it comes to growing multiple herbs together. The pot should also be at least deep 18 inches (46 cm) in order to allow the roots to grow.[4]
- If you choose too small of a pot, you might end up with small, stunted herbs. You won't have much to harvest when it comes to picking.
- Smaller pots also dry out faster and need to be watered more often.
-
2Make sure that that pot has a drainage hole. This is a must, regardless of the type of herb you are growing. If your pot doesn't have a drainage hole, drill it yourself. Use a masonry drill for clay or ceramic pots, and a regular drill for plastic pots.[5]
- Just 1 drainage hole is enough, but it's okay if your pot has more.
-
3Match the porosity of the pot to your climate. Some pots, such as clay and terracotta, are going to be more porous than others, such as plastic and glazed ceramic. This means that a porous pot is going to absorb more water from the soil than a non-porous pot. This won't be an issue on a rainy day, but it will on a hot, dry day.
- Avoid clay pots if you live in a dry climate, as they dry out quickly. Choose a plastic pot or a pot that's glazed inside.
- If you live in a humid climate, a clay pot might be better, especially if your herb likes dry soil.
-
4Buy potting soil or create your own mix. Do not use gardening soil from outside. Not only does it not drain well, but it could also have parasites in it that could make your herbs sick. Instead, buy a potting soil from the nursery. Alternatively, make your own blend with:[6]
- 3 parts potting soil
- 1 part compost or aged manure
- 1 part perlite or pumice


Putting the Herbs into the Pot
-
1Cover the hole in the bottom of your pot with a piece of screening. This will help keep the soil inside the pot and prevent it from falling out. Alternatively, you can tuck a coffee filter into the bottom of the pot, or use a piece of broken pottery.
- The mesh screen does not have to be big--anything large enough to cover the hole is fine.
- The broken pottery will keep the soil in the pot, but it will still allow water to drain out.
-
2Fill the pot with potting soil 2 to 3 inches (5.1 to 7.6 cm) from the top. Use a trowel or your gloved hands to fill your pot with potting (not gardening) soil. Keep adding soil until you are 2 to 3 inches (5.1 to 7.6 cm) from the pot's rim. Gently pat the soil down with your hands.
- If your pot is made from clay, soak it overnight first. This will prevent it from absorbing the water from the soil.[7]
-
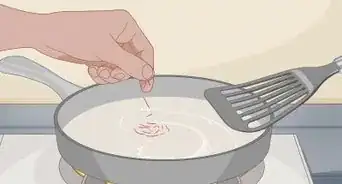
3Dampen the soil then add more, if needed. Use just enough water to make the soil damp. Be sure to mix it with a trowel so that you distribute the water throughout the soil. You want it to be evenly moist from top to bottom.
- Sometimes, wet soil compresses, so if it falls more than 3 inches (7.6 cm) below the top edge of the pot, mix in more soil.
-
4Dig a hole large enough to it your first herb. How deep and wide this hole is depends on the size of your plant. Take a look at the pot that your herb came in, then dig a hole that is just a little bit larger than that.
- Be sure to leave enough room for the other herbs. Instead of digging right in the middle of the pot, dig close to the edge.
-
5Remove the plant from its original pot. Do not grab the plant by the stem and yank it up, as you can damage it. Instead, gently squeeze the plastic pot by the sides, then tip it over to slide the plant out.
- Do just 1 herb for now. Once you take the herb out of the pot, you want to get it into the soil as quickly as possible.
-
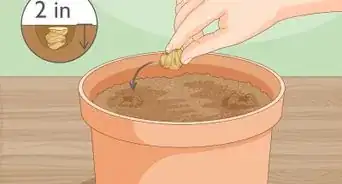
6Place the herb into the hole and cover it with 1 inch (2.5 cm) of soil. If the roots are tightly packed, gently loosen them with your fingers first. Next, tuck the herb into the hole you just made, then fill any gaps in the hole with soil. Cover the root ball with 1 inch (2.5 cm) of soil.
- Gently pat the soil down with your hands to make it nice and neat.
- Note that the soil level should remain the same from the store container to the newly-planted pot for most plants.
-
7Repeat the process for the remaining herbs. Dig a hole into the soil, then remove the herb from its original pot. Set the herb into the hole, then cover it with 1 inch (2.5 cm) of soil. Keep going until you have used up all of your herbs.
- Work 1 herb at a time. You don’t want to leave the other herbs laying around outside of their original pots for too long.
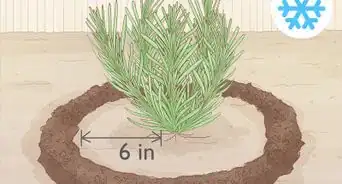
- Leave a few inches/centimeters of space between each herb.
- Plant taller herbs in the center and shorter herbs around the sides.[8]
-
8Water the soil well, then transfer the pot into a sunny location. Pour enough water into the pot until it starts to come out of the bottom. Let the pot finish draining, then set it outside or on a sunny counter or windowsill.
- Place the pot on top of a plastic or ceramic tray. This will help keep your table or counter clean.
- Don't leave the excess water in the saucer. Lift the pot up and dump the water out.[9]


Caring for Your Herbs
-
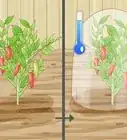
1Water your herbs according to their watering needs. Not all plants require the same amount of water. If your herbs did not come with a care tag when you bought them, you'll have to research them online. In general:[10]
- Mediterranean plants, such as oregano, require less water. Let the top 1 to 2 inches (2.5 to 5.1 cm) of soil dry before you water them again.
- Water-loving herbs, like basil, require constant moisture. The top 1 to 2 inches (2.5 to 5.1 cm) of soil should feel like a damp sponge.
- When watering, use enough water until you can see it coming out from the bottom of the pot.
-
2Use a fertilizer a few times per year. How often you use the fertilizer depends on what you are using. If you are using a liquid fertilizer, you need to use it every 3 to 4 weeks during the growing season. If you are using a slow-release fertilizer, however, you only need to use it once or thrice per year.[11]
- For best results, use a slow-release organic fertilizer, or a half-strength liquid fertilizer.
- Make sure that the fertilizer is suitable for herbs. Read the label.
-
3Rotate the pot as needed to ensure that herbs get enough sunlight. How much sunlight your herbs need will very, so read the care tag or research the information online. In general, most herbs need around 6 hours of daily sunlight, but some may require more.[12]
- The strength of the sunlight is also important. South-facing windows will provide the best, strongest sunlight, whereas north-facing windows will give you the weakest sunlight.
-
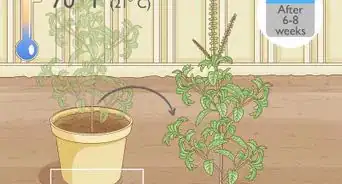
4Keep the herbs at a temperature between 65 and 70 °F (18 and 21 °C). If your herb pot is on a windowsill, you may have to move the pot around throughout the day or year. This is because windows can become really hot or really cold.
- You don't have to remove the pot from the window completely; a table next to the window would be just fine.
- If you put the herbs outside and the temperature rises or drops below the ideal range, you may want to bring the herbs inside.
-
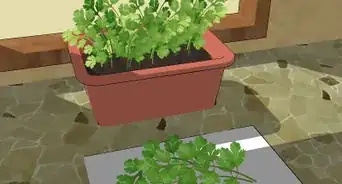
5Harvest the herbs from the top. When harvesting, you want to leave the larger leaves at the bottom along so that they absorb more sunlight. Be sure to prune off spent flowers and leggy stems as you see them. This will result in stronger, bushier herbs.[13]
- You can pinch the herbs off with your fingers, or you can cut them with scissors. If you decide to use scissors, however, make sure that they are clean.
-
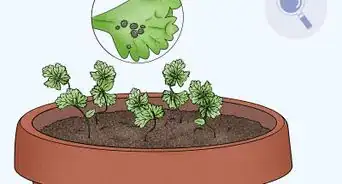
6Replace the herbs as needed. Unfortunately, not all herbs last forever. Some herbs are annual and need to be replanted every year. Others are perennial and will return every year. A few herbs are biennial and need to replaced every 2 years.[14]


Community Q&A
-
QuestionWhat is a good sized container to grow herbs in?
 Community AnswerPick a container about 4 or 5 inches tall and preferably round, as the herb's roots will have more space to fan out, and this enhances the flavour.
 -
QuestionWhy are drainage holes important when planting a herb pot?
 Community AnswerDrainage holes are important for most plants. Casual plants such as a Cactus need drainage holes so they don't get clogged with water, same for herbs.
 -
QuestionWhat kind of soil do I need?
 Community AnswerAny potting soil you can pick up from a home store should work just fine.
Warnings
- Mint and lemon balm are vigorous growers that can spread quickly. Consider giving them their own pots.⧼thumbs_response⧽
Things You'll Need
- Herbs
- Large pot
- Potting soil
- Trowel
- Gardening gloves
- Water


References
- ↑ https://acultivatednest.com/my-tips-for-planting-a-one-pot-container-herb-garden/
- ↑ http://www.oregonlive.com/hg/index.ssf/2015/03/10_tips_for_growing_herbs_in_p.html
- ↑ https://acultivatednest.com/my-tips-for-planting-a-one-pot-container-herb-garden/
- ↑ http://www.oregonlive.com/hg/index.ssf/2015/03/10_tips_for_growing_herbs_in_p.html
- ↑ http://www.oregonlive.com/hg/index.ssf/2015/03/10_tips_for_growing_herbs_in_p.html
- ↑ http://www.oregonlive.com/hg/index.ssf/2015/03/10_tips_for_growing_herbs_in_p.html
- ↑ http://www.surfersam.com/articles/herb-garden-in-a-pot.htm
- ↑ http://www.surfersam.com/articles/herb-garden-in-a-pot.htm
- ↑ http://www.surfersam.com/articles/herb-garden-in-a-pot.htm
- ↑ http://www.oregonlive.com/hg/index.ssf/2015/03/10_tips_for_growing_herbs_in_p.html
- ↑ http://www.oregonlive.com/hg/index.ssf/2015/03/10_tips_for_growing_herbs_in_p.html
- ↑ https://acultivatednest.com/my-tips-for-planting-a-one-pot-container-herb-garden/
- ↑ http://www.oregonlive.com/hg/index.ssf/2015/03/10_tips_for_growing_herbs_in_p.html
- ↑ http://www.surfersam.com/articles/herb-garden-in-a-pot.htm
About This Article