X
wikiHow is a “wiki,” similar to Wikipedia, which means that many of our articles are co-written by multiple authors. To create this article, volunteer authors worked to edit and improve it over time.
This article has been viewed 11,534 times.
Learn more...
16-bit applications are applications made to run on 16-bit processors and operating systems. They were in common use in the 1980s and early 1990s, but fell out of favor after the introduction of Windows 95 and Windows NT. Due to the way modern 64-bit processors work, 64-bit versions of Windows generally cannot run 16-bit applications without installing additional software.
Steps
Method 1
Method 1 of 3:
Using DOSBox
-
1Download and install DOSBox from the official website. DOSBox is a free emulator designed to run games made for MS-DOS. It is available for Windows, macOS, Linux, and even Android.
-
2Create a directory to store the program files in. In Windows, C:\Users\DOSBOX is a good start, as it is easy to find. Place the installer or any files the program needs into the directory.Advertisement
-
3Find the DOSBox configuration file. In Windows, the DOSBox configuration file is usually located in C:\Users\[your username]\AppData\Local\DOSBox
-
4Open the DOSBox configuration file in a text editor (like Notepad) and scroll down to the bottom. Under the line that says "[autoexec]", enter
- mount c C:\Users\DOSBOX
- c:
-
5Save the file and exit. This makes the contents of the directory you created appear as a hard drive in DOSBox.
-
6Open DOSBox, and run the application or installer. This is done by typing in the name of the program or batch file responsible, such as GAME.BAT or SETUP.EXE.


Advertisement
Method 2
Method 2 of 3:
Using VirtualBox
-
1Download and install VirtualBox. VirtualBox is a free virtual machine. It allows you to run various operating systems inside a window, without requiring you to reboot your computer or repartition your hard drive. It runs on Windows, macOS (Intel Macs only), and Linux. You will need a copy of the operating system you want to run, as it does not come with any. Windows 2000 or Windows XP (32-bit) are good choices for operating systems, as they can run most 16-bit applications while performing well in VirtualBox. Windows 95 and Windows 98 also work, but do not run as well.
-
2Start VirtualBox. Click the "New" button", or press Ctrl-N, to start the Create Virtual Machine wizard. Type in a name for the virtual machine, such as "Windows XP" or "Old applications." Click the "Next" and "Create" buttons for the rest of the wizard, as the default options are fine for 16-bit applications.
-
3Right-click the virtual machine you just created in the list and select "Settings." Go to Storage. You should see a CD icon with the word "Empty" next to it. Click it. On the far right-hand side, you should see a second CD icon with a down arrow on it. Click it.
- If you have a CD for the operating system you want to use and your computer has a CD/DVD drive, click "Host Drive 'D:' (the letter may be different on your computer)
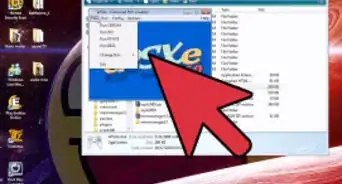
- If you have a CD, but your computer does not have a disc drive, ask a friend to make a copy of it for you. This is legal, as long as you have a license for the operating system. InfraRecorder is a good free program for making copies of CDs, known as ISOs. Use the "Choose a disk file" option to use the ISO image
-
4Click "OK" after selecting the disk drive or ISO image. You are now ready to start the virtual machine! Click the Start button, or double-click the virtual machine in the list. It should now start the installer for your operating system.
-
5Finish installing the operating system. You can now install applications on it, by inserting the discs or mounting their ISO images.
- Unlike CD/DVDs, VirtualBox does not have an option for using real floppy drives and disks directly. If you open the Storage menu again, there is a button for adding a new storage controller. Click it, and then select "I82078 (Floppy)". Now click "Add new storage attachment" to bring up the Floppy Disk Selector window. Click "Add" to select a floppy disk image
- If your program does not have a CD/DVD, you can create a new one with the "Choose/Create a Virtual Optical Disk" option


Advertisement
Method 3
Method 3 of 3:
Using QEMU
-
1Download and install QEMU. QEMU is a free emulator for multiple processors and computer systems. While not quite as fast or simple to use, it is compatible with more operating systems than VirtualBox or DOSBox, and thus is a good option if you need to run Windows 95 or 98. It is available for Windows, macOS, and Linux.
-
2Open the QEMU program directory (if using Windows). QEMU is a command-line program. To use it, you have to type in additional parameters, or provide them in a batch file. The default installation directory should be C:\Program Files\qemu\.
-
3Open a Command Prompt, PowerShell, or terminal window. In Windows, if you hold down Shift and right-click in a folder, you'll see a "Open a PowerShell window here" or "Open a Command Prompt window here" option.
-
4Create a blank hard disk image for your operating system. For example, qemu-img create -f raw C:\Users\WikiHow\Windows98.img 6G will create a file named "Windows98.img" that act like a 6 GB hard drive for Windows 98 in the user "WikiHow"'s home directory. Substitute your own username in place of "WikiHow."
-
5Start QEMU and tell it to boot from the CD, with the hard drive image you created attached.
- qemu-system-i386 -hda C:\Users\WikiHow\Windows98.img -cdrom /dev/cdrom -boot d will use your computer's real CD-ROM drive to boot from
- qemu-system-i386 -hda C:\Users\WikiHow\Windows98.img -cdrom C:\Users\WikiHow\Windows98.iso -boot d will use an ISO image as the boot disk.
-
6Follow the directions onscreen for your operating system's installation.
-
7Start QEMU again, booting from the hard drive, with the CD-ROM still in the drive. This may be necessary to complete the setup process, or to install additional drivers.
- qemu-system-i386 -hda C:\Users\WikiHow\Windows98.img -cdrom /dev/cdrom -boot c or qemu-system-i386 -hda C:\Users\WikiHow\Windows98.img -cdrom C:\Users\WikiHow\Windows98.iso -boot c
-
8Start QEMU without any CDs, to make sure everything works
- qemu-system-i386 -hda C:\Users\WikiHow\Windows98.img boot c
-
9(Optional) Create several batch files or scripts to start QEMU in different configurations. For example, one without any CDs inserted, or one with a different disc inserted, so that you can install the application you need. It is possible to switch ISO images after booting, but some may find shutting down and rebooting preferable to typing in the commands to switch them.


Advertisement
Warnings
- Never mount your actual C: drive directly in DOSBox (mount c C:\) as this could potentially break something in your host operating system.⧼thumbs_response⧽
Advertisement


References
About This Article
Advertisement